Bolded Quick Summary: Securely installing a DIY wood lathe faceplate is straightforward. This guide provides essential steps for a reliable DIY wood lathe faceplate installation, ensuring safe and effective operation for your turning projects. We’ll cover everything from choosing the right materials to precise mounting, making your lathe ready for action.
Welcome to Lathe Hub! Ever looked at your wood lathe and thought, “I need a better way to hold this big, awkward piece of wood?” That’s where a faceplate comes in. It’s a sturdy disc that attaches to your lathe’s spindle, giving you a solid mounting point for larger projects or odd-shaped stock that just won’t fit on a chuck. While you can buy them, making your own DIY wood lathe faceplate can be a rewarding project, saving you money and giving you a custom fit. Don’t worry if this sounds a bit intimidating; we’ll break down the installation process step-by-step. By the end of this guide, you’ll have a securely mounted faceplate, ready to tackle your next big turning challenge with confidence and safety.
Why Install a DIY Wood Lathe Faceplate?
A lathe faceplate is a versatile attachment that screws onto your lathe’s headstock spindle. It’s your go-to solution when working with larger, irregularly shaped, or oversized pieces of wood that a standard chuck can’t handle. Think of large bowls, platters, or even furniture components. A faceplate provides a flat, secure surface to mount your work, either directly or by attaching clamps and jigs to it.
For beginners, understanding the function of a faceplate is key to expanding your turning capabilities. It opens up a world of possibilities beyond smaller spindle turnings. Moreover, a DIY approach allows you to tailor the faceplate to your specific lathe and needs. You can choose the material, the size, and even add features that a generic store-bought one might lack. It’s a practical skill that offers direct benefits to your woodworking projects.
Understanding Your Lathe’s Spindle Threads
Before you even think about making or installing a faceplate, the most critical piece of information you need is your wood lathe’s spindle thread size and direction. This is the mechanical interface that connects everything. Getting this wrong means your faceplate won’t fit, and you could even damage your lathe’s spindle.
Most wood lathes use standard UNC (Unified National Coarse) or UNF (Unified National Fine) threads. The most common sizes for wood lathes include:
- 1″ x 8 TPI (Threads Per Inch)
- 1 1/4″ x 8 TPI
- 3/4″ x 10 TPI
- M33 x 3.5 (Metric)
How to find your spindle thread information:
- Check your lathe’s manual: This is the easiest and most reliable method. The manual should clearly state the spindle thread size and direction.
- Measure the spindle: If you don’t have the manual, you can carefully measure your lathe’s spindle. You’ll need a ruler or calipers and a thread gauge (which you can often borrow from a machinist friend or sometimes find at a hardware store).
- Measure the outer diameter of the spindle where the threads are.
- Count the number of threads per inch (TPI) or measure the pitch for metric threads.
- Visual inspection: Compare the threads on your spindle to images or charts of common thread sizes online. This is the least precise method but can offer clues.
Thread Direction: For most lathes, the spindle threads are “right-hand,” meaning you tighten the faceplate (or chuck) by turning it clockwise. Some specialized lathes might have left-hand threads, so always verify. A quick test is to thread on a spare nut or the faceplate itself; if it tightens by turning it clockwise, it’s right-hand.
Knowing these specifications is paramount. Once you have this information, you can confidently purchase or fabricate a faceplate with the correct internal threads. For those making their own, this dictates the size of the tap you’ll need to cut the internal threads into your DIY faceplate.
Choosing Your Faceplate Material
For a DIY wood lathe faceplate, durability, rigidity, and ease of machining are key. Here are the most common and suitable materials:
Steel
Steel is the most robust option and is often used for commercial faceplates. It offers excellent strength and durability, allowing for secure clamping of heavy workpieces. However, it’s also the hardest material to machine, especially for beginners. If you have access to a metal lathe and are comfortable with steel, it’s a fantastic choice.
- Pros: Extremely strong, durable, can handle heavy loads.
- Cons: Difficult to machine, heavy, requires metalworking tools.
Aluminum
Aluminum is a popular choice for DIY projects. It’s significantly lighter and easier to machine than steel, making it accessible for those with basic metalworking tools or even some advanced woodworking tools adapted for metal. While not as strong as steel, for most woodturning applications, a well-designed aluminum faceplate is more than sufficient. Look for thicker stock to ensure rigidity.
- Pros: Lighter, easier to machine than steel, good balance of strength and workability.
- Cons: Less strong than steel, can deform under extreme stress.
Cast Iron
Cast iron is also used for some commercial faceplates. It has good damping qualities, which can help reduce vibration. Machining cast iron can be easier than steel, but it can also be brittle. It’s a good option if you have access to it and are comfortable working with it.
- Pros: Good vibration damping, machinable.
- Cons: Can be brittle, heavy.
For beginners looking to make their own faceplate, starting with a sturdy piece of aluminum is often the most practical recommendation. It balances the need for strength with the accessibility of machining in a home workshop environment.
Essential Tools and Materials for Installation
To successfully install your DIY wood lathe faceplate, you’ll need a few key items. The exact list might vary slightly depending on whether you’re making the faceplate yourself or installing a pre-made one, but this covers the essentials for a secure installation of a DIY version onto your lathe.
DIY Faceplate Construction Materials (if applicable)
If you’re fabricating your faceplate:
- Material Stock: A solid round disc of steel, aluminum, or cast iron with a thickness appropriate for your lathe (e.g., 1/2″ to 1″ thick, 4-6″ in diameter, depending on your lathe’s capacity).
- Tap: The correct size and TPI (or metric pitch) tap to cut the internal threads matching your lathe’s spindle. This is crucial. Example: For a 1″ x 8 TPI spindle, you need a 1″ x 8 TPI tap.
- Drill Bits: For pilot holes if you plan to add mounting holes for your workpiece or attachment points.
- Measuring Tools: Calipers, ruler, marking tool (scribe or punch).
- Cutting Tools: If machining the disc shape and threads, you’ll need a metal lathe. If using a pre-formed disc, you might only need to drill holes.
- Files: For deburring edges and refining shapes.
- Deburring Tool: For cleaning up sharp edges after drilling or cutting.
Faceplate Installation Tools
- Lathe Spindle Wrench (or appropriate tool): Often a flat bar, pin wrench, or specific chuck key that engages with notches or holes on the spindle collar to turn the spindle.
- Faceplate (DIY or purchased): With the correct matching threads for your spindle.
- Thread Chaser (Optional but recommended): If the internal threads on your faceplate are a bit rough, a thread chaser can clean them up without cutting new threads.
- Anti-seize Lubricant (Optional): A small amount can prevent threads from galling, especially with steel parts.
- Safety Gear:
- Safety Glasses: Absolutely essential.
- Gloves: To protect your hands from sharp edges and grease.
- Hearing Protection: Recommended, especially if using power tools.
Workpiece Mounting Tools (for when using the faceplate)
- Bolts, Washers, Nuts: For attaching your workpiece or jigs to the faceplate. Ensure they are the correct size and length.
- Clamps: If you need to secure an irregularly shaped workpiece.
Having these tools ready will make the process smooth and safe. For the DIY aspect of thread cutting, ensure you have the correct tap and know how to use it. A good resource for safely using taps and dies is available from organizations like OSHA, which provides general safety standards for machinery that apply to any workshop environment.
Step-by-Step: DIY Wood Lathe Faceplate Installation
Here’s how to get your DIY wood lathe faceplate installed and ready for action. We’ll cover the creation of the faceplate itself (briefly, assuming basic machining knowledge) and then the crucial installation onto your lathe.
Phase 1: Creating Your DIY Faceplate (If Not Purchased)
This phase assumes you are comfortable with basic metal machining on a lathe. If you are not, it is highly recommended to purchase a pre-made faceplate with the correct spindle threads.
- Prepare the Blank: Start with your chosen material in a solid round disk. Face off one side on your metal lathe for a perfectly flat surface that will run true on your spindle.
- Bore Center Hole: If your blank isn’t pre-drilled, bore out the center to the appropriate size for your spindle diameter.
- Cut the Threads: This is the most critical step. Using your metal lathe and the correct tap or die for your spindle threads, cut the internal threads into the center bore of your faceplate blank.
- Using a Tap (Internal Threads): Mount the blank securely in a chuck or fixture. You’ll likely need to use a tailstock-mounted tap holder for stability. Lubricate the tap and the workpiece. Slowly and carefully feed the tap into the bore, turning it with the tailstock and reversing to clear chips. Ensure you are cutting straight threads. A common method is to use a floating tap holder or support the tap securely.
- Using a Die (External Threads for Spindle): This is less common for faceplates but theoretically possible if you were threading the spindle itself to accept a custom plate. However, faceplates typically have internal threads.
- Drill Mounting Holes (Optional but Recommended): Decide if you want mounting holes for attaching workpieces or clamps. If so, mark out evenly spaced holes around the faceplate. Use a drill press for accuracy and drill your holes. Tap these holes if you plan to use bolts extensively.
- Deburr and Finish: Use files and a deburring tool to smooth all edges, especially around the threads and drilled holes. A smooth finish makes the faceplate safer and easier to handle.
Phase 2: Installing the Faceplate onto Your Lathe
This is the core of the “installation” part of our DIY wood lathe faceplate guide.
- Ensure Lathe is Powered Off and Secured: First and foremost, safety. Turn off your lathe and unplug it. Ensure the lathe is stable and not going to move.
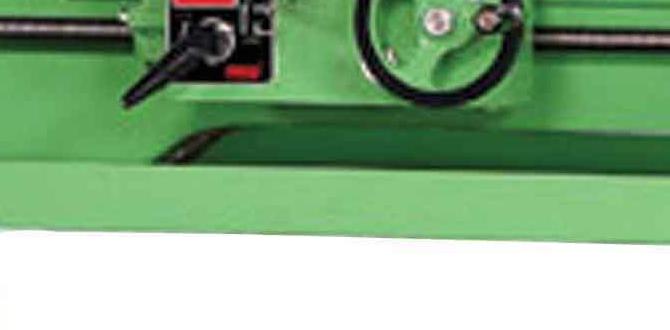
- Locate Spindle Wrench Port(s): Examine your lathe’s headstock spindle. You’ll usually find either:
- A threaded collar with notches or holes designed to accept a pin-wrench or faceplate wrench.
- A smooth collar where a strap wrench or a specialized grip tool might be used.
- Clean Spindle Threads: Inspect your lathe’s spindle threads. If they look dirty, greasy, or slightly corroded, clean them gently with a rag and a bit of solvent or a wire brush. Ensure they are dry and free of debris.
- Clean Faceplate Threads: Do the same for the internal threads of your DIY faceplate. Ensure no metal shavings or dirt are present. You can use compressed air or a clean brush.
- Apply Anti-seize (Optional): If you’re using steel parts or anticipate frequent removal and reinstallation, a tiny dab of anti-seize compound on the spindle threads can prevent them from seizing up over time. Use sparingly.
- Align and Thread On: Carefully align the DIY faceplate with the spindle threads. Gently turn the faceplate counter-clockwise (lefty-loosey for normal thread direction). You should feel the threads engage smoothly. If you feel resistance, stop, back it off, and re-align. Never force threads.
- Hand Tighten: Once the threads are engaged, start turning the faceplate clockwise by hand. Continue until it’s snug against the spindle collet or shoulder.
- Secure with Spindle Wrench: Now, use your spindle wrench or appropriate tool. Engage it with the spindle collar or faceplate notches and turn firmly clockwise. You’re tightening it securely against the spindle. How tight is tight enough? It needs to be very secure. It shouldn’t budge at all during operation. Think “very snug,” but avoid overtightening to the point where you might strip threads or damage components. The goal is to prevent any possibility of it unscrewing during use.
- Test Rotation: Remove the wrench. Give the faceplate a good spin by hand to ensure it’s properly seated and doesn’t wobble.
- Power Up Safely: Plug your lathe back in. Turn it on at a very low speed. Stand clear and observe. Listen for any unusual noises and watch for any signs of imbalance or looseness. If everything seems fine, you can slowly increase the speed and perform a quick check for runout.
Your DIY wood lathe faceplate is now installed! The key here is ensuring those threads are perfectly matched and the faceplate is mounted with zero play. A loose faceplate is incredibly dangerous.
Ensuring a Safe and Reliable Mount
Safety is paramount when working with any lathe, and a securely mounted faceplate is non-negotiable. Here’s what to consider to ensure your DIY wood lathe faceplate installation is both safe and reliable:
1. Thread Integrity
The most common failure point is mismatched or damaged threads. Always double-check your spindle thread size and TPI against your faceplate’s internal threads. Even a slight mismatch can lead to cross-threading, damaging both the spindle and the faceplate. If you are cutting your own threads, ensuring they are cut straight and to the correct depth is vital.
2. Full Thread Engagement
When mounting the faceplate, ensure you are engaging as many threads as possible. This distributes the load and creates a stronger connection. If the faceplate only threads on a few turns, it’s not fully engaged and could be a safety hazard.
3. Proper Tightening
As mentioned, the faceplate needs to be snug. It must be tightened against the spindle shoulder or collar with sufficient force that it cannot vibrate loose during turning. Use the appropriate wrench and firm pressure. If you’re unsure about how tight, err on the side of “very secure” rather than “barely snug.”
4. Regular Inspection
Before and after each turning session, take a moment to check the faceplate. Is it still tight? Are there any visible signs of wear or damage on the threads or the faceplate itself? A quick visual and tactile check can prevent accidents.
5. Understanding Load Limits
Even with a secure mount, be mindful of the forces involved, especially when turning large or unbalanced pieces. Your DIY faceplate, particularly if made from aluminum, has a material limit. Avoid excessive out-of-balance loads that could stress the mounting points or the lathe itself.
6. Workpiece Attachment
Simply mounting the faceplate is only part of the puzzle. How you attach your workpiece to the faceplate is equally critical. Ensure all bolts, clamps, and jigs are securely fastened. Exposed bolt heads or clamp mechanisms can be a snagging hazard.
For more information on safe machining practices, resources from woodworking associations like the Woodturners Guild of New South Wales (Australia) often provide excellent, practical safety advice applicable to DIY projects.
Using Your Faceplate for Your Projects
Once your DIY wood lathe faceplate is securely installed, you’re ready to turn! Here’s how you typically use it:
Attaching Your Workpiece
There are a few common methods:
- Direct Bolting: For flat