For G10, a face mill offers faster material removal and a smoother finish for larger areas, while a fly cutter provides precision for small, flat surfaces and features a simpler setup. Choosing depends on your project’s scale and accuracy needs.
Working with innovative materials like G10 can be exciting, but sometimes achieving that perfect flat surface or precise dimension on your milling machine feels like a puzzle. You might be staring at your tool cabinet, wondering which cutter is the right one for the job. Is it the sturdy face mill, or the elegant fly cutter? Don’t worry, this is a common question for many CNC hobbyists and aspiring machinists. Getting this decision right means less frustration, better results, and more confidence in your projects. In this guide, we’ll break down exactly what each tool does, its strengths, and when it’s the perfect choice for machining G10. Stick around, and we’ll uncover the secrets to achieving that flawless finish your G10 parts deserve!
Understanding G10: The Machining Challenge
G10, also known as Garolite, is a high-pressure thermosetting laminate. It’s made from layers of fiberglass cloth impregnated with an epoxy resin. This construction gives G10 some fantastic properties: it’s incredibly strong, lightweight, has excellent electrical insulation, and is resistant to moisture and chemicals. These traits make it a popular choice for many applications, from circuit boards and electrical insulation to knife handles and custom mechanical parts.
However, G10 also presents some unique machining challenges. The fiberglass component can be abrasive, leading to faster tool wear if you’re not using the right cutting tools and speeds. The epoxy resin can also be prone to chipping or delaminating if too much force is applied or if the cutting strategy isn’t appropriate. For machinists, this means selecting the right cutting tool is crucial for a clean cut, minimal tool wear, and a smooth, functional surface finish.
What is a Face Mill?
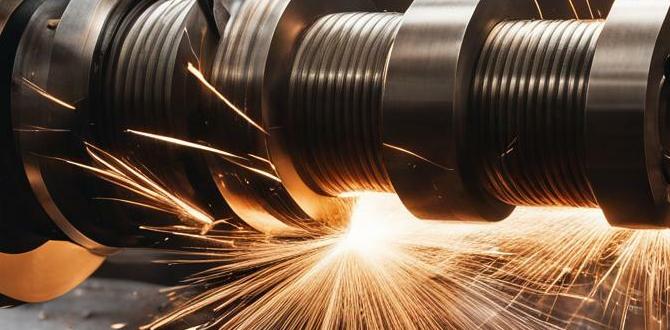
A face mill is a type of milling cutter designed for machining flat surfaces, often on large areas. Think of it as a wide, disc-shaped tool with multiple cutting edges, called inserts, arranged around its periphery and sometimes on its face. These inserts are usually made of carbide or high-speed steel and are replaceable.
When a face mill spins, its many cutting edges work together to remove material. This distributed cutting action allows for high material removal rates, meaning you can take off a good amount of material relatively quickly. The inserts are typically set at an angle to the work surface, which helps to produce a smooth finish.
Key Features of a Face Mill:
- Multiple Inserts: Allows for efficient material removal and provides multiple cutting edges for longer tool life.
- Large Diameter: Designed to cover a wide area of the workpiece quickly.
- Insert Design: Inserts can be flat, slightly rounded, or have specialized geometries, affecting the finish and cutting action.
- Rigidity: Generally robust tools designed for demanding milling operations.
How a Face Mill Works
The rotation of the face mill causes the inserts to engage with the material. Each insert takes a small bite, and because there are many inserts, the overall load is distributed. This is similar to how a planer works, shaving off a thin layer of material as it passes over the surface. The depth of cut for each insert is usually quite shallow, but the rapid rotation and multiple inserts mean that a significant volume of material can be removed efficiently.
What is a Fly Cutter?
A fly cutter, on the other hand, is a much simpler tool. It typically consists of a single-point cutting tool mounted on an adjustable arm that rotates around a central axis. It’s essentially a single cutting edge that sweeps out a large diameter. The primary purpose of a fly cutter is to create a very flat surface and achieve precise dimensions.
Because it has only one cutting edge, a fly cutter removes material much more slowly than a face mill. It’s not designed for aggressive material removal. Instead, its strength lies in its ability to achieve extremely precise flatness and surface finish, especially on smaller areas or for specific features. Many fly cutters allow for fine adjustment of the cutter’s position, enabling very accurate surfacing.
Key Features of a Fly Cutter:
- Single Cutting Edge: Typically a single carbide or HSS insert or tool bit.
- Adjustable Arm: The cutting tool extends from a body and can often be precisely positioned radially.
- Light-duty Cutting: Designed for finishing passes and achieving high accuracy, not for bulk material removal.
- Simplicity: Easier to set up and often less expensive than a multi-insert face mill.
How a Fly Cutter Works
As the fly cutter rotates, the single cutting edge sweeps across the entire surface of the workpiece within its diameter. The depth of cut is precisely controlled by the tool’s height, and the feed rate is often quite slow to ensure a good finish. Because it’s a single point, it can “true up” a surface by taking a light skim cut that averages out any high spots.
Face Mill vs. Fly Cutter for G10: The Core Differences
When you place a face mill and a fly cutter side-by-side, the differences become very apparent. These differences directly translate into how they perform when machining G10.
Speed and Material Removal
The most significant difference is in their capacity for material removal. A face mill, with its multiple inserts, can remove material much faster. If you need to flatten a large area of G10 or hog out a significant depth of material, a face mill is your go-to tool. It’s efficient and saves valuable machining time.
A fly cutter, with its single cutting edge, is inherently slower. It’s designed for taking light finishing passes. Trying to remove a lot of material with a fly cutter will likely lead to excessive tool wear, chatter, and a poor finish, or even damage to the workpiece and the tool.
Accuracy and Surface Finish
This is where the fly cutter often shines. Because it’s a single-point tool that sweeps across the surface, it has the potential to create an exceptionally flat and smooth finish. The ability to precisely adjust the cutting depth and position of the single insert makes it ideal for applications where very tight tolerances are required.
While a good quality face mill can also produce an excellent finish, it can sometimes leave small scallops or marks from the individual inserts catching slightly differently, especially if the inserts are not perfectly aligned or if the machine has any backlash. For achieving the ultimate in flatness and a mirror-like finish on a small to medium-sized area, a fly cutter often has the edge.
Tooling Cost and Complexity
Face mills, especially those with multiple high-quality carbide inserts, can be a significant investment. The cost of the tool body and the replacement inserts can add up. They also require more careful setup to ensure all inserts are cutting effectively and evenly.
Fly cutters are generally simpler and less expensive. A basic fly cutter with a single tool bit is a much more accessible tool for a home workshop. Setup is also often more straightforward, primarily involving setting the precise cutting diameter and the depth of cut.
Tool Wear on G10
G10’s abrasive nature is a concern for both tools, but the impact differs. With a face mill, wear is distributed across multiple inserts. If one insert becomes slightly dull, the others can compensate to some extent, so the finish might degrade gradually. However, dulled inserts can lead to increased heat and therefore faster degradation of the G10 resin.
With a fly cutter, the entire cutting load is on a single edge. If that edge dulls or chips, your finish will suffer immediately and drastically. Therefore, maintaining a sharp edge on the fly cutter’s single tool is paramount when working with G10. Using appropriate speeds and feeds, and sometimes even specific geometries for G10, is crucial for maximizing tool life for both types of cutters.
When to Use a Face Mill for G10
A face mill is your go-to tool for G10 when:
- You need to flatten a large surface area: This is its primary strength. If you have a large sheet of G10 or a large block that needs to be squared up or made perfectly flat, a face mill will do it efficiently.
- Fast material removal is a priority: When time is a factor, or you have significant material to remove, the multi-insert design of a face mill allows for much quicker work.
- The final surface finish is important but doesn’t require micron-level flatness: A good face mill can leave a very acceptable finish for many applications, like the backplate of a project or the surface where another component will be mounted.
- You have a rigid machine capable of handling the forces: Face mills can exert significant cutting forces, so a sturdy milling machine is necessary.
Example G10 Applications for Face Milling:
- Squaring up large blocks of G10.
- Creating a perfectly flat mounting surface for components.
- Reducing the thickness of a G10 sheet to a precise dimension across a wide area.
- Machining large, flat areas on custom G10 enclosures or fixtures.
When using a face mill on G10, consider using inserts specifically designed for composites or plastics. These often have higher rake angles and polished flutes to prevent material buildup and reduce heat. For instance, specialized aluminum cutting inserts can sometimes perform well on G10 due to their sharp edges. Always consult your insert manufacturer’s recommendations.
Also, remember that G10 dust can be an irritant. Always use appropriate dust collection and personal protective equipment (PPE) when machining it. This includes safety glasses and a respirator, as the epoxy resins in G10 can be harmful if inhaled. The Occupational Safety and Health Administration (OSHA) provides guidelines on hazardous substances, and while specific G10 dust isn’t always listed, general principles for fine particulate and resinous dusts apply.
When to Use a Fly Cutter for G10
A fly cutter is the better choice for G10 when:
- Extreme flatness is required: If you need a surface that is incredibly flat and parallel to another surface, a fly cutter excels.
- Machining smaller, critical surfaces: For precise surfacing of small areas, such as mating surfaces or features that need to be perfect, a fly cutter is ideal.
- Achieving a high-quality surface finish is paramount: Fly cutters are often used for final finishing passes to get a smooth, almost polished look.
- You need to lightly “true up” a surface: If a surface is slightly warped or has minor imperfections, a quick pass with a fly cutter can level it out precisely.
- Tooling budget or machine rigidity is a concern: A fly cutter is a much less demanding tool in terms of machine power and can be a more affordable option.
Example G10 Applications for Fly Cutting:
- Creating perfectly flat mating surfaces between G10 parts.
- Machining the seating surface for bearings or O-rings.
- Finishing the pockets or recesses where components will sit precisely.
- Achieving a very fine finish on decorative G10 knife scales or grips.
When fly cutting G10, a sharp, high-quality carbide insert is essential. A single-point insert with a polished face and a small nose radius will provide the best finish. Setting the depth of cut very shallow is key. Start with a depth of cut that is a fraction of your typical finishing pass on metal, perhaps even 0.001″ to 0.003″ (0.025mm to 0.075mm). Slow and steady wins the race here. Too aggressive a cut will lead to chipping, resin buildup on the tool, and a poor surface finish.
Additionally, a fly cutter’s spindle speed needs to be managed. While higher speeds can sometimes help with finish, the heat generated can be an issue with G10. You’re looking for a balance. For a typical 1″ or 2″ diameter fly cutter on a small CNC mill, spindle speeds in the range of 3,000 to 8,000 RPM might be a good starting point, adjusting based on the material’s response. Always listen to your machine and the sound of the cut.
Head-to-Head Comparison Table
Here’s a quick table summarizing the key differences between a face mill and a fly cutter when machining G10:
| Feature | Face Mill | Fly Cutter |
|---|---|---|
| Material Removal Rate | High | Low |
| Surface Finish Potential | Good to Excellent | Excellent to Superior (for flatness) |
| Precision for Flatness | Good | Excellent |
| Ideal for Large Areas | Yes | No (limited to cutter diameter) |
| Ideal for Small, Critical Surfaces | No | Yes |
| Tooling Complexity | Higher (multiple inserts, body) | Lower (single cutter, body) |
| Initial Tooling Cost | Higher | Lower |
| Setup Simplicity | More Complex | Simpler |
| Tool Wear on G10 | Distributed across inserts | Concentrated on single edge |
Machining G10 Safely and Effectively
Regardless of whether you choose a face mill or a fly cutter, safe and effective machining of G10 involves a few universal principles.
1. Tool Selection for G10
Carbide: Generally the best material for cutting G10 due to its hardness and wear resistance.
Sharpness: Always use sharp tools. Dull tools cause excessive heat, chatter, and poor finishes. For G10, a polished edge can help prevent resin buildup.
Coating: Vapor deposition coatings (like TiN or TiCN) can sometimes help with wear and heat resistance, but a sharp uncoated carbide edge is often preferred for composites. Specific diamond coatings are also excellent for abrasive materials.
Geometry: Tools with higher rake angles and clearance angles can help reduce cutting forces and prevent chipping.
2. Speeds and Feeds
Finding the right speeds and feeds (S&F) is critical. G10 is not metal, so typical metal S&F charts may not apply directly.
Surface Speed (SFM/SMM): For G10, lower to moderate surface speeds are often best to control heat buildup and prevent melting or glazing of the epoxy. Experimentation is key, but starting points might be in the range of 200-500 SFM (60-150 SMM).
Feed Rate: A moderate feed rate per tooth (FPT) is usually best. Too slow a feed can cause the cutter to rub and generate heat, while too fast can lead to chipping. A good starting point for a fly cutter might be 0.001″-0.003″ FPT, and for a face mill, it would depend on the number of teeth but aim for a similar chip load per tooth and a consistent feed rate to utilize all teeth.
Depth of Cut: Keep depths of cut relatively shallow for G10, especially when finishing. For roughing with a face mill, you can take more material, but for finishing with either tool, take light passes.
3. Coolant/Lubrication
Air Blast: Often the best option for G10. A strong blast of compressed air directed at the cutting zone helps to clear chips and dissipate heat without introducing coolant that could interact with the resin or make cleanup more difficult.
Misting Systems: A fine mist of coolant can be effective, but avoid flooding the workpiece, as it can lead to messy cleanup and potential issues with the laminate.
Dry Machining: If using a dust extraction system, machining dry might be feasible, but always monitor temperatures.
4. Dust Control and Personal Protective Equipment (PPE)
G10 dust is an irritant and potentially harmful.
Dust Extraction: Use a vacuum system directly at the cutting tool to capture as much dust as possible at the source.
Respirator: Always wear a properly fitting respirator (e.g., an N95 or better) to protect your lungs from fine particles.
Safety Glasses: Essential to protect your eyes from chips and dust.
Gloves: Wear gloves to protect your skin from any abrasion or potential resin irritation.
5. Workholding
Ensure your G10 is held securely. Clamps should be placed to avoid stressing the material in a way that could cause delamination. If machining a large sheet, consider using a spoilboard or support underneath to prevent sagging.
Fly Cutter vs. Face Mill: Which is Right for Your G10 Project?
The choice between a face mill and a fly cutter for your G10 project boils down to your specific needs.
Need to flatten a big piece quickly? Reach for the face mill. It’s designed for efficiency and speed on larger surfaces.
Need extreme flatness on a small, critical area? Go for the fly cutter. Its single-point precision is unmatched for these tasks.
Budget is tight, and you need a precise finishing tool? The fly cutter is likely your best bet.
Working on a production run with tight tolerances? A **face mill


