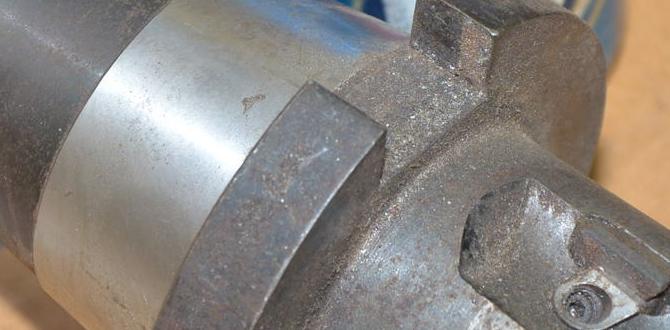
Knurling is a metalworking process that creates a decorative or functional pattern on a workpiece. A knurling tool for a lathe is a device that does this by pressing a pattern of diamonds or straight lines onto the surface. It’s used for improving grip on handles, making parts look nicer, or preparing surfaces for other processes. This guide will show you how to use one effectively.
Hey there, fellow makers! Daniel Bates here from Lathe Hub. Ever look at a nicely finished tool handle or a precision part and wonder how that textured grip got there? It’s usually done with something called knurling. If you’re new to the lathe, the idea of adding this textured finish might seem a bit mysterious, maybe even daunting. But trust me, once you understand the basics of a knurling tool for a lathe, you’ll find it’s a fantastic way to add professional flair and improved functionality to your projects. Let’s demystify this useful machining technique together, step by step.
What Exactly is Knurling?
Knurling is a manufacturing process where a patterned tool (the knurl) is pressed into the surface of a workpiece mounted in a lathe. This process plastically deforms the metal, creating a raised pattern of diamonds or straight lines. Think of it like a very precise way of indenting a pattern into soft metal to give it texture. It’s not cutting or removing material; it’s about pushing it around.
The patterns created by knurling serve several purposes:
- Improved Grip: This is the most common use. Knurled surfaces provide a much better hold, especially on handles, knobs, and levers, preventing slippage even when hands are oily or wet.
- Decorative Finish: A knurled pattern can add a professional and aesthetically pleasing look to machine parts, making them stand out.
- Assembly Aid: In some cases, knurling can help retain parts, acting as a form of mechanical locking.
- Surface Preparation: A knurled surface can sometimes provide a good base for subsequent operations, though this is less common than grip and aesthetics.
Types of Knurling Tools
When you’re looking for a knurling tool for your lathe, you’ll notice a few main types. Understanding these will help you choose the right one for your needs and your lathe.
Single-Die Knurling Tools
These are simple and often come with a single knurling wheel. They are typically mounted in a tool post holder and feed straight into the workpiece. Because they only have one wheel, they tend to create more pressure on the workpiece and can be prone to flexing, especially on larger diameters. They are best suited for smaller parts and softer materials.
Double-Die (or Two-Wheel) Knurling Tools
These are the most common type for general use. They feature two knurling wheels mounted on opposing sides of a pivoting arm. One wheel typically has a male thread pattern, and the other has a female thread pattern. As the tool is fed into the workpiece, the wheels are forced against the material, creating an opposing pressure that helps to keep the workpiece stable and the knurl pattern centered. This balanced pressure makes them more stable and less likely to cause bending.
Forming Knurling Tools
These tools use knurling wheels that are designed to push the material outwards, creating a raised bead or ridge. They are often used for creating a specific decorative effect or for adding a gripping surface without necessarily creating a full diamond pattern across a whole section. They are less common for general-purpose knurling.
Cut Knurling Tools
Instead of pressing the pattern into the metal, cut knurling tools shear a small amount of material to create the pattern. This requires a more robust tool and can be slower but is suitable for harder materials or when a very precise pattern is needed without excessive deformation. These are less common for beginners.
Knurling Wheels: The Heart of the Tool
The knurling wheels themselves are what create the pattern. They are hardened steel wheels with raised patterns. The most common patterns are:
- Diamond Knurls: These are the most popular, created by a pair of wheels, one convex and one concave, or two wheels with opposing diamond patterns. They provide excellent grip and a pleasing aesthetic.
- Straight Knurls: Created by a pair of straight-toothed wheels. These are often used for decorative purposes or for specific industrial applications where a linear grip is preferred.
Knurling wheels come in various pitches (the distance between the teeth). The pitch is usually measured in TPI (threads per inch). Common pitches are 8, 16, and 24 TPI. Coarser pitches (lower TPI like 8 or 11) create deeper, more pronounced knurls, while finer pitches (higher TPI like 16 or 24) create shallower, more delicate patterns. The choice of wheel pitch often depends on the size of the workpiece, the material hardness, and the desired final appearance.
Essential Considerations Before You Start
Before you dive into knurling, there are a few things you need to get right. Skipping these steps can lead to poor results or even damage your workpiece or tool.
1. Your Lathe’s Capabilities
Knurling puts a significant load on your lathe, especially on the spindle bearings and the drive system. Ensure your lathe is robust enough for the task. Smaller, lighter-duty machines might struggle with larger workpieces or deep knurls. For more on understanding your lathe, check out resources like NIST’s Manufacturing Metrology Division on lathe operation.
2. Workpiece Rigidity
The workpiece must be well-supported. Long, slender parts are prone to bending or vibrating under the pressure of the knurling wheels. If you’re working on a long piece, consider using a steady rest or follower rest to provide extra support. A wobbling or vibrating workpiece will result in an uneven, messy knurl.
3. Material Type and Hardness
Knurling works best on materials that can be plastically deformed. Softer metals like aluminum, brass, and mild steel are ideal. Harder steels can be knurled, but they require more force, a more robust knurling tool, and slower speeds. Very hard materials might not yield to knurling at all without potential tool damage.
4. Tooling and Setup
You’ll need a suitable knurling tool that fits securely in your lathe’s tool post. Most common tools are for screw-cutting or standard tool posts. Ensure the knurl wheels are the correct type (e.g., diamond or straight) and pitch for your desired outcome.
5. Speeds and Feeds
This is crucial. Knurling requires slower spindle speeds and relatively faster feed rates than turning or threading. If the speed is too high, the knurl wheels can skip and tear the material. If the feed is too slow, you risk marring the surface or overheating the tool. We’ll cover specific recommendations later.
Step-by-Step Guide to Knurling on a Lathe
Alright, let’s get down to business. Follow these steps carefully for a successful knurling operation.
Step 1: Prepare Your Lathe and Workpiece
- Clean Your Machine: Make sure your lathe is clean and free of any debris.
- Mount the Workpiece: Securely mount your workpiece between centers, in a chuck, or on a faceplate. Ensure it’s running true.
- Support Long Workpieces: If your workpiece is long and slender, set up a steady rest or follower rest to provide rigidity.
- Tool Post Setup: Install your knurling tool securely in the tool post. Ensure it’s at the correct height, usually centered with the spindle axis. If your tool post has a swivel, you don’t need to adjust its angle for standard knurling.
Step 2: Select and Install Knurl Wheels
Choose the appropriate pair of knurl wheels for the pattern and pitch you want. For a diamond pattern, you’ll typically use one raised convex wheel and one raised concave wheel, or two flat wheels with opposing diamond patterns. Make sure they are clean and free of burrs.
Install the wheels onto the tool holder according to the manufacturer’s instructions. Ensure they are firmly in place.
Step 3: Set Spindle Speed and Feed Rate
This is critical for good results. For knurling, you generally need:
- Spindle Speed: Much slower than turning or threading. A good starting point for mild steel is often around 200-300 RPM, but this varies greatly. For softer metals like aluminum, you might be able to go slightly faster. Always start slow and increase if needed.
- Feed Rate: Faster than you might think. You want the knurl wheels to engage and roll across the surface, not cut or drag. A feed rate appropriate for a light finishing cut is a good starting point. Use the carriage handwheel or power feed. For reference, common feed rates might be around 0.006 to 0.010 inches per revolution (IPR).
It’s a good practice to do a test knurl on a scrap piece of the same material and diameter to dial in your speeds and feeds. A common recommendation for a starting point is to use a feed rate close to your finishing feed rate for turning and a spindle speed that feels stable without excessive vibration.
Step 4: Engage the Knurling Tool
With the spindle rotating and the workpiece at your chosen speed, slowly feed the knurling tool into the workpiece. Do this with the Z-axis feed (along the length of the workpiece), not the cross-slide. Engage the tool just enough so that the knurl wheels begin to bite into the surface.
You should hear and feel the wheels start to press into the metal. Avoid plunging the tool in rapidly. A gradual engagement is key. You are not cutting; you are displacing metal.
Step 5: Make the First Pass
Once the wheels are engaged, move the carriage along the length of the workpiece where you want the knurl. Let the tool traverse the entire length of the desired knurled area. Do not dwell or stop in one spot, as this can create undesirable marks.
After completing one pass, retract the knurling tool slightly using the cross-slide. Do NOT retract the tool using the carriage feed.
Step 6: Adjust Depth (If Necessary)
If the pattern is too shallow, you can make a second pass. To increase the depth, advance the knurling tool very slightly using the cross-slide. Just a small turn of the dial might be enough. Then, make another pass using the carriage feed along the same path.
Important Note: For double-die knurling tools, you typically do not need to adjust the tool depth with the cross-slide after the initial engagement if the wheels are properly opposed. The pattern is formed by the pressure of the two wheels. If a deeper pattern is needed, it’s often best achieved by a second pass at the same depth or by using a coarser pitch wheel. For single-die tools, you will regularly use the cross-slide to increase depth. Always consult your tool’s manual.
To achieve a full diamond pattern with opposing wheels, you often need to make multiple passes in both directions (left-to-right and right-to-left) and potentially a pass along the length again. The goal is for the concave wheel to enter the peaks created by the convex wheel. This can take several passes.
Step 7: Lubrication and Coolant
While not always strictly necessary for all materials and light knurling, using a lubricant can help improve the finish, reduce wear on the knurl wheels, and prevent overheating, especially on harder materials or when making deeper knurls. General-purpose cutting oil or even a bit of WD-40 can work wonders. Apply it to the knurl wheels or the workpiece as you go.
Step 8: Finishing the Knurl
Continue making passes, adjusting depth slightly with the cross-slide if needed (especially for single-die tools), until the desired pattern is achieved. Aim for a clean, consistent pattern without any tearing or excessive metal deformation. Some people like to make a final pass at a slightly shallower depth to “clean up” the pattern.
Step 9: Inspection and Cleanup
Once you are satisfied with the knurl, carefully retract the tool. Turn off the lathe and inspect your work. The knurled pattern should be sharp and well-defined. Clean up any metal chips and apply a light coat of oil to your workpiece and tools to prevent rust.
Tips for Perfect Knurling Every Time
Here are some golden rules to follow to ensure your knurling projects turn out great:
- Start Slow: Always begin with the slowest spindle speed and gradually increase if necessary.
- Workpiece Support is Key: Especially for long, thin parts. A flexible workpiece will ruin your knurl.
- The Right Tool for the Job: Use a knurling tool and wheel combination appropriate for your lathe size and material.
- Firm Grip: Ensure the knurling tool is firmly held in the tool post. Any wobble will be transferred to the knurl.
- Lubricate: Though not always essential, it helps on many materials and situations.
- Multiple Passes are Normal: Don’t expect a perfect knurl on the first try. Many passes are often required, especially with opposing wheel designs.
- Feed Rate: Don’t be afraid of a relatively quick feed rate. You want the wheels to roll, not drag.
- Depth Control: For opposing double-die tools, fine adjustments are minimal. For single-die tools, controlled, small increments are essential.
- Practice on Scrap: Before tackling a critical part, practice on scrap material of the same diameter and type.
Troubleshooting Common Knurling Problems
Even with the best intentions, you might run into a snag. Here’s how to fix some common knurling issues:
Problem: Uneven or Incomplete Pattern
Cause: Spindle speed too high, inconsistent feed rate, workpiece flexing, tool not centered, or insufficient passes.
Solution: Slow down spindle speed, maintain a steady feed rate, use a steady rest if needed, ensure the tool is perfectly centered, and make more passes, potentially at slightly adjusted depths (for single-die tools).
Problem: Torn or Jagged Knurls
Cause: Spindle speed too high, feed rate too slow, dull knurl wheels, or material too hard for the tool.
Solution: Reduce spindle speed, increase feed rate, inspect wear on knurl wheels (replace if necessary), or try on softer material. Ensure you are not trying to knurl something too hard for the process.
Problem: Tool Binding or Chattering
Cause: Excessive feed rate, tool depth set too deep too quickly, or workpiece not rigid.
Solution: Reduce the feed rate, engage the tool more gradually, and ensure your workpiece is well-supported.
Problem: Knurling Wheels Slipping
Cause: Surface too hard, insufficient pressure, or lubricant is too thin.
Solution: Increase pressure gently (if your tool allows), try a different lubricant, or consider if the material is too hard for this type of knurling.
Knurling vs. Other Grip Enhancements
While knurling is popular, it’s not the only way to add grip. Here’s a quick comparison:
| Feature | Knurling | Checkering | Grooving | Etxra-Grip Coatings |
|---|---|---|---|---|
| Process | Deforms metal by rolling/pressing. | Cuts criss-cross grooves. | Cuts parallel or spiral grooves. | Applied as a coating. |
| Appearance | Diamond or straight patterns. | Sharp, angular patterns. | Linear textures. | Varies widely. |
| Grip | Excellent, comfortable. | Very good, can be sharp. | Good, directional. | Varies, can be excellent. |
| Tooling | Knurling tool with wheels. | Specialized cutting tools. | Parting or grooving tools. | Applies during manufacturing or as aftermarket. |
| Workpiece Load | High pressure. | Moderate cutting force. | Low |

