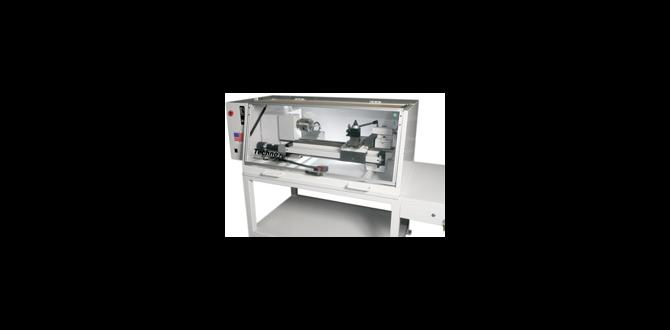
A lathe is an indispensable tool for gunsmithing, allowing precise shaping, threading, and fitting of firearm components. For beginners, a small, versatile metal lathe is ideal for tasks like chambering barrels, making custom parts, and performing repairs with accuracy and control.
Welcome to Lathe Hub! If you’re diving into the world of gunsmithing, you’ve likely heard that a lathe is practically essential. It can seem like a big, maybe even intimidating, piece of equipment. But honestly, it’s a game-changer for precision work on firearms. Whether you’re looking to build a custom rifle, repair a beloved handgun, or simply understand how gun parts are made, a lathe opens up a whole new level of possibilities. Don’t worry if you’re new to machining; we’ll break down exactly why a lathe is so vital for gunsmithing and what you should look for. Get ready to discover how this powerful tool can help you achieve professional results right in your own workshop.
Why a Lathe is Crucial for Gunsmithing
Gunsmithing is all about precision. Firearms are complex mechanisms where even thousandths of an inch can make a difference in performance, reliability, and safety. A lathe is the cornerstone tool for achieving that kind of accuracy when working with metal components.
Think about it: a barrel needs to be perfectly straight, the chamber precisely sized, and any custom parts must fit snugly without play. These aren’t tasks you can accomplish with hand tools. A lathe, by spinning a workpiece against a cutting tool, allows for the controlled removal of material to create cylindrical shapes, bore holes, thread rods, and much more, all to exacting specifications.
For a home gunsmith or hobbyist, having access to a lathe means you’re not limited by off-the-shelf parts or the services of a professional gunsmith for every modification. You gain the ability to:
- Create custom parts: From simple pins and screws to more complex components like muzzle brakes or custom bolt handles.
- Modify existing parts: Such as shortening barrels, fluting them for weight reduction, or creating custom contours.
- Chambering barrels: This is perhaps the most critical gunsmithing operation that requires a lathe, ensuring the cartridge fits perfectly for safe and reliable firing.
- Thread work: Essential for attaching suppressors, muzzle devices, or creating robust connections for custom builds.
- Repair work: Fixing damaged threads, worn parts, or misalignment issues.
Choosing Your First Gunsmithing Lathe
Deciding on your first lathe for gunsmithing can feel overwhelming. The market offers a wide range of options, from tiny hobby lathes to massive industrial machines. For most home gunsmiths and beginners, the sweet spot lies in a versatile, mid-sized metal lathe. Here’s what to consider:
Key Features for Gunsmithing Lathes
- Swing: This refers to the maximum diameter of a workpiece that can be rotated over the lathe bed. For most gunsmithing tasks, a swing of 10 to 13 inches is generally sufficient. This allows you to work on rifle barrels (which can be quite long) and other common firearm components.
- Taper Attachment: Essential for cutting tapers, such as those found on bottleneck cartridges or certain rifle actions.
- Threading Capabilities: This is non-negotiable for gunsmithing. Ensure the lathe has a gearbox that allows for cutting both standard and metric threads, and that it’s accurate and easy to set up.
- Distance Between Centers (Bed Length): This determines the maximum length of a workpiece you can machine. For working with rifle barrels, aim for a bed length that allows at least 36 inches between centers. Longer is often better if space and budget allow.
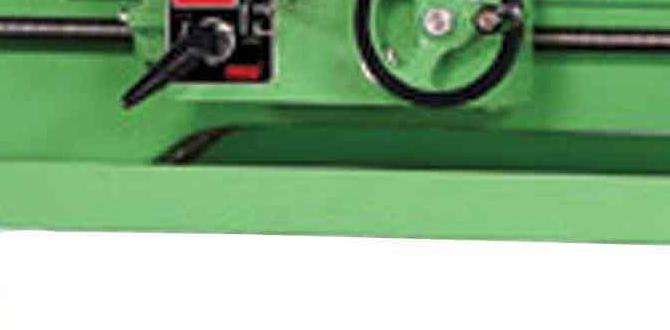
- Power and Speed: A motor with sufficient horsepower (e.g., 1 HP or more) is needed to handle the forces involved in metal cutting. Variable speed control is highly desirable for different materials and operations. Look for a lathe that can achieve speeds from around 50 RPM up to 1500 RPM or higher.
- Accuracy and Rigidity: A solid, well-built lathe will be more rigid, reducing chatter and allowing for cleaner cuts and greater accuracy. Look for cast iron construction.
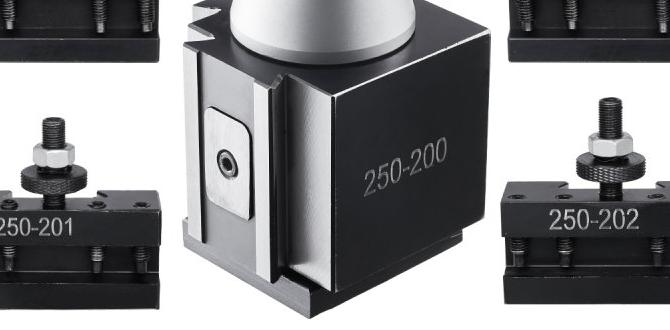
- Included Accessories: Check what comes standard. A three-jaw chuck, four-jaw chuck, faceplate, steady rest, follow rest, and centers are crucial for various gunsmithing tasks.
Types of Lathes to Consider
When you first start looking, you’ll see a few common types that are good entry points for gunsmithing:
- Benchtop Metal Lathes: These are smaller, more affordable, and suitable for smaller parts like pistol components, pins, screws, or smaller rifle modifications. They are great for learning the basics but may be too small for full-length rifle barrels.
- Gap Bed Lathes: These have a removable section in the bed near the headstock, allowing you to swing larger diameter pieces for specific operations (like threading the muzzle of a barrel).
- Engine Lathes (Full-Size): These are the workhorses. They offer more power, rigidity, and capacity for larger projects and longer workpieces like rifle barrels. If space and budget allow, a good quality used engine lathe can be an excellent investment.
Budget Considerations
New metal lathes suitable for gunsmithing can range from around $1,500 to $5,000 or more. Used lathes can offer significant savings but require careful inspection for wear and tear. Always factor in the cost of necessary accessories, cutting tools, and measuring equipment.
Essential Operations a Lathe Performs in Gunsmithing
Let’s dive into some of the core tasks that make a lathe so indispensable for anyone serious about firearm work.
1. Barrel Work
The barrel is the heart of most firearms, and the lathe is crucial for its proper creation and modification.
Chambering Barrels
This is the process of cutting the precise cavity in the breech end of the barrel where the cartridge sits before firing. It requires extreme accuracy. Using specialized reamers and boring bars on a lathe ensures the chamber is the exact dimensions specified by the cartridge manufacturer, including headspace. Incorrect chambering can lead to dangerous malfunctions.
For a beginner gunsmith, chambering is a task that requires significant practice and understanding. It’s often recommended to start with less critical operations or to have an experienced gunsmith guide you through your first few chamberings.
Threading Muzzles
Attaching muzzle devices like flash suppressors, compensators, or sound suppressors requires precisely cut threads on the barrel’s muzzle. A lathe allows you to cut these threads to exact specifications (e.g., 1/2-28 TPI for many AR-15 platforms). Proper threading ensures a secure fit and alignment.
Barrel Contouring and Fluting
Gunsmiths often reshape barrels to reduce weight or improve aesthetics. This includes:
- Tapering: Thinning the barrel profile from the muzzle back towards the receiver.
- Straight Tubing: Creating a perfectly parallel profile.
- Fluting: Cutting concave grooves along the length of the barrel. This significantly reduces weight while maintaining rigidity. Fluting requires careful planning and precise execution on the lathe.
Measuring diameter accurately at multiple points along the barrel is critical for these operations. A good lathe combined with calibrated measuring tools like micrometers and calipers is key.
2. Receiver and Action Work
The firearm’s action or receiver is where the bolt, trigger mechanism, and barrel connect. The lathe is also vital here.
Facing and Trimming Actions
Sometimes, the faces of rifle actions (where the bolt lugs sit or the barrel threads in) need to be perfectly square and at the correct depth. A lathe can turn these mating surfaces to ensure proper alignment and headspace. This is a critical step in building accurate rifles.
Drilling and Tapping Holes
Many firearm components require holes for screws, pins, or mounting scope bases. A lathe can be used to accurately drill and tap these holes, especially in round parts like bolt bodies or custom components. Using a tailstock and a steady rest can help maintain perfect alignment.
3. Bolt and Bolt Component Work
The bolt of a rifle is a complex assembly. The lathe is used for several operations:
- Bolt Handle Replacement/Modification: Creating custom bolt handles or repairing damaged ones.
- Bolt Head Machining: In sophisticated builds, parts of the bolt head may be modified or replaced.
- Extractor and Ejector Fitting: While often done with specialized tools, the lathe can be used for initial shaping or adjustments to these small, critical parts.
4. Custom Part Fabrication
This is where creativity with a lathe truly shines.
- Creating Pins and Rollers: Many trigger groups and action mechanisms use small, precisely sized pins.
- Making Set Screws and Custom Fasteners: If you need a screw of a very specific length or thread pitch, the lathe is your go-to.
- Fabricating Bushings and Adapters: To mate different parts or create custom fittings.
- Making Trigger Components: Some trigger parts can be machined from scratch for custom triggers.
5. Threading Dies and Jigs
Beyond working on the firearm itself, gunsmiths often use lathes to create specialized tools. This includes:
- Threading Dies: For re-cutting or creating threads on smaller parts like bolts or rods.
- Forming Tools: To create specific shapes or profiles for custom projects.
Safety First: Operating a Lathe Responsibly
Machining metal can be hazardous. A lathe, with its powerful rotating parts and sharp cutting tools, demands respect and adherence to safety protocols. As Daniel Bates of Lathe Hub, I can’t stress this enough: safety isn’t an option; it’s a requirement.
Essential Safety Gear
- Safety Glasses: Always wear ANSI-approved safety glasses with side shields, even for short operations. A face shield over safety glasses provides extra protection.
- Appropriate Clothing: Avoid loose clothing, dangling jewelry, or anything that can get caught in the rotating spindle. Tie back long hair.
- Gloves: Generally, avoid wearing gloves when operating a lathe, as they can become entangled. Handle sharp tools and workpieces with care.
Operating Procedures
- Read the Manual: Familiarize yourself thoroughly with your specific lathe’s operation and safety features.
- Secure the Workpiece: Ensure the workpiece is securely mounted in the chuck or between centers. A loose workpiece can fly out with tremendous force.
- Tool Setup: Use sharp cutting tools set at the correct height. Dull tools cause chatter and increase the risk of accidents.
- Clear the Area: Keep your workstation clean and free of clutter. Remove tools, rags, and materials not in use.
- Never Leave a Running Lathe Unattended: Always be present and attentive when the machine is on.
- Use the Right Tools for the Job: Don’t force bits or make drastic cuts that could overload the machine or workpiece.
- Beware of Spinning Stock: Keep hands and fingers away from the rotating workpiece and chuck.
- Chip Removal: Use a brush or hook to remove chips, never your hands. Hot chips can cause burns.
- Know Your Emergency Stop: Be aware of where the power switch and emergency stop buttons are located.
For more in-depth safety information, resources from organizations like the U.S. Occupational Safety and Health Administration on machinery safety can be invaluable. Always prioritize a safe working environment.
OSHA Machinery Safety Information
Lathe Accessories and Setup for Gunsmithing
Beyond the lathe itself, having the right accessories and setting them up correctly is key to successful gunsmithing.
Must-Have Accessories
- Chuck (3-Jaw and 4-Jaw): A 3-jaw chuck is quick and good for holding round stock concentrically. A 4-jaw chuck is essential for holding irregularly shaped or off-center workpieces, crucial for many gunsmithing tasks where perfect centering might be compromised by existing features.
- Centers (Live and Dead): Used to support long workpieces like barrels between the headstock and tailstock. A live center spins with the workpiece, reducing friction.
- Steady Rest and Follow Rest: These support long, slender workpieces to prevent whipping and vibration, essential for accurately machining rifle barrels. A steady rest supports the workpiece from stationary points, while a follow rest moves with the carriage.
- Faceplate: Used for mounting larger diameter or irregularly shaped work that cannot be held in a chuck.
- Tooling: A good set of high-speed steel (HSS) or carbide cutting bits, threading tools, boring bars, and knurling tools.
- Measuring Tools: Calipers, micrometers (inside and outside), dial indicators, and a depth gauge are critical for accuracy.
- Threading Gears/Tooling: Ensure your lathe has the necessary change gears or a threading dial for cutting accurate threads.
Setting Up Your Lathe
Leveling: The lathe must be perfectly level to ensure accuracy. Use shims and a machinist’s level to verify. Imbalance will cause vibration and affect precision.
Alignment: The headstock and tailstock spindles must be perfectly aligned. Misalignment will cause conical holes when drilling or turning and affect accuracy when using centers. Many lathes have adjustment screws for this purpose.
Lubrication: Regular lubrication of all moving parts is vital for smooth operation, wear prevention, and accuracy. Consult your lathe’s manual for its specific lubrication schedule and points.
Working with Small vs. Large Lathes for Gunsmithing
The type of gunsmithing you intend to do heavily influences the size and type of lathe you’ll need.
Small/Benchtop Lathes (e.g., 7×10, 8×12):
Pros:
- Affordable entry point
- Takes up less space
- Good for small parts, pins, screws, minor repairs, and learning
- Lower power consumption
Cons:
- Limited capacity: Too small for most rifle barrels
- Less rigid: More prone to chatter and vibration
- Lower precision floor
- May struggle with harder steels
Medium to Large Engine Lathes (e.g., 13×40 and up):
Pros:
- Ample capacity for rifle barrels and larger components
- Greater rigidity for cleaner cuts and higher precision
- More power to handle tough materials and larger cuts
- Better stock support options (steady/follow rests)
- Generally more durable and built for heavier work
Cons:
- Higher initial cost (new or used)
- Require significantly more space
- Heavier power requirements
- Can be more complex for absolute beginners
Ideal Choice for Most Gunsmiths
For comprehensive gunsmithing, including working on rifle barrels effectively, an engine lathe with at least a 12-inch swing and 36-inch distance between centers is highly recommended. Something in the 13×40 or 14×50 range is a common sweet spot for serious hobbyists and emerging gunsmiths.
If your budget is limited, a quality used benchtop lathe can be a starting point for simpler tasks, but you may eventually outgrow it for more involved projects. Many aspiring gunsmiths start small and upgrade as their skills and projects demand more capacity and precision.
A Comparison of Lathe Specifications for Gunsmithing
Here’s a look at how different lathe specifications translate to gunsmithing capabilities:
| Specification | Typical Gunsmithing Need | Beginner-Friendly Interpretation |
|---|---|---|
| Swing | 10-13 inches for pistols/small rifles, 13+ inches for long rifle barrels | Can it turn a rifle barrel end-to-end? (Check bed length too) |
| Distance Between Centers | 36+ inches for rifle barrels | How long of a piece can it hold between the two ends? |
| Taper Attachment | Essential for chambering and custom actions | Helps make angled cuts smoothly. |
| Threading Capability | Must cut metric and imperial threads accurately | Can it make correct screw threads for parts? |
| Spindle Bore Diameter | 1.5 inches or larger
Related Posts |