Have you ever watched a metal lathe in action? It works like magic, turning raw metal into incredible shapes. But what happens when your lathe stops working? Many people face this problem. They may think it’s too difficult to fix. But guess what? Restoring a metal lathe can be fun and rewarding!
One of the first steps in the process is understanding the lathe wiring diagram. This diagram shows how each part connects. It may seem complex, but it’s really just a guide. With a bit of patience and the right tools, you can bring an old lathe back to life.
Imagine taking a rusty machine and transforming it into a valuable tool! Not only will you learn a lot, but you’ll also save money. Plus, there’s a special feeling in making something work again. So, let’s dive into the world of lathe restoration and discover how to make your lathe run smoothly!
Lathe Restoration: Essential Metal Lathe Wiring Diagram Guide

Lathe Restoration Metal Lathe Wiring Diagram
Restoring a metal lathe is exciting and rewarding. A proper wiring diagram is key to ensuring your machine runs smoothly. Readers discover how to identify essential components and safely connect them. This process requires attention to detail and the right tools. Fun fact: a well-restored lathe can last decades and hold great value! By understanding the wiring layout, users can avoid common mistakes and keep their machinery in top shape. Ready to get started?Understanding Lathe Restoration
Importance of lathe restoration for hobbyists and professionals. Common issues faced in metal lathes that necessitate restoration.Restoring a lathe is like giving a sleepy dog a bath—necessary and rewarding! For hobbyists and professionals, it means getting your trusty machine back to work. Lathes face common problems like rust, worn bearings, and bad wiring. These issues can stop your projects in their tracks, turning fun into frustration. Just think of restoration as a doctor’s check-up, giving your lathe a new lease on life and lots of happy turns ahead!
| Common Lathe Issues | Importance of Restoration |
|---|---|
| Rust | Prevents damage to the machine |
| Worn Bearings | Ensures smooth operation |
| Bad Wiring | Enhances safety and efficiency |
Tools and Materials Needed for Lathe Restoration
Essential tools for disassembly and assembly. Recommended materials for electrical repairs and enhancements.Before starting your adventure in lathe restoration, gather some essential tools. You’ll need screwdrivers, pliers, and a socket set for disassembly and assembly. A hammer might help, too—just in case you feel like persuading some stubborn bolts! For wiring, grab electrical tape, connectors, and a multimeter to test everything. Let’s not forget a good manual; it’s like the treasure map for your lathe project!
| Tools | Purpose |
|---|---|
| Screwdrivers | For removing and tightening screws |
| Pliers | To grip and twist wires |
| Socket set | For loosening and tightening bolts |
| Multimeter | To check electrical connections |
Step-by-Step Process of Disassembling a Metal Lathe
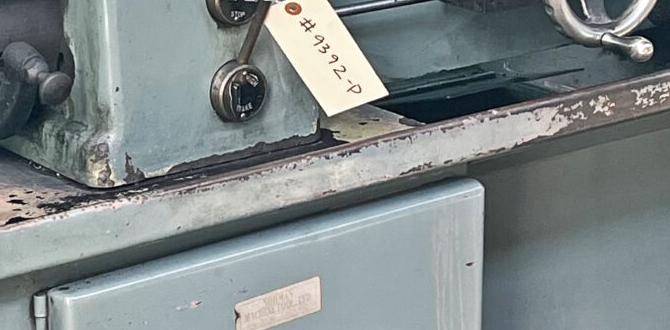
Safe disassembly practices to avoid damage. Key components to inspect during disassembly.Disassembling a metal lathe can feel like solving a puzzle, but you’ve got to be careful! Always wear safety gear to keep your fingers safe. Start by taking photos as you go. This helps you remember how everything fits back together. Inspect key components like the bed, carriage, and tailstock for any damage. Check for rust or wear—like finding an old sock in your closet! Use a table to organize your parts so they don’t play hide-and-seek.
| Component | What to Inspect |
|---|---|
| Bed | Look for scratches or dents |
| Carriage | Check for smooth movement |
| Tailstock | Ensure it locks properly |
Creating a Metal Lathe Wiring Diagram
Components of a typical lathe wiring system. How to sketch and label a wiring diagram for easy reference.Creating a wiring diagram for your metal lathe can feel like piecing together a puzzle. First, identify key components like the motor, switch, and transformer. These parts are like the lathes’ best buddies. Next, sketch your diagram on paper. Use clear labels. Don’t worry; it doesn’t have to be art! Add colors to make it pop—who said wiring had to be boring?
| Component | Description |
|---|---|
| Motor | Powers the lathe with spinning magic. |
| Switch | Controls the on/off action like a light switch. |
| Transformer | Adjusts the voltage to keep things running smoothly. |
By having a clear diagram, you’ll avoid troubleshooting with a confused face. Remember, practice makes perfect! Every lathe can be your masterpiece, shiny and humming happily!
Identifying and Troubleshooting Wiring Issues
Common wiring problems in metal lathes. Diagnostic tips to ensure a successful restoration.Wiring issues can be a headache for metal lathe enthusiasts. Common problems include frayed wires, loose connections, and burnt-out motors. These pesky issues can halt your project faster than a cat chasing a laser pointer! To diagnose problems, check connections first. Are they snug enough? Next, use a multimeter to test for voltage—like searching for treasure in a wiring cave. Remember, a successful restoration often hinges on catching these hiccups early.
| Common Wiring Problem | Diagnostic Tip |
|---|---|
| Frayed Wires | Inspect for damage and replace if needed. |
| Loose Connections | Tighten all connections to avoid power loss. |
| Burnt-out Motors | Check voltage using a multimeter for signs of life. |
Rewiring Your Metal Lathe: A Comprehensive Guide
Stepbystep instructions for rewiring. Safety precautions to follow during the rewiring process.Rewiring a metal lathe can seem tricky, but it doesn’t have to be. Follow these simple steps for a safe and smooth process:
- First, **unplug the machine** to avoid electric shocks.
- Next, **remove old wires** carefully to prevent damage.
- Then, **connect new wires** following a clear wiring diagram.
- Finally, **test the lathe** to ensure everything works well.
Always wear protective gear. Use gloves and goggles to stay safe. Working with electricity can be dangerous, so be cautious.
What should I do first when rewiring my lathe?
Start by **unplugging the lathe**. This protects you from accidental shocks.
How do I know if my rewiring is correct?
Check connections against the wiring diagram. If unsure, seek help.
Upgrading Your Lathe’s Electrical Components
Evaluation of old vs. new components. Suggestions for modern upgrades to improve efficiency.Upgrading parts in your lathe can be exciting! Old components might be slow or use too much power. New parts can make your machine run better. Think about swapping out these parts:
- Motors: A new motor can give you more speed and power.
- Wiring: Modern wiring can help prevent shorts and keep everything safe.
- Controls: Digital controls can give you more accuracy and ease of use.
Choosing new components can really improve efficiency and performance!
What upgrades can I make to my lathe?
You can upgrade with newer motors, safety wiring, and digital controls. These changes can boost power and ease of use. Modern upgrades make a huge difference!
Testing and Calibration After Restoration
Importance of testing the lathe postrestoration. Calibration methods for accuracy and performance.Testing your lathe after restoration is crucial. It ensures everything works correctly. Calibration checks the lathe’s accuracy and performance. Regular tests help catch issues early and keep your machine safe.
- Run a test cut to check precision.
- Measure dimensions of the finished piece.
- Adjust settings based on your measurements.
Remember, the goal is to enjoy smooth operation and great results!
Why is testing a lathe after restoration important?
Testing ensures your lathe works right, is safe, and delivers good results.
Calibration methods to ensure accuracy:
- Check tool alignment
- Use dial indicators for precision
- Verify speed settings and stability
Maintaining Your Restored Metal Lathe
Regular maintenance tips to prolong lifespan. Best practices for electrical system care and inspection.Keeping your restored metal lathe in top shape is key to its longevity. Regular maintenance can make a big difference. Here are a few important tips:
- Check and clean the electrical connections often.
- Inspect and change lubricants according to the manual.
- Keep the workspace clean to avoid dirt buildup.
- Look for wear on belts and gears regularly.
Caring for the electrical system is crucial too. Ensure all wires are intact and free from damage. Inspect the wiring diagram periodically to spot any issues early. A well-maintained lathe can last for years!
How often should I maintain my lathe?
It’s best to check your lathe weekly for signs of wear and tear, and perform in-depth maintenance every few months.
What types of lubrication should I use?
Use machine oil specifically designed for metal lathes to ensure smooth operation.
Conclusion
In conclusion, restoring a metal lathe can be rewarding. Understanding the wiring diagram is crucial for a successful project. Take your time to learn each step. We encourage you to gather all materials and follow the diagram closely. If you’re unsure, seek out tutorials or guides. With patience, you can bring your lathe back to life and make it work again!FAQs
What Are The Essential Components Needed For Rewiring A Metal Lathe During Restoration?To rewire a metal lathe during restoration, you need a few important parts. First, get new wires that can handle electricity well. You also need a power supply to give the lathe energy to work. Don’t forget connectors to join the wires together safely. Finally, use electrical tape to keep everything secure and protected.
How Can I Identify The Correct Wiring Diagram For Different Models Of Metal Lathes?To find the right wiring diagram for different metal lathes, start by checking the model number. Look on the machine’s front or back for a label with this number. Next, search online for that model and “wiring diagram.” You can also ask the manufacturer or check the manual if you have it. This will help you find the diagram you need!
What Safety Precautions Should Be Taken When Working On The Electrical Wiring Of A Lathe?When working on the electrical wiring of a lathe, you should always turn off the power first. This means unplugging it or switching off the circuit breaker. You should wear rubber gloves to protect your hands from shocks. Keep tools dry and away from water. Lastly, it’s best to have someone nearby in case you need help.
How Do I Troubleshoot Common Electrical Issues That May Arise In A Restored Metal Lathe?To troubleshoot electrical problems in your metal lathe, start by checking the power source. Make sure it’s plugged in and the outlet works. Then, look at the cords for any damage. If it doesn’t turn on, test the switch to see if it’s working. If these steps don’t fix the issue, you might need help from a professional.
Are There Any Recommended Upgrades To Consider While Restoring The Wiring Of An Old Metal Lathe?Yes, there are some good upgrades to think about. First, you might want to change the old wires to newer ones. This can help with safety and make your lathe work better. You could also add a new switch that is easier to use. Lastly, consider installing a fuse to protect the machine from overloads.