Have you ever wondered how a lathe can make such precise threads? It’s all thanks to something called a lathe reverse threading gear setup. This special setup helps turn materials easily and accurately.
Imagine you need to create a screw for a school project. A lathe with a reverse threading gear can make the job much easier. It allows you to cut threads in both directions. Isn’t that cool?
Many people don’t know that using a reverse threading setup can save time and effort. With just a few adjustments, your lathe becomes a powerful tool. You’ll be amazed at how fast you can finish your projects.
In this article, we will explore the exciting world of lathe reverse threading gear setups. We will break down the steps, tips, and tricks you need to know. Get ready to dive in and discover the magic behind this fantastic tool!
Lathe Reverse Threading Gear Setup: A Complete Guide

Lathe Reverse Threading Gear Setup
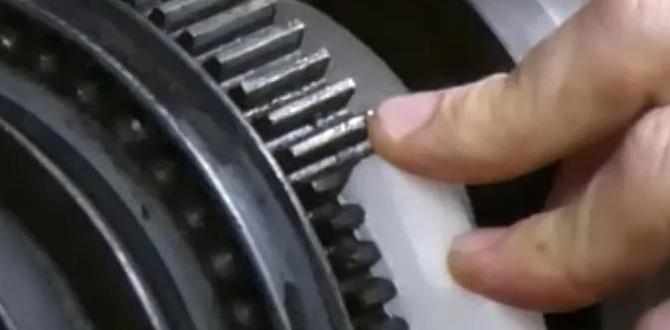
Lathe reverse threading gear setup is essential for creating threads in the opposite direction. This technique is useful for producing left-hand threads often found in specific machinery and tools. Have you ever wondered why some screws turn counterclockwise? Understanding this setup helps you make the right threads for your projects. It’s like flipping a pancake! A good setup involves mastering the gears, saving time, and improving your work quality. Wouldn’t you love to make complicated parts with ease?Components of a Lathe for Reverse Threading
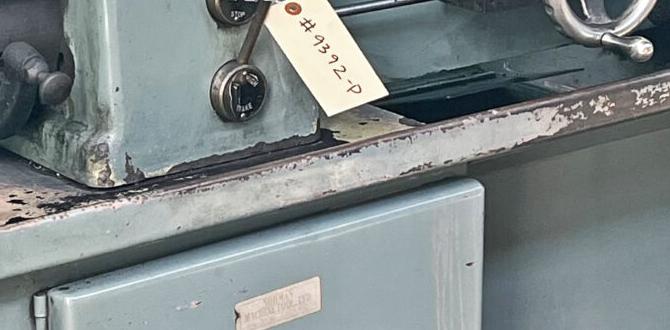
Key parts of a lathe relevant to threading. Importance of selecting the right lathe model for threading tasks.Understanding lathe components is essential for successful reverse threading. Key parts include the headstock, which houses the motor and spindle, and the tailstock, used for support. Picking the right lathe model is crucial for threading tasks. A model that suits your needs can make threading smoother than butter on toast. Remember, not all lathes are created equal!
| Component | Function |
|---|---|
| Headstock | Holds motor and spindle |
| Tailstock | Provides support |
| Carriage | Moves tools for cutting |
Choosing wisely can save you from many headaches, like that time I tried threading with a blender. Talk about messy!
Setting Up the Gear for Reverse Threading
Stepbystep guide on setup process. Common tools and equipment needed for the setup.To set up the gear for reverse threading, start by gathering the right tools. You will need a lathe, cutting tools, and safety gear. Here’s how to do it step by step:
- First, turn off the machine.
- Next, install the reverse threading gear.
- Then, adjust the settings for size and depth.
- Finally, double-check everything before starting.
This easy setup helps you create threads quickly and safely. Always remember, safety first!
What tools do I need for lathe reverse threading?
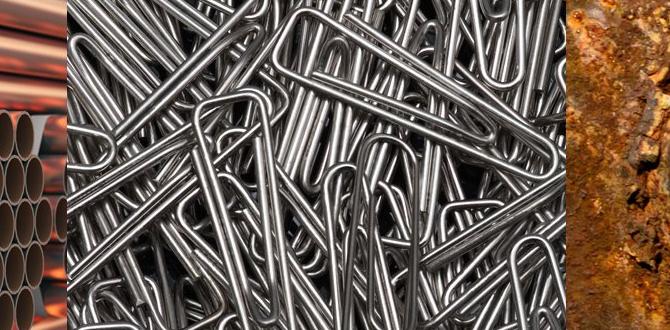
For lathe reverse threading, you need:
- Lathe machine – your main tool.
- Cutting tools – for precise cuts.
- Safety gear – protect yourself while working.
Adjusting the Lathe for Reverse Threading
Detailed instructions on adjustments required for reverse threading. Importance of precision in adjustments for successful threading.To set up your lathe for reverse threading, follow these steps carefully. Begin by adjusting the spindle direction. Switch it to reverse so the tool turns the right way. Next, check the gear settings. Make sure the gears align properly for reverse action. Precision is key here. Small mistakes can cause problems in your threads. A tiny misalignment can lead to failure in cutting. Always double-check each adjustment.
What are the steps to set up for reverse threading?
Here are the main steps:
- Switch spindle direction to reverse.
- Align gears for proper threading action.
- Double-check adjustments for precision.
Common Challenges and Troubleshooting
Typical issues encountered during setup and threading. Solutions and preventative measures for common problems.Setting up a lathe for reverse threading can be tricky. You might face some common problems. For example, the thread may not align correctly or may end up too loose. Here are some tips to fix these issues:
- Always measure your materials accurately.
- Check the tool height before starting.
- Keep the gears clean and lubricated.
Taking these steps can save time and frustration. Proper setup can lead to better results every time!
What are common issues in lathe threading?
Typical issues include misalignment and improper tension in threads. These can cause weak points in the finished product. Ensuring proper setup reduces these problems.
Best Practices for Successful Reverse Threading
Tips for achieving highquality threads. Maintenance tips for lathes used in threading operations.Creating great threads takes practice and a few smart tips. Start with clean tools; dirt can ruin your work. Make sure your lathe is oiled and happy, or it might throw a tantrum. Regular maintenance keeps everything running smoothly. Check the alignment often; misalignment leads to wonky threads. And remember, threading should be exciting, not scary! Think of it like knitting, but with metal. Here’s a handy table for quick reference:
| Tip | Description |
|---|---|
| Clean tools | Keep your tools free from dirt and grime. |
| Regular maintenance | Check oil and overall lathe health frequently. |
| Check alignment | Ensure everything is lined up to avoid errors. |
| Practice patience | Take your time for better results—no one likes a rushed thread! |
Safety Considerations in Reverse Threading
Essential safety practices while using a lathe. Personal protective equipment (PPE) recommendations.Before diving into reverse threading, safety is key! Always wear your Personal Protective Equipment (PPE), such as goggles, gloves, and ear protection. These tools are like your superhero cape, protecting you from danger. Make sure the lathe is clean and free from clutter, too. You don’t want a piece of wood to trip you up! Check the equipment regularly to ensure it’s in tip-top shape. Remember, safety first means your fingers stay attached!
| PPE Item | Purpose |
|---|---|
| Goggles | Protects eyes from flying debris |
| Gloves | Prevents cuts and scrapes |
| Earmuffs | Reduces noise exposure |
Advanced Techniques for Reverse Threading
Exploration of advanced methods for experienced users. Discussion on the benefits of using CNC lathes for complex threading tasks.Experienced users can dive into advanced reverse threading techniques to make their work stand out. Using CNC lathes can make complex threading tasks feel like a walk in the park. Why? Because these machines offer precision that other methods can’t. You can create threads that are tighter than your grandma’s hug! Plus, CNC lathes can handle multiple tasks at once, saving time and making you look like a threading superstar.
| Benefits of CNC Lathes | Why They Rock! |
|---|---|
| Precision | Fewer mistakes, more fun! |
| Speed | Finish fast, impress your friends! |
| Versatility | Do more with less effort! |
Conclusion
In summary, understanding lathe reverse threading gear setup is essential for precise projects. You can create threads easily by reversing the spindle rotation. Remember to set your gears correctly for smooth operation. To improve your skills, practice with different materials and read more about threading techniques. With practice, you’ll become confident using your lathe. Happy threading!FAQs
Sure! Here Are Five Questions Related To Lathe Reverse Threading Gear Setup:Sure! Here are answers to five questions about setting up the reverse threading gear on a lathe: 1. **What is a lathe?** A lathe is a machine that cuts and shapes metal or wood. 2. **Why do we need reverse threading?** We use reverse threading to make certain screws or threads. It helps in unscrewing parts. 3. **How do we set up the gears?** You need to follow the instructions in the manual. This helps you place the gears correctly. 4. **Can I change gears by myself?** Yes, you can. Just be careful and make sure everything is turned off first. 5. **What should I check after setup?** Always check that the machine runs smoothly and the threads are correct. This ensures safety and quality.
Sure! Please go ahead and ask your question, and I’ll be happy to help you.
What Specific Gear Combinations Are Required To Reverse The Direction Of Threading On A Lathe?To reverse the direction of threading on a lathe, you need to change some gears. Use a gear combination that allows backward motion. Usually, this involves switching a specific gear with another one. Check your lathe’s manual for the right setup. This will let you thread left instead of right.
How Do You Properly Adjust The Tailstock And Tool Post To Accommodate Reverse Threading On A Lathe?To adjust the tailstock for reverse threading on a lathe, you need to move it carefully. First, loosen the tailstock clamp and slide it to the right position. Then, tighten the clamp again to hold it in place. For the tool post, you can simply make sure the cutting tool is set at the right angle. Check that everything is secure before starting.
What Are The Common Challenges Faced When Setting Up A Lathe For Reverse Threading, And How Can They Be Overcome?When setting up a lathe for reverse threading, you might face a few problems. First, you could mix up the direction of the screw. To fix this, double-check your settings before you start. Second, the tool might not be sharp enough. Make sure your tools are sharp and ready to cut. Lastly, the material could be hard to grip. Use a strong chuck to hold the piece tightly. This way, you can work safely and easily!
How Does The Choice Of Threading Tool Affect The Success Of Reverse Threading On A Lathe?The threading tool you choose is very important for reverse threading on a lathe. A good tool will cut cleanly and smoothly, making better threads. If the tool is dull or the wrong shape, it might mess up the threads. We want to make sure the tool fits the job so we get strong and accurate threads. This way, our project will turn out great!
What Safety Precautions Should Be Taken When Operating A Lathe In Reverse Threading Mode?When using a lathe in reverse threading mode, be very careful. Always wear safety goggles to protect your eyes. Keep long hair tied back, so it doesn’t get caught. Make sure your hands are away from the tool while it runs. Lastly, check that all parts are secure before starting. Safety first!
{“@context”:”https://schema.org”,”@type”: “FAQPage”,”mainEntity”:[{“@type”: “Question”,”name”: “Sure! Here Are Five Questions Related To Lathe Reverse Threading Gear Setup:”,”acceptedAnswer”: {“@type”: “Answer”,”text”: “Sure! Here are answers to five questions about setting up the reverse threading gear on a lathe: 1. **What is a lathe?** A lathe is a machine that cuts and shapes metal or wood. 2. **Why do we need reverse threading?** We use reverse threading to make certain screws or threads. It helps in unscrewing parts. 3. **How do we set up the gears?** You need to follow the instructions in the manual. This helps you place the gears correctly. 4. **Can I change gears by myself?** Yes, you can. Just be careful and make sure everything is turned off first. 5. **What should I check after setup?** Always check that the machine runs smoothly and the threads are correct. This ensures safety and quality.”}},{“@type”: “Question”,”name”: “”,”acceptedAnswer”: {“@type”: “Answer”,”text”: “Sure! Please go ahead and ask your question, and I’ll be happy to help you.”}},{“@type”: “Question”,”name”: “What Specific Gear Combinations Are Required To Reverse The Direction Of Threading On A Lathe?”,”acceptedAnswer”: {“@type”: “Answer”,”text”: “To reverse the direction of threading on a lathe, you need to change some gears. Use a gear combination that allows backward motion. Usually, this involves switching a specific gear with another one. Check your lathe’s manual for the right setup. This will let you thread left instead of right.”}},{“@type”: “Question”,”name”: “How Do You Properly Adjust The Tailstock And Tool Post To Accommodate Reverse Threading On A Lathe?”,”acceptedAnswer”: {“@type”: “Answer”,”text”: “To adjust the tailstock for reverse threading on a lathe, you need to move it carefully. First, loosen the tailstock clamp and slide it to the right position. Then, tighten the clamp again to hold it in place. For the tool post, you can simply make sure the cutting tool is set at the right angle. Check that everything is secure before starting.”}},{“@type”: “Question”,”name”: “What Are The Common Challenges Faced When Setting Up A Lathe For Reverse Threading, And How Can They Be Overcome?”,”acceptedAnswer”: {“@type”: “Answer”,”text”: “When setting up a lathe for reverse threading, you might face a few problems. First, you could mix up the direction of the screw. To fix this, double-check your settings before you start. Second, the tool might not be sharp enough. Make sure your tools are sharp and ready to cut. Lastly, the material could be hard to grip. Use a strong chuck to hold the piece tightly. This way, you can work safely and easily!”}},{“@type”: “Question”,”name”: “How Does The Choice Of Threading Tool Affect The Success Of Reverse Threading On A Lathe?”,”acceptedAnswer”: {“@type”: “Answer”,”text”: “The threading tool you choose is very important for reverse threading on a lathe. A good tool will cut cleanly and smoothly, making better threads. If the tool is dull or the wrong shape, it might mess up the threads. We want to make sure the tool fits the job so we get strong and accurate threads. This way, our project will turn out great!”}},{“@type”: “Question”,”name”: “What Safety Precautions Should Be Taken When Operating A Lathe In Reverse Threading Mode?”,”acceptedAnswer”: {“@type”: “Answer”,”text”: “When using a lathe in reverse threading mode, be very careful. Always wear safety goggles to protect your eyes. Keep long hair tied back, so it doesn’t get caught. Make sure your hands are away from the tool while it runs. Lastly, check that all parts are secure before starting. Safety first!”}}]}