Have you ever wondered how amazing things are made on a lathe? Picture this: spinning wood or metal, shaping it into something unique. That’s the magic of turning projects. One key part of this process is the lathe tailstock offset. It’s not just a fancy name; it plays a big role in making cool shapes.
What if I told you that with just a small adjustment, you could create beautiful, precise objects? The lathe tailstock offset allows you to change the angle and position of your workpiece. This means you can explore endless designs. So, are you ready to dive into the world of lathe tailstock offset turning projects?
Some people think turning is tricky, but it can be a fun challenge! Even beginners can learn to create their own unique items. With the right tips and tricks, you’ll be amazed at what you can produce. Let’s embark on this exciting journey of creativity and craftsmanship together!
Lathe Tailstock Offset Turning Project: A Guide To Precision

Lathe Tailstock Offset Turning Project
Ever wonder how to make unique shapes on a lathe? The lathe tailstock offset turning project shows you how! By adjusting the tailstock, you can create amazing effects on your wood pieces. This technique allows for beautiful curves and designs that plain turning can’t achieve. It’s like magic! Plus, you’ll gain confidence using your lathe. Dive into this craft, and impress your friends with your new skills! Who knew turning could be this fun?Understanding Lathe Tailstock Functionality
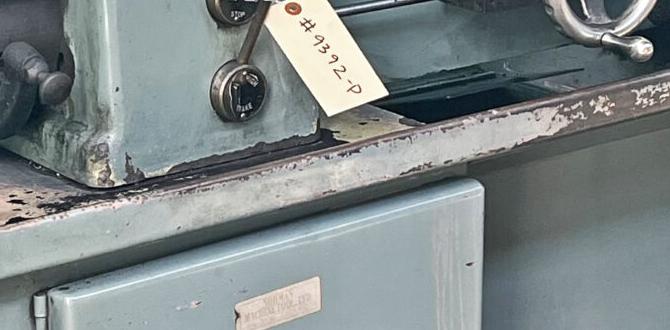
Explanation of tailstock use and mechanics. Importance of tailstock in precision turning.The tailstock is like the trusty sidekick of your lathe. It helps hold the other end of your workpiece tight and steady. This is super important for making precise cuts. Without it, things could get wobbly, and nobody wants a wonky project, right? Precision matters, especially in turning projects where even a tiny mistake can turn a lovely vase into a paperweight!
| Tailstock Functions | Importance |
|---|---|
| Holds workpiece | Ensures stability |
| Adjustable positioning | Allows for precision |
| Guide for drilling | Improves accuracy |
In summary, the tailstock is a vital part of lathe work. It keeps everything in line while you create amazing projects. Remember, precision is key! As they say, “Measure twice and cut once,” or in our case, “Secure twice and turn like a pro!”
Benefits of Tailstock Offset in Woodturning
Advantages of applying offset in projects. Impact on the final product’s shape and aesthetics.Using a tailstock offset in woodturning has great advantages. It helps create unique shapes and makes your final product look better. This technique allows for exciting designs that can’t be made with standard turning. Here are some benefits:
- Creates interesting curves and bends.
- Enhances the overall visual appeal.
- Increases creative possibilities for projects.
So, when you use an offset, you can turn ordinary pieces into extraordinary art!
What is the impact of tailstock offset on the final product?
The tailstock offset changes the way wood spins, affecting the shape. This leads to unique and eye-catching designs.
Tools and Materials Required for Offset Turning
List of essential tools (lathe, tools, etc.). Recommended materials suitable for offset turning.To dive into the fun world of offset turning, you need some key tools and materials. First up is the lathe, your main machine for spinning wood or metal. Don’t forget your trusty lathe tools for shaping and carving. For materials, try softwoods like pine or hardwoods such as oak. These will turn smoother, making your project enjoyable!
| Essential Tools | Recommended Materials |
|---|---|
| Lathe | Pine (Softwood) |
| Turning Tools | Oak (Hardwood) |
| Chisels | Basswood |
| Calipers | Poplar |
With these, you’re all set! It’s like preparing for an exciting adventure—make sure your tools are sharper than your jokes!
Step-by-Step Guide to Setting Up Tailstock Offset
Detailed setup procedure for tailstock offset. Adjustments for different lathe models.Setting up the tailstock offset is crucial for precise turning. Follow these easy steps:
- Start by loosening the tailstock lock. This allows you to move it easily.
- Slide the tailstock until it is aligned with the desired offset position.
- Tighten the lock once you have set the offset. Ensure it is secure.
- Adjust the offset based on your lathe model if needed. Different models may have unique settings.
- Check the alignment again before starting your project.
Remember to read your lathe’s manual for specific adjustments!
What should I know about different lathe models?
Different lathe models may change how you set the tailstock offset. Always refer to the user manual for your machine. This ensures you follow the correct steps. Specific adjustments might be needed based on the model.
Essential Techniques for Successful Offset Turning
Techniques to maintain balance and control. Common pitfalls to avoid during the process.To master offset turning, focus on balance and control. Use a stable setup and check your tailstock alignment. Keep your workpiece tight to avoid wobbling. Start slow; it’s better than a spinning top gone rogue! Watch out for common mistakes, like uneven cuts and loose tools. They can turn your project from masterpiece to mess in seconds. Remember, patience pays off, and a smile makes even the toughest tasks fun!
| Technique | Common Pitfall |
|---|---|
| Maintain even pressure | Uneven cuts |
| Use a sharp tool | Using dull tools |
| Check setup regularly | Skipping inspections |
Project Ideas for Tailstock Offset Turning
Creative project suggestions for beginners and experts. Tips on selecting projects based on skill levels.Looking to dive into the world of offset turning? Here are some fun project ideas for all skill levels. For beginners, consider making simple candle holders or basic bowls. These projects help you practice while having a blast! If you’re a pro, why not try a wobbly vase or a unique gear assembly? Choosing projects based on skill level is key to learning and enjoying the process.
| Skill Level | Project Ideas |
|---|---|
| Beginner | Candle Holders, Simple Bowls |
| Expert | Wobbly Vases, Gear Assemblies |
Make sure to pick projects that spark your creativity! Happy turning!
Safety Precautions and Best Practices
Necessary safety gear and precautions. Best practices for safe operation during offset turning.Before diving into your lathe offset turning adventure, put on safety gear. This includes a snug fitting face shield to protect your eyes and a dust mask to avoid breathing in wood shavings. Always secure your hair and loose clothing. Remember, your fingers are not fans of spinning tools!
Keep your workspace tidy. A clean area means fewer accidents. Check the lathe settings before starting. Slow and steady wins the race; don’t rush! And always keep a friend nearby. It helps to have someone to laugh with when things get a bit messy, and they can lend a hand in case of any trouble.
| Safety Gear | Purpose |
|---|---|
| Face Shield | Protects eyes from flying debris |
| Dust Mask | Prevents inhalation of harmful dust |
| Gloves | Protects hands but use carefully |
Conclusion
In a lathe tailstock offset turning project, you learn to create unique shapes by adjusting the tailstock. This technique allows for interesting designs and better creativity. Try experimenting with your own projects to see how the offset changes the outcome. We encourage you to read more about lathe techniques and practice your skills. Happy turning!FAQs
What Is The Purpose Of Offsetting The Tailstock In A Lathe, And How Does It Affect The Turning Process?Offsetting the tailstock in a lathe helps you make special shapes, like tapers. When you move it to the side, the piece you’re working on can change its angle as it spins. This makes it easier to create parts that are not just straight. It also helps the tool cut smoothly and evenly. Overall, it gives you more control over the shape you’re making.
What Are The Key Steps To Set Up A Lathe For Tailstock Offset Turning, Including Any Necessary Calculations?To set up a lathe for tailstock offset turning, first, measure your workpiece’s diameter. Decide how much offset you want, usually a small amount like 1/16 inch. Next, adjust the tailstock to the measured offset using a ruler or caliper. Make sure to tighten everything so it doesn’t move. Finally, test run the lathe at a slow speed to ensure it works correctly.
What Types Of Projects Or Components Benefit Most From Using Tailstock Offset Turning Techniques?You can use tailstock offset turning for projects that need a curved shape, like lamps or bowls. This method helps you make parts that are not perfectly round. It works best for items that have a unique or fancy design. You can create beautiful shapes that catch people’s eyes!
What Safety Considerations Should Be Taken Into Account When Performing Tailstock Offset Turning?When you do tailstock offset turning, safety is very important. Always wear safety glasses to protect your eyes. Keep your hands away from the spinning part of the machine. Make sure your tools are sharp and not broken. Lastly, use a steady position to avoid slipping or falling.
How Can You Troubleshoot Common Issues That May Arise During A Tailstock Offset Turning Project?To fix problems in a tailstock offset turning project, first check if your tool is sharp. A dull tool can make rough cuts. Next, make sure the tailstock is tight and not moving. If your piece wobbles, adjust the offset carefully. Finally, take your time and try again if something doesn’t look right.