Have you ever worked with a lathe and ended up with a tearout on your surface? It can be frustrating, right? This problem can ruin your project and waste your efforts. But don’t worry; you’re not alone.
Many hobbyists and professionals face the same issue. It’s like learning to ride a bike—you might fall a few times before you get it right. Thankfully, there are fixes for lathe turning surface tearout that can help you improve your skills. Have you heard some tips that work wonders?
In this article, we’ll explore simple solutions to reduce or even eliminate surface tearouts. You’ll discover how some small adjustments can make a big difference. Plus, you’ll gain confidence in your lathe work.
So, if you’re ready to get started, let’s dive into the world of lathe turning fixes!
Lathe Turning Surface Tearout Fixes: Effective Solutions

Lathe Turning Surface Tearout Fixes
Fixing surface tearout in lathe turning is essential for smooth, high-quality finishes. Knowing how to address this common issue can save time and frustration. Readers learn about proper tool selection, the importance of sharp blades, and adjusting feed rates. Applying the right technique increases the chances of a successful cut. Did you know that using the correct grain direction can also minimize tearout? These simple tips can turn a rough surface into a masterpiece!Understanding Surface Tearout
Definition and causes of surface tearout in lathe turning. Importance of addressing tearout for quality finishes.Surface tearout happens when rough patches appear on wood or other materials during lathe turning. It is often caused by factors like dull tools, high speeds, or wrong feeding rates. When this occurs, it affects the dull, uneven finish of the workpiece. Fixing tearout issues is crucial for a smooth and professional look. A nice finish enhances the quality of the product.
What causes surface tearout?
Surface tearout is often caused by:
- Dull cutting tools
- High spindle speeds
- Incorrect feed rates
Why is fixing tearout important?
Addressing tearout is essential for quality finishes. A clean surface looks better and helps the final product last longer. Quality work makes customers happy too!
Types of Wood and Their Impact on Tearout
Hardwoods vs. softwoods: how different materials affect tearout. Best wood species for minimizing tearout.Different types of wood affect tearout in unique ways. Hardwoods are usually tougher and lead to less tearout. On the other hand, softwoods can be softer and may tear more easily. Choosing the right wood can help. Here are some of the best wood types:
- Maple
- Cherry
- Birch
- Oak
These woods tend to minimize tearout due to their dense grain structure. Always keep these tips in mind for a smoother finish!
What wood is best for reducing tearout?
Hardwoods like Maple and Oak are ideal for less tearout. Their tight grain helps tools cut cleanly. Softwoods, like Pine, can tear more easily because of their softer fibers.
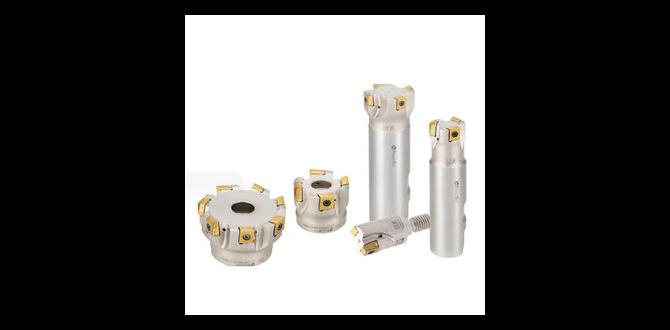
Tool Selection and Maintenance
Choosing the right cutting tool for smooth finishes. Importance of tool sharpness and maintenance in preventing tearout.Choosing the right cutting tool is key for smooth finishes. A sharp tool cuts cleanly, while a dull one can leave rough edges. Maintaining that sharpness is just as important. Regularly check and sharpen your tools. This keeps them effective and helps stop lathe turning surface tearout. Remember, it’s easier to finish a job right with a good tool.
Why is sharpness important?
Tool sharpness helps create a better surface finish. It allows for precise cuts, reducing the risk of tearout. Sharp tools help make your project quicker and easier.
Quick tips for tool maintenance:
- Regularly sharpen your cutting tools.
- Clean tools after each use.
- Store tools properly to avoid damage.
Optimal Cutting Techniques
Recommended lathe speeds and feeds to reduce tearout. Proper angle and depth of cut for achieving cleaner surfaces.Choosing the right cutting techniques can improve your lathe work. Using recommended speeds and feeds can greatly reduce tearout. Keep your lathe speed between 800 to 1200 RPM for best results. Adjust your feed rate so the cut is smooth and steady.
The angle and depth of your cut also matter. A shallow angle helps create a cleaner surface. Aim for a depth of cut no more than 1/8 inch to avoid issues. Always remember, proper techniques lead to fewer problems!
What speeds and feeds should I use?
Keep lathe speeds from 800 to 1200 RPM. Adjust feed rates for smooth cutting.
Key points for cutting:
- Shallow angle cuts create a better finish.
- Limit depth to 1/8 inch.
- Use a steady feed to prevent tearout.
Using Proper Tool Geometry
Understanding cutting edge design and its effect on tearout. Recommendations for tool geometry adjustments.Choosing the right tool for lathe turning is like picking the perfect pizza topping—it makes all the difference! A well-designed cutting edge can minimize tearout, which is that pesky surface damage. A sharper angle can help cut cleanly, while a dull one will cause trouble. So, what’s the secret sauce?
| Tool Angle | Effect on Tearout |
|---|---|
| Positive Angle | Reduces tearout |
| Negative Angle | Can increase tearout |
| Radius Edge | Helps smooth edges |
For best results, keep your tools sharp and consider adjusting the tool geometry based on your material. Funny thing is, a little change can prevent a big mess!
Finishing Techniques to Mitigate Tearout
Sanding strategies postturning to smooth out any remaining tearout. Sealing and finishing methods that enhance surface quality.Sanding after turning is like giving your project a nice spa day! Start with a coarse grit to smooth out the tough spots from tearouts. Then, work your way up to finer grits for that silky finish—like polishing an old shoe! Always sand with the grain to keep it smooth and happy.
Next, sealing and finishing can make a world of difference. Polyurethane or wax can seal the surface and add shine. They make your piece look fantastic and keep that pesky tearout under control. A good finish can make onlookers say, “Wow, did you make that?” Trust me, your project deserves a fabulous sparkle!
| Sanding Grits | Purpose |
|---|---|
| 80 | Remove rough areas |
| 150 | Smooth the surface |
| 220 | Final polish |
Common Repair Methods for Existing Tearout
Stepbystep guide to repairing surface tearout. When to rework versus when to accept imperfections.Repairing surface tearout is important for a smooth finish. Here’s how to fix it:
- Start by cleaning the area. Remove any dust or debris.
- Use sandpaper to shave down rough spots gently.
- If needed, apply wood filler and let it dry completely.
- Finally, sand the area again for a smooth surface.
Consider reworking only if the tearout is significant. Small imperfections often add character. Sometimes, it’s best to embrace nature in the wood.
When should you fix tearouts?
Fix tearouts that are deep and noticeable. For slight marks, accepting them might be better to keep the item’s charm.
Preventative Strategies for Future Projects
Planning and layout techniques to avoid tearout in design stage. Recommended best practices during the lathe operation.Starting a project with a solid plan can save you from a lot of headaches later. Think about the design carefully to prevent that pesky tearout. It helps to use strong tools and sharp blades. Always cut with the grain, like slicing bread. Here’s a quick guide:
| Technique | Description |
|---|---|
| Plan Ahead | Sketch your design on paper first. It makes things easier! |
| Position Your Wood | Keep the grain direction in mind while placing your material. |
| Use Sharp Tools | New tools slice better. It’s like bringing a sword to a knife fight! |
Following these steps can help keep your projects tearout-free. Happy turning!
Conclusion
In summary, fixing surface tearout in lathe turning involves using sharp tools, adjusting speeds, and choosing the right wood grain direction. You can prevent tearout by taking these steps. Remember to practice regularly! For more tips, check out articles on lathe techniques or join a woodworking community. Your skills will improve, and you’ll create better projects. Happy turning!FAQs
What Are The Common Causes Of Surface Tearout When Turning Wood On A Lathe?Surface tearout happens when wood fibers get pulled out instead of cut cleanly. This can happen if your tool is dull. A dull tool makes rough cuts. Also, if you’re turning wood with knots or soft spots, you can get tearout too. Lastly, using the wrong angle can cause problems, so always check your tool position.
How Can The Selection Of Tool Material And Shape Impact The Occurrence Of Tearout In Lathe Turning?Choosing the right tool material and shape for lathe turning is very important. Harder materials can cut wood better, which helps reduce tearout. A sharp shape helps make smoother cuts, which also lowers tearout. If you pick the wrong tool, it can pull out little pieces of wood and make a mess. So, using the right tool keeps your work looking nice!
What Techniques Or Adjustments Can Be Made To Reduce Tearout When Working With Highly Figured Or Soft Woods?To reduce tearout in soft or fancy-looking woods, you can try a few tricks. First, use a sharp tool. When your tool is sharp, it cuts the wood cleanly. Second, you can cut with the grain instead of against it. This helps the wood stay smooth. Finally, using a lower speed on power tools can make a big difference too!
How Can The Lathe Speed And Feed Rate Be Optimized To Minimize Surface Tearout During Turning Operations?To make sure we don’t tear the surface while using a lathe, we can change the speed and feed rate. First, use a slower speed for softer materials, so they don’t get damaged. Next, slow down the feed rate, which means cutting less material at a time. This helps to create a smoother surface. By doing these things, we can keep our work looking nice and clean.
What Finishing Methods Can Be Used To Conceal Or Remedy Surface Tearout After The Turning Process Is Completed?You can fix surface tearout by using sanding to smooth it out. Start with coarse sandpaper and switch to finer grades. Another way is to apply wood filler to the damaged spots. Last, using a clear finish, like varnish or polyurethane, can help hide the repairs and protect your project.
{“@context”:”https://schema.org”,”@type”: “FAQPage”,”mainEntity”:[{“@type”: “Question”,”name”: “What Are The Common Causes Of Surface Tearout When Turning Wood On A Lathe? “,”acceptedAnswer”: {“@type”: “Answer”,”text”: “Surface tearout happens when wood fibers get pulled out instead of cut cleanly. This can happen if your tool is dull. A dull tool makes rough cuts. Also, if you’re turning wood with knots or soft spots, you can get tearout too. Lastly, using the wrong angle can cause problems, so always check your tool position.”}},{“@type”: “Question”,”name”: “How Can The Selection Of Tool Material And Shape Impact The Occurrence Of Tearout In Lathe Turning? “,”acceptedAnswer”: {“@type”: “Answer”,”text”: “Choosing the right tool material and shape for lathe turning is very important. Harder materials can cut wood better, which helps reduce tearout. A sharp shape helps make smoother cuts, which also lowers tearout. If you pick the wrong tool, it can pull out little pieces of wood and make a mess. So, using the right tool keeps your work looking nice!”}},{“@type”: “Question”,”name”: “What Techniques Or Adjustments Can Be Made To Reduce Tearout When Working With Highly Figured Or Soft Woods? “,”acceptedAnswer”: {“@type”: “Answer”,”text”: “To reduce tearout in soft or fancy-looking woods, you can try a few tricks. First, use a sharp tool. When your tool is sharp, it cuts the wood cleanly. Second, you can cut with the grain instead of against it. This helps the wood stay smooth. Finally, using a lower speed on power tools can make a big difference too!”}},{“@type”: “Question”,”name”: “How Can The Lathe Speed And Feed Rate Be Optimized To Minimize Surface Tearout During Turning Operations? “,”acceptedAnswer”: {“@type”: “Answer”,”text”: “To make sure we don’t tear the surface while using a lathe, we can change the speed and feed rate. First, use a slower speed for softer materials, so they don’t get damaged. Next, slow down the feed rate, which means cutting less material at a time. This helps to create a smoother surface. By doing these things, we can keep our work looking nice and clean.”}},{“@type”: “Question”,”name”: “What Finishing Methods Can Be Used To Conceal Or Remedy Surface Tearout After The Turning Process Is Completed? “,”acceptedAnswer”: {“@type”: “Answer”,”text”: “You can fix surface tearout by using sanding to smooth it out. Start with coarse sandpaper and switch to finer grades. Another way is to apply wood filler to the damaged spots. Last, using a clear finish, like varnish or polyurethane, can help hide the repairs and protect your project.”}}]}