Have you ever watched a metal lathe in action? It’s fascinating to see how metal becomes a precise shape. A metal lathe is a powerful tool for crafting and shaping materials in many projects. But it can be a bit tricky to use if you’re not familiar with it. That’s where a lathe tutorial comes in handy.
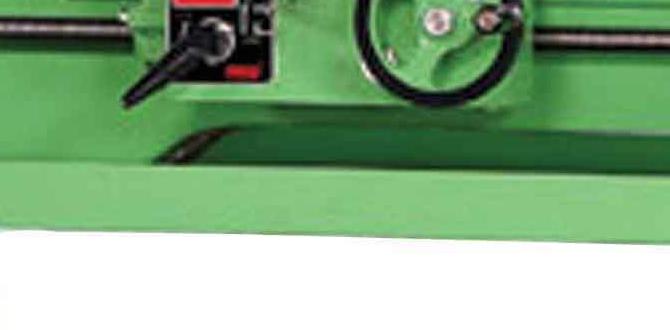
One important feature on a metal lathe is the threading dial. It helps you create perfect threads on your workpiece. But do you know how to use it properly? Many beginners find it confusing. With the right instructions, you can master this skill in no time!
Imagine creating your very own threaded parts that fit perfectly together. That can feel pretty amazing! Knowing how to use your lathe and threading dial opens many doors in metalworking. You can make anything, from simple tools to complex machine parts.
In this article, we’ll explore the ins and outs of using a lathe and its threading dial. Get ready to dive into the exciting world of metal lathe threading!
Lathe Tutorial: Metal Lathe Threading Dial
Learn how to use a metal lathe threading dial to make precise threads on your workpiece. This tool is key for ensuring accurate cuts, making it easier for beginners and experienced users alike. Have you ever wondered how machinists create those perfect threads? It all starts with understanding the threading dial. With this tutorial, you’ll discover tips for setup and operation. Mastering this skill can bring your metalworking projects to a whole new level!
Understanding the Metal Lathe
Definition and function of a metal lathe. Common components of a metal lathe.
A metal lathe is a tool that shapes metal by rotating it against a cutting tool. Imagine a giant pencil sharpener for metal! It helps create parts that fit together perfectly. A metal lathe’s main parts include the bed, headstock, tailstock, and carriage. Each piece plays a vital role, like players on a sports team. Here’s a simple table to illustrate these components:
| Component | Function |
|---|---|
| Bed | Supports the entire machine |
| Headstock | Holds and drives the spindle |
| Tailstock | Provides support to long pieces |
| Carriage | Moves cutting tool to shape the metal |
With this tool, you can create everything from bolts to beautiful sculptures. So, who knew a lathe could sculpt metal like a magician?
Importance of the Threading Dial
Role of the threading dial in precision machining. Benefits of using a threading dial for thread cutting.
The threading dial plays a crucial role in precision machining. This nifty tool helps you cut threads accurately, making sure they fit just right. Without it, your threads could end up looking like spaghetti! Using a threading dial allows for smoother, safer cuts. Plus, it saves time, so you can get back to making awesome projects. Just think of it as your trusty sidekick on the lathe; together, you can conquer even the trickiest threading tasks!
| Benefit | Description |
|---|---|
| Precision | Ensures exact thread depth and pitch for perfect fit. |
| Efficiency | Reduces time spent on adjustments and mistakes. |
| Laser Focus | Helps you concentrate on cutting instead of counting! |
Setting Up Your Metal Lathe for Threading
Stepbystep guide on basic lathe setup. Importance of checking levels and alignment.
Before you start threading on your metal lathe, getting everything set up is key, like making sure you have enough snacks for movie night! First, level your lathe using a spirit level. Then, check for alignment. This means making sure the tailstock and headstock are in line, so your workpiece doesn’t wobble like a jelly on a trampoline!
| Step | Action |
|---|---|
| 1 | Use a spirit level to check the lathe’s flatness. |
| 2 | Align the tailstock with the headstock. |
| 3 | Tighten all screws and make sure everything is secure. |
With everything aligned, you’re now ready to thread like a pro. Remember, a well-set lathe makes for smoother cuts, and fewer accidents (unless you count the mishap when you dropped your wrench!).
How to Read the Threading Dial
Explanation of threading dial markings and numbers. Tips for accurate reading during threading.
Reading the threading dial is like solving a fun puzzle. The markings help you see how far to turn the dial. Typically, you’ll find numbers that tell you how many threads per inch you’re working with. Remember, the more you twist, the more threads you create! To get it right, always align the cursor with the right number before you start. If you misread, you might end up with threads that are as crooked as a banana! Here’s a handy glance at common markings:
| Marking | Meaning |
|---|---|
| 0 | Starting point |
| 1 | First thread |
| 2 | Two threads |
Keep these tips in mind, and you’ll be threading like a pro. Happy lathing!
Common Problems and Troubleshooting
Identifying issues with threading accuracy. Solutions for common threading mistakes.
When using a metal lathe, threading issues can happen. These can make threads uneven or too tight. It’s important to pinpoint these problems quickly. Here are common mistakes and solutions:
- Incorrect Speed: Adjust the lathe speed for better threads.
- Wrong Tool Angle: Set the tool at the right angle to avoid mistakes.
- Measurement Errors: Double-check measurements before cutting.
By fixing these errors, your threading will improve. Remember, practice helps too!
How can I improve threading accuracy?
To improve threading accuracy, check your tool setup and ensure proper measurements. Adjust your cutting speed for smoother results.
Safety Precautions When Using a Metal Lathe
Essential safety gear and practices. Risks associated with improper use of the threading dial.
Before you start spinning metal on a lathe, safety gear is a must! Don your trusty goggles, gloves, and ear protection. You wouldn’t want shavings in your eyes or noise making your ears ring like a school bell! Also, remember that the threading dial can be a sneaky beast. Improper use might lead to mistakes or even accidents. A safe lathe area keeps you safe and your work neat. Happy turning!
| Essential Safety Gear | Purpose |
|---|---|
| Safety Goggles | Protect your eyes from flying debris |
| Gloves | Shield your hands from sharp edges |
| Ear Protection | Block out loud machinery noise |
Maintenance Tips for Threading Dials
Routine care and upkeep for optimal performance. Signs of wear and when to replace your threading dial.
To keep your threading dial in top shape, regular care is essential. Clean it often to remove dirt. Lubricate moving parts to ensure smooth operation. Check for any signs of wear. If you notice rough movement or out-of-alignment issues, it might be time for a replacement. Keeping a close eye on these points will help you avoid problems.
- Clean regularly
- Lubricate parts
- Watch for wear
- Replace when needed
How do I know when to replace the threading dial?
Look for rough movement or alignment issues. If adjustments don’t help, replacement could be necessary. Act early to ensure smooth operations.
Conclusion
In summary, a lathe tutorial on metal lathe threading dials can enhance your skills. You learn to set up, adjust, and use threading dials effectively. This knowledge helps create precise threads in your projects. We encourage you to practice and explore more tutorials to master lathe operations. Let’s get started and make something amazing together!
FAQs
What Is The Purpose Of A Threading Dial On A Metal Lathe, And How Does It Improve The Threading Process?
A threading dial on a metal lathe helps you make neat threads on metal. It shows you when to start and stop as you cut. This makes sure your threads are even and fit well. With the dial, you can work faster and more accurately. It’s like having a guide that helps you do a great job!
How Do You Properly Set The Threading Dial To Ensure Accurate Thread Cutting On A Metal Lathe?
To set the threading dial, first, you need to check the dial’s numbers. Move the cutting tool to the starting point of your thread. Turn the threading dial until the needle lines up with the number “0.” Then, start the lathe and move the tool through the material. Make sure to follow this each time for precise cuts!
What Are The Common Mistakes To Avoid When Using The Threading Dial While Cutting Threads On A Lathe?
When using the threading dial on a lathe, avoid a few common mistakes. First, don’t forget to stop the lathe before adjusting the dial. Always line it up carefully; misalignment can ruin your threads. Also, remember to make sure the tool is set correctly before starting. Finally, pay attention to the numbers on the dial to cut the right threads.
How Can You Troubleshoot Threading Issues When Using The Threading Dial On A Metal Lathe?
To fix threading problems on a metal lathe, first check the threading dial. Make sure it’s set to the right number for your project. Also, look at the tool and make sure it’s sharp and in good shape. Check that the lathe is running at the right speed. If the threads are still wrong, you might need to adjust your settings or start over.
What Types Of Threads Can Be Created Using The Threading Dial On A Metal Lathe, And What Are Some Tips For Achieving A Better Finish?
You can create different types of threads like coarse threads and fine threads using the threading dial on a metal lathe. Coarse threads have bigger spaces between them, while fine threads are closer together. To get a better finish, make sure your tool is sharp and clean. Also, go slow and steady while cutting the threads. It helps to use oil to keep everything smooth!