Yes, a mini wood lathe is an excellent and accessible tool for carving spoons, offering hobbyists a precise and efficient way to shape spoon blanks into beautiful, functional art. This guide breaks down everything you need to know to get started safely and effectively.
Ever admired a beautifully carved wooden spoon and thought, “I could never do that”? Many aspiring woodworkers feel the same way. The idea of shaping wood can seem daunting, especially when it comes to creating delicate curves and smooth finishes for something as simple as a spoon. You might have pictured large, complex machinery, intimidating tools, and a steep learning curve. But what if I told you that a compact, user-friendly machine could transform these wooden blanks into elegant kitchen tools? It’s not a dream; it’s the reality of using a mini wood lathe. This guide is your friendly introduction to unlocking that creativity, making spoon carving approachable and achievable, even if you’ve never touched a lathe before. Let’s dive in!
Why a Mini Wood Lathe is Perfect for Spoon Carving
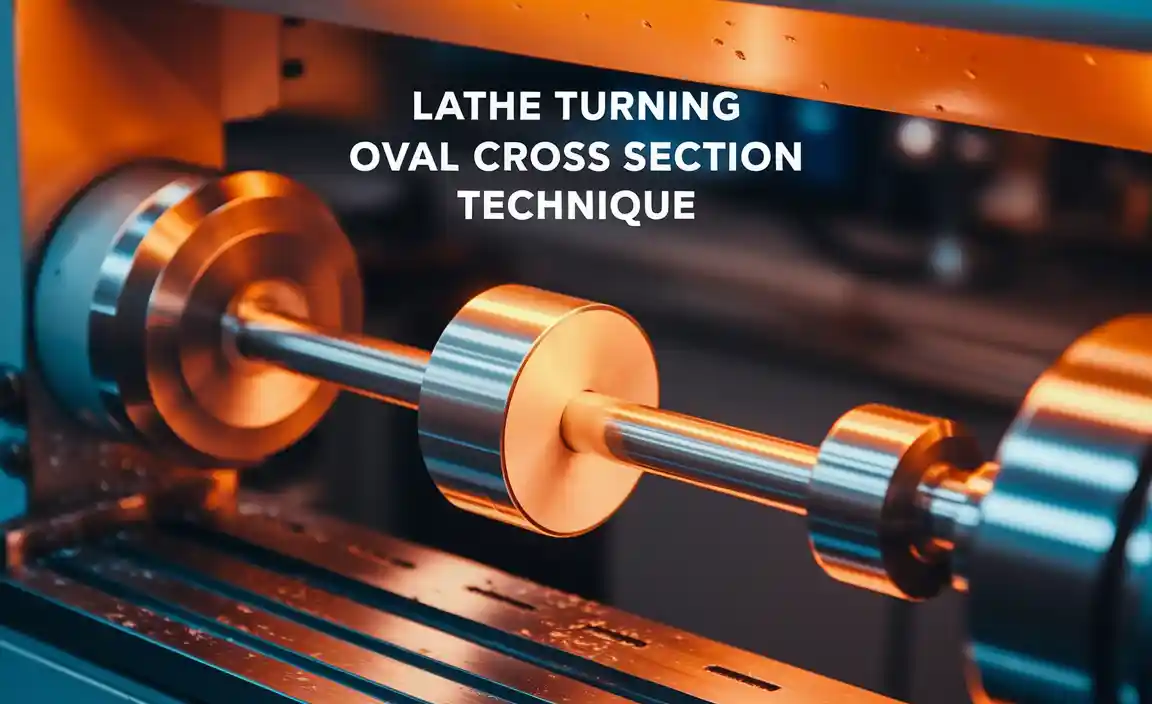
When you think of wood turning, you might imagine massive industrial lathes shaping furniture legs or baseball bats. While those machines are powerful, a mini wood lathe offers a surprisingly robust and dedicated solution for smaller projects like spoon carving. They are less intimidating, take up less space, and are generally more affordable, making them perfect for home workshops and beginners. The precision they offer is ideal for the detailed work required to turn a simple block of wood into a refined utensil.
Mini lathes are essentially scaled-down versions of their larger counterparts. They spin a piece of wood, allowing the carver to use specialized tools to remove material and shape the wood into desired forms. For spoon carving, this means you can rapidly remove excess material and then refine the shape of the handle and the bowl with controlled cuts. The stability and consistent rotation provided by a lathe are crucial for achieving symmetrical and evenly formed spoons, which can be challenging to achieve solely with hand tools.
Choosing Your First Mini Wood Lathe for Spoon Carving
Selecting the right mini wood lathe is the first exciting step. Don’t let the number of options overwhelm you. For spoon carving, you don’t need the most powerful or feature-rich model. Focus on a few key elements that will make your experience enjoyable and productive.
Key Features to Look For:
- Motor Power: A motor between 500W and 750W is usually sufficient for most spoon carving tasks. This provides enough torque to handle the wood without bogging down.
- Swing and Distance Between Centers: For spoons, you’re dealing with relatively small workpieces. A swing of 8-12 inches and a distance between centers of 12-18 inches is more than enough. This is often referred to as “bed length” or “distance between centers.”
- Variable Speed Control: This is a crucial feature. Being able to adjust the RPM (revolutions per minute) allows you to work at safer, slower speeds for initial shaping and faster for finishing. It also lets you adapt to different types of wood.
- Construction Quality: Look for a sturdy cast-iron or steel bed. This minimizes vibration, which is essential for smooth cuts and accuracy. A heavier machine is generally more stable.
- Tool Rest Design: A robust and easily adjustable tool rest is vital for supporting your carving tools.
Popular Mini Lathe Models for Beginners:
Several brands offer excellent entry-level mini lathes. While specific models change, look for options from manufacturers known for quality in the hobbyist market. Brands like WEN, JET, and NOVA often have well-regarded beginner lathes.
A quick search for “mini wood lathe for beginners” will bring up popular models. For example, the JET JWL-1015 is a very popular choice, known for its solid construction and reliable performance. The WEN 3420T is another frequently recommended option that offers good value and features suitable for carving spoons.
When comparing, pay attention to user reviews. What do experienced woodturners say about the machine’s vibration, ease of setup, and durability? Remember, your first lathe is an investment in learning, so choosing one that’s reliable will make the process far more enjoyable.
Essential Tools and Accessories for Spoon Carving on a Lathe
Beyond the lathe itself, you’ll need a few specialized tools and safety gear to get started with spoon carving. Think of these as your kit – each piece plays a vital role.
Mandatory Safety Gear:
Safety is paramount when working with any power tool, especially a lathe. Never compromise on this.
- Eye Protection: Always wear ANSI-certified safety glasses or a full face shield. Wood chips can fly at high speeds.
- Dust Mask or Respirator: Wood dust can be harmful to your lungs.
- Hearing Protection: Lathes can be noisy, especially during longer turning sessions.
- Appropriate Clothing: Avoid loose clothing, dangling jewelry, or anything that could get caught in the spinning wood.
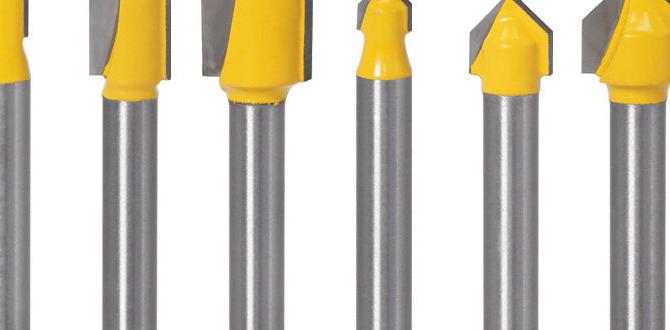
Essential Lathe Tools for Spoon Carving:
These are the specific tools you’ll use to shape your spoon on the lathe.
- Lathe Chisels (Gouges):
- Spindle Gouge: This is your workhorse. A 1/2-inch or 5/8-inch spindle gouge is perfect for shaping the handle and basic contouring of the spoon.
- Detailer or Small Gouge: A smaller gouge (e.g., 1/4-inch or 3/8-inch) can be useful for finer details and cleaning up the transition areas, especially around the bowl.
- Parting Tool: Used to accurately cut sections of wood from the blank, helping to define the limits of your spoon shape and separate work pieces.
- Skew Chisel: While more advanced, a small skew chisel (e.g., 1/2-inch) can be used for smoothing the handle and creating fillets, though it has a steeper learning curve.
- Scrapers (Optional but helpful): Round or flat scrapers can be used for smoothing the curve of the spoon bowl after roughing it out.
Essential Accessories:
- Wood Blanks: Choose hardwoods like maple, cherry, or walnut. They are dense enough to hold detail and turn well. Start with pre-cut spoon blanks for convenience until you’re comfortable cutting your own.
- Chuck: A chuck is a device that grips the wood and attaches it to the lathe’s spindle. For spoon carving, you’ll likely use a scroll chuck with jaws designed for holding both the waste end of the handle and the spoon bowl.
- Wood Screws (for initial mounting): If you aren’t using a specialized chuck, you might mount your blank to a faceplate using wood screws, especially in the early stages.
- Sanding Supplies: Sandpaper in various grits (from 80 to 220 or higher).
- Finishing Supplies: Food-safe oils like mineral oil or beeswax for finishing.
Having the right tools makes all the difference. Investing in good quality chisels will make your work easier and safer. For a comprehensive overview of woodworking chisels and their uses, the Wood Magazine website offers excellent resources.
Step-by-Step Guide: Carving a Spoon on a Mini Wood Lathe
Ready to turn? This step-by-step process will guide you through creating your first spoon. Remember to always wear your safety gear and proceed with caution.
Step 1: Prepare Your Wood Blank
For your first attempt, using a pre-made spoon blank is highly recommended. These are often rectangular or square pieces of wood already sized for a spoon. If you’re cutting your own, select a piece of hardwood, like maple or cherry, that’s slightly longer and wider than your intended spoon. Ensure the grain is oriented along the length of the blank for strength.
You’ll need to mount this blank to the lathe. A common method involves using a headstock center and a live tailstock center to support the ends initially, or you can use a faceplate screwed into the end of the blank. A chuck is ideal for more advanced turning and is crucial for refining the bowl.
Step 2: Mount the Blank and Rough Shaping
For initial handle shaping (before bowl): Mount your blank between centers using a drive spur on the headstock and a live center on the tailstock. Ensure the tailstock is snug but not so tight it binds. Turn on the lathe at a slow speed (around 500-800 RPM). Use your spindle gouge to round over the blank, creating the basic cylinder for the handle. Gradually refine the shape, tapering it as desired. Use a parting tool to define where the handle meets the bowl area, creating a slightly narrower section.
For bowl and integrated handle: A more advanced but common method is to turn the entire piece as a unit. You might start by mounting a thicker piece of wood on a faceplate from the headstock side, with the tailstock end of the blank extending freely. Alternatively, some woodturners use a chuck that can hold a square blank. The goal is to have a part accessible for both handle and bowl creation.
Step 3: Shaping the Handle
With the blank secured and rotating, use your spindle gouge to shape the handle. Start at a slower speed (around 800-1200 RPM). Hold the gouge securely, resting its flute on the tool rest, and make gentle slicing cuts. Work from the middle of the handle towards the ends, or from the tailstock towards the headstock. Remove bulk material to achieve the desired thickness and contour. You can gradually increase speed as you remove more material and the shape becomes more balanced, but always stay within safe RPM limits. A general rule of thumb for safety is that larger diameter pieces should be turned at lower speeds.
To learn more about safe operating speeds for lathes, consult resources like the University of California, Davis Environmental Health & Safety guide on lathe operation.
Step 4: Forming the Bowl Area
Once the handle is roughly shaped, you need to create the transition and the basic form for the spoon bowl. Use your spindle gouge or a dedicated bowl gouge to define the point where the handle will meet the bowl. You’ll also start to remove material from the face of the blank to create the bowl’s exterior curve. This is often done at a slightly different angle, working across the grain or at an angle to it.
If you’re turning the spoon from a single block, you’ll need to shape the outside of the bowl. Use your gouge to create a gentle curve, working from the shoulder where the handle joins to the tip of the bowl. This can be tricky and requires patience.
Step 5: Hollowing Out the Bowl
This is where dedicated bowl gouges or scrapers become very useful. If you have a bowl gouge, use its curved cutting edge to hollow out the inside of the bowl. Start from the center and work your way outwards in a scooping motion. For beginners, using a round scraper can be easier. Present the scraper to the spinning wood at a slight angle and push it into the wood to remove thin shavings. This method allows for better control and a smoother finish initially.
Pay close attention to the depth and shape of the bowl. You want it to be functional without making the wood too thin. Aim for a consistent thickness throughout.
Step 6: Refining and Detailing
Once the basic shape is achieved, go back and refine all the curves and transitions. Use your gouges and scrapers to smooth out any tool marks. You can use a parting tool to slightly undercut the back of the bowl where it meets the handle, giving it a more defined look. For the handle, use a skew chisel (if you’re comfortable) or the edge of your spindle gouge to create sharper lines or a more ergonomic shape. Ensure the transition from handle to bowl is smooth and comfortable.
Important Note on Orientation: When working on the bowl, especially hollowing it out, it’s often easier and safer to use a chuck that grips the handle you’ve already shaped. This allows you to swing the now-balanced bowl end freely for shaping.
Step 7: Sanding
Remove the spoon from the lathe for sanding. Start with a coarser grit sandpaper (e.g., 80 or 100 grit) to remove any significant tool marks. Gradually move to finer grits (120, 150, 180, 220, and even higher for a silky smooth finish). Sand both the inside and outside of the bowl and the entire handle. A simple way to sand on the lathe is to turn the lathe on at a very low speed (or even off and just spin by hand if the surface is mostly smooth) and hold the sandpaper against the spinning wood. Alternatively, hand-sanding off the lathe is often more thorough.
Step 8: Finishing
Clean off all the dust. Apply a food-safe finish to protect the wood and enhance its natural beauty. Mineral oil, walnut oil, or a beeswax-based finish are excellent choices for kitchen utensils. Apply a liberal coat, let it soak in for 15-20 minutes, and then wipe off any excess. You may want to apply a second coat after a few hours.
Tips for Success and Troubleshooting
Every maker encounters challenges. Here are some common issues and how to overcome them when carving spoons on a mini lathe. Remember, patience and practice are your best tools.
Common Issues and Solutions:
- Vibration: This is the enemy of smooth cuts.
- Cause: Unbalanced workpiece, lathe not on a stable surface, loose components.
- Solution: Ensure your wood blank is properly centered and balanced. Place your lathe on a sturdy workbench or a dedicated stand. Check that all knobs and bolts are tightened. For very light blanks, you might fill the hollow of the spoon bowl with a temporary material like crumpled paper to add mass and balance.
- Chatter Marks (Bumpy surface): Small, repeating ridges on the wood surface.
- Cause: Tool not sharp enough, wrong cutting angle, unsteady tool rest, or lathe vibration.
- Solution: Ensure your gouges and scrapers are razor-sharp. Experiment with different cutting angles. Make sure your tool rest is close to the wood and securely positioned. Reduce lathe speed slightly.
- Wood Splitting: Especially around the bowl or at the end of the handle.
- Cause: Turning against the grain too aggressively, unbalanced workpiece, or using green (wet) wood that is drying unevenly.
- Solution: For initial shaping, consider using dried hardwood. If using green wood, turn the piece to a thick rough shape and let it dry slowly before final shaping to avoid cracking. Ensure your cuts are not too deep or aggressive, especially when working across the grain.
- Difficulty Shaping the Bowl: Hollowing it out cleanly.
- Cause: Wrong tool, not sharp enough tool, or incorrect technique.
- Solution: A dedicated bowl gouge is best. If using scrapers, ensure they have a sharp edge and are presented at the correct angle. Practice makes perfect; start with shallow bowls and increase depth as you gain confidence.
Pro Tips for Spoon Carving:
- Sharp Tools are Crucial: A dull chisel will tear the wood, tear your shoulders, and cause frustration. Invest in a good sharpening system and learn to use it. A honing guide is invaluable for beginners.
- Let the Tool Do the Work: Don’t force the chisel. Use slicing cuts and let the sharp edge glide through the wood.
- Start Slow: Especially with new tools or techniques, begin at slower lathe speeds.
- Work in Stages: Don’t try to get the perfect shape in one go. Rough out the shape, refine it, sand it.
- Practice with Different Woods: Different hardwoods have different turning characteristics. Experimenting will teach you a lot.
- Embrace Imperfection: Your first spoons may not be perfect, and that’s okay! Each one is a learning experience.
Alternative Techniques and Beyond Spoon Carving
While this guide focuses on spoons, the principles learned on a mini wood lathe extend to many other small woodworking projects. Once you’re comfortable shaping handles and bowls, you can explore other kitchenware.
Other Utensils to Try:
- Small Bowls: You can turn small decorative bowls or trinket dishes.
- Salt and Pepper Grinders: These often involve turning two separate parts that screw together.
- Small Vases: For decorative, non-functional pieces.
- Pens: Pen turning is a very popular small-scale lathe project that requires specific kits and bushings.