Quick Summary:
Installing your mini wood lathe chuck is a straightforward process that greatly improves your turning control and project versatility. This guide breaks down the steps, tool needs, and safety tips, making the installation easy for beginners.
Welcome to the workshop! If you’re diving into the exciting world of woodturning with a mini lathe, one of the first essential upgrades you’ll consider is a chuck. It’s the secure grip that holds your wood while you shape it, and a good chuck makes all the difference. But the thought of installing new hardware on your lathe can feel a bit daunting, especially when you’re just starting out. Don’t worry, it’s far less complicated than it sounds! This guide is designed specifically for beginners, breaking down the process of installing your mini wood lathe chuck into simple, easy-to-follow steps. We’ll cover everything you need to know, from what a chuck is to how to safely secure it. Get ready to enhance your turning capabilities and take your projects to the next level!
What is a Wood Lathe Chuck?
At its core, a wood lathe chuck is a specialized device that securely grips a piece of wood (the workpiece) to the lathe’s headstock. Unlike faceplates, which typically screw directly onto the lathe spindle and grip a workpiece from the back, chucks often use jaws. These jaws can expand or contract to hold workpieces in different ways, offering incredible versatility. This ability to hold various shapes and sizes of wood opens up a world of turning possibilities, from small decorative items to larger bowls and platters.
Think of it as the handshake between your lathe and your wood. A reliable chuck ensures that your workpiece is held firmly and centered, allowing for smooth, controlled cuts and reducing the risk of accidents. For beginners, a chuck is a significant step up from friction-based holding methods or simple faceplates, providing greater precision and confidence in your turning.
Why Install a Wood Lathe Chuck?
- Enhanced Grip Security: Chucks employ jaws that provide a strong, dependable hold on your workpiece, minimizing the chance of it flying off the lathe.
- Versatility: Different chuck jaws can grip wood in various ways – expanding into a recess, contracting onto a tenon, or even holding square stock. This means one chuck can handle a wider range of projects.
- Precision and Centering: Chucks are designed for accuracy, helping you achieve better centering and truing of your wood, leading to more balanced and professional-looking results.
- Efficiency: Quickly mount and dismount workpieces. This saves time when you need to take multiple cuts, sand, or make adjustments.
- Project Expansion: Enables you to tackle more complex projects like bowls, intricate spindle work, and hollow forms that might be difficult or impossible with other holding methods.
Types of Mini Wood Lathe Chucks
For mini woodworking lathes, you’ll most commonly encounter two primary types of chucks:;
1. Scroll Chucks (Four-Jaw Chucks):
These are the workhorses for most woodturners. They feature four sharp jaws that move in unison, controlled by a key. This synchronized movement ensures the jaws remain perfectly aligned, providing a consistent and secure grip. Scroll chucks are incredibly versatile and can:
- Grip on a Tenon: The jaws expand outwards to grip a protruding section of wood (a tenon) that you’ve turned on your workpiece.
- Grip in a Recess: The jaws contract inwards to hold onto an internal hole or recess that you’ve created in your workpiece.
- Grip Square Stock: With specialized jaws, they can even hold square stock for initial shaping.
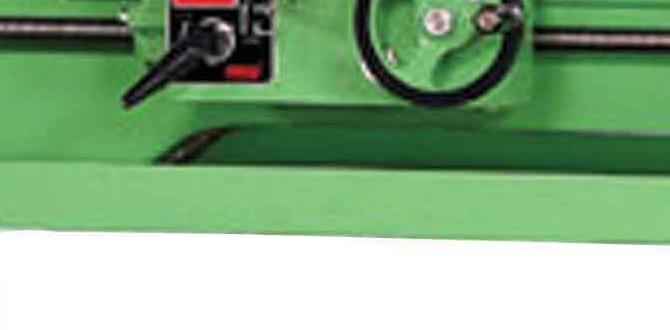
Most mini lathe scroll chucks are designed to screw onto the lathe’s headstock spindle. They usually come with a standard thread size, but it’s crucial to confirm this for your specific lathe model.
2. Drive Centers (Optional, but related):
While not technically a chuck in the same sense as a scroll chuck, some beginners start with a drive center. This is a pointed or cup-shaped accessory that’s mounted on the headstock spindle. The wood is then driven onto it, and a live center on the tailstock supports the other end. This method works well for spindle turning (making pieces longer than they are wide, like table legs or pen blanks) but offers limited versatility for face-on work like bowls.
Safety First: Essential Precautions
Before we get our hands dirty with the installation, let’s talk about safety. Woodturning involves spinning objects at high speeds, and safety should always be your top priority. Always remember:
- Unplug the Lathe: Never work on or near the lathe while it’s plugged in or powered on.
- Wear Safety Glasses: Always wear a full face shield or safety glasses. Wood chips can splinter and fly unexpectedly.
- Clear Your Workspace: Ensure your work area is clean, well-lit, and free from trip hazards.
- Read Your Manuals: Both your lathe’s manual and your chuck’s manual are invaluable resources. Refer to them early and often.
- Understand Load Capacity: Be aware of the weight and size limitations for both your lathe and your chuck. Don’t push them beyond their capabilities.
- Proper Tool Storage: Keep your chuck, jaws, and installation tools organized and stored safely when not in use.
A secure chuck installation is a fundamental part of safe turning. A loose chuck is incredibly dangerous.
What You’ll Need: Tools and Materials for Installation
Gathering the right tools before you start makes the installation process smooth and efficient. Here’s what you’ll typically need:
Essential Tools:
- Your New Wood Lathe Chuck: This is the main event!
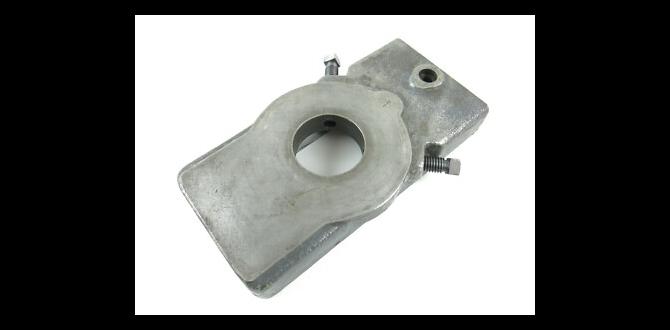
- Headstock Adapter (if required): Some chucks come with integrated adapters, while others require a separate one to match your lathe’s specific spindle thread size.
- Lathe Tool Rest: While not directly used for installation, keep it handy to steady the chuck if needed.
- Chuck Key(s): Most scroll chucks come with one or two keys to operate the jaw-moving mechanism.
- Allen Wrenches (Hex Keys): Usually needed to install or remove the chuck from the headstock adapter, or to tighten set screws. Common sizes are 3mm, 4mm, 5mm, and 6mm.
- Adjustable Wrench or Spanner Wrench: May be needed if your chuck has a specific tightening mechanism, though often not required for standard screw-in types.
- Thread-Chasing Tool (Optional but Recommended): If your lathe spindle threads are dirty or slightly damaged, a thread chaser (e.g., a tap for the specific thread size) can clean them up. This ensures a smooth, secure fit. You can find information about lathe spindle threads at resources like Woodworking Network.
- Brass Brush or Clean Rag: For cleaning the lathe spindle threads.
- Locking Pliers (e.g., Vise-Grips) or a Lathe Steady Rest (for larger lathes): To help hold the chuck steady while you tighten it, especially during the initial stages.
- Manufacturer’s Instructions: Always refer to the specific manuals for your lathe and chuck.
Optional but Helpful:
- Anti-Seize Compound: A small dab can prevent threads from seizing up over time, making future removal easier. Use sparingly.
- Thread Sealant (e.g., RectorSeal): Some sources suggest using a minimal amount to ensure a tight fit and prevent vibration loosening, but be cautious not to use too much, which can make removal incredibly difficult. Others prefer to rely on a tight mechanical fit alone.
- Torque Wrench: For precisely tightening the chuck if specified by the manufacturer, though often overkill for most mini lathes.
Understanding Your Lathe Spindle Threads
This is perhaps the MOST critical part before you even buy a chuck. Your chuck needs to screw onto your lathe’s headstock spindle. These spindles have internal or external threads, and they come in various sizes and thread pitches. Getting this wrong means the chuck simply won’t fit!
Common Mini Lathe Spindle Thread Sizes:
For mini lathes, you’ll frequently see a few standard thread sizes. Always confirm your specific lathe model’s spindle thread before purchasing a chuck or adapter. Some common sizes include:
- 1″ x 8 TPI (Threads Per Inch)
- 3/4″ x 16 TPI
- M33 x 3.5mm
- Other metric sizes might also be present.
How to Find Your Lathe’s Spindle Thread:
- Check Your Lathe Manual: This is the easiest and most reliable method.
- Measure It: If you don’t have the manual, you can sometimes measure the diameter and count the threads per inch directly on the spindle. A caliper and some patience are needed here.
- Manufacturer’s Website: Look up your lathe model’s specifications online.
- Online Forums/Communities: Search woodworking communities for your specific lathe model. Other users likely have the answer.
Direct Thread vs. Adapters:
- Direct Thread: Many chucks have interchangeable nose pieces, allowing them to thread directly onto common spindle sizes.
- Adapter: If your chuck doesn’t have the right nose piece, you’ll need a separate “headstock adapter” or “spindle adapter.” This adapter screws onto your lathe’s spindle, and then the chuck screws onto the adapter. For example, you might have a lathe with a 1″ x 8 TPI spindle and buy a chuck with an M33 x 3.5mm nose, requiring you to purchase a 1″ x 8 female to M33 x 3.5 male adapter.
Step-by-Step: Installing Your Mini Wood Lathe Chuck
Alright, you’ve got your chuck, the right adapter (if needed), and all your tools. Let’s get this installed safely. Remember to work with the lathe unplugged!
Step 1: Prepare the Lathe Spindle
First things first, let’s make sure the part where your chuck will screw on is clean. This ensures a snug fit and makes installation much easier.
- Unplug the Lathe: Double-check that the power cord is disconnected.
- Remove Any Existing Faceplate or Spur Drive: If you have something else attached to the spindle, unscrew it. Sometimes these can be stubborn. You might need to brace the headstock pulley with a block of wood or use locking pliers on the pulley to stop it from turning while you unscrew the existing item.
- Clean the Spindle Threads: Use a clean rag or a brass brush to remove any dust, debris, grease, or old thread locker from the spindle threads. If your spindle has standard threads (like 1″ x 8 TPI), you can use a matching tap (a thread-chasing tool) to clean them up. Gently turn the tap clockwise into the spindle threads and then back it out. Do this a couple of times to ensure the threads are clean and free of obstruction. This step is crucial for preventing damage to the threads and ensuring a secure mount for your chuck.
Step 2: Install the Headstock Adapter (If Applicable)
If your chuck doesn’t thread directly onto your lathe’s spindle, you’ll need to install an adapter first.
- Identify the Adapter: This piece will have threads on one side to match your lathe spindle (female thread) and threads on the other side to match your chuck (male thread).
- Screw on the Adapter: Carefully thread the adapter onto the clean spindle. Turn it by hand as far as it will go, ensuring it’s not cross-threading.
- Tighten the Adapter: Once hand-tight, you may need to tighten it further. Some adapters have a set screw that needs to be tightened against the spindle’s flat or a groove. Others require a specific wrench or spanner. If your adapter is meant to be tightened directly onto spindle threads without a set screw, you might need to use a wrench to snug it up. In many cases, hand-tight plus a small nudge with a wrench is sufficient, but always check the adapter’s instructions. Some users apply a tiny amount of anti-seize to the spindle threads before installing the adapter to prevent future seizing.
Step 3: Mount the Chuck
Now it’s time to attach your chuck to the spindle or the adapter.
- Align the Chuck: Carefully lift the chuck and align its threads with the threads on the spindle (or the adapter).
- Start Threading by Hand: Gently begin to screw the chuck onto the spindle threads. It should turn smoothly. If you feel any resistance or if it feels like it’s binding, stop immediately. Back it off and try again, ensuring you are not cross-threading. Cross-threading can damage both the chuck and the adapter/spindle.
- Thread it On: Continue to thread the chuck onto the spindle by hand until it is as snug as you can get it.
Step 4: Secure the Chuck
This is where you ensure the chuck is firmly locked onto the spindle. A loose chuck is extremely dangerous.
- Tighten Firmly: Once the chuck is hand-snug, you need to tighten it further. The method for this can vary slightly depending on the chuck and lathe.
- Method A – Spanner Wrench/Key: Some chucks are designed so that you insert the chuck key or a specific spanner wrench into a designated hole or slot on the chuck body and use it to rotate the chuck body tightly against the spindle threads.
- Method B – Allen Wrench/Set Screw: Some chucks, especially those mounted via an adapter, have set screws that need to be tightened with an Allen wrench to lock the chuck body onto the adapter or spindle.
- Method C – Gripping the Chuck Body: For chucks designed to tighten by rotating the chuck body against the spindle, you may need to use specialized tools. A cloth-wrapped pair of locking pliers (Vise-Grips) carefully applied to a sturdy part of the chuck body can help you give it one final, firm turn to seat it snugly. Be careful not to damage the chuck’s surface. Some prefer using a strap wrench for this.
- Check Manufacturer’s Instructions: Always refer to your chuck’s manual for the recommended tightening procedure.
- The “Snug Test”: The goal is a very tight fit. You want the chuck to feel like it’s an integral part of the spindle, not something that could wiggle loose. It should not budge or rotate independently of the spindle.
Step 5: Test and Final Check
Before you turn on the lathe, give it a final once-over.
- Visual Inspection: Make sure the chuck is seated flush against the spindle or adapter.
- Wiggle Test: With the lathe still unplugged, try to wiggle the chuck by hand. It should feel solid and unmoving.
- Check Chuck Jaws: Insert the chuck key and ensure the jaws move smoothly in and out. This is a good habit for any new installation.
- Power On Briefly: With safety glasses on and no workpiece mounted, turn the lathe on at its lowest speed for just a second or two. Listen for any unusual noises or vibrations. Then turn it off.
Troubleshooting Common Installation Issues
Even with the best intentions, you might run into a snag. Here are a few common issues and how to resolve them:
Issue: The Chuck Won’t Thread On Straight
- Cause: Cross-threading due to misaligned threads or foreign debris.
- Solution: Back the chuck off completely. Inspect the spindle and chuck/adapter threads for damage or dirt. Carefully realign and try threading by hand again. Use a thread-chasing tool if necessary.
Issue: The Chuck is Loose or Wobbly After Tightening
- Cause: Improper tightening, dirty threads, or a worn spindle/adapter thread.
- Solution: Unthread the chuck. Thoroughly clean both sets of threads. Reinstall and use the recommended tightening method, applying more force if safe and appropriate, or using a tool to ensure a snug lock. If the threads are worn, you may need to replace the spindle or adapter.
Issue: The Chuck is Extremely Difficult to Tighten/Loosen
Cause: Dry threads, debris, or friction. This can also happen if a previous user applied excessive thread locker (like Loctite).
- Solution: For initial installation, ensure threads are clean and perhaps a tiny amount of brass-safe anti-seize compound is