A mini wood lathe is a genius essential for model making, offering precision, control, and versatility for crafting intricate details and smooth finishes on small projects. It’s an indispensable tool for any hobbyist looking to elevate their miniature creations.
Ever looked at a beautifully crafted miniature ship, a detailed architectural model, or intricate dollhouse furniture and wondered how those impossibly smooth curves and perfect cylinders were made? If you’ve tried to achieve that level of detail with hand tools alone, you know it can be frustrating, time-consuming, and sometimes, down-right impossible. The secret weapon for many model makers isn’t a magic wand, but a small, powerful tool: the mini wood lathe. This guide will show you why a mini wood lathe is a genius essential for model making and how you can start using one to bring your miniature visions to life.
You’ll learn about the unique advantages a mini lathe offers for small-scale work, what to look for when choosing one, and how to get started with some basic techniques. Let’s transform your model-making game!
Why a Mini Wood Lathe is a Genius Essential for Model Making
When we talk about lathes, many people picture large, industrial machines. But for the delicate world of model making, a smaller, more manageable tool is often ideal. A mini wood lathe bridges the gap between basic crafting and professional-level precision, making it perfect for detailed work on a smaller scale. Here’s why it’s such a game-changer:
Unmatched Precision and Control
Model making demands accuracy down to the millimeter. A mini wood lathe allows you to turn small pieces of wood with incredible precision. You can shape intricate details, create uniform components, and achieve perfectly symmetrical forms that are nearly impossible by hand. The controlled rotation and steadying effect of the lathe provide a stable platform for fine-tuning your work.
Versatility for Diverse Models
Whether you’re building a historical ship, a fantasy castle, or even intricate jewelry, a mini wood lathe can handle it. You can create:
- Perfectly round shafts and dowels for structural elements.
- Small, detailed columns and spires for architecture.
- Tiny barrels, wheels, or decorative elements for dioramas.
- Smooth, flowing pieces for custom furniture or artistic models.
- Even small, custom turned components for other hobbies like pen making.
Efficiency and Speed
While precision is key, speed also matters, especially when you need to create multiple identical components, like numerous small spindles for a model fence or railing. A mini lathe dramatically speeds up the process of shaping wood compared to manual carving or sanding. What might take hours by hand can often be accomplished in minutes on the lathe.
Learning Curve and Accessibility
Compared to larger industrial machines, mini wood lathes are generally more affordable and have a gentler learning curve, making them accessible for beginners. Most models are also compact enough for a small workshop or even a dedicated corner of a room, fitting into the home hobbyist environment perfectly. This accessibility means you can start experimenting and learning new skills without a huge investment in space or money.
Smooth, Professional Finishes
Achieving a smooth, glass-like finish on small wooden parts can be a challenge. A lathe allows you to use sharp turning tools to shave off wood in very fine increments, resulting in surfaces that are far smoother than what can typically be achieved with sanding alone. This is crucial for models where realism and a polished look are desired.
Choosing the Right Mini Wood Lathe for Model Making
Not all mini lathes are created equal, and picking the right one for model making involves considering a few key features. Think of this as fitting the tool to your specific needs.
Key Features to Consider
- Bed Length and Swing: This determines the maximum size of the workpiece you can accommodate. For most model making, a shorter bed is fine, but ensure the “swing” (the diameter of material that can be turned over the bed) is sufficient for your typical projects.
- Motor Power: While you won’t need a powerhouse for small models, adequate power ensures the lathe runs smoothly without bogging down, especially when removing material. Look for at least 1/4 to 1/2 horsepower for general model making.
- Speed Control: Variable speed control is highly recommended. It allows you to adjust the rotation speed based on the wood type, the part of the model you’re working on, and the tool you’re using. Lower speeds are safer for beginners and for fine detail work.
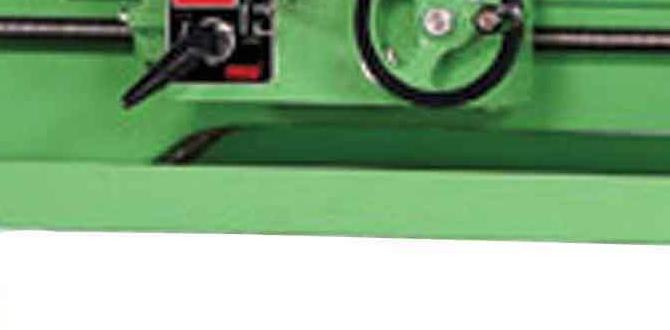
- Build Quality and Stability: A solid cast-iron base and headstock/tailstock are crucial for minimizing vibration. Vibration is the enemy of precision, especially in small workpieces.
- Tool Rest: A sturdy and easily adjustable tool rest is important for supporting your turning tools. Ensure it can be positioned close to the workpiece for optimal control.
- Included Accessories: Many mini lathes come with a basic faceplate, spur drive center, and live tailstock center. Check what’s included, and be prepared to purchase additional chucks or specialized accessories if needed for your projects.
Table: Comparing Mini Lathe Categories for Model Making
Here’s a quick look at common types of mini lathes and how they might fit your model-making needs:
| Lathe Type | Typical Motor Power | Bed Length | Best For | Considerations |
|---|---|---|---|---|
| Micro Lathes (Benchtop) | Under 1/4 HP | Under 12 inches | Very small, intricate parts (e.g., dollhouse miniatures, jewelry beads) | Limited workpiece size, may require specialized small tools. Vibration can be an issue if not heavy enough. |
| Small Benchtop Lathes | 1/4 HP – 1/2 HP | 12 – 18 inches | General model making, small architectural elements, turned parts for larger models. | Good balance of size, power, and capability. Most popular choice for hobbyist model makers. |
| Compact Midi Lathes | 1/2 HP – 1 HP | 18 – 36 inches | Larger model components, if you also want to turn slightly larger items, or build very detailed, larger-scale models. | Takes up more space, more powerful than strictly necessary for tiny models but offers more capacity. |
Popular Mini Lathe Brands (for Research)
When you’re ready to start looking, some brands are known for producing reliable mini lathes suitable for hobbyists. While specific models change, brands like Nova, Jet, Grizzly, and various others offer excellent options. Do your research, read reviews, and compare specifications based on the features discussed above.
Essential Tools and Accessories for Model Making on a Mini Lathe
Once you have your mini lathe, you’ll need a few key tools to get started with turning small wooden pieces. Don’t get overwhelmed; you can build your collection over time. For model making, focus on tools designed for small-scale work.
Basic Turning Tools
These are the primary tools you’ll use to shape the wood. For a mini lathe, smaller, lighter tools are often preferred.
- Spur Drive Center: This screws into your headstock and has spurs that dig into the wood, holding it against the tailstock.
- Live Center: This fits into your tailstock and has a bearing, so it spins with the wood, reducing friction and providing support.
- Scrapers: These are essential for small work. They have a flat edge, often with a slight curl, used to smooth and shape delicate details. Common types include round nose scrapers, square end scrapers, and detail scrapers.
- Skew Chisel (Small Size): While larger skew chisels can be aggressive, a small, finely ground skew can be excellent for scraping and creating fine details or slight coves on miniature parts.
- Parting Tool: Used to cut grooves and to cut a piece of wood off the main stock (like separating a bead from a rod).
- Gouges (Small Bowl/Spindle Gouges): For model making, you’ll typically use smaller spindle gouges, which are good for shaping and hollowing.
Essential Accessories
- Faceplate: This attaches to the headstock and allows you to mount flat pieces of wood or a chuck.
- Chuck (Optional but Recommended): A chuck grips the workpiece and offers more versatility than just centers. For model making, a small scroll chuck with jaws designed for small diameters is invaluable. Reversible jaws allow you to grip small tenons or even drill out internal features.
- Tool Rest: Ensure your lathe comes with a sturdy tool rest. You might want to find or make smaller, more finely adjustable rests for super-fine detail work.
- Safety Gear: Always—absolutely always—wear safety glasses or a face shield. Hearing protection is also a good idea. Dust masks are essential when working with wood dust.
Wood Selection for Model Making
The type of wood you use will significantly impact your results. For delicate model work, opt for woods that are easy to turn and hold detail well.
- Basswood: Very soft, stable, and easy to carve and turn. It’s excellent for beginners and for very fine details. It has a fine, uniform texture.
- Pine: Readily available and relatively soft, though it can have knots and grain variations that make it challenging.
- Poplar: A bit harder than basswood but still easy to work with. It has a fine, straight grain.
- Maple: A harder wood, excellent for turning smooth finishes and holding detail. Good for components that need to be strong.
- Cherry/Walnut: Beautiful hardwoods that turn well and offer great color and grain. They might require a slightly sharper tool than softer woods.
Avoid very knotty or stringy woods until you gain more experience. Always allow your wood to acclimate to your workshop environment to prevent warping or cracking.
Getting Started: Basic Techniques for Model Makers
With your lathe set up, tools ready, and safety gear on, it’s time to turn! Here are some fundamental techniques tailored for model-making precision.
Step 1: Mounting Your Workpiece
- Prepare the Wood: Cut your wood blank to slightly longer and wider than your desired finished piece. If using centers, ensure the ends are relatively flat.
- Install Drive and Tailstock Centers: Screw the spur drive center into your headstock. Place your wood blank on the spur center. Insert a live center into the tailstock.
- Advance the Tailstock: Swing the tailstock into position and advance its quill (the part that telescopes) until the live center is snug against the end of your wood blank. Lock the tailstock in place.
- Check for Runout: Give the workpiece a gentle spin by hand to ensure it rotates freely and isn’t wobbling excessively.
Step 2: Tool Rest Setup
This is critical for safety and control. Position the tool rest as close as possible to the workpiece without rubbing against it. For most turning, the rest should be slightly below the center line of the workpiece, allowing your tool to pivot on it. For scraping, you might bring it closer to center or even slightly above.
Step 3: Basic Turning – Rounding and Tapering
Start with a simple task, like creating a perfectly uniform dowel or a tapered rod.
- Start Slow: Begin at the lowest speed setting on your lathe.
- Rough Turning: Use a scraper or a small spindle gouge to begin removing the corners of your square blank, working towards a cylinder. Make light passes.
- Shaping: Once roughly round, use your scraper (a round nose scraper is excellent for this) to create a smooth cylinder. Hold the scraper on the tool rest and push it gently into the spinning wood. Let the tool do the work.
- Tapering: To create a taper, use a scraping action with your tool, gradually moving it along the length of the workpiece while changing your angle slightly.
Remember to always keep your hands and tools on the tool rest or firmly supported. Never attempt to hold a tool freehand while the lathe is spinning, especially as a beginner.
Step 4: Creating Details – Beads and Coves
This is where the magic happens for model making.
- Mark Your Divisions: Use a pencil to mark the locations for beads (raised sections) and coves (concave hollows).
- Cutting Coves: Use a small round nose scraper or a small bowl gouge held with a scraping action. Plunge the tool into the wood to create the hollow. Work from the outside of your planned cove towards the center.
- Forming Beads: Beads are essentially small cylinders that stand proud of the cove. You can create a bead by first cutting a cove, then using a scraping tool (like a small skew chisel used flat, or a specialised bead-forming tool) to shape raised sections on either side of the cove. You might need to use a parting tool to define the ends of the bead before shaping it.
- Parting Off: To separate a finished piece (like a small bead or a complete miniature component) from the stock, use a parting tool. Cut a deep groove where you want to detach the piece. Be patient, and make sure the piece is well-supported as you finish the cut, or it might fly off.
It’s also incredibly useful to understand external resources. For instance, the Woodturners Guild of New Zealand offers a wealth of information on turning techniques, some of which can be adapted for miniature work. Always refer to your lathe’s manual for safe operation specific to your machine.
Safety First: Essential Precautions for Mini Lathe Use
Working with any power tool requires vigilance, and a wood lathe is no exception. For beginners, understanding and implementing safety protocols is paramount. Think of safety not as a restriction, but as the foundation for enjoyable and productive turning.
Always Use Safety Gear
- Eye Protection: A must-have. Wear safety glasses with side shields, or better yet, a full face shield. Wood chips can fly off at high speed.
- Hearing Protection: Lathes can be noisy. Earplugs or earmuffs are recommended, especially for extended use.
- Dust Mask/Respirator: Wood dust is harmful to your lungs. Wear appropriate respiratory protection, especially when sanding or when working with certain types of wood.
- No Loose Clothing or Jewelry: Tie back long hair. Remove rings, bracelets, and watches. Wear snugly fitting clothing. Anything that can get caught can pull you into the lathe.
- Secure Footwear: Wear sturdy shoes with closed toes.
Lathe Operation Safety
- Read Your Manual: Every lathe is slightly different. Understand your machine’s controls, safety features, and recommended operating procedures.
- Secure Workpiece: Ensure your wood is properly mounted between centers or in a chuck. Check that it’s not loose before starting the lathe.
- Correct Tool Rest Position: Always position the tool rest close to the workpiece and at the correct height before turning the lathe on. Never adjust the tool rest while the lathe is spinning.
- Sharp Tools: Use sharp tools. Dull tools require more force, leading to loss of control and increased risk of kickback.
- Light Cuts: Especially for beginners, take light, shaving cuts rather than trying to remove large amounts of material at once.
- Stay Clear: Keep your hands, hair, and clothing away from the spinning workpiece and tool.
- One Person Operation: Do not let anyone else approach the lathe while it is running.
- Power Off for Adjustments: Always turn off the lathe before making any adjustments, such as moving the tool rest, tightening a tailstock, or changing tools.
- Beware of Kickback: This is when the tool catches in the wood and forces it violently, potentially pulling your hands or the tool towards you. Sharp tools, taking too heavy a cut, or a poorly supported tool can cause kickback.
Workspace Safety
- Good Lighting: Ensure your work area is well-lit so you can see clearly.
- Cleanliness: Keep your workspace tidy. Remove wood shavings and dust regularly. A clear floor reduces trip hazards.
- Stable Surface: Make sure your mini lathe is placed on a sturdy, level surface that can support its weight and absorb vibrations.
A great resource for understanding lathe safety, applicable even to mini lathes, is the Occupational Safety and Health Administration (OSHA) regulations on woodworking machinery. While these are industrial standards