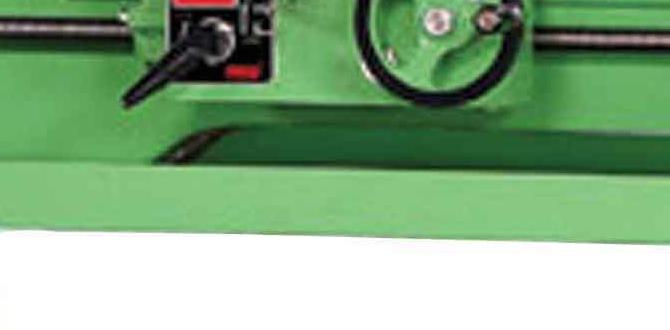
A mini wood lathe is essential for pen turning because its compact size, precise control, and affordability make it the perfect beginner-friendly tool to create beautiful custom pens with ease and confidence.
Turning a pen on a lathe might seem like a complex woodworking project, but with the right tools, it’s surprisingly accessible. So many aspiring woodworkers get excited about creating unique pens, only to be intimidated by the machinery. If this sounds like you, don’t worry! You don’t need a massive workshop or a hefty budget to get started. We’re going to demystify the process and show you exactly why a mini wood lathe is your proven essential for embarking on this rewarding craft. Get ready to learn how to bring your pen-making dreams to life, step-by-step.
Why a Mini Lathe is Your Pen Turning Best Friend
When we talk about pen turning, the first image that might pop into your head is a large, powerful lathe. However, for the beginner dabbling in this intricate craft, a smaller, more manageable machine is often not just beneficial – it’s practically indispensable. A mini wood lathe, specifically designed for smaller projects, offers a sweet spot of functionality, control, and affordability that larger, more industrial machines simply can’t match for this particular application.
Think of it like this: you wouldn’t use a sledgehammer to delicately crack an egg, right? Similarly, while a full-sized lathe could turn a pen, it’s like using a beast for a delicate operation. A mini lathe provides the finesse required. Its smaller footprint also means it fits comfortably in most home workshops, garages, or even craft rooms, making it a practical choice when space is a concern. For anyone just starting out, the learning curve is gentler, the initial investment is lower, and the satisfaction of creating your first handmade pen is within easy reach.
The Benefits Are Clear:
- Precision Control: Mini lathes generally offer finer adjustments, crucial for the delicate work involved in shaping pen blanks.
- Cost-Effectiveness: They are significantly more affordable than their larger counterparts, making them an accessible entry point for hobbyists.
- Compact Size: Perfect for smaller workspaces, easily stored when not in use.
- Simplicity: Often less complex to operate, reducing the intimidation factor for beginners.
- Specialized Functionality: Optimized for smaller projects like pens, bowls, and spindles, making them ideal for the task.
Understanding Your Mini Wood Lathe
Before we dive into the actual pen turning process, it’s helpful to get acquainted with the basic components of your mini wood lathe. Knowing these parts, and what they do, will make operating the machine much more intuitive and safe.
At its core, a lathe’s job is to spin a piece of wood (the workpiece) at a controlled speed while you use cutting tools to shape it. Your mini lathe has several key parts that work together to achieve this:
Key Lathe Components:
- Headstock: This is the part of the lathe that houses the motor and the spindle. The spindle is what rotates, and it’s where you’ll attach your drive center or chuck to hold your workpiece.
- Tailstock: Located at the opposite end of the lathe bed from the headstock, the tailstock provides support for the workpiece. You’ll typically mount a live center in the tailstock, which pivots with the wood, reducing friction.
- Bed: The main beam of the lathe that runs between the headstock and tailstock, providing a stable platform for the tool rest and tailstock to slide along.
- Tool Rest: An adjustable bar that sits close to the workpiece. Your turning tools rest on this bar, allowing you to maintain a consistent angle as you shape the wood. This is a crucial element for safe and effective turning.
- Tooling (Chisels/Gouges): These are the hand-held instruments you use to cut and shape the wood. For pen turning, smaller, specialized sets are common.
- Drive & Live Centers: The drive center (usually in the headstock) grips one end of the wood and forces it to turn with the spindle. The live center (in the tailstock) supports the other end and rotates with the wood.
- Chuck (Optional but Recommended for Pens): A chuck is a device that securely grips the wood and often has jaws that can expand or contract to hold different shapes and sizes. For pen turning, a pen blank chuck or a small scroll chuck is highly recommended for holding the fragile pen tubes securely.
Essential Tools and Materials for Pen Turning
Beyond the mini lathe itself, you’ll need a few key tools and materials to transform a simple piece of wood into a functional and beautiful pen. Don’t feel overwhelmed by this list; many of these items are part of a starter kit, and you can acquire them gradually.
Tools You’ll Need:
- Mini Wood Lathe: Your primary machine. Ensure it has variable speed control for safety and best results.
- Pen Turning Mandrel: This is a specialized shaft that fits into your lathe. It holds the pen tubes and allows you to turn the wood around them. It has sections for the bushings and the pen blank.
- Bushings: Small metal tubes that fit onto the mandrel, acting as guides to create the correct diameter for your pen components.
- Pen Kit: This is the hardware for your pen – the tip, ink cartridge holder, clip, and connector. Kits come in various styles and finishes.
- Pen Blank: This is the piece of wood (or acrylic, or resin) that you will turn and shape into the body of the pen. You can buy pre-drilled pen blanks or drill your own.
- Woodturning Tools (Skew Chisel, Parting Tool, Scraper): While a dedicated set for pen turning isn’t strictly necessary at first, a small skew chisel is very useful for shaping. A parting tool helps to cut off the finished pen.
- Safety Gear: Absolutely non-negotiable. This includes safety glasses or a full face shield, and potentially hearing protection.
- Drill and Drill Bits: If you’re preparing your own pen blanks, you’ll need to drill them precisely to fit the pen tubes.
- Sandpaper: A range of grits from coarse (e.g., 120) to very fine (e.g., 400, 600, or even higher for a super smooth finish).
- Finishing Products: This could be a friction polish, CA glue (super glue), lacquer, or a wax finish to protect and enhance the wood.
- Chuck for Pen Blanks (Highly Recommended): A specialized chuck that holds the pen blank securely while allowing easy access to the ends. This is safer and more reliable than just live centers for pen blanks.
Materials for Pen Blanks:
The possibilities for pen blanks are vast! While wood is a classic choice, many materials can be successfully turned:
- Hardwoods: Maple, Walnut, Cherry, Oak. These are durable and often have beautiful grain patterns.
- Exotic Woods: Bocote, Purpleheart, Padauk. These offer striking colors and unique figures.
- Stabilized Burls: These pieces are infiltrated with resin for strength and to prevent cracking, often featuring incredible textures. For more on wood stabilization, resources like Woodworking Network offer valuable insights.
- Acrylics and Resins: These can simulate wood grain, gemstone patterns, or be embedded with glitter, flowers, or other objects for truly unique pens.
- Reclaimed Materials: Old baseball bats, billiard cues, or even denim embedded in resin.
When selecting a pen kit, ensure it matches the size of your drilled blank and the mandrel you’re using. Most pen kits come with instructions on drilling and assembly specific to that kit.
Step-by-Step Guide to Turning Your First Pen
With your mini lathe, tools, and pen kit ready, it’s time to get turning! This guide breaks down the process into manageable steps. Remember, take your time, especially on your first few pens. Safety is paramount at every stage.
Step 1: Prepare Your Pen Blank
If your pen blank isn’t pre-drilled, you’ll need to drill it precisely using a drill press (highly recommended for accuracy) and the drill bit size specified by your pen kit. Many pen kits come with tubes that you’ll need to glue into the drilled holes. If you’re using pre-drilled blanks, skip this part.
Often, the wooden blank is turned into a cylinder that’s slightly larger than the metal tubes. This is done by using the pen blank diameter measurements provided by your pen kit and the corresponding bushings. Those bushings will guide you on how large to turn your wood.
Step 2: Set Up the Lathe and Mandrel
Mount your pen turning mandrel onto your mini lathe. Typically, you’ll place the drive center into the headstock and the live center into the tailstock, and then slide the mandrel onto them.
Place the bushings and your pen blank (with tubes inserted and glued if you did this step separately) onto the mandrel. Ensure everything is snug. You’ll often have a nut on the tailstock end to help tighten everything. The goal is a secure fit that won’t wobble.
Step 3: Set the Spindle Speed
This is where variable speed on your mini lathe is invaluable. Start at a slower speed, especially if you’re new to turning or working with a softer wood. Around 1,000 to 1,500 RPM is a good starting point for shaping. You can gradually increase the speed as you become more comfortable and as the pen blank gets closer to its final shape, but always err on the side of caution. Higher speeds can increase the risk of catches. For the most accurate and up-to-date safety guidelines on lathe speeds, consult your lathe’s manual and resources from organizations like the Woodworking Tools Safety Guidelines.
Step 4: Shape the Pen Blank
Position your tool rest parallel to the workpiece and about 1/4 inch away. Using your skew chisel (or other appropriate tool), begin to shape the wood. Start by making light passes to turn the blank into a cylinder. Then, gradually introduce the desired shape for your pen. Think about the contours – will it be straight, bulbous, or a combination? You’re essentially shaping the wood down to the diameter determined by the bushings.
Pro Tip: Let the tool do the work! Don’t force it. Take light shavings, especially when you are getting close to the final shape. The goal is to remove material gradually and smoothly.
Step 5: Sand and Finish
Once you have the desired shape, it’s time for sanding. Keep the lathe running at a moderate speed for sanding. Start with a coarser grit sandpaper (like 120 or 150) and work your way up through progressively finer grits (220, 320, 400, and even higher like 600 or 1000). Sand thoroughly at each grit level, ensuring all facets and tool marks are removed. Wipe away dust between grits.
After sanding, apply your chosen finish. Many pen turners use a friction polish or CA glue (super glue) applied in thin coats while the lathe is running slowly, followed by sanding with very fine grits and a final buffing. This creates a durable, high-gloss finish. Follow the instructions for your specific finish product.
Step 6: Assemble the Pen
With the pen body turned, sanded, and finished, it’s time for the final assembly. Remove the pen blank from the mandrel. You’ll typically use a vise or the lathe’s tailstock (if it has a vise attachment or you can improvise) to press the pen components (tip, ink cartridge, clip, receiver) into the glued tubes.
Follow the specific instructions provided with your pen kit for assembly. Ensure all parts fit together snugly, and you should have a functional, beautifully crafted pen!
Mini Lathes vs. Larger Lathes for Pen Turning
It’s a common question for beginners: can I just use the larger lathe I might already have, or is a dedicated mini lathe really necessary? While a larger lathe can turn pens, there are distinct advantages to using a mini lathe specifically for this task.
Advantages of Mini Lathes for Pen Turning:
- Cost: Significantly cheaper upfront.
- Footprint: Takes up much less space.
- Ease of Use: Simpler controls and operation for beginners.
- Control: Often better fine-tuning for smaller, delicate pieces.
- Safety: Less power means potentially fewer severe consequences from mistakes.
Disadvantages of Mini Lathes:
- Size Limitations: Cannot undertake larger turning projects like bowls or table legs.
- Power: Less power can mean slower material removal, though this is often an advantage for pens.
- Durability: Generally less robust build quality than heavy-duty industrial lathes.
When a Larger Lathe Might Be Considered:
If you already own a larger lathe and have plenty of space, and you’re only turning pens occasionally, it might be feasible to use it. However, you’ll need to be extra cautious with speed settings and the stability of your setup for such small items. Many woodworkers find that the dedicated control and ease of use of a mini lathe for pen turning far outweigh the convenience of using a larger, more cumbersome machine.
Here’s a quick comparison:
| Feature | Mini Lathe | Larger Lathe |
|---|---|---|
| Typical Swing (Diameter it can turn) | 6-12 inches | 16+ inches |
| Typical Distance Between Centers | 10-18 inches | 36+ inches |
| Motor Power | 1/2 HP – 1 HP | 1 HP – 5+ HP |
| Ideal For | Pens, spindles, small bowls, craft items | Large bowls, furniture legs, large spindle work |
| Beginner Friendliness for Pens | High | Moderate (requires more caution) |
| Cost | $150 – $500 | $500 – $5000+ |
Troubleshooting Common Pen Turning Issues
Even with a mini lathe, you might encounter a few hiccups along the way. Here are some common problems and their solutions:
Issue 1: Wobbly or Vibrating Pen Blank
- Cause: The mandrel isn’t secured properly, bushings are loose, or the blank isn’t centered on the mandrel.
- Solution: Ensure the drive and live centers are properly seated and tightened. Tighten the locking nut on the mandrel. Check that the

