Quick Summary
Learn how to polish wood lathe bowls easily! This guide breaks down the process step-by-step, from sanding to buffing. Achieve a smooth, professional finish for your turned wooden bowls safely and effectively. Get ready to make your bowls shine!
Turning beautiful bowls on a wood lathe is incredibly rewarding. But getting that final, showroom-quality finish can sometimes feel like a puzzle. You’ve spent hours shaping your piece, and now you want it to gleam! Sometimes, sandpaper marks can stubbornly stick around, or the finish might not look as smooth as you’d hoped. Don’t worry! Polishing your wood lathe bowls is a skill everyone can master. This guide will walk you through everything you need to know, from the essential tools to the final buffing stage. We’ll make sure your handcrafted bowls look their absolute best.
Why Polishing Your Wood Lathe Bowls Matters
A well-polished bowl isn’t just about looking good; it’s about protecting the wood and enhancing its natural beauty. The process removes minor imperfections left by tools and sandpaper, creating a surface that feels silky smooth to the touch. A polished finish also makes the wood more resistant to moisture and stains, extending the life of your creation. Think of it as the final, crucial step that transforms a good piece of woodwork into a stunning work of art. It shows the care and attention you’ve put into every stage of your turning project.
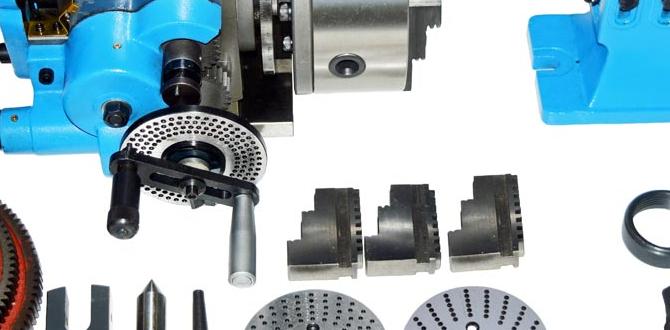
Tools and Materials You’ll Need
Gathering the right supplies is the first step to a successful polish. Don’t be intimidated by the list; many of these are common in a woodworking shop. Having them ready will make the polishing process smooth and enjoyable.
Essential Tools and Equipment:
- Wood Lathe: The foundation of your project.
- Bowl Turning Tools: Scrapers, gouges, and parting tools for shaping.
- Sandpaper: A range of grits, from coarse (e.g., 80 or 100 grit) to very fine (e.g., 400, 600, 800, 1000, 2000 grit). Including abrasive papers in various forms like discs or sheets is helpful.
- Sanding Blocks or Backing Pads: For hand sanding and for use with power tools if available.
- Dust Mask and Safety Glasses: Always prioritize safety!
- Vacuum Cleaner or Air Compressor: To remove dust between grits.
- Wood Sealant or Finish: Such as a mineral oil, Danish oil, lacquer, or a wax-based finish.
- Buffing System: This could be a dedicated buffing wheel with compounds, or soft rags and polishing compounds.
- Clean Cloths: For applying finishes and buffing.
- Optional: Micro-mesh pads, automotive-grade clear coat for a super high gloss, tack cloths.
Choosing Your Polish/Finish:
The type of polish or finish you choose will affect the final look and feel of your bowl. For beginners, simple finishes are often best:
- Oils (Mineral Oil, Danish Oil): These penetrate the wood, enhancing its natural grain and color. They offer a matte to satin finish and are easy to apply. Mineral oil is food-safe, making it great for bowls intended for serving food.
- Waxes (Beeswax, Carnauba-based waxes): These provide a protective layer and a lovely sheen. They are often used over an oil finish to add an extra layer of protection and luster.
- Lacquer or Polyurethane: These create a durable film on the surface. They can provide a high-gloss finish but require more careful application and ventilation. For a beginner, start with oils and waxes.
Step-by-Step Guide to Polishing Wood Lathe Bowls
Polishing is all about progressively smoothing the surface. The key is to start with a coarser grit to remove tool marks and then move to finer grits to eliminate scratches from the previous stage. Patience is your best friend here!
Step 1: Thorough Sanding
This is the most critical phase for achieving a smooth finish. Don’t rush it! Proper sanding removes all visible tool marks and imperfections.
- Start with a Coarse Grit: Begin with a grit like 80 or 100 to remove any significant chuck marks or rough patches left by your turning tools. Use your lathe’s lowest speed.
- Work Up Through the Grits: This is where the progression happens. Move from the coarse grit to progressively finer ones. Common progressions include:80/100 grit -> 150 grit -> 220 grit -> 320 grit -> 400 grit
- Sanding Technique:
- On the Lathe: Apply sandpaper firmly, but avoid pressing too hard, which can create heat and obscure the surface. Let the lathe do the work. Move the sandpaper back and forth along the grain if possible, and around the circumference.
- Lathe Speed: As you move to finer grits, you can gradually increase your lathe’s speed. Higher speeds can help create a smoother surface with finer grits. A general guideline is to increase speed as grit coarseness decreases. Always ensure your workpiece is securely mounted before increasing speed. A good reference for lathe speeds can be found at resources like Wood Magazine’s Lathe Speed Guide.
- Clean Between Grits: After each grit is completely used, remove all dust. Use a vacuum, compressed air, or a tack cloth. Dust from a coarser grit will scratch the surface when you move to a finer grit.
- Wet Sanding (Optional but Recommended): For an even smoother finish, especially with finer grits (400 grit and up), you can use a technique called “wet sanding.” Apply water, mineral spirits, or a mild soap solution to the surface while sanding with the finer grits. This helps to “raise the grain” and lubricate the sandpaper, preventing clogging and creating a more refined surface. Make sure the wood is dry before applying any finish.
- Final Grits: Continue to very fine grits like 600, 800, or even 1000 grit if you have them. The smoother you get the surface with sandpaper, the less work your polishing step will require.
Step 2: Applying a Sealer or Initial Finish
Once sanding is complete, the wood surface is very porous and ready to accept a finish or sealant. This step fills the pores and prepares the surface for polishing.
- Clean Again: Ensure the bowl is completely free of dust. A tack cloth is excellent for this.
- Apply Your Chosen Finish: For most beginners, an oil finish like Danish oil or mineral oil is a great start.
- Oils: Apply a liberal coat of oil with a clean cloth. Let it soak in for 10-15 minutes.
- Remove Excess: Wipe off any excess oil that hasn’t soaked in. You don’t want a sticky surface.
- Let it Dry/Cure: Allow the oil to dry or cure according to the product’s instructions. This can take anywhere from a few hours to 24 hours, depending on the product. For food-safe finishes, consult reputable sources like the FDA’s guidance on Food Contact Substances to ensure safety.
- Light Sanding After Sealing (Optional): Some woodworkers like to very lightly sand with an ultra-fine grit (e.g., 600 or 800) or a fine steel wool (0000) after the first coat of oil or sealer has dried. This knocks down any raised grain and creates an even smoother surface. Clean off all dust thoroughly afterward.
Step 3: The Polishing/Buffing Stage
This is where the magic happens! Polishing brings out the sheen and depth of the wood.
Method 1: Using Buffing Wheels and Compounds
This method is faster and often yields a more professional result once mastered.
- Set Up Your Lathe: Use a variable-speed lathe if possible. You’ll want to run it at a medium to high speed for buffing. Ensure your buffing arbor is securely attached.
- Choose Your Buffing Wheels: A common setup involves a series of wheels, each for a different compound:
- Sisal Buffing Wheel: For aggressive cutting and removing light scratches. Used with a abrasive compound like Tripoli.
- Cotton Buffing Wheel: For cutting and pre-polishing. Used with a compound like Stainless Steel or Crayon-type compounds.
- Soft Flannel or Chamois Buffing Wheel: For final polishing and achieving a high gloss. Used with a final polishing compound like Carnauba or White Diamond.
- Apply Compound to the Wheel: Simply touch the compound to the spinning buffing wheel. The wheel will pick up the abrasive. Don’t over-apply; a little goes a long way.
- Buff the Bowl: Hold the bowl gently but firmly against the spinning buffing wheel. Move the bowl smoothly to ensure even polishing across the entire surface, inside and out. The heat generated can help melt the compound into the wood.
- Work Through the Grits: If you’re using multiple compounds, start with the coarser one (e.g., Tripoli) on the sisal wheel, then move to the medium compound (e.g., Stainless Steel) on the cotton wheel, and finally the fine compound (e.g., White Diamond or Carnauba) on the soft wheel for a mirror-like shine.
- Clean Between Stages: Wipe down the bowl between using different compounds and wheels to prevent contamination.
Method 2: Hand Rubbing with Polishes or Waxes
This is a more accessible method for beginners and can still produce beautiful results.
- Apply Polishing Compound or Wax:
- Rubbing Compounds: Some fine rubbing compounds are designed for wood. Apply a small amount to a soft, lint-free cloth.
- Paste Waxes: Often used as a final step. Apply a thin, even coat with a clean cloth.
- Specialty Wood Polishes: Many brands offer polishes that add shine and protection.
- Rub it In:
- With the Lathe Running (Low Speed): You can apply these finishes with the lathe turning at a very low speed. Hold the cloth over the spinning bowl. The friction will help melt the wax or rub the compound in.
- Rubbing by Hand (No Lathe): If you’ve removed the bowl from the lathe, you can rub the polish or wax in with a clean cloth or a fine synthetic pad (like those used for automotive finishes). Work in small sections, applying gentle pressure and circular motions.
- Buff to a Shine: With a separate clean, dry cloth, buff the surface vigorously. This brings out the shine. For waxes, let them haze over slightly before buffing for the best results.
- Multiple Coats: For oil and wax finishes, applying multiple thin coats is often better than one thick coat. Let each coat dry or cure slightly before applying the next and buffing.
Step 4: Applying a Final Protective Coat (Optional but Recommended)
After polishing, a final protective coat can enhance durability and sheen.
- Choose Your Top Coat:
- Carnauba Wax: A favorite for its hardness and high gloss. It can be applied by hand or with a buffing wheel at the very end.
- Friction Polish: These are special polishes designed to be applied while the lathe is spinning, creating a fast sheen.
- Food-Safe Finish: If the bowl is for food, ensure your top coat is food-safe and applied according to best practices.
- Application: Apply thin, even coats as per the product instructions. Many top coats are best applied with the lathe running at a moderate speed, using a clean cloth wrapped around your hand or a buffing pad.
- Buffing: Once the top coat has dried or cured to the manufacturer’s recommendation, buff it with a clean, soft cloth for a final shine.
Table: Sandpaper Grit Progression for Wood Lathe Bowls
This table provides a common progression of sandpaper grits. You may be able to skip a grit or two depending on the quality of your initial turning.
| Stage | Grit Range | Purpose | Lathe Speed (Approx.) |
|---|---|---|---|
| Initial Shaping Removal | 80 – 120 | Remove major tool marks and level the surface. | Low (e.g., 500-800 RPM) |
| Medium Sanding | 150 – 220 | Remove scratches from previous grit, refine shape. | Medium (e.g., 800-1200 RPM) |
| Fine Sanding | 320 – 400 | Eliminate visible scratches, prepare for very fine grits. | Medium-High (e.g., 1200-1800 RPM) |
| Very Fine Sanding | 600 – 800 | Create a smooth, pore-opening surface. Wet sanding often used here. | High (e.g., 1800-2500 RPM) |
| Ultra-Fine Sanding | 1000 – 2000+ (Optional) | Achieve a glass-like surface before polishing. | High (e.g., 2000-3000 RPM) |
Troubleshooting Common Polishing Problems
Even with the best intentions, you might run into a few snags. Here’s how to fix them:
- Stubborn Sandpaper Marks: If a finish isn’t covering up visible scratches, you likely didn’t sand finely enough. Go back to a coarser grit (e.g., 220 or 320) and re-sand through all the finer grits again. Ensure you are holding the sandpaper firmly and that it’s not worn out.
- Sticky Finish: This usually happens when too much finish or wax is applied, or it’s not allowed to cure properly. Try to gently scrape away excess with a plastic scraper, or if using oil, try wiping with a mineral spirit-dampened cloth (test in an inconspicuous area first). For wax, try buffing harder.
- Uneven Sheen: Inconsistent application is the usual culprit. Ensure you’re applying finishes and polishes evenly, and buffing with a consistent motion. For buffing wheels, ensure the compound is applied evenly to the wheel.
- “Fuzzies” or Raised Grain: This is common, especially with water-based finishes or wet sanding. It’s why light sanding with ultra-fine grits after the first sealer coat can be helpful. If you get fuzzies, you can often remove them by lightly sanding with a very fine grit (800+) or 0000 steel wool, then cleaning carefully before proceeding.
- Rubbing Marks from Buffing Wheels: This can happen if pressure is too heavy, a wheel is too stiff, or the lathe speed is too high. Try reducing pressure, using a softer buffing wheel, or slightly lowering the lathe speed.
Safety First!
Working with power tools like a wood lathe always requires caution. Here are some key safety tips for polishing bowls:
- Wear Safety Glasses: Always protect your eyes from dust and debris.
- Use a Dust Mask or Respirator: Sanding and buffing create fine dust that can be harmful to your lungs.
- Secure Your Workpiece: Ensure your bowl is mounted securely on the lathe before starting or increasing speed.
- Work at Appropriate Speeds: Start slow, especially with coarser grits. As you use finer grits and for buffing, you can increase speed, but always be mindful of vibration and stability.