Quick Summary:
A portable variable speed wood lathe is an essential tool for woodworkers. It offers flexibility to move your workshop and precisely control rotation for various projects. Learn how it elevates your craft and makes turning accessible anywhere.
Welcome to Lathe Hub! If you’re looking to create beautiful turned wood projects but feel limited by space or the inability to move your tools, you’re in the right place. Many beginners find the idea of woodworking intimidating, especially when it comes to specialized equipment. But what if you could have a powerful wood lathe that’s not only versatile but also easy to move around? That’s where the portable variable speed wood lathe shines. It opens up a world of creative possibilities without tying you down to one spot. This guide will show you why this particular lathe is a game-changer for hobbyists and professionals alike.
Why a Portable Variable Speed Wood Lathe is an Essential Tool
As woodworkers, we often dream of having a dedicated workshop space filled with specialized tools. However, reality for many means working in a garage, a spare room, or even needing to bring projects to different locations. This is precisely where a portable variable speed wood lathe proves its worth. It’s not just about being able to move it; it’s about the combination of portability and fine-tuned control that makes complex projects achievable for everyone, from the absolute beginner to the seasoned pro.
Freedom to Create, Anywhere
The most obvious benefit is mobility. Imagine being able to attend a woodworking class and bring your lathe, set up at a friend’s larger shop for a big project, or simply move it out of the way when you need your workspace for something else. This flexibility removes a significant barrier to entry and practice for many aspiring woodworkers. You’re no longer tied to a heavy, stationary machine. You can take your creative passion with you, wherever inspiration strikes.
Precise Control for Better Results
The “variable speed” aspect is crucial. Unlike older or simpler lathes with fixed speeds, a variable speed model allows you to dial in the exact rotational speed for your workpiece and task. Starting a rough blank? You might want a slower speed for safety and control. Finishing a delicate spindle? A higher speed can provide a smoother surface finish. This granular control is essential for:
- Safety: Slower speeds prevent dangerous kickbacks, especially when turning irregularly shaped or green wood
- Material Handling: Different wood types and densities respond best to specific speeds.
- Tool Performance: Your chisels will cut more cleanly and last longer at optimal speeds.
- Surface Finish: Achieving a glass-smooth finish often requires higher speeds.
Versatility for Various Projects
From small decorative bowls and pens to larger furniture legs and intricate spindles, the right portable variable speed wood lathe can handle it all. The user can adjust the speed to suit the scale and complexity of the project, making it a truly versatile machine in any workshop, big or small.
Key Features to Look For
When you’re choosing your first portable variable speed wood lathe, it’s important to know what features make a real difference. These aren’t just fancy additions; they are functional aspects that will make your woodworking experience safer, easier, and more rewarding. Think of these as your checklist for finding the perfect machine.
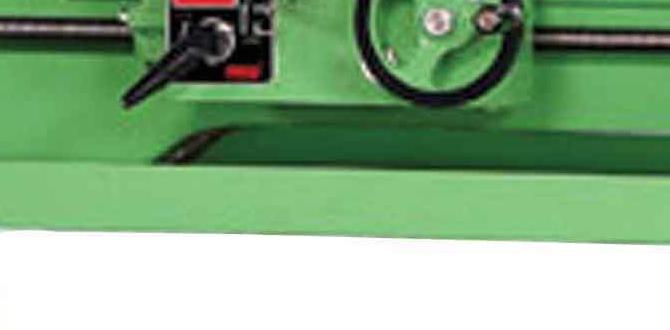
Variable Speed Control (The Heart of the System)
This is the star feature. Most portable variable speed lathes use a belt drive system with multiple pulley positions, or more advanced electronic variable speed (EVS) controls. EVS offers a wider and more continuous range of speeds, often adjusted with a dial or knob. This offers superior control and is generally preferred.
- Belt Drive: Simple, reliable, and common. Requires stopping the lathe to change pulley positions for different speed ranges (e.g., low, medium, high).
- Electronic Variable Speed (EVS): Offers a much wider, continuous range of RPMs without stopping the machine. Usually provides a digital readout of the current speed. This is the more modern and user-friendly option.
Motor Power
Motor power is usually measured in horsepower (HP). For a portable lathe, a motor between 1/2 HP and 1 HP is generally sufficient for beginner to intermediate projects. More power means it can handle larger or harder woods with less strain. Don’t underestimate the power of a well-designed motor from a reputable manufacturer.
Swing and Distance Between Centers
These specs tell you the size of workpieces the lathe can handle.
- Swing: This is the maximum diameter of a workpiece that can rotate over the bed of the lathe. It’s often described as the swing over the bed and the swing over the tool rest bed. A typical measurement might be “8-inch swing over the bed.”
- Distance Between Centers: This is the maximum length of a workpiece that can be mounted between the headstock and tailstock. A common measurement might be “16 inches between centers.”
For portability and starting out, look for lathes with at least a 10-inch swing and 16-20 inches between centers. This provides enough capacity for many common projects like bowls, platters, and spindles.
Bed Construction
The bed of the lathe (the main beam it sits on) is crucial for stability and vibration dampening. Cast iron is the premium material, offering excellent rigidity and reducing chatter. Some lighter-duty portable lathes might use steel tubing or aluminum, which can be lighter but may vibrate more.
Tool Rest and Tool Rest Post
A comfortable and easily adjustable tool rest is vital. Look for a tool rest that can be quickly positioned at the correct height and angle relative to your workpiece. The post that holds the tool rest into the lathe bed should be sturdy and not wobble.
Indexing Head (Optional but Useful)
An indexing head allows you to lock the spindle in specific positions. This is invaluable for tasks like cutting flutes, mortises, or creating decorative patterns in spaced increments around the workpiece. Some portable lathes come with this feature integrated, while others offer it as an accessory.
Weight and Portability Features
While the goal is portability, you still want a machine that feels solid. A good compromise is a lathe that’s manageable to lift (perhaps with a stand that has wheels) but heavy enough not to shake itself apart. Check for built-in handles or sturdy stand designs.
Setting Up Your Portable Variable Speed Wood Lathe: A Step-by-Step Guide
Getting your new lathe ready to turn is straightforward, but going through the steps carefully ensures safety and proper function. Think of this like preparing your workbench – it’s all about setting yourself up for success. Follow these steps, and you’ll be ready to make wood shavings in no time.
Step 1: Unboxing and Inspection
Carefully unpack your lathe. Remove all packaging materials and protective coverings. Inspect each component for any damage that may have occurred during shipping. Check that you have all the parts listed in the owner’s manual. If something looks amiss, contact the manufacturer immediately.
Step 2: Assembly (If Required)
Most portable lathes require some assembly. This typically involves attaching the legs to the bed and mounting the headstock and tailstock. Follow the manufacturer’s assembly instructions precisely. Ensure all bolts are securely tightened. A wobbly lathe is a dangerous lathe.
Step 3: Placement and Stability
Choose a level and stable surface for your lathe. A dedicated stand is ideal, especially one with caster wheels for easy repositioning. If you’re placing it on a workbench, ensure the workbench is robust and won’t move. If the lathe comes with rubber feet, use them – they help dampen vibrations.
For information on workshop safety, including proper tool placement and securing machinery, the Occupational Safety and Health Administration (OSHA) provides excellent guidelines:
OSHA Laboratory Safety Chemical Hygiene Plan (and general workshop safety principles apply)
Step 4: Power Connection
Ensure your lathe is connected to a properly grounded electrical outlet that matches the voltage and amperage requirements specified by the manufacturer. If your lathe has a GFCI (Ground Fault Circuit Interrupter) plug, use it – this is an important safety feature, especially in a home workshop environment.
Step 5: Adjusting the Tool Rest
Before you even think about turning on the lathe, adjust the tool rest. It should be positioned just slightly below the center line of your intended workpiece and about 1/8 to 1/4 inch away from where the wood will spin. Too high or too far away is a recipe for gouges and safety hazards.
Step 6: Safety Check and First Power-Up
Double-check that no tools or loose items are on or near the lathe. Ensure your workpiece (if you’ve mounted one) is securely attached. Turn on the lathe at its lowest speed setting. Listen for any unusual noises or excessive vibrations. If everything sounds and feels normal, you’re ready to start turning!
Turning Your First Project: Safety First!
You’ve got the lathe set up, and no doubt you’re eager to get started. That’s fantastic! But before you dive into a complex project, let’s talk about safety. Working with a lathe involves rapidly spinning wood, and a little bit of preparation and attention to detail goes a long way. This is the most important part of learning to turn.
Essential Safety Gear (PPE)
Always wear Personal Protective Equipment (PPE). This isn’t optional; it’s your first line of defense.
- Eye Protection: A full-face shield is highly recommended over just safety glasses. Small chips can fly unexpectedly. Ensure it fits well and is free of scratches.
- Hearing Protection: Lathes can be loud. Earplugs or earmuffs will protect your hearing long-term.
- Dust Mask/Respirator: Wood dust is harmful. Wear a mask rated for fine dust particles, especially when sanding.
- Appropriate Clothing: Avoid loose clothing, dangling jewelry, or anything that could get caught in the spinning workpiece or the lathe. Tie back long hair.
Workpiece Mounting Techniques
How you attach your wood to the lathe is critical. There are several methods; start with the basics.
- Faceplate: Ideal for bowls and platters. The wood is screwed to a metal faceplate, which then threads onto the lathe spindle.
- Drive Center and Live Center (Spur Drive & Spur): Used for spindle turning (e.g., legs, spindles for furniture). A spur drive center bites into the wood at the headstock end, and a live center (which rotates with the wood) supports the tailstock end.
- Chuck: A versatile tool that grips workpieces from the inside or outside. Many portable lathes can be fitted with a chuck, which is highly recommended for versatility and secure mounting once you’re comfortable.
Always ensure your workpiece is balanced as much as possible, especially when starting. Remove all nails, screws, or foreign objects from the wood first.
Understanding Speeds and Wood Types
This is where your variable speed lathe really shines. Different woods require different approaches.
- Green Wood (Wet): Generally needs slower turning speeds to avoid cracking and to reduce the effort required.
- Seasoned Hardwood (Oak, Maple): Can be turned at moderate to higher speeds once dried.
- Softwoods (Pine, Fir): Can be prone to tear-out and may require slower speeds with sharper tools.
- Starting Speeds: Always begin with a new piece of wood at the lowest speed. Gradually increase the speed as you get a feel for how the wood is behaving and once you’ve roughed out the basic shape.
- Roughing Out: Use slower speeds (e.g., 500-800 RPM).
- Finishing Cuts and Sanding: Higher speeds (e.g., 1000-2500+ RPM) can yield smoother results with clean cuts and during sanding.
Tool Control and Techniques
Crucially, always keep the tool rest close to the workpiece. The cutting edge of your tool should be just slightly below the center line, digging into the wood. Never place the tool rest so far away that a catch could pull it into the spinning wood.
For beginners, the roughing gouge and a spindle gouge are key. Practice making smooth, flowing cuts. Let the tool do the work; don’t force it.
For more advanced safety and best practices in woodworking, organizations like the Woodworkers Institute offer detailed guides.
Troubleshooting Common Issues
Even with the best tools, you might run into a snag now and then. Don’t get discouraged! Most common lathe issues are easily resolved with a little understanding. Think of troubleshooting as part of the learning process.
Vibration and Chatter
This is frustrating, as it marks your finish and can be noisy. Causes and solutions include:
- Unbalanced Workpiece: Ensure your wood is as round and centered as possible.
- Loose Tool Rest: Tighten its post and clamp. Position it closer to the workpiece if possible without contact.
- Lathe Not Stable: Ensure the lathe is on a level, solid surface. Add weight to the base if possible.
- Dull Tools: Very commonly, chatter is caused by a dull cutting edge. Sharpen your tools!
- Incorrect Speed: Sometimes changing the speed can eliminate vibration.
Workpiece Flying Off
This is a serious safety hazard. If this happens, stop immediately and reassess. Causes:
- Improper Mounting: Double-check that your faceplate, spur, or chuck is securely attached and tightened.
- Not Enough Support: For spindle turning, ensure the tailstock center (live center) is firmly seated and supporting the wood.
- Too Much Speed Too Soon: Always start low and increase speed gradually once the basic shape is established.
Tool Not Cutting Cleanly
This usually means your tool needs attention.
- Dull Edges: This is the most common reason for tear-out and poor cuts. Sharpen your tools regularly. A good sharpening system is a worthwhile investment.
- Incorrect Tool Angle: The bevel of your tool needs to rub against the wood correctly. Refer to your tool’s or lathe’s manual for proper angles.
- Speed Too High or Too Low: Experiment with different speeds to see what works best for the wood and the tool.
Lathe Won’t Turn On
Before assuming it’s the motor:
- Check Power: Is it plugged in? Is the outlet working? Is the circuit breaker tripped?
- Check Overload Protection: Some motors have internal thermal overload protection that may trip if the motor was strained too much. Allow it to cool.
- Consult Manual: Refer to your specific model’s troubleshooting guide.
Portable Variable Speed Wood Lathe vs. Static Lathes: A Comparison
Choosing a lathe often comes down to your specific needs and workshop setup. While static (benchtop or floor-standing) lathes offer robust performance, portable variable speed models bring a unique set of advantages that can be indispensable for many woodworkers. Here’s a breakdown:
| Feature | Portable Variable Speed Wood Lathe | Static Lathe (Benchtop/Floor Standing) |
|---|---|---|
| Portability | High. Easy to move, store, and transport. Ideal for small spaces or shared workshops. | Low to None. Designed to stay in one place. Requires dedicated space. |
| Variable Speed Control | Standard. Offers precise RPM adjustment for optimal turning. | Common on mid-to-high-end models, but basic models might have belt-driven speeds. |
| Footprint/Space Saving | Excellent. Can be stored when not in use. | Requires a permanent or semi-permanent space. |
| Power & Sturdiness | Can vary. Lighter construction may lead to more vibration with very large pieces. | Generally more robust, heavier construction for better stability with larger, unbalanced loads. |
| Price Range | Wide, from entry-level to professional. Can be more affordable for comparable variable speed features. | Wide. Basic models can be cheaper, but heavy-duty professional models are very expensive. |
| Ideal User | Hobbyists, beginners, those with limited space, people
Related Posts |