A portable wood lathe with a stand is a versatile and space-saving powerhouse for any home workshop, enabling precise woodworking projects wherever you need them.
So, you’ve caught the woodworking bug? That’s fantastic! You’ve probably been dreaming of turning beautiful bowls, elegant table legs, or intricate spindles. But then you look around your workshop and think, “Where would a big, stationary lathe even fit?” It’s a common hurdle for many budding woodworkers. Don’t let limited space or the thought of a complex setup dim your creative spark. This guide is here to show you that with a portable wood lathe and its integrated stand, you can unlock a world of turning possibilities. We’ll walk through everything you need to know to get started, making this exciting woodworking tool accessible and manageable, right from the start.
Why a Portable Wood Lathe with Stand is Your Workshop’s New Best Friend
As a seasoned machinist and tool enthusiast, I’ve seen countless workshops, from sprawling professional spaces to cozy garage setups. One thing that always impresses me is how makers adapt and overcome space limitations. A key player in this adaptation is the portable wood lathe with a stand. It’s not just a compromise; it’s a smart, strategic choice that brings significant advantages to your woodworking adventures.
Think about it: you get the precision and capability of a wood lathe without the commitment of a permanent, bulky machine. This means you can set it up when you need it and, often, fold it away or move it with relative ease when you don’t. This flexibility is invaluable for anyone working in a multi-purpose space or a smaller home workshop. Plus, the integrated stand is designed to provide stability and the correct working height, crucial for both safety and accuracy.
We’ll dive deep into why this specific tool is so beneficial, what to look for when choosing one, and how to use it effectively and safely. Get ready to transform your woodworking game!
Understanding the Portable Wood Lathe with Stand
At its core, a wood lathe is a machine that spins a piece of wood, allowing you to shape it with chisels and gouges. The “portable” aspect refers to its design, which often includes lighter construction, a smaller footprint, and sometimes features like carrying handles or wheels. The “stand” is the crucial component that elevates the lathe to a comfortable working height and provides a stable base, preventing vibrations that can ruin delicate work. Many portable lathes come with folding stands, making them incredibly convenient for storage and transport.
Key Components Explained
Before we get into the benefits, let’s quickly identify the main parts you’ll encounter on a portable wood lathe setup:
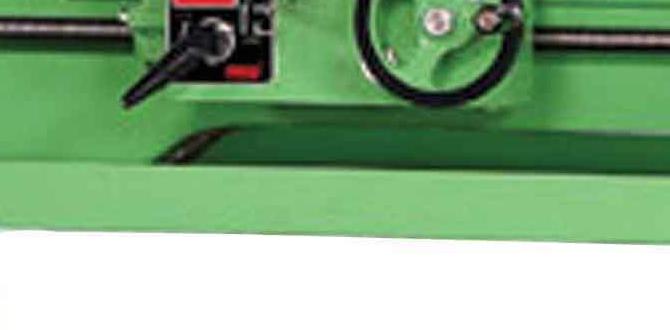
- Headstock: This is where the motor and drive mechanism are housed. It spins the workpiece.
- Tailstock: Located at the other end of the lathe bed, it supports the far end of the workpiece, especially for longer pieces. It can also be used to drill holes into the center of turning projects.
- Bed: The main structural element that connects the headstock and tailstock, providing a way to slide the tailstock and tool rest.
- Tool Rest: An adjustable arm that supports your chisels as you shape the wood.
- Motor: Powers the rotation of the headstock spindle. Portability often means lighter-duty motors, suitable for smaller to medium projects.
- Stand: The base that raises the lathe to a comfortable working height and provides stability.
- Spindle: The threaded rod extending from the headstock that fittings (like faceplates and drive centers) attach to.
The Undeniable Benefits of Choosing Portable
Why opt for portable when stationary models exist? The advantages are compelling, especially for hobbyists and those in smaller workshops. Let’s break them down:
- Space Efficiency: This is the big one. A portable lathe with a folding stand can shrink its footprint dramatically when not in use, fitting into corners, garages, or even being stored against a wall. This is a lifesaver for multi-use workspaces.
- Flexibility and Mobility: Need to work outside on a nice day? Moving to a different part of the workshop? A portable setup makes it easy. You can position it for optimal light or airflow, or simply move it out of the way.
- Cost-Effectiveness: Generally, portable wood lathes are more affordable than their larger, stationary counterparts. This makes them an excellent entry point for beginners who want quality without a massive initial investment.
- Ease of Setup: Most portable lathes with stands are designed for quick assembly and disassembly. You can often be up and running in minutes, rather than hours, and packed away just as quickly.
- Ideal for Smaller Projects: If your passion lies in crafting smaller decorative items, pens, bowls up to a certain size, or spindles, a portable lathe offers more than enough capacity.
- Reduced Vibration (with a Good Stand): While portability might suggest less stability, a well-designed stand is engineered to minimize vibration. This is critical for achieving smooth finishes and accurate results.
What to Look For in a Portable Wood Lathe with Stand
When you’re ready to buy, keeping a few key features in mind will ensure you select a tool that meets your needs and budget. As Daniel Bates of Lathe Hub, I always advise beginners to focus on these practical aspects:
Key Features to Consider:
- Swing and Distance Between Centers: These are the two primary capacity measurements. “Swing” refers to the largest diameter workpiece that can be turned over the bed (e.g., a 12-inch swing means you can turn objects up to 12 inches in diameter). “Distance between centers” (or bed length) dictates the maximum length of a workpiece you can accommodate. For beginners, a swing of 10-12 inches and a distance between centers of 16-18 inches is a good starting point.
- Motor Power (HP): More horsepower means more torque, which is helpful for larger workpieces or turning harder woods. For most portable lathes, 1/2 HP to 1 HP is common and sufficient for beginning projects. Look for variable speed control if possible.
- Variable Speed Control: This is a highly desirable feature. It allows you to adjust the rotational speed of the workpiece, which is crucial for safety and achieving different finishes depending on the wood and the turning operation. Lower speeds are safer for roughing out material and for beginners; higher speeds are used for finishing.
- Stand Stability and Adjustability: The stand is paramount for safe and effective operation. Does it fold easily? Is it sturdy and free of excessive wobble? Are there features like rubber feet or the option to bolt it down? Some stands are adjustable for height, which can improve ergonomics.
- Ease of Maintenance: Look for models that have easily accessible parts for lubrication and cleaning.
- Included Accessories: Some lathes come with a faceplate, spur drive center, and live tailstock center, which are essential for starting. Others require these to be purchased separately.
- Build Quality: Even on a portable model, robust construction is important. Cast iron components, where present, often indicate better durability and vibration dampening.
Table: Portable Wood Lathe Specifications for Beginners
To give you a clearer picture, here’s a comparison of typical specifications you might find:
| Feature | Entry-Level Portable (Example) | Mid-Range Portable (Example) |
|---|---|---|
| Motor Power | 1/2 HP | 3/4 HP – 1 HP |
| Swing Over Bed | 10 inches | 12 inches |
| Distance Between Centers | 16 inches | 18 inches |
| Speeds | Fixed or 5-Speed Manual Change | Variable Speed Control (Electronic) |
| Stand Type | Folding Steel Tube | Folding Steel Tube with Rubber Feet |
| Tabletop vs. Floor Standing | Often tabletop, requires separate sturdy bench | Usually floor-standing with attached stand |
Safety First: Essential Precautions for Portable Lathes
Regardless of the size or type of lathe, safety is paramount. Portable wood lathes, while generally less powerful, still carry risks if not operated correctly. Always remember: your hands are your most important tools, so protect them!
General Safety Guidelines:
- Read the Manual: Before you even plug it in, thoroughly read your lathe’s instruction manual.
- Wear Safety Gear: This is non-negotiable. Always wear a full face shield (not just safety glasses) to protect against flying debris. Consider a dust mask, especially for longer turning sessions.
- Proper Attire: Avoid loose clothing, jewelry, gloves, or anything that could get caught in the rotating workpiece. Tie back long hair.
- Secure the Lathe: Ensure the lathe is on a stable, level surface. If it’s a floor-standing model, make sure the stand is fully deployed and locked. If it’s a tabletop model, secure it firmly to a workbench. If your stand has provisions for bolting down, use them.
- Check Your Workpiece: Before mounting, inspect the wood for loose knots, cracks, or nails. These can cause the workpiece to break apart violently (a “catch”). For rough lumber, consider using wedging or other methods to prevent catastrophic failure.
- Mount Workpiece Securely: Ensure your spur drive, faceplate, or other mounting hardware is tightly secured to both the lathe spindle and the workpiece.
- Start Slowly: Begin turning at the lowest speed setting, especially when removing material or if the workpiece is uneven. Gradually increase speed as the workpiece becomes balanced.
- Tool Rest Placement: Position the tool rest close to the workpiece (but not touching) and at the correct height. For most operations, the top of the tool rest edge should be slightly below the center line of the workpiece.
- Tool Handling: Always hold your turning tools firmly with two hands and keep them in contact with the tool rest. Never reach over a rotating workpiece.
- Be Aware of Your Surroundings: Keep the area around the lathe clear of clutter and distractions.
Setting Up Your Portable Wood Lathe with Stand
Getting your new portable wood lathe ready for action should be straightforward. Most models are designed for quick assembly. Here’s a general guide;
Step-by-Step Setup:
- Unpack and Inspect: Carefully unpack all components. Check for any damage that might have occurred during shipping.
- Assemble the Stand: If your stand is foldable, unfold it and ensure all locking mechanisms are engaged. If it requires bolting parts together, follow the manual’s instructions precisely. Make sure it sits level.
- Mount the Lathe Bed: Place the lathe bed onto the stand. Many stands have mounting points or slots to secure the bed. Tighten any provided bolts or clamps firmly.
- Attach Headstock and Tailstock: Slide them into position on the bed. Ensure they are locked in place.
- Install Tool Rest Post: Insert the post into its receptacle on the lathe bed and adjust it to a suitable height, usually just below the center of where your workpiece will be.
- Connect Power: Plug the lathe into a suitable electrical outlet. Ensure the power switch is in the ‘off’ position before plugging in.
- Test Run (No Workpiece): Before mounting any wood, turn the lathe on at its lowest speed. Listen for any unusual noises or excessive vibrations. Let it run for a minute to ensure everything is functioning correctly.
- Mount Essential Accessories: Attach your spur drive center to the headstock spindle and the live tailstock center to the tailstock. Gently tighten them.
For more detailed information on safe setup and operation, the Occupational Safety and Health Administration (OSHA) provides guidelines on machine guarding and safe operating procedures that are relevant to all power tools, including lathes.
Your First Wood Turning Projects
Once your lathe is set up and you’re feeling confident, it’s time to turn! Start with simple projects to build your skills and get a feel for the tools and the machine.
Beginner-Friendly Project Ideas
- Pens: Pen kits are readily available and use small wood blanks. They’re excellent for practicing drilling, shaping, and finishing techniques.
- Small Bowls: Start with forgiving woods like pine or poplar. Focus on creating a simple cove and a bead, and learn to make a smooth rim.
- Mallet Handles or Tool Handles: Turning cylindrical shapes and adding simple tapers or flares is a fundamental skill.
- Spinning Tops: A fun project that teaches basic symmetry and balancing.
- Candlesticks: These often involve a series of simple turned sections and can be a great way to practice different shapes.
When selecting wood, hardwoods like maple, cherry, or walnut are popular choices for their grain and durability, but for early practice, softer woods are more forgiving. Always ensure your wood is properly dried to prevent warping or cracking.
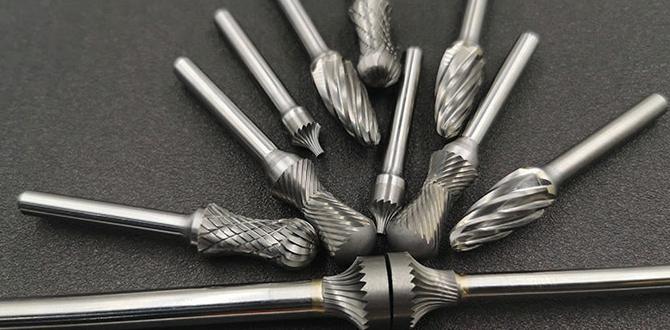
Essential Tools for Wood Turning
Beyond the lathe itself, you’ll need a set of turning tools to shape the wood. For beginners, a starter set is usually sufficient.
Must-Have Turning Tools:
- Spur Drive Center: Mounts into the headstock, biting into the end of the workpiece to drive it.
- Live Tailstock Center: Mounts into the tailstock and supports the other end of the workpiece, rotating with it to reduce friction (unlike a dead center).
- Faceplate: A flat disc that screws onto the headstock spindle, used for mounting larger diameter workpieces like bowls.
- Gouges: These are the primary shaping tools. You’ll likely start with a spindle gouge (for spindle work) and a bowl gouge (for bowls).
- Scrapers: Used to smooth surfaces, especially on bowls.
- Skew Chisel: A versatile tool used for making cuts, scraping beads, and smoothing.
- Safety Gear: As mentioned, a face shield is critical.
Learning to sharpen your tools is also a vital skill and will improve your turning immensely. A dull tool is not only ineffective but also dangerous.
Maintaining Your Portable Wood Lathe
To ensure your portable wood lathe and stand provide reliable service for years to come, a little regular maintenance goes a long way.
Routine Maintenance Checklist:
- Cleanliness: After each use, wipe down the lathe bed, headstock, and tailstock to remove sawdust and wood shavings. This prevents dust buildup that can affect smooth operation.
- Lubrication: Check your manual for recommended lubrication points. The ways (tracks) of the lathe bed and the tailstock quill often benefit from a light oiling.
- Check Belts: Periodically inspect the drive belt for cracks or wear. Ensure it’s properly tensioned according to the manufacturer’s instructions.
- Fastener Check: Make sure all bolts and screws, especially those holding the lathe to the stand and the headstock/tailstock locking mechanisms, are tight.
- Stand Stability: Regularly check that the stand is solid and all folding/locking mechanisms are functioning correctly.
- Electrical Connections: Visually inspect the power cord and plug for any damage.
Following these steps will help maintain the performance and safety of your equipment. You can find excellent resources on machinery maintenance from universities like the U.S. Forest Service, offering practical advice applicable to various woodworking machines.
When to Upgrade: Recognizing Limitations
While portable wood lathes are fantastic for many, there are times when you might outgrow one. Recognizing these limitations is part of your growth as a woodworker.
Signs You Might Need a Larger Lathe:
- Consistently working with very large diameters or lengths: If you find yourself frequently limited by the swing or distance between centers.
- Turning dense hardwoods for extended periods at lower speeds: This requires more power and torque than many portable lathes can comfortably provide.
- Experiencing excessive vibration even with proper setup: This can indicate a machine that’s struggling with the load or lacks the mass for stability.
- Desiring advanced features: Larger, stationary lathes often come with more robust build quality, higher horsepower, more sophisticated electronic controls, and better dust collection integration.