Roughing end mills remove material quickly, while finishing end mills create smooth surfaces. Understanding this difference is key to efficient machining, especially with materials like PEEK, preventing tool wear, and achieving high-quality results with your end mills.
Hey everyone, Daniel Bates here from Lathe Hub! Ever found yourself staring at your end mill collection, wondering which one to grab for your next project? It’s a common puzzle, especially when you’re just starting out in the machining world. You’ve got that amazing idea for a PEEK part, but picking the right tool can make the difference between a perfect finish and a costly mistake. Don’t worry, I’ve been there! Today, we’re going to demystify the world of roughing and finishing end mills. We’ll dive into what makes them different, when to use each one, and how they’ll help you achieve those crisp, clean cuts you’re aiming for.
Think of it like this: building a sculpture often starts with a rough chisel to quickly shape the block of stone, followed by finer tools to add detail and polish. Machining with end mills is much the same! We’ll explore their unique designs, how they interact with materials like tough PEEK, and the benefits they bring to your workshop. Get ready to gain some confidence and precision!
What Exactly Are End Mills? A Quick Refresher
Before we tackle the roughing versus finishing debate, let’s quickly revisit what an end mill is. In simple terms, an end mill is a type of milling cutter used to create straight and irregular shapes, pockets, and slots in a workpiece. Unlike a drill bit, which is designed primarily for making holes downwards, end mills can cut sideways as well as downwards. They have cutting edges along their sides and at their tip.
The design of an end mill – its geometry, flutes (the spiral grooves), material, and coatings – determines its performance. This variety is what leads us to specialized types like roughing and finishing end mills. Knowing these basics helps us appreciate why different designs are needed for different tasks.
PEEK: The Material That Needs the Right Touch
We’re focusing on PEEK (Polyetheretherketone) because it’s a fantastic, high-performance polymer, but it can be a bit tricky to machine if you don’t have the right approach. PEEK offers excellent mechanical strength, thermal resistance, and chemical stability, making it a go-to for demanding applications in aerospace, medical, and automotive industries. However, it’s also a thermoplastic, meaning it can soften and melt when subjected to heat, which is easily generated during machining.
This is where the right end mill becomes CRUCIAL. If you use an inefficient tool or the wrong machining strategy, you risk:
- Melting the PEEK, leading to poor surface finish and gummy chip formations.
- Excessive tool wear because the material sticks to the cutting edges.
- Poor dimensional accuracy of your part.
- Unnecessary stress on your milling machine.
Let’s see how our two main players, the roughing and finishing end mills, help us tackle these challenges with PEEK specifically.
Roughing End Mill vs. Finishing End Mill: The Core Differences
The fundamental difference between a roughing end mill and a finishing end mill lies in their geometry and intended purpose. They are designed to perform distinct roles in the machining process, working together to efficiently and accurately shape your material.
Roughing End Mills: The Material Removers
Imagine you have a large block of material and you need to quickly remove a significant amount of it to get close to your final shape. That’s the job of a roughing end mill. They are designed for aggressive material removal.
Key Features of Roughing End Mills:
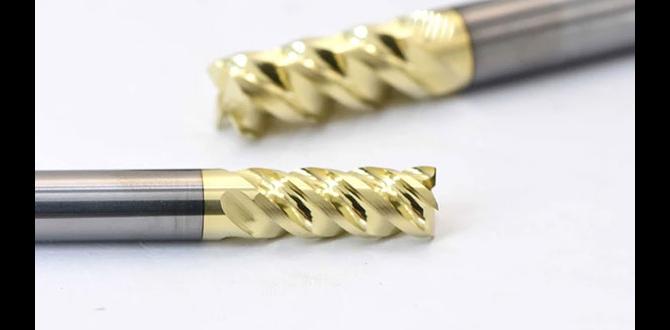
- Irregular Flute Geometry: This is their defining characteristic. Instead of smooth, sharp flutes, roughing end mills have a scalloped or chipped edge along the flute. This creates a more aggressive cutting action, breaking chips into smaller, manageable pieces.
- High Helix Angle: Often featuring a high helix angle, these end mills can shear material more effectively and help evacuate chips.
- More Flutes: Roughing end mills typically have more flutes (commonly 4, 6, or even 8) compared to some finishing end mills. This allows for more cutting edges to engage with the material simultaneously.
- Durability Over Surface Finish: Their primary goal is speed and efficiency in material removal, not a mirror-smooth finish.
How They Work with PEEK:
When machining PEEK, the aggressive, chip-breaking action of a roughing end mill is beneficial. It helps to prevent long, stringy chips that can melt and clog the flutes or re-weld onto the workpiece. The rougher geometry also helps to keep cutting forces somewhat lower per cutting edge, distributing the load and potentially reducing heat buildup per contact point, compared to a less aggressive tool trying to remove the same volume of material so quickly.
However, you must still use appropriate speeds and feeds for PEEK to avoid melting. Roughing PEEK with a roughing end mill is about making progress, getting close to the final dimensions efficiently, but you’ll still need a finishing pass.
Finishing End Mills: The Detail Makers
Once the bulk of the material is removed, you need to refine the shape, achieve precise dimensions, and create a smooth, aesthetically pleasing surface. That’s where the finishing end mill comes in.
Key Features of Finishing End Mills:
- Smooth, Sharp Flutes: These end mills have clean, sharp, and smooth cutting edges along their flutes. This design minimizes friction and allows the tool to glide through the material, leaving a polished surface.
- Lower Helix Angle (Often): While not always the case, many finishing end mills have a lower helix angle or even a square end on the tip. This provides a flat cutting face for excellent surface finish.
- Fewer Flutes: Typically, finishing end mills have 2 or 4 flutes. Less flute count usually means more space for chips to evacuate and less interference with the finished surface.
- Precision Over Speed: Their focus is on accuracy, tight tolerances, and a superior surface finish.
How They Work with PEEK:
For PEEK, a finishing end mill is essential for achieving that final, smooth surface required for many applications. The smooth flutes reduce friction, minimizing the heat generated during the cut, which is critical for preventing melting and material deformation. The sharp cutting edges cleanly shear the material, producing a better surface finish than a rougher could. You’ll typically use higher spindle speeds and slower feed rates for finishing PEEK to ensure a clean cut and prevent heat buildup.
Types of Roughing and Finishing End Mills
Within the categories of roughing and finishing, there are specific designs that further optimize their performance. Here are a few common types you’ll encounter, often relevant for PEEK machining:
For Roughing:
- High-Feed Roughing End Mills: These tools feature very aggressive corner geometries and often a parabolic flute shape. They are designed to take very shallow depths of cut at very high feed rates, which can be very efficient for certain materials and setups. While powerful, they require rigid machines and precise setup.
- Crusher Roughing End Mills: These have a distinctly serrated or “crushed” cutting edge. This geometry breaks chips into very fine particles as it cuts, offering excellent chip control even in tougher materials. They are aggressive and produce a rougher surface, ideal for initial material removal.
- General Purpose Roughers: These are the workhorses. They have chipped or scalloped edges and are good all-rounders for removing material quickly.
For Finishing:
- Square End Mills: These are the most common. They have a flat tip with sharp 90-degree corners. They’re versatile for pocketing, profiling, and facing operations where sharp internal corners are acceptable.
- Ball Nose End Mills: These have a rounded tip. They are excellent for creating contoured surfaces, 3D shapes, and fillets. For PEEK, a ball nose is often used in multi-axis machining for smooth, flowing surfaces, and is also great for creating fillets in pockets.
- Corner Radius End Mills: These are a hybrid, with square edges that have a small radius at the corner. This strengthens the corner, making it less prone to chipping, while still providing a relatively sharp corner for profiling and pocketing. This can be a good choice for finishing PEEK if you need slightly more robust corners than a pure square end mill.
- Compression End Mills: These are very effective for finishing sheet materials, often used in CNC routers for woodworking and plastics. They have an up-spiral and down-spiral cutting edge, allowing them to deburr the top and bottom surfaces simultaneously, leaving a clean edge. While often used in routers, the principle of a clean cut is vital for PEEK.
Roughing End Mill vs. Finishing End Mill for PEEK: A Comparison Table
To really hammer home the differences, let’s look at a side-by-side comparison. This table highlights the key distinctions and how they apply to machining PEEK.
| Feature | Roughing End Mill | Finishing End Mill |
|---|---|---|
| Primary Goal | Rapid material removal | Precise sizing and smooth surface finish |
| Cutting Edge Geometry | Scalloped, chipped, or serrated | Smooth, sharp, and clean |
| Chip Formation | Breaks chips into smaller pieces | Creates finer chips; primarily concerned with clean shearing |
| Application on PEEK | Bulk material removal, getting close to final dimensions | Achieving tight tolerances and smooth surface finish |
| Surface Finish Produced | Rough, less precise | Smooth, precise, often polished |
| Tool Life (High Material Removal Rate) | Designed for durability during aggressive cutting | Less optimized for bulk removal; can wear quickly if pushed too hard |
| Heat Generation (per pass) | Can generate significant heat due to aggressive cutting; chip breaking helps manage it. | Lower heat generation per pass when used correctly; critical for PEEK. |
| Common Flute Count | 4, 6, 8 | 2, 4 |
The Two-Step Process: Roughing Then Finishing
For most machining operations, especially with a material like PEEK, employing a two-step machining strategy is the most effective approach:
- Roughing Step: Start with a roughing end mill. Use it to remove the bulk of the material, getting your part close to its final desired dimensions. This might involve taking deeper cuts and higher feed rates where appropriate, all while managing chip load and monitoring for signs of overheating PEEK. The goal here is efficiency and gross shape creation.
- Finishing Step: Once the roughing is complete, switch to a finishing end mill. Use this tool for the final cuts. These cuts are typically much shallower (e.g., 0.010″ to 0.030″ stock to leave) and often at slower feed rates. This step refines the geometry, achieves the precise dimensions, and creates the smooth surface finish required.
This strategy is not just about achieving a better result; it’s also about maximizing tool life. Roughing end mills are built to withstand the stresses of heavy material removal, and finishing end mills are designed for the precision of light, fast cuts. By using each tool for its intended purpose, you prevent premature wear and ensure optimal performance.
Material Considerations for PEEK Machining
When machining PEEK, even with the right end mills, several factors are critical to success. These are general guidelines, and you should always consult the specific material datasheets and recommended machining parameters for the exact grade of PEEK you are using.
Recommended Speeds and Feeds:
PEEK generally benefits from higher spindle speeds and moderate to high feed rates, but the “sweet spot” is crucial to avoid melting. The goal for PEEK is to cut faster than the heat can conduct into the material. This is often referred to as “high-speed machining” principles.
- Surface Speed (SFM/SMM): Look for recommendations that often fall into the higher end for plastics, but not so high that it melts. For instance, a range of 200-600 SFM (60-180 SMM) might be a starting point for some PEEK grades, but always verify.
- Feed Per Tooth (IPT/IPM): This is critical. You want to remove material effectively without overloading the tool or generating excessive heat. Often, for PEEK, you’ll see recommendations for a solid feed rate designed to create a good chip. A good rule of thumb for finishing is to leave a small amount of material for finishing (e.g., 0.010″ – 0.020″) and then use very light, fast finishing passes.
Coolant/Lubrication:
For PEEK, dry machining is often preferred to avoid contaminating the material or causing thermal shock. If coolant is absolutely necessary for chip evacuation or tool cooling (especially during aggressive roughing), use a high-pressure air blast or a mist coolant system designed for plastics. Avoid flood coolants, as they can introduce excessive moisture and cooling that might not be ideal for PEEK’s properties and can make chip evacuation difficult.
Tool Material and Coatings:
- Carbide: Solid carbide end mills are almost always the preferred choice for machining PEEK. They offer the necessary stiffness and heat resistance.
- Coatings: While TiN or TiCN coatings can offer some benefit, they are often unnecessary or even detrimental for PEEK if they increase friction too much. For PEEK, a non-coated, highly polished carbide tool is often the best choice. Some specialized coatings for plastics might be beneficial, but research is key.
For more detailed machining guidelines on plastics, the Carbide Process Shop offers valuable industry insights into machining advanced polymers.
Common Mistakes to Avoid
When you’re learning, making mistakes is part of the process. Here are a few common pitfalls to watch out for when roughing and finishing, especially with PEEK:
- Using the wrong end mill for the job: Trying to rough out large volumes of material with a finishing end mill will dull it rapidly. Conversely, using a roughing end mill for a fine finish will leave a terrible surface.
- Incorrect speeds and feeds: This is paramount for PEEK. Too slow a speed or too fast a feed can lead to melting. Too fast a speed or too slow a feed can lead to chatter or poor chip formation.
- Not managing chip load: If chip load is too small, the tool isn’t cutting effectively and can rub, creating heat. If it’s too large, you risk tool breakage or overloading the spindle.
- Ignoring heat buildup: For PEEK, heat is the enemy. Always be mindful of how hot the tool and workpiece are getting.
- Not leaving stock for finishing passes: If you machine directly to final size with a roughing end mill, you won’t get a good finish. Always leave a small amount of material (e.g., 0.010″ – 0.020″) for the finishing pass.
- Using a dull tool: A dull end mill will generate more heat, require more force, and produce a poor-quality cut. It’s always better to swap for a sharp tool.
Step-by-Step: Machining a Simple PEEK Part
Let’s walk through a hypothetical simple part – say, a small rectangular block with a central pocket. This will illustrate the roughing and finishing process.
Phase 1: Roughing
Tools Needed:
- A 1/4″ or 1/2″ solid carbide roughing end mill suitable for plastics (e.g., chipped edge, high feed rougher).
- Your milling machine setup.
- Measuring tools (calipers, micrometer).
- Safety glasses and hearing protection.
Steps:
- Secure Workpiece: Clamp your PEEK material firmly on the milling machine table. Ensure it’s indicated in and square.
- Set Up Tool: Install the roughing end mill into your milling machine’s collet.
- Program Roughing Passes:
- Outside Profile: Program a contour pass to cut the external dimensions of your part. Use a step-over (e.g., 50-75% of tool diameter) and a depth of cut appropriate for your machine and material
- Outside Profile: Program a contour pass to cut the external dimensions of your part. Use a step-over (e.g., 50-75% of tool diameter) and a depth of cut appropriate for your machine and material


