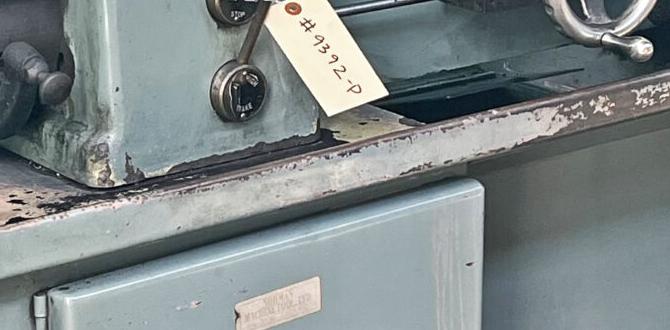
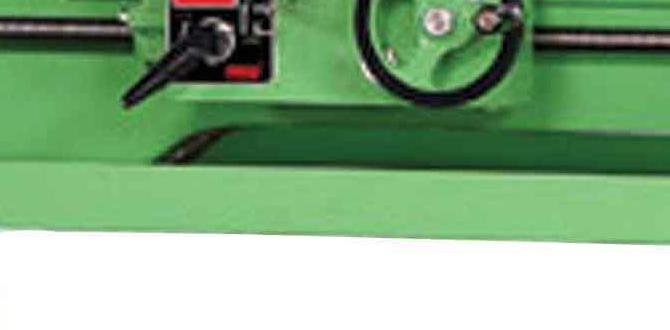
A steady rest for lathes is a vital accessory that supports long, slender workpieces to prevent them from sagging or vibrating during machining. It significantly improves accuracy and finish while allowing for higher cutting speeds and deeper cuts, making it essential for anyone working with challenging stock on their lathe.
Working with long, thin workpieces on a lathe can be a real head-scratcher when you’re starting out. They have a tendency to wobble, vibrate, or even bow under the cutting tool’s pressure. This makes it incredibly difficult to get a clean cut or a precise shape. It’s a common problem that can leave you feeling frustrated. But don’t worry! There’s a fantastic tool that solves this issue: the steady rest. This guide will walk you through everything you need to know about steady rests, from what they are to how to use them effectively, so you can tackle those challenging projects with confidence.
What is a Steady Rest for Lathes?
At its core, a steady rest is a lathe accessory designed to provide external support to a long workpiece. Unlike a chuck or faceplate that holds one end of the material, a steady rest supports the workpiece from the side, typically near the cutting tool. This support is crucial for preventing deflection and vibration, especially when machining long, thin shafts, rods, or tubes.
Imagine trying to balance a long noodle on a table – it’s going to bend. Now imagine holding that noodle in a few places along its length to keep it straight. That’s essentially what a steady rest does for your workpiece on the lathe. It stops that undesirable bending and wobbling, allowing for more accurate and cleaner machining.
Why Use a Steady Rest? The Core Benefits
Using a steady rest isn’t just about making things easier; it’s about achieving results that would otherwise be impossible or extremely difficult. Here are the key advantages:
Improved Accuracy: By minimizing deflection, a steady rest ensures your workpiece maintains a straighter axis, leading to more precise dimensions throughout the length of your part.
Enhanced Surface Finish: Less vibration means a smoother finish on your workpiece. The cutting tool can engage with the material more cleanly, reducing chatter marks and rough surfaces.
Ability to Machine Longer Workpieces: Without a steady rest, the practical length of a workpiece you can machine is limited by its own stiffness. A steady rest extends this limit considerably.
Increased Cutting Efficiency: With proper support, you can often use higher spindle speeds and take deeper cuts without compromising the part or your tools. This translates to faster machining times.
Reduced Tool Wear: Less chatter and vibration mean your cutting tools experience less stress, potentially extending their lifespan.
Support for Out-of-Round or Irregularly Shaped Stock: While primarily for cylindrical parts, some steady rests can be adapted to help stabilize slightly out-of-round stock for initial operations.
Types of Steady Rests
While the basic function of all steady rests is the same, there are a few variations you might encounter. Understanding these can help you choose the right one for your needs.
1. Conventional (Conventional Jaw) Steady Rest
This is the most common type. It features adjustable jaws that press against the workpiece. These jaws are typically made of a material that won’t damage the workpiece, such as brass, bronze, or nylon, or they might have rollers.
Construction: Usually consists of a frame that clamps to the lathe bed, and an adjustable head that holds three or four jaws.
Adjustment: The jaws are moved in or out using screws to contact the workpiece.
Best For: General-purpose turning and supporting of cylindrical workpieces.
2. Roller Steady Rest
Similar in concept to the conventional type, but instead of solid jaws, it uses rollers to contact and support the workpiece.
Construction: The frame clamps to the lathe bed, and the head contains three rollers.
Adjustment: The rollers can be adjusted to apply pressure.
Best For: Applications where minimizing surface marking is critical, or when dealing with harder materials where friction from solid jaws could be an issue. Rollers also tend to offer smoother operation with less binding.
3. Traveling Steady Rest
This type is usually built into the lathe itself or is a more complex accessory. It moves along the lathe bed with the carriage, meaning the support is always directly adjacent to the cutting tool.
Construction: Integrates with or mounts directly to the lathe carriage.
Adjustment: Jaws or rollers are adjusted against the workpiece.
Best For: Very long workpieces or operations requiring continuous support along the entire length of the cut. These are less common on smaller hobbyist lathes.
Anatomy of a Steady Rest: Key Components
To effectively use a steady rest, it’s helpful to understand its main parts:
Frame/Body: This is the main housing that attaches to the lathe bed. It provides a stable structure for the rest of the components.
Jaws (or Rollers): These are the parts that make direct contact with the workpiece. Typically, there are three: two below and one above, or two on the sides and one below, depending on the design. They are adjustable.
Adjustment Screws: These are used to move the jaws in or out to precisely contact and support the workpiece.
Clamping Mechanism: This secures the steady rest to the lathe bed. It’s crucial for stability.
How to Use a Steady Rest: A Step-by-Step Guide
Using a steady rest is a straightforward process, but it requires careful setup to be effective and safe. Here’s a common method for setting up a conventional jaw steady rest:
Step 1: Prepare Your Lathe and Workpiece
Clean: Ensure your lathe bed ways are clean and free of debris.
Mount Workpiece: Secure your workpiece in the chuck or between centers. For this guide, let’s assume you’re using between centers, as it’s a common scenario for steady rest use. Ensure plenty of stock overhangs the headstock.
Rough Turn (Optional but Recommended): If possible, turn down a section of your workpiece where the steady rest will sit to a consistent diameter. This makes aligning and setting the steady rest much easier and more accurate. Aim for a diameter slightly larger than your final intended diameter for that section.
Step 2: Position the Steady Rest
Measure: Determine where you need the support. This is usually a few inches away from the chuck or tailstock, but always positioned close to the area you will be machining.
Align: Place the steady rest frame onto the lathe bed so it’s aligned with your workpiece. Ensure the clamping mechanism can engage the bed securely.
Loosely Clamp: Lightly secure the steady rest to the bed. You’ll need to be able to slide it slightly for fine adjustments, but it shouldn’t move during the next steps.
Step 3: Adjust the Jaws
This is the most critical part. The goal is to have the jaws gently but firmly supporting the workpiece without distorting it.
Loosen Jaws: Completely retract the adjustment screws so the jaws are pulled back from the workpiece.
Center: Ensure the steady rest’s opening is roughly centered on the workpiece diameter where it will make contact.
Advance Jaws: Slowly advance each jaw using its adjustment screw.
Trial and Error: For each jaw, advance it until it just starts to make light contact with the workpiece.
Spin Check: Carefully give the workpiece a manual spin (with power off!). You should feel a slight resistance from each jaw.
Sequential Tightening: For a three-jaw rest, advance one jaw, then the opposing jaw (often the bottom two), and then the third jaw. Advance them incrementally. The goal is to have all three jaws supporting the workpiece equally.
Lubrication: Apply a bit of cutting fluid or grease to the contact points on the jaws and the workpiece where they meet. This reduces friction and prevents scoring. For machining metal, use appropriate cutting fluid. For wood, wax or a light oil might suffice.
The “Touch” Test: Once you think they are adjusted, put the workpiece into a gentle spin with the lathe at a very low RPM. You should feel a consistent, light drag from the jaws. If you feel a tight spot in one area and no drag in another, readjust. The workpiece should spin freely but without any wobble.
A good test: try to slide a piece of thin paper between the jaw and the workpiece. You should be able to slide it with just a bit of resistance. If it tears, it’s too tight. If it slides freely with no drag, it’s too loose.
Step 4: Secure the Steady Rest
Tighten: Once the jaws are properly adjusted, securely tighten the steady rest’s clamping mechanism to the lathe bed. This is crucial for stability.
Step 5: Machining
Start Slow: Begin your machining operation at a very low spindle speed and take light cuts.
Monitor: Continuously monitor for any signs of vibration, chatter, or excessive noise. If you hear or see anything unusual, stop the lathe immediately and re-check your steady rest setup.
Advance as Needed: As you progress with your cuts and the workpiece diameter reduces, you may need to readjust the steady rest jaws to maintain proper support. Remember to do this with the lathe off.
Tips for Success with Your Steady Rest
Workpiece Preparation: The cleaner and more consistent the surface where the steady rest jaws make contact, the better the results. If you are turning a long shaft, it’s often beneficial to turn down the area for the steady rest to a smooth, precise diameter before setting it up.
Lubrication is Key: Always use appropriate lubrication (cutting fluid for metal, wax or oil for wood) at the jaw contact points. This prevents galling, scoring, and overheating.
Don’t Overtighten: The jaws should support, not constrict, the workpiece. Overtightening can distort the workpiece, leading to inaccurate measurements and even snapping brittle materials. Think “gentle support” rather than “crushing grip.”
Align with Carriage: Ideally, the steady rest should be positioned such that its travel is aligned with the travel of your lathe’s carriage. This ensures you can machine the entire length if needed.
Consider Roller Rests: If you frequently work with softer metals or materials prone to marring, or if you’re aiming for the absolute smoothest finish, a roller steady rest might be a worthwhile investment.
Practice Makes Perfect: Setting up a steady rest can seem daunting at first, but with practice, you’ll develop a feel for the correct jaw pressure and alignment.
When to Move the Steady Rest
You’ll need to reposition and readjust the steady rest whenever your machining operation moves past its current support point.
Machining Longer Sections: If you’ve fully machined the section supported by the steady rest and need to move further down the workpiece, you’ll stop the lathe, loosen the steady rest clamp, slide it along the bed to the next support position, re-adjust the jaws, and then re-clamp it.
Changing Operations: If you’re switching from turning one diameter to a significantly different diameter, or performing other operations that would interfere with the current steady rest position, you’ll need to reposition it.
A good rule of thumb is to always have the steady rest support the workpiece as close as practically possible to where your cutting tool is working. This provides the most effective support.
Steady Rest vs. Follower Rest
It’s important not to confuse a steady rest with a follower rest, as they serve different but complementary purposes on a lathe.
| Feature | Steady Rest | Follower Rest |
|---|---|---|
| Purpose | Supports long workpieces from the lathe bed, preventing sag and vibration. | Supports the workpiece directly behind the cutting tool, attached to the carriage. |
| Mounting | Clamps to the lathe bed. | Attaches to the lathe carriage. |
| Support Points | Typically 3 or 4 jaws (or rollers) that contact the workpiece. | Typically 1, 2, or 3 hardened blocks or rollers that follow the tool. |
| Movement | Manually moved along the bed as needed. | Moves automatically with the carriage. |
| Primary Use | Turning long shafts, tubes, lengthy spindles. | Turning long, slender diameters where deflection is a major issue during the cut. Often used for multiple passes where the diameter is progressively reduced. |
Think of it this way: a steady rest provides overall stability across a long span, while a follower rest provides pinpoint support directly at the point of cutting action. They are often used together for very challenging long parts – the steady rest provides general stability, and the follower rest ensures extreme rigidity right at the tool face.
Safety First! Using Your Steady Rest Responsibly
Safety is paramount in any machining operation, and using a steady rest is no exception.
Secure Mounting: Ensure the steady rest is firmly clamped to the lathe bed. A rogue steady rest is a serious hazard.
Proper Jaw Adjustment: As mentioned, overtightening can be dangerous, potentially causing the workpiece to break or the steady rest to shift. Undertightening means it won’t do its job and the workpiece could still vibrate excessively.
Clearance: Make sure the steady rest does not interfere with any other part of the lathe or the toolpath of your cutting tools on any part of the workpiece.
Lubrication: Avoid dry operations between the jaws and workpiece. Use appropriate lubricants to prevent binding and damage.
Power Off for Adjustments: Always turn off the lathe power before making any adjustments to the steady rest jaws or position.
Material Properties: Be aware of the material you are working with. Brittle materials can fracture, and very soft materials can be deformed by excessive pressure.
Troubleshooting Common Steady Rest Issues
Even with the best intentions, you might run into a few snags. Here are some common problems and their solutions:
Workpiece Vibrates or Bounces:
Cause: Jaws are too loose, or not evenly adjusted.
Solution: Re-adjust jaws, ensuring even contact and slight resistance on all. Check that the steady rest is tightly clamped to the bed.
Scoring or Galling on Workpiece:
Cause: Insufficient lubrication, jaws are too tight, or jaws are damaged/dirty.
Solution: Ensure adequate lubrication. Loosen jaws slightly. Clean jaws thoroughly and check for nicks or burrs. Consider using softer jaw material if appropriate for your material.
Workpiece is Out-of-Round After Machining:
Cause: Uneven jaw pressure, steady rest not properly aligned with lathe axis.
Solution: Ensure jaws are adjusted to support evenly. Re-check alignment of the steady rest relative to the lathe centerlines. For very long parts, you might need to “sweep” the workpiece to check runout before and after cuts.
Cannot Achieve Desired Cut Depth:
Cause: Steady rest is not providing enough support, or is deforming the workpiece.
Solution: Ensure steady rest is positioned optimally close to the cut. Re-verify jaw pressure – you need support but not distortion. It might also indicate the need for a follower rest for more localized support directly behind the tool.
External Resources for Further Learning
For more in-depth information and technical specifications on lathe operation and accessories, consider exploring resources from reputable machining organizations and educational institutions.
Machinery’s Handbook: This is the bible of metalworking. It contains extensive tables, formulas, and practical information on all aspects of machining, including the use of rests. You can find many editions and online references for this invaluable tool (e.g., Industrial Press).
Community College and University Machine Shop Curricula: Many technical schools and engineering departments offer online resources or public access to their course materials that cover lathe accessories. Searching for “lathe steady rest operation” on sites like MIT OpenCourseware or through university engineering departments can yield excellent, academically sound information.
* Reputable Tool Manufacturers: Companies that produce lathes and accessories, such as Grizzly Industrial, Sherline, or Haas Automation (though Haas is more industrial scale), often have product manuals and support sections on their websites that detail the use of their specific steady rests.
Frequently Asked Questions (FAQ)
What is the primary function of a steady rest on a lathe?
The main purpose of a steady rest is to provide external support to long, slender workpieces. It prevents them from sagging due to gravity, vibrating during cuts (chatter), and deforming, thereby allowing for more accurate and cleaner machining of longer parts.
How do I know if I need a steady rest?
You likely need a steady rest if you are machining workpieces that are significantly longer than their diameter and you experience issues like wobbling, excessive vibration, or your part coming out bowed or inaccurate. Generally, if the length-to-diameter ratio is 4:1 or more, and you’re having trouble, a steady rest is a good idea.
How tight should the jaws of a steady rest be?
The jaws should be adjusted to support the workpiece firmly enough to prevent wobble, but not so tight that they distort or deform the material. It should spin freely with only slight resistance from each jaw. A good test is to try sliding a thin piece of paper between the jaw and workpiece; it should drag slightly