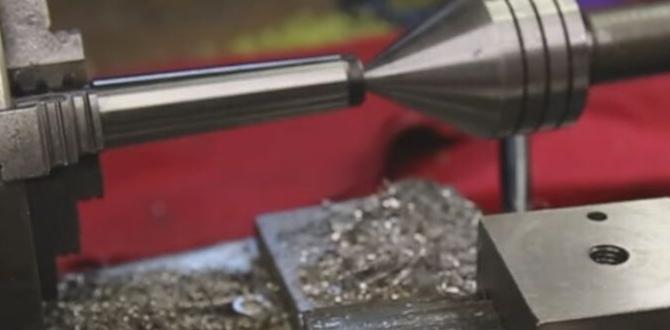
Tialn ball nose end mills make clearing mild steel easy and efficient for beginners by offering superior hardness, heat resistance, and a smooth finish, preventing chips from sticking.
Are you new to milling and finding it tough to efficiently remove material from mild steel? Maybe your chips are sticking, or the tool feels like it’s struggling. Don’t worry, many beginners face these challenges. The good news is, there’s a tool that can make a world of difference: the TiAlN ball nose end mill. With the right approach, you can achieve clean, fast material removal, even with mild steel. This guide will walk you through how to use this fantastic tool, step-by-step.
<h1>Why TiAlN Ball Nose End Mills Shine for Mild Steel</h1>
Mild steel is a common material for all sorts of projects, from brackets to custom parts. However, it can be a bit gummy to machine, meaning chips can stick to the cutting edges, leading to poor finish and tool breakage. That’s where a specially coated ball nose end mill like one with a TiAlN coating comes in.
<h2>Understanding the Magic: TiAlN Coating</h2>
The “TiAlN” in the name stands for Titanium Aluminum Nitride. This isn’t just a fancy coating; it’s a game-changer for milling operations, especially with materials like mild steel.
<ul>
<li><strong>Superior Hardness:</strong> The TiAlN coating is incredibly hard, which means it resists wear much better than an uncoated tool. This is crucial for maintaining sharp edges as you cut.</li>
<li><strong>Heat Resistance:</strong> Machining generates heat. TiAlN’s high thermal stability prevents the coating from breaking down at elevated temperatures. It also creates a thermal barrier between the tool and the workpiece, reducing heat transfer into the mild steel.</li>
<li><strong>Reduced Friction:</strong> This coating has a slick surface that helps chips glide off the cutting edges more easily. Less sticking means cleaner cuts and a longer tool life.</li>
<li><strong>Improved Chip Evacuation:</li> Because chips don’t stick as much, they are evacuated more freely from the cutting zone. This is especially important when milling “gummy” materials like mild steel.</li>
</ul>
<h2>The Ball Nose Advantage</h2>
A ball nose end mill has a rounded tip, like half a sphere. This shape is perfect for creating curved surfaces, milling pockets with rounded bottoms, and performing 3D contouring. For clearing material, its radiused tip can help manage chip loads more smoothly.
<h3>Why a 35-Degree Helix Angle for Mild Steel?</h3>
You might see “35-degree” mentioned. This refers to the helix angle of the flutes. While a 35-degree helix angle isn’t the most screamingly common for all milder steels, it offers a good balance. Higher helix angles (like 45 or 60 degrees) are generally better for softer, gummy materials like aluminum, as they provide more shearing action. Lower helix angles (like 30 degrees or less) are often preferred for harder materials because they offer more rigidity.
A 35-degree helix angle sits in a nice middle ground. For mild steel, it can offer a decent shearing action for smoother cuts without sacrificing too much rigidity. It’s a versatile choice that performs well in many situations for beginners who are still learning the nuances of different steel grades and their machining behavior.
<h2>When to Use Your TiAlN Ball Nose End Mill</h2>
This tool is particularly well-suited for:
<ul>
<li><strong>Adaptive Clearing:</strong> This is a highly efficient machining strategy where the tool path continuously engages the material with a consistent depth of cut and a large stepover. A ball nose end mill can be excellent for this in 3D pockets.</li>
<li><strong>Pocketing:</strong> Creating enclosed areas with smooth, radiused internal corners.</li>
<li><strong>3D Contouring:</strong> Machining complex, curved shapes and surfaces.</li>
<li><strong>Finishing:</strong> Leaving a smooth surface finish on curved or complex geometries.</li>
</ul>
<h1>Step-by-Step: Effortless Mild Steel Clearing with Your TiAlN Ball Nose End Mill</h1>
Let’s get down to business! Here’s how to use your trusty TiAlN ball nose end mill to clear mild steel efficiently and safely.
<h2>Step 1: Gather Your Essential Tools and Safety Gear</h2>
Before you even think about turning on the machine, make sure you have everything ready. Safety first, always!
<ul>
<li><strong>TiAlN Ball Nose End Mill:</strong> Ensure it’s the correct diameter and fluting for your task.</li>
<li><strong>Collet Chuck or Tool Holder:</strong> A good quality, runout-compensated holder is key to precision and tool life.</li>
<li><strong>R8 Collets (if applicable):</strong> Properly sized collets for your mill.</li>
<li><strong>Machining Lubricant/Coolant:</strong> Crucial for mild steel to prevent sticking and overheating. A mist coolant system or a good quality cutting fluid works well. The U.S. Department of Labor’s Occupational Safety and Health Administration (OSHA) provides guidelines on controlling exposure to metalworking fluids, emphasizing the importance of proper ventilation and fluid management for worker health.</li>
<li><strong>Workholding:</strong> Vises, clamps, or fixtures that securely hold your mild steel workpiece.</li>
<li><strong>Safety Glasses:</strong> Always wear them!</li>
<li><strong>Face Shield (Recommended):</strong> Extra protection for your face.</li>
<li><strong>Gloves:</strong> To handle sharp tools and workpieces.</li>
<li><strong>Dust Mask/Respirator:</strong> For fine metal dust.</li>
<li><strong>Chip Brush and Shop Vacuum:</strong> For clearing chips safely.</li>
</ul>
<h2>Step 2: Secure Your Workpiece</h2>
A well-secured workpiece is fundamental to safe and accurate machining.
<ol>
<li><strong>Clean Surfaces:</strong> Ensure the vise jaws and the workpiece surfaces are clean of oil and debris.</li>
<li><strong>Position Appropriately:</strong> Place the workpiece firmly against the fixed jaw of your vise. Ensure it’s seated squarely.</li>
<li><strong>Tighten Securely:</strong> Tighten the vise until the workpiece is firmly held. Use a decent amount of force, but don’t overtighten to the point of deforming the part (unless that’s a specific design requirement).</li>
<li><strong>Indicator Check (Optional but Recommended):</strong> For critical applications, indicate the workpiece in the vise to ensure it’s perfectly aligned before you start cutting.</li>
</ol>
<h2>Step 3: Load the End Mill and Set Z-Zero</h2>
This is where you prepare your milling machine.
<ol>
<li><strong>Install the Collet:</strong> Insert the correctly sized collet into the spindle.</li>
<li><strong>Insert the End Mill:</strong> Place the TiAlN ball nose end mill into the collet. Make sure it’s seated properly and then tighten the collet nut securely using the appropriate wrench.</li>
<li><strong>Check Runout (Optional but Recommended):</strong> If you have a dial indicator, check the runout of the end mill shank. Minimal runout ensures a good cut.</li>
<li><strong>Set Z-Zero:</strong> This is critical. You need to tell the machine where the top of your workpiece is.
<ul>
<li><strong>Method 1: Touch Probe:</strong> If you have a probe, use it to accurately set your Z-zero on the top surface of the workpiece.</li>
<li><strong>Method 2: Paper Trick:</strong> Carefully lower the spinning end mill (at a low RPM and with no feed) until a piece of paper just starts to be pinched between the tip and the workpiece. Then, set your Z-zero to 0.000.</li>
<li><strong>Method 3: Edge Finder:</strong> Use an edge finder to locate the top surface and set Z-zero.</li>
</ul>
</li>
</ol>
<h2>Step 4: Setting Up Your Cutting Parameters (Speeds and Feeds)</h2>
This is often the trickiest part for beginners, but we’ll keep it straightforward. For mild steel, you want to find a balance between cutting aggressively and not overheating the tool.
<h3>Material: Mild Steel (e.g., 1018 Steel)</h3>
<h3>Tool: TiAlN Coated Ball Nose End Mill</h3>
Here’s a general guideline. Always consult your end mill manufacturer’s recommendations if available, as coatings and geometries can vary.
<table>
<thead>
<tr>
<th>Parameter</th>
<th>Typical Value for Mild Steel</th>
<th>Notes</th>
</tr>
</thead>
<tbody>
<tr>
<td>Spindle Speed (RPM)</td>
<td>1500 – 3000 RPM</td>
<td>Start lower, increase if chips are sticky.</td>
</tr>
<tr>
<td>Feed Rate (IPM)</td>
<td>0.002″ – 0.005″ per tooth</td>
<td>Adjust based on spindle speed and desired chip load.</td>
</tr>
<tr>
<td>Depth of Cut (DOC – Axial)</td>
<td>0.050″ – 0.250″ (1.2mm – 6.3mm)</td>
<td>Depends on end mill diameter and machine rigidity. Smaller for finishing.</td>
</tr>
<tr>
<td>Stepover (Radial – for Adaptive Clearing)</td>
<td>30% – 70% of tool diameter</td>
<td>Higher stepover for roughing, lower for finishing.</td>
</tr>
<tr>
<td>Coolant/Lubrication</td>
<td>Flood or Mist Coolant</td>
<td>Essential for mild steel!</td>
</tr>
</tbody>
</table>
<h3>Calculating Feed Rate (A Simple Way)</h3>
If your end mill has ‘N’ teeth and you want a chip load of ‘CL’ (e.g., 0.003″), your feed rate (F) in inches per minute (IPM) is calculated as:
`F = N CL RPM`
For example, a 4-flute end mill with a desired chip load of 0.003″ at 2000 RPM would be:
`F = 4 0.003 2000 = 24 IPM`
<h3>Beginner Tip:</h3> Start conservative. It’s always better to cut a little slower and take lighter passes than to break an end mill. You can always increase speeds and feeds slightly if the chips are coming off cleanly and the tool sounds happy.
For more detailed information on machining parameters and safety, the National Institute for Occupational Safety and Health (NIOSH) offers resources on machining operations and hazard controls within manufacturing environments.
<h2>Step 5: Performing the Cut – Adaptive Clearing Example</h3>
Adaptive clearing is a fantastic strategy for programmers and for getting the most out of your end mill’s cutting edges. It’s designed to keep as much of the tool engaged with the material as possible, while maintaining a consistent chip load.
<ol>
<li><strong>Engage Spindle and Coolant:</strong> Start your spindle to the programmed RPM and turn on your coolant or lubricant system.</li>
<li><strong>Approach Z-Zero:</strong> Carefully bring your tool down to the Z-zero point using your machine’s controls (e.g., handwheel, DRO, or G-code program). For manual operation, use the “Z” axis handwheel and watch your DRO carefully. For full CNC, this is part of the program.</li>
<li><strong>Initiate Feed:</strong> Start the feed rate. If you’re operating manually, engage the feed (e.g., use the handwheel with a consistent rate or engage an auto-feed if available). If you’re running a program, hit the cycle start button.</li>
<li><strong>Observe and Listen:</strong> Pay close attention! You should hear a consistent cutting sound. The chips should be flowing away from the tool and should not be excessively hot or welding to the end mill. The TiAlN coating should help with this by preventing material buildup.</li>
<li><strong>Monitor Chip Evacuation:</strong> Ensure chips are being cleared effectively by the coolant and the tool’s flutes. If chips start building up, your feed rate might be too high, your spindle speed too low, or you might need more coolant. This is where the 35-degree helix can sometimes struggle if it’s too shallow or too deep for the material and the chip load.</li>
<li><strong>Perform Adaptive Toolpath:</strong> Let the machine follow the programmed adaptive clearing toolpath. This strategy involves a sweeping motion of the end mill, maintaining a constant engagement with the material. It’s efficient for clearing large volumes of material in pockets.</li>


