Quick Summary:
A 40-degree TiAlN ball nose end mill is a star player for profiling copper. Its specific geometry and coating excel at high-speed, smooth cutting in this softer metal, preventing chip buildup and ensuring clean, accurate profiled edges without welding.
Mastering Copper Profiling: Your Guide to the 40-Degree TiAlN Ball Nose End Mill
Working with copper can be a bit tricky for beginners. It’s soft, and sometimes tools can get sticky, causing rough cuts or even damaging your workpiece. You might have tried different cutters, only to find they don’t give you that clean, precise edge you’re after, especially when you need to shape intricate profiles. It can be frustrating when your project doesn’t turn out as smooth as you envisioned. But don’t worry! There’s a specialized tool that makes copper profiling much simpler and more effective: the 40-degree TiAlN ball nose end mill. This guide will walk you through exactly why this tool is so good for copper and how to use it to get fantastic results, every time.
Why Copper Profiling Needs the Right Tool
Copper is a wonderful material for many projects, from decorative pieces to electrical components. However, its softness and tendency to deform or clog tools can present challenges, particularly during profiling operations. Profiling involves cutting around the edge of a material to create a specific shape. When this is done on copper, any tool that isn’t optimized for it can lead to:
- Chip Welding: Soft metals like copper can melt slightly at the cutting edge, causing chips to stick to the tool. This ruins the finish and can break the tool.
- Rough Surfaces: Imprecise cuts leave a gritty or uneven edge, requiring a lot of extra finishing work.
- Tool Wear: The wrong tool can wear out quickly or get damaged by the gummy nature of copper.
- Inaccurate Dimensions: Poor surface finish and tool wander mean your final part won’t be to the exact specifications.
This is where specialized tooling comes into play. A well-chosen end mill can dramatically improve your results, making the machining process smoother, faster, and more enjoyable.
Understanding the 40-Degree TiAlN Ball Nose End Mill
Let’s break down what makes this specific tool so effective for copper profiling.
What is a Ball Nose End Mill?
A ball nose end mill has a hemispherical tip. This shape is perfect for creating rounded edges, fillets, and most importantly for profiling, it allows for smooth, continuous cutting paths without sharp corners that can dig into the material. Think of it like a round-tipped pen creating a smooth line, rather than a sharp pencil that can snag.
The Significance of the 40-Degree Angle
The “40-degree” refers to the helix angle of the flutes. This is a relatively low helix angle. For softer metals like copper, lower helix angles are often preferred because they provide:
- Increased Rake Angle: This helps the cutting edge glide through the material more easily, reducing friction and heat.
- Better Chip Evacuation: A more open flute design (associated with lower helix angles) helps to clear chips efficiently, preventing buildup.
- Smoother Finish: Less cutting force and better chip control lead to a finer surface finish.
What is TiAlN Coating?
TiAlN stands for Titanium Aluminum Nitride. This is a PVD (Physical Vapor Deposition) coating applied to the end mill. For cutting metals, TiAlN offers:
- Excellent Heat Resistance: It forms a hard ceramic layer that protects the tool at high temperatures generated during cutting.
- Increased Hardness: This coating makes the end mill much harder, improving its wear resistance and extending its lifespan.
- Reduced Friction: The smooth coating helps chips slide off more easily, further preventing welding.
- Good for High Speeds: It allows for higher cutting speeds and feed rates, making your machining more efficient.
Why This Combo is Gold for Copper
When you combine the smooth profiling capability of a ball nose, the efficient cutting action of a 40-degree helix, and the heat and wear resistance of TiAlN coating, you get a tool that’s almost custom-made for profiling copper. It’s designed to cut cleanly, prevent sticking, and last longer, giving you the best possible results on this challenging but rewarding material.
Essential Specifications for Your 40-Degree TiAlN Ball Nose End Mill
When selecting your tool, a few more details matter to ensure it’s the right fit for your milling machine and your project. Pay attention to:
Material of the End Mill
Most modern high-performance end mills are made from Solid Carbide. Carbide is extremely hard and rigid, making it ideal for precise cuts. For general copper work where you don’t need extreme speeds, a good quality solid carbide end mill with the specified geometry and coating will serve you exceptionally well.
Number of Flutes
For profiling softer metals like copper, you typically want fewer flutes. This is because:
- 2 Flutes: Often considered the sweet spot for softer, gummy materials like aluminum and copper. The wider chip gullets (the space between the flutes) allow for better chip evacuation, which is crucial to prevent chip welding.
- 3 Flutes: Can also work, offering a slightly better surface finish than 2-flute tools but with less chip clearance. You might need to reduce your feed rate slightly.
- 4+ Flutes: Generally not recommended for profiling soft copper as they can lead to chip packing and poor chip evacuation.
For best results in copper profiling, a 2-flute or possibly a 3-flute TiAlN ball nose end mill with a 40-degree helix angle is your target.
Shank Diameter
This is the part of the end mill that fits into your milling machine’s collet or tool holder. Common shank diameters include 1/8″, 3/16″, 1/4″, 3/8″, and 1/2″. Make sure the shank diameter matches your machine’s tooling system. For detailed work, smaller diameters are common. For more rigid setups and faster material removal, larger diameters are used. Always ensure your machine’s collet can securely grip the shank.
Cutting Diameter (Ball Diameter)
This is the diameter of the ball at the very tip. You’ll choose this based on the radius you need for your profiled features. If you need a 2mm radius, you’ll typically use a 4mm cutting diameter ball nose end mill (since the radius is half the diameter). Common diameters range from 1mm up to several inches.
| Specification | Ideal for Copper Profiling | Why it Matters |
|---|---|---|
| End Mill Type | Ball Nose | Creates smooth radius, ideal for profiling and fillets. |
| Helix Angle | 40 Degrees (or lower) | Promotes good chip evacuation and easier cutting in soft metals. |
| Coating | TiAlN | Reduces friction, prevents chip welding, offers heat resistance. |
| Material | Solid Carbide | Hard, rigid, and provides excellent tool life. |
| Number of Flutes | 2 or 3 | 2-flute for best chip evacuation; 3-flute for smoother finish with careful feed rates. |
| Shank Diameter | Matches Tool Holder/Collet | Ensures secure clamping and compatibility with your machine. |
| Cutting Diameter | Based on desired radius | Determines the size of the rounded features or profiling depth. |
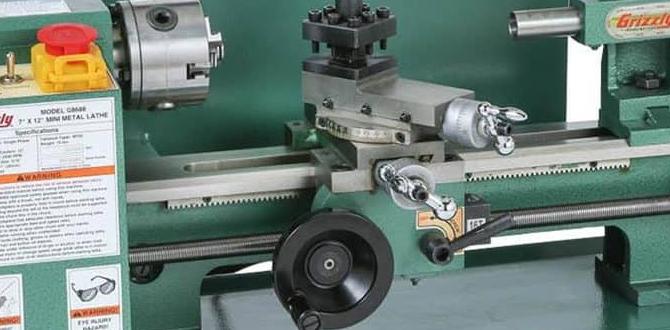
Setting Up Your CNC Machine for Copper Profiling
Proper machine setup is crucial for achieving good results with any milling operation, and copper profiling with a TiAlN ball nose end mill is no exception. Here’s what you need to consider.
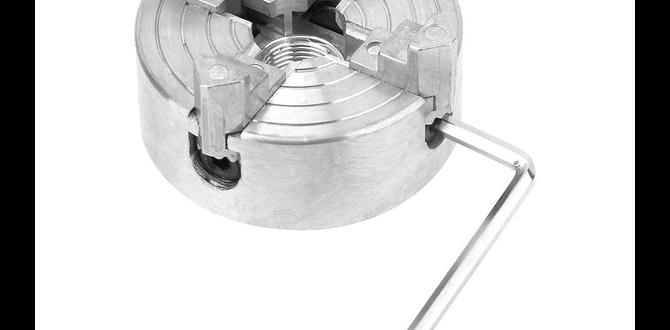
Workholding
Your copper workpiece needs to be held securely. Any movement during machining will result in inaccurate profiles and a poor finish. For small parts, consider using:
- Vises: A good quality machinist vise with soft jaws (made of brass, aluminum, or plastic) can prevent marring the copper while providing a firm grip.
- Clamps: If using a fixture plate or table, use hold-down clamps that directly secure the workpiece without distorting it. Ensure the clamps are not in the path of the end mill.
- Double-Sided Tape: For very thin or delicate parts on a spoilboard, temporary fixturing with strong double-sided tape can work, but ensure it’s rated for machining forces.
For larger parts, custom jigs or fixtures might be necessary. Always prioritize rigidity and stability.
Spindle Speed (RPM) and Feed Rate
This is where the magic happens for soft metals like copper. The TiAlN coating and 40-degree helix angle allow for relatively high speeds and feeds.
- Start Conservatively: If you’re unsure, start with recommended values for copper machining, often found in tooling catalogs or manufacturer websites. A good starting point for a 1/4″ diameter carbide end mill might be:
- Spindle Speed (RPM): 10,000 – 20,000 RPM
- Feed Rate (IPM or mm/min): 20 – 40 IPM (500 – 1000 mm/min)
- Listen and Observe: The sound of the cut is your best indicator. A smooth, consistent whirring sound is good. Chattering or screaming indicates you’re too fast on your feed or too slow on your RPM. If the tool sounds like it’s dragging or chipping, you might be feeding too slowly or have chip buildup concerns.
- Chip Load: This is the thickness of the material removed by each cutting edge. For copper with a 2-flute end mill, you’re aiming for a chip load of around 0.001″ to 0.003″ per tooth (0.025mm to 0.075mm). Your CAM software can calculate the required feed rate based on your desired chip load, RPM, and number of flutes.
Higher spindle speeds and appropriate feed rates help the TiAlN coating do its job by reducing the time the cutting edge spends in contact with the material, thereby minimizing heat buildup and the potential for chip welding.
Depth of Cut (DOC) and Stepover
When profiling, you’re typically cutting along the XY plane, but you’ll also be moving down in Z. For copper:
- Depth of Cut (DOC): For profiling operations where the tool moves along the edge, your DOC in Z will be determined by the feature you’re creating. However, when roughing out a profile or making plunging moves, it’s best to use conservative depths of cut. A good starting point might be 0.010″ to 0.020″ (0.25mm to 0.5mm) for light cuts, working your way deeper if the material and machine can handle it.
- Stepover: This applies when you’re using the end mill to clear an area or create a complex 3D profile. For profiling, the stepover is less critical as you’re often following a path defined by your software. However, if you’re using the ball nose for surface finishing, a small stepover (e.g., 0.005″ to 0.010″ or 0.125mm to 0.25mm) will produce a smoother surface.
Coolant/Lubrication
While TiAlN coated tools and their geometry help manage heat and chip welding, a little lubrication can go a long way with copper. It helps keep temperatures down, lubricates the cutting action, and further prevents chips from sticking.
- Mist Coolant: A fine mist of cutting fluid is ideal for this application. It cools and lubricates without creating a flood of coolant that can be messy.
- Cutting Fluid Stick/Paste: For smaller machines or simpler setups, a dedicated cutting fluid stick or paste applied directly to the cutting area can provide localized lubrication.
- Air Blast: A strong blast of compressed air can help, especially for clearing chips, but it’s less effective for cooling and lubrication compared to mist or fluid.
You can find excellent resources on machining copper from organizations like the Copper Development Association, which offers detailed guidance on material properties and machining best practices.
Step-by-Step Guide to Profiling Copper
Let’s walk through the process. Imagine you’ve designed a part in CAD and are ready to machine it on your CNC mill.
Step 1: Design Your Model and Create Toolpaths
- Design in CAD: Create your 2D or 3D model of the part with the desired profile.
- Import into CAM: Load your model into your Computer-Aided Manufacturing (CAM) software.
- Select Tool: Define your 40-degree TiAlN ball nose end mill in the tool library, ensuring its diameter, flute count, and material are correct.
- Create Profiling Operation: Choose a 2D contour or 3D adaptive/sculpt toolpath strategy. For simple profiles, a 2D contour is usually sufficient. Ensure you select “Outside Contour” if you want to cut to the outer edge of your part.
- Set Parameters: Input your desired spindle speed, feed rate, depth of cut, and stepover. For profiling, the stepover is often set to 0 or a very small value if you’re using the side of the tool. If you’re using the tip for 3D features, use a stepover appropriate for the surface finish you desire.
- Simulate: Always use the simulation feature in your CAM software. This will show you the toolpath, highlight any potential collisions, and give you a visual preview of the material removal. Check that the tool is not going to crash into clamps or the workpiece in unintended ways.
- Generate G-code: Once simulation looks good, generate the G-code that your CNC machine will read.
Step 2: Prepare Your Machine and Workpiece
- Load the End Mill: Securely install your 40-degree TiAlN ball nose end mill into the collet or tool holder of your CNC machine. Ensure the collet runout is minimal.
- Secure the Workpiece: Clamp your copper workpiece firmly to the machine bed using the workholding methods discussed earlier. Double-check that it cannot move.
- Set Work Zero: Accurately set your machine’s X, Y, and Z zero point (datum) on the workpiece. The Z zero is often set to the top surface of the copper.
- Set Up Coolant (if using): Ensure your mist coolant system or lubrication is ready and positioned to spray the cutting area.
Step 3: Perform the Machining Operation
- Load G-code: Load the generated G-code file into your CNC controller.
- Dry Run (Optional but Recommended): Many controllers allow for a “dry run” where the machine moves through the toolpath without the spindle spinning or the tool engaging the material. This is a great safety check to ensure the toolpath is clear of unexpected obstacles.
- Initial Plunge (for some toolpaths): If your toolpath requires plunging into the material, ensure your plunge feed rate is significantly slower than your cutting feed rate. This reduces stress on the tool.
- Start the Cut: Begin the machining program. Keep a close watch on the process.
- Monitor Sound and Chips: Listen for any unusual noises (chatter, screaming). Observe the chips being produced; they should be relatively small and easily cleared. If you see long, stringy chips or signs of the copper sticking to the cutter, you may need to adjust your feed rate or spindle speed, or increase lubrication.
- Observe the Finish: After the toolpath is complete, inspect the profiled edge. It should be smooth, precise, and free of rough marks or burrs.
Step 4: Post-Machining Inspection and Finishing
- Remove Workpiece: Carefully remove the finished part from the machine.
- Deburr (if necessary): Even with a good cut, very fine burrs might be present. A light pass with a deburring tool or a fine-grit abrasive paper can clean this up.
- Inspect Dimensions: Use calipers or a micrometer to