Quick Summary
The Tialn 40-degree ball nose end mill is a top choice for achieving a stunning, smooth finish on copper. Its specific geometry and Tialn coating reduce friction and heat, preventing material buildup and ensuring a clean, mirror-like surface ideal for detailed work. Learn how to use it effectively for exceptional copper finishing.
Hey everyone, Daniel Bates here from Lathe Hub! Ever found yourself wrestling with copper, trying to get that perfect, shiny finish, only to end up with smudges and rough edges? It’s a common frustration for many makers. Copper is a beautiful material, but it can be a bit tricky to machine cleanly. The good news is that with the right tools and a little know-how, you can achieve that professional, mirror-like finish you’re after.
Today, we’re going to dive deep into a specific tool that’s an absolute game-changer for copper finishing: the Tialn 40-degree ball nose end mill. We’ll break down exactly why this tool works so well and walk you through the simple steps to use it like a pro. Get ready to transform your copper projects!
Why the Tialn 40-Degree Ball Nose End Mill Excels at Copper Finishing
Copper is a soft, ductile metal. This means it can easily gum up cutting tools, leading to poor surface finishes and potentially damaging the tool itself. Standard end mills can struggle with this, leaving behind smeared material and an inconsistent surface. This is where specialized tooling comes in, and the Tialn 40-degree ball nose end mill is designed to tackle these challenges head-on.
Understanding the Key Features
Let’s break down what makes this specific end mill so effective for copper:
- Ball Nose Geometry: The rounded tip, or “ball nose,” is crucial. Unlike flat-bottomed end mills, the ball nose creates a smooth, contoured surface as it cuts. This shape is perfect for creating radiused internal corners and for general surfacing where you don’t need sharp internal edges. It also allows for a much finer surface finish because the tool path effectively “scallops” the material, and with fine step-overs, these scallops become virtually invisible.
- 40-Degree Helix Angle: This is a bit of a sweet spot for softer metals like copper. A shallower helix angle (like 30 degrees) can sometimes lead to more chatter and tool deflection with softer materials. A steeper angle (like 45 degrees or more) can sometimes cause excessive buildup on the flutes. The 40-degree angle provides a good balance: it offers decent chip evacuation without being so steep that it digs into the soft copper, and it helps to control the cutting forces, leading to a smoother cut.
- Tialn Coating: This is perhaps the most significant factor. Tialn stands for Titanium Aluminum Nitride. This is a super-hard, multi-layer coating. For copper machining, Tialn offers several benefits:
- Reduced Friction: It creates a very smooth surface on the cutting tool, which significantly reduces the friction between the tool and the copper. Less friction means less heat generated.
- Prevents Buildup: Copper has a tendency to stick to the cutting edge (this is called “built-up edge” or BUE). The Tialn coating resists this buildup, keeping the cutting edges clean and sharp. A clean cutting edge is essential for a good finish.
- Increased Tool Life: Because it’s so hard and resists wear and buildup, Tialn coated tools last much longer, even in abrasive or sticky materials.
- Higher Cutting Speeds: The reduced friction and heat allow you to run the tool at slightly higher speeds and feeds, which can improve productivity without sacrificing finish.
- Number of Flutes: For finishing softer metals like copper, you’ll typically want an end mill with more flutes. A 3-flute or 4-flute end mill is often ideal. More flutes mean more cutting edges engaging the material simultaneously, which generally leads to a smoother finish and better stability for light finishing cuts.
When these features are combined in a tool specifically designed for finishing, the result is exceptional. You get a clean cut, minimal material buildup, and a surface that needs very little, if any, post-machining polishing.
Essential Tools and Setup for Copper Finishing
Before you start cutting, having the right setup is crucial for success and safety. Here’s what you’ll need:
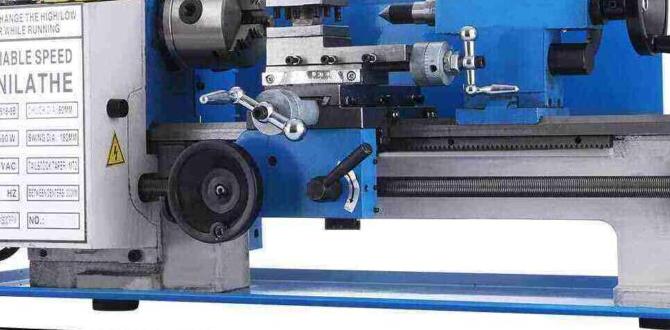
Milling Machine Setup
- Rigid Milling Machine: A sturdy, well-maintained milling machine is a must. For delicate finishing cuts, you want a machine that doesn’t have excessive play in the ways or spindle. This ensures consistent depth of cut and minimal vibration.
- Tool Holder: Use a high-quality tool holder, preferably a shrink fit or a precision collet chuck. This will ensure the end mill is held securely and run out is minimized. Run out is when the tool doesn’t spin perfectly true, causing an inconsistent cut and poor finish.
- Workholding: Secure your copper workpiece firmly. This could be with clamps, a vise, or specialized fixturing. Any movement of the workpiece during the cut will ruin your finish and can be dangerous. Ensure your clamps aren’t positioned where the end mill will make contact.
Copper Material Preparation
- Annealed Copper: For the best results, especially for intricate finishes, use annealed copper. Annealing makes the copper softer and more malleable, reducing the forces required for cutting and minimizing the risk of tearing or galling. You can anneal copper at home by heating it red-hot with a torch (wearing appropriate safety gear!) and then quenching it in water.
- Clean Surface: Start with a clean workpiece free from oils, dirt, or oxidation.
Lubrication and Coolant
Machining copper without any lubrication can lead to the issues we discussed – tool buildup and poor finish. You have a few options:
- Cutting Fluid/Coolant: A good quality cutting fluid designed for non-ferrous metals is highly recommended. Look for fluids that have good lubricating properties and help to flush away chips. Many general all-purpose cutting fluids work well.
- Mist Coolant System: For finer control and a more efficient cooling/lubrication effect, a mist coolant system is excellent for copper. It delivers a fine spray of coolant and air directly to the cutting zone.
- Manual Application: If you don’t have automated systems, you can also manually apply a suitable cutting lubricant with a brush or squirt bottle. Ensure you reapply as needed.
Safety Gear
Safety is paramount in any machining operation. Never skip these:
- Safety Glasses: Always wear ANSI-approved safety glasses. A face shield over your safety glasses offers even more protection.
- Gloves: Wear cut-resistant or leather gloves when handling the copper workpiece and during setup, but remove them when operating the machine to avoid them getting caught.
- Dust Mask: When dry machining or dealing with fine particulate, a dust mask is advisable.
- Hearing Protection: Milling machines can be noisy.
Step-by-Step Guide to Using Your Tialn 40-Degree Ball Nose End Mill for Copper Finishing
Now that you’re set up, let’s get cutting! This guide focuses on achieving a beautiful surface finish on copper.
Step 1: Secure the Workpiece
Carefully mount your copper workpiece in your milling machine vise or fixture. Ensure it’s held very securely and that the surface you intend to finish is accessible to the end mill. Double-check that no clamps are in the path of the tool. A stable workpiece is the foundation for a good finish.
Step 2: Install the End Mill
Insert the Tialn 40-degree ball nose end mill into your tool holder. If using a collet chuck, tighten it securely. Make sure the end mill is seated properly and that the tool holder is clean. Insert it into the milling machine spindle.
Step 3: Set Your Zero and Tool Offset
This is a critical step for accuracy. Define your program’s X, Y, and Z zero points based on your CAD/CAM program or your manual machining plan. If you are using a CNC machine, ensure your tool offsets are correctly programmed. For manual machining, you’ll be using handwheels to control the axes.
Step 4: Determine Cutting Parameters (Speeds and Feeds)
This is where the magic happens. For copper with a Tialn-coated ball nose end mill, you can often run fairly aggressive parameters compared to uncoated tools, contributing to a better finish. However, always start conservatively and listen to the machine.
Here’s a table with suggested starting points. These are general guidelines for annealed copper and may need adjustment based on your specific machine rigidity, coolant, and the exact alloy of copper.
| Parameter | Tialn 40-Degree Ball Nose End Mill (Example: 1/4″ Diameter) | Notes |
|---|---|---|
| Spindle Speed (RPM) | 4,000 – 8,000 RPM | Start lower and increase if conditions allow. Higher speed generally leads to a better finish. |
| Feed Rate (IPM) | 12 – 30 IPM | This is the speed the tool moves through the material. Adjust based on sound and surface finish. |
| Depth of Cut (DOC) – Finishing Pass | 0.002″ – 0.010″ | This is for the final finishing pass. Very shallow cuts are key for a mirror finish. |
| Stepover – Finishing Pass | 0.005″ – 0.020″ | The amount the tool moves sideways between passes. Smaller stepover = smoother finish. Aim for 5-10% of tool diameter for a true mirror finish. |
| Lubrication | Flood coolant or mist coolant | Essential for copper to prevent buildup and heat. |
Important Note on Speeds and Feeds: These figures are for guidance. The goal is a smooth, consistent cutting sound, not a squealing or chattering noise. You can find online calculators and manufacturer data for more specific recommendations. A great resource for machining data is the National Institute of Standards and Technology (NIST) databases, which provide extensive research on machining parameters for various materials. (NIST Manufacturing Programs)
Step 5: Execute the First Cut
Roughing (Optional but Recommended): If you’re removing a significant amount of material, consider a two-stage approach. First, use a standard end mill or the ball nose end mill with a larger stepover and depth of cut to quickly remove bulk material. This makes the finishing pass faster and more effective.
Finishing Pass:
- Start your spindle at the chosen RPM.
- Engage your coolant/lubrication system.
- Manually, or through your CNC program, feed the end mill into the material at the determined feed rate. Listen to the cut. If it sounds smooth, you’re on the right track.
- Make your shallow finishing pass using a small Depth of Cut (DOC) and a fine Stepover. For a mirror finish, the stepover should be a small percentage of the tool diameter – think 5% to 10% or even less for ultimate smoothness. The ball nose shape will naturally create a contoured surface, and with a small stepover, each pass blends seamlessly into the next.
- Use a dedicated finishing pass where the end mill’s center traces over the desired surface.
Step 6: Inspect and Adjust
Once the finishing pass is complete, retract the tool. Carefully inspect the surface finish. Ideally, it should appear smooth, lustrous, and consistent, with minimal visible tool marks. If you see any smearing, chatter marks, or unevenness:
- Check for Buildup: Is there copper sticking to the end mill flutes? If so, your speeds/feeds might be too low, or you might need better lubrication.
- Increase Spindle Speed: Slightly increasing RPM can often improve finish by reducing chip load per tooth.
- Decrease Feed Rate: Slowing down the feed rate for a given RPM can also improve finish.
- Reduce Depth of Cut/Stepover: Ensure your finishing pass is very shallow and the stepover is fine enough.
- Verify Rigidity: Ensure the machine and workholding are not vibrating.
Make small, incremental adjustments and perform another pass. Patience here is key to achieving that perfect polish.
Achieving Specific Finishes with the 40-Degree Ball Nose
The beauty of the ball nose end mill is its versatility. Here’s how you can leverage it:
Creating Convex and Concave Radii
The inherent shape of the ball nose makes it ideal for creating rounded surfaces.
- Convex Shapes: By controlling the Z-axis depth, you can trace out convex mounds and domes.
- Concave Features: For internal fillets or rounded pockets, the ball nose is the go-to tool. The radius of the end mill will determine the tightest internal radius you can machine.
Surface Finishing for Patinas and Coatings
A highly polished copper surface is perfect for applying patinas or other decorative coatings. The smooth, uniform surface created by the Tialn 40-degree ball nose end mill ensures that these finishes adhere evenly and look their best. The Tialn coating itself helps achieve this consistent, fine surface finish that often rivals manual polishing.
Intricate Engraving and Detail Work
For detailed artwork or fine engraving on copper, the precise control offered by a CNC mill and a small-diameter Tialn ball nose end mill is invaluable. The coating and geometry allow for clean, sharp lines (relative to the tool’s diameter) without excessive material dragging or smearing, which is critical for intricate designs.
Maintenance and Care for Your End Mill
To ensure your Tialn 40-degree ball nose end mill continues to perform, proper care is essential:
- Clean After Use: As soon as you finish machining, clean the end mill thoroughly. Use a soft brush and a suitable solvent (like denatured alcohol or a mild degreaser) to remove any residual copper particles or coolant.
- Inspect for Wear: Regularly check the cutting edges for signs of wear, chipping, or excessive buildup. The Tialn coating is very hard, but it’s not invincible. Built-up edge is the primary enemy of your finish, and if it starts to form, the tool’s effectiveness diminishes rapidly.
- Proper Storage: Store your end mills in a clean, dry place, ideally in a tool holder or protective case to prevent accidental damage to the cutting edges.
- Avoid Grinding: Tialn-coated tools are difficult to resharpen without specialized equipment. For most users, it’s more cost-effective to replace worn-out coated tools than to attempt regrinding.
When to Choose a Different Tool
While the Tialn 40-degree ball nose is excellent for finishing copper, it’s not always the best tool for every job:
- Roughing Heavy Material: For removing large amounts of material quickly, a larger diameter, lower flute count (e.g., 2-flute) uncoated or TiN-coated end mill might be more efficient, followed by a finishing pass with your Tialn tool.
- Very Sharp Internal Corners: The ball nose geometry inherently creates a radius. If absolutely crisp, 90-degree internal corners are required, you’d need a square end mill and likely EDM (Electrical Discharge Machining) for the smallest radii, or a series of plunging and pocketing operations with a square end mill for larger radii.
- Extremely Abrasive Materials: While Tialn is tough, super-abrasive materials might wear it down faster than dedicated tooling designed for them.
Common Beginner Mistakes to Avoid
Even with the right tool, beginners can fall into common traps. Watch out for these:
- Insufficient Lubrication: This is the #1 killer of good finishes on copper. Always ensure ample coolant.
- Too Deep of a Cut: For finishing, think “light and fast” (in terms of feed rate) rather than “deep and slow.”
- Ignoring Machine Rigidity: A wobbly setup or a machine with loose gibs will chatter and produce a poor finish.
- Incorrect Speeds and Feeds: Guessing without any reference can lead to tool breakage or smearing.
- Not Securing the Workpiece Properly: