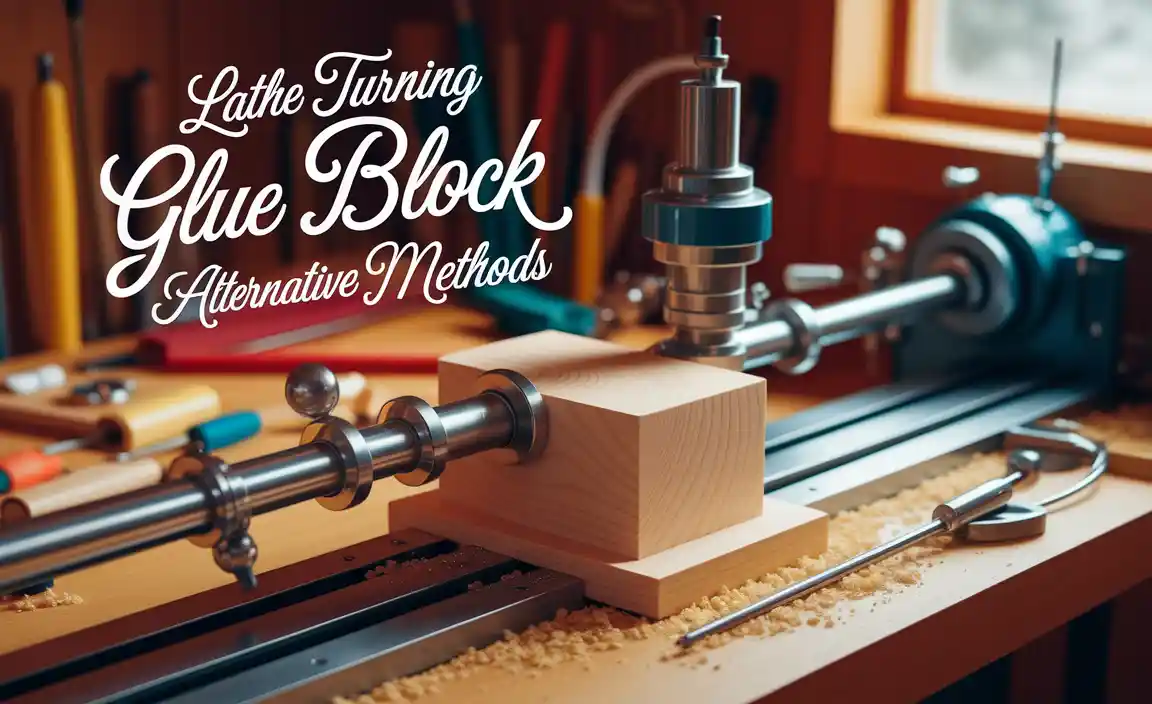
TIaIN Ball Nose End Mill 55 Degree for Brass Profiling: Your Guide to Smooth Finishes.
This guide covers using a TiAlN ball nose end mill with a 55-degree helix angle for profiling brass. Learn why this tool is excellent for brass, how to set it up, and tips for achieving clean, precise cuts, perfect for hobbyists and beginners.
Hey there, fellow makers! Ever found yourself wrestling with brass on the milling machine, trying to get those smooth, rounded profiles just right? It can be a bit tricky, right? Getting a clean cut, avoiding burrs, and having that tool last a good while is the goal for any project. It’s frustrating when your brass part just doesn’t come out the way you envisioned. But don’t worry! This guide is all about making that process simple. We’re going to dive into using a specific type of tool that, once you get the hang of it, makes profiling brass a breeze. Stick around, and we’ll walk through it step-by-step.
Why a 55-Degree TiAlN Ball Nose End Mill is Your Brass Buddy
So, what’s so special about this particular tool for brass? Let’s break it down, piece by piece.
Understanding the “TiAlN” Coating
First off, “TiAlN” stands for Titanium Aluminum Nitride. Think of it as a super-tough, heat-resistant shield for your end mill.
Heat Resistance: Brass can get pretty warm when you machine it. TiAlN coating helps the cutting edge stay cooler for longer. This means less heat buildup, which is great for tool life and helps prevent the brass from melting or smearing.
Hardness: This coating also makes the end mill harder. A harder tool can cut more efficiently and resist wear, giving you more clean cuts before you need to worry about sharpening or replacing it.
Reduced Friction: It creates a smoother surface on the tool, which reduces friction as it cuts through the metal. Less friction often means cleaner chips and a better finish on your workpiece.
The “Ball Nose” Shape Matters
The “ball nose” part refers to the shape of the cutting tip. Instead of being flat or pointed, it’s rounded, like the end of a ball.
Corner Radii: This rounded tip is absolutely fantastic for creating smooth, contoured profiles or internal corners that have a radius. No more sharp, awkward corners unless you want them!
3D Machining: It’s also essential for more complex 3D carving or surface finishing where you need to blend surfaces smoothly.
Reduced Stress: The rounded profile distributes cutting forces more evenly, which can reduce stress on both the tool and your workpiece.
What About the “55-Degree”? (Helix Angle)
Finally, the “55-degree helix angle” is about how the flutes (the spiral grooves on the end mill) are angled.
Chip Evacuation: A 55-degree helix angle is generally a good compromise. It helps in effectively clearing out chips from the cutting area, which is important to prevent the tool from getting clogged, especially in softer metals like brass.
Smooth Cutting: This angle often contributes to a smoother, more stable cut. It balances aggressive material removal with a clean finish. For brass, it helps prevent chatter and vibration, leading to a nicer surface.
Why These Together are “Essential Brass Profiling”
When you combine these features, you get a tool that’s purpose-built for tackling brass:
The TiAlN coating handles the heat and wear.
The ball nose shape creates those desirable rounded profiles and clean internal corners.
The 55-degree helix angle ensures efficient chip removal and a smooth cutting action.
Together, they make profiling brass a much more predictable and successful endeavor for beginners and experienced machinists alike.
Before You Start: Essential Setup and Safety
Alright, before we even think about spinning that tool in the machine, let’s get set up safely and correctly. This is the most important part!
Safety First, Always!
Machining can be dangerous if you’re not careful. Always remember these basics:
Eye Protection: Wear safety glasses or a face shield at all times. No exceptions.
Clothing: Avoid loose clothing, jewelry, or anything that could get caught in the machine. Tie back long hair.
Machine Guards: Ensure all safety guards are in place and functioning.
Coolant/Lubricant: Use appropriate coolant or lubricant for brass. It helps with cutting and cooling, and keeps your workshop cleaner. (More on this later!)
Know Your Machine: Be familiar with your milling machine’s controls, emergency stop, and how it operates.
Gathering Your Tools and Materials
You’ll need a few things besides your TiAlN ball nose end mill:
The End Mill: Your trusty TiAlN ball nose end mill with a 55-degree helix angle.
Milling Machine: Of course! This could be a CNC or a manual mill.
Workholding: This is how you’ll hold your brass securely. Vises, clamps, or fixtures are common. Make sure your brass is held very firmly.
Brass Stock: The piece of brass you’re going to machine.
Cutting Fluid/Lubricant: Essential for brass. A mist coolant or a light cutting oil works well.
Calipers/Measuring Tools: To set your depths and check your work.
Rigid Setup: Ensure your workpiece, the tool holder, and the machine itself are all rigid and free from excessive vibration.
Preparing Your Workpiece
Secure Mounting: Mount your brass block or part securely in the milling machine vise. Ensure it’s as close to the vise jaws as possible and won’t move during machining. A wobbly workpiece is a recipe for bad cuts and accidents.
Cleanliness: Make sure the surface of the brass is free from dirt, oil, or any debris that could interfere with the cut.
Step-by-Step: Profiling Brass with Your TiAlN Ball Nose End Mill
Now for the fun part! Let’s get cutting. We’ll focus on making smooth, rounded profiles.
Step 1: Setting Up the Tool in the Spindle
Tool Holder: Place your ball nose end mill into a clean, appropriate tool holder (like a collet chuck). Make sure it’s held securely and centered.
Install Tool: Insert the tool holder with the end mill into the milling machine spindle. Ensure it’s tightened properly according to your machine’s procedure.
Step 2: Finding Your Zero Point (Setting Work Offsets)
This is critical for accuracy. You need to tell the machine where your workpiece is.
X and Y Zero: Find the center or edge of your brass stock and set your machine’s X and Y zero points accordingly. For simple profiling, often the center is a good starting point.
Z Axis Zero: This is how high the tool is from your workpiece. Carefully bring the tip of the ball nose end mill down until it just touches the top surface of your brass. Many machines have a “touch probe” or you can use a piece of paper to feel for contact. Take your time here! Once you feel contact, set your Z zero.
Step 3: Determining Cutting Speeds and Feeds
This is where the magic happens for a good finish and tool life. For beginners, it’s best to start conservatively.
Spindle Speed (RPM): For brass, you can often use higher spindle speeds than with steel. A good starting point for a 1/4″ or 1/2″ TiAlN coated ball nose end mill might be between 3,000 – 8,000 RPM. Always check the manufacturer’s recommendations for your specific end mill if available.
Feed Rate (IPM or mm/min): This is how fast the tool moves into the material. For brass, you want a feed rate that allows the tool to cut cleanly without pushing too much material. Too slow, and it might rub. Too fast, and you risk breaking the tool or getting a rough surface. A good starting point for a 1/4″ end mill could be 10-20 inches per minute (IPM), or about 250-500 mm/min.
Chip Load: This is a more advanced concept, but it’s the amount of material removed by each cutting edge per revolution. A good target chip load for brass with a ball nose end mill might be around 0.001″ – 0.003″ per tooth.
Using a Chart (Example):
| End Mill Diameter | Material | Coating | Recommended RPM (Approx.) | Recommended Feed Rate (IPM Approx.) | Notes |
|---|---|---|---|---|---|
| 1/4″ (6.35mm) | Brass | TiAlN | 4,000 – 7,000 | 10 – 18 | Start conservative. Adjust for finish. |
| 1/2″ (12.7mm) | Brass | TiAlN | 3,000 – 5,000 | 15 – 25 | Use higher feed rates for larger diameters for better chip load. |
Coolant/Lubrication: Turn on your mist coolant or apply cutting fluid. A light machining oil or a specific brass cutting fluid is recommended. This prevents the brass from building up on the tool and helps achieve a smooth finish. You can find great resources on machinability data from organizations like the National Institute of Standards and Technology (NIST) which often have guidelines for cutting various materials, though specific tool coatings might vary. You can find general machining data resources to help guide your parameters.
Step 4: Making the First Cut (Depth of Cut)
How Deep to Go: For profiling, especially if you’re making a pocket or a complex shape, you typically want to take shallow cuts. This is much easier on the tool and your machine.
Suggested DOC: For brass, a Depth of Cut (DOC) of 0.010″ to 0.050″ (0.25mm to 1.27mm) is a good starting point, depending on your end mill diameter and machine rigidity. For a first pass, go even shallower, maybe 0.010″ to 0.020″.
Engaging the Material: Always engage the material with the side of the end mill, not by plunging straight down unless it’s specifically designed for it (a “center cutting” end mill). Ball nose end mills can plunge, but on a profile cut, you’ll be moving sideways.
Step 5: Executing the Profiling Program (CNC) or Manual Pass
CNC Machining: If you’re using a CNC, you’ll load your G-code program. The machine will then follow your programmed path, moving the tool around the profile at the set speeds and feeds.
Manual Machining: If you’re using a manual mill, you’ll carefully crank the handwheels to move the cutting head along your desired profile. Take smooth, controlled passes. Watch the chips and listen to the sound of the cut. Adjust your feed rate if it sounds like it’s rubbing or chattering.
Step 6: Finishing Passes and Step-overs
Smooth Surfaces: For really smooth surfaces, especially on curves, you might want to do a “finishing pass.” This is where you take a very shallow cut (e.g., 0.005″ or less) at a slightly slower feed rate. This “burnishes” the surface and removes any minor imperfections.
Step-over for Surfaces: If you’re machining a larger surface with the ball nose end mill, the “step-over” is the distance the tool moves sideways between each pass. A smaller step-over (e.g., 10-30% of the tool diameter) will give a smoother surface finish but take longer. A larger step-over will be faster but leave more visible “cusps.”
Step 7: Inspecting Your Work
Clean and Check: Once the machining is done, clean your part. You should have a nice, smooth profile with minimal burrs.
Measure: Use your calipers to check dimensions against your design.
Tips for Achieving the Best Brass Profile Finish
Getting that perfect, shiny brass finish takes a little finesse.
Sharp Tool: Always use a sharp end mill. A dull tool will drag, cause chatter, and produce a rough finish.
Appropriate Lubrication: Don’t skimp on the cutting fluid. It makes a huge difference in brass. It prevents galling (where the brass sticks to the cutter) and keeps the edges clean.
Machine Rigidity: The more rigid your setup (tool, holder, workpiece, machine), the better the finish. Vibrations are your enemy.
Chip Management: Make sure chips are clearing away from the cutting zone. If they build up, the tool will re-cut them, leading to a poor finish and potential tool damage.
Entry and Exit: Be mindful of how the tool enters and exits the material. Smooth entry and exit points can prevent marks on your part.
Common Issues and How to Solve Them
Let’s talk about what can go wrong and how to fix it.
Chatter/Vibration:
Cause: Too high a spindle speed, too deep of a cut, worn tool, loose workpiece, or lack of rigidity.
Solution: Reduce feed rate, decrease depth of cut, try a different spindle speed, tighten your workpiece, ensure tool and holder are seated correctly, or use a more rigid setup.
Rough Surface Finish:
Cause: Dull tool, incorrect speeds/feeds, insufficient lubrication, or excessive chip buildup.
Solution: Use a sharp tool, adjust spindle speed and feed rate (often slower feed, slightly higher speed for brass finish), increase lubrication, and ensure good chip evacuation. Consider a finishing pass.
Workpiece Smearing/Galling:
Cause: Tool rubbing instead of cutting, insufficient cooling, or tool isn’t sharp enough.
Solution: Increase feed rate slightly, ensure ample lubrication and cooling, and check tool sharpness.
Tool Breaking:
Cause: Plunging too fast into solid material unless it’s center cutting, taking too deep of a cut, taking too heavy a feed, or unexpected binding.
Solution: Ensure you are not feeding too fast on Z axis for plunging. Reduce depth of cut and/or feed rate. Make sure workpiece is securely held.
Frequently Asked Questions (FAQ)
Got more questions? Here are some common ones for beginners.
What RPM should I use for a 1/4″ TiAlN ball nose end mill on brass?
A good starting point for a 1/4″ TiAlN ball nose end mill on brass is between 4,000 and 7,000 RPM. Always start conservatively and adjust based on the sound and finish of your cut. Check the end mill manufacturer’s recommendations if available.
Can I use a standard end mill for brass profiling?
Yes, you can, but a dedicated brass end mill or one with a TiAlN coating and appropriate geometry (like your 55-degree ball nose) will give you significantly better results. Standard end mills might work, but you’ll likely experience more tool wear, rougher finishes, and more difficulty with chip buildup.
How do I prevent brass from sticking to my end mill?
This is called ‘galling’. To prevent it, use plenty of good quality cutting fluid or lubricant designed for brass. Ensure your feed rate is appropriate – too slow can cause rubbing, and too fast can overload the tool. A sharp tool is also crucial.
What is the best way to hold brass for profiling?
For profiling, you need to hold the brass very securely. A good milling vise is usually the best option. Jaws should grip the workpiece firmly and evenly. Ensure there’s minimal overhang from the vise to prevent vibration or movement during the cut.
Can I use a 55-degree helix angle end mill for other materials besides brass?
While this specific setup is excellent for brass, a 55-degree helix angle ball nose end mill can often be used for other softer metals like aluminum or plastics. For harder steels, you would typically need tools with different geometries, coatings, and engage at much lower speeds and feeds. Always consult machining data for the specific material.
What’s the difference between climb milling and conventional milling for brass profiling?
Climb milling (tool rotation direction matches feed direction) generally provides a smoother finish and better chip evacuation, especially with newer CNC machines. Conventional milling (tool rotation opposes feed direction) can be more stable on older, less rigid machines but may leave a rougher finish. For profiling brass with a ball nose end mill, climb milling is often preferred for a better surface finish if your machine can handle it.
How deep should my cuts be when profiling brass?
For profiling, especially for initial passes or when working with more complex shapes, shallow cuts are best. A depth of cut (DOC) between 0.010″ and 0.050″ (0.25mm