Have you ever wondered how to make your metal lathe work better? A tool holder metal lathe wiring diagram can help you with that! This diagram shows you how to connect parts easily. It is like a treasure map for your lathe. Using it, you can avoid mistakes and save time.
Imagine your lathe not working as it should. It might be frustrating, right? But with the right wiring diagram, you can fix many common problems. You don’t have to be an expert to understand it. Anyone can do it with a simple guide!
Did you know that even small changes in wiring can make a big difference? A proper setup can lead to smoother performance and better results. Just picture creating amazing projects with your lathe! It’s exciting to think about what you could build!
In this article, we will break down the most useful aspects of a tool holder metal lathe wiring diagram. By the end, you’ll feel confident in wiring your lathe. Get ready to unleash your creativity!
Tool Holder Metal Lathe Wiring Diagram: A Complete Guide

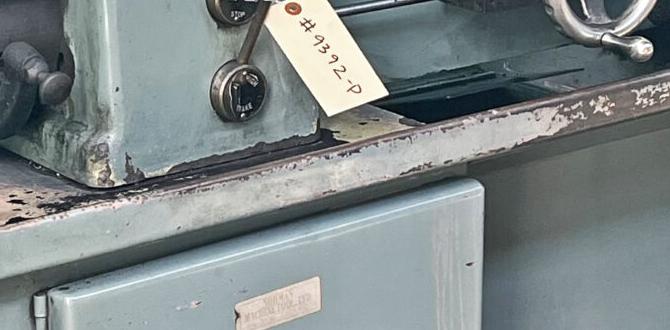
Tool Holder Metal Lathe Wiring Diagram
Understanding the tool holder metal lathe wiring diagram is essential for any DIY enthusiast. This diagram shows how to properly wire your metal lathe for safe and efficient operation. Understanding each component can simplify repairs and upgrades. Did you know that a well-wired lathe can improve your project’s accuracy? With clear labels and connections, this diagram makes it easier to follow, even for beginners. Mastering it can unlock your creativity in metalworking!Components of a Tool Holder Metal Lathe
Description of essential parts and their functions.. Importance of tool holders in lathe operations..A tool holder is key in metal lathes. It secures cutting tools in place. Several main parts make this possible. They include:
- Tool Holder Body: This part holds the tool firmly.
- Clamping Mechanism: It tightens or loosens the tool.
- Insert Holder: This part holds cutting inserts.
- Mounting Base: It connects the holder to the lathe.
Tool holders ensure smooth and precise cuts. They help create everything from small parts to big machinery. Without them, lathe operations would be messy and imprecise.
Why are tool holders important?
Tool holders are vital for accuracy and efficiency in lathe work. They keep the tools stable during operation, allowing for smooth cutting and shaping of materials.
Step-by-Step Wiring Diagram Creation
Instructions on gathering necessary tools and materials.. Detailed process of drafting a wiring diagram..To create a wiring diagram, start by gathering your tools and materials. You will need a pencil, ruler, and graph paper for drawing. Make sure to have a multimeter to check connections. Once you have everything, follow these steps:
- Draw the base layout.
- Label each part clearly.
- Connect components with lines.
Take your time to check your work. This process can help avoid mistakes later. Remember, a clear diagram saves time and effort in the long run!
What are the key tools for wiring diagrams?
Essential tools include a pencil, ruler, graph paper, and a multimeter. These tools help you create accurate and detailed diagrams.
Interpreting Wiring Diagrams for Metal Lathes
How to read and understand wiring diagrams effectively.. Common pitfalls and how to avoid them while interpreting..Reading wiring diagrams for metal lathes can seem tricky. First, look for symbols. These tell you what each part does. Read labels carefully. They can show colors and wire types. Avoid getting lost by focusing on the main connection points. Common mistakes include skipping details or assuming what symbols mean. Take your time and double-check your work. You’ll gain confidence and understanding!
How do I understand wiring diagrams better?
To understand wiring diagrams better, focus on these tips:
- Know the symbols
- Follow the lines
- Check for colors
- Read carefully
Safety Considerations for Wiring Metal Lathes
Essential safety precautions before starting wiring.. Importance of grounding and circuit protection..Before diving into wiring a metal lathe, safety is a must. Always wear protective gear, like goggles and gloves. This isn’t just a fashion statement; it keeps your eyes and hands safe! Also, remember to check your wiring diagrams thoroughly. Missing a small detail is like baking a cake without sugar—yikes!
Grounding is crucial. It acts like a superhero, stopping electrical shocks from spoiling your fun. Always use circuit protection devices, like fuses, to prevent electrical disasters. Think of them as the bouncers at a club, keeping things safe and sound!
| Safety Tip | Description |
|---|---|
| Wear Protective Gear | Safety goggles and gloves can save your skin! |
| Check Wiring Diagrams | A small detail can lead to big problems! |
| Implement Grounding | Grounding stops electrical shocks in their tracks! |
| Use Circuit Protection | Fuses prevent electrical disasters and keep the party going! |
Taking these steps helps ensure a fun and safe experience while working with your metal lathe. Remember, safety first means more time for creativity and less time worrying about accidents!
Troubleshooting Common Wiring Issues
Identifying typical wiring problems in metal lathes.. Solutions and tips for resolving wiring issues..Wiring problems in metal lathes can be tricky. Common issues include loose connections and frayed wires. To fix these, start by checking all connections. Ensure they are tight and secure. Also, examine wires for any damage. If you find any, they may need replacing. Here are some helpful tips:
- Always turn off the power before working on your lathe.
- Use a multimeter to test connections.
- Keep wiring neat to prevent future problems.
What are signs of wiring issues in a metal lathe?
Signs include strange noises, power loss, and sparks. If you see any of these, it’s time to investigate.
Maintenance Tips for Tool Holder Metal Lathes
Routine checks to ensure electrical efficiency.. Signs of wear and troubleshooting maintenance approaches..When working with tool holder metal lathes, regular maintenance is key. Check the wiring often. Loose wires can lead to electrical hiccups. Signs of wear may include strange sounds or uneven cuts. Don’t ignore them! These could mean it’s time to tighten bolts or replace worn parts. Even lathes need a little pampering now and then. Keep your tool holder happy, and it’ll keep you smiling!
| Maintenance Tips | Signs of Wear | Troubleshooting |
|---|---|---|
| Inspect wiring monthly | Strange noises | Tighten loose parts |
| Clean regularly | Uneven cuts | Replace worn tools |
Resources for Further Learning
Suggested books and online resources for advanced understanding.. Community forums and workshops for handson experience..Learning more about tool holder metal lathe wiring can be exciting. Here are some places to help you dive deeper:
- Books: Look for titles on metalworking and machine tools to understand the basics.
- Online Resources: Websites like YouTube have great tutorials that show different techniques.
- Community Forums: Join forums where you can ask questions and share experiences with other enthusiasts.
- Workshops: Attend local workshops for hands-on practice. Learning from experts can make a big difference!
What are good online resources for learning?
Great online resources include videos, blogs, and online courses that focus on metal lathe techniques and wiring diagrams.Conclusion
In conclusion, a tool holder metal lathe wiring diagram helps you understand how to safely connect and use your machine. It shows where wires go and ensures everything works smoothly. Remember to follow the diagram closely for safety. For more tips, check out additional resources or tutorials. With practice, you’ll master your metal lathe in no time!FAQs
What Are The Key Components Included In A Wiring Diagram For A Tool Holder On A Metal Lathe?A wiring diagram for a tool holder on a metal lathe shows how to connect everything. First, you need a power source, like a battery or plug. Next, you’ll see wires that connect to switches and motors. The diagram also shows where the tool holder connects to the lathe. Labels are important too, so you know what each part does.
How Do You Safely Troubleshoot Wiring Issues In A Metal Lathe’S Tool Holder System?To safely troubleshoot wiring issues in a metal lathe’s tool holder, first, turn off the machine. Next, unplug it to avoid electric shock. Look for any loose or damaged wires. If you find problems, you can fix them with new parts. Always wear safety glasses and gloves while you work!
What Electrical Specifications Should Be Considered When Creating A Wiring Diagram For A Metal Lathe?When making a wiring diagram for a metal lathe, you need to think about the power supply. Check how many volts (a measure of electricity) the lathe needs. You also need to choose the right size of wires. Wires must safely carry the electricity without getting too hot. Finally, consider any safety devices, like fuses, to protect the lathe from damage.
How Do The Wiring Connections Differ Between Various Types Of Tool Holders Used On Metal Lathes?Different tool holders on metal lathes have different designs. This means their wiring connections can change. Some use screws for tight holds, while others might use clamps. You will need to check the instructions for each tool holder. This helps you connect them safely and correctly.
What Common Wiring Mistakes Should Be Avoided When Assembling A Tool Holder For A Metal Lathe?When you make a tool holder for a metal lathe, avoid a few wiring mistakes. First, don’t mix up colors of the wires. This can make it hard to know which wire goes where. Also, make sure your wires are tight and not loose. Loose wires can cause problems or even accidents. Finally, check that you use the right type of wire for the job. Using the wrong wire can be unsafe.
{“@context”:”https://schema.org”,”@type”: “FAQPage”,”mainEntity”:[{“@type”: “Question”,”name”: “What Are The Key Components Included In A Wiring Diagram For A Tool Holder On A Metal Lathe? “,”acceptedAnswer”: {“@type”: “Answer”,”text”: “A wiring diagram for a tool holder on a metal lathe shows how to connect everything. First, you need a power source, like a battery or plug. Next, you’ll see wires that connect to switches and motors. The diagram also shows where the tool holder connects to the lathe. Labels are important too, so you know what each part does.”}},{“@type”: “Question”,”name”: “How Do You Safely Troubleshoot Wiring Issues In A Metal Lathe’S Tool Holder System? “,”acceptedAnswer”: {“@type”: “Answer”,”text”: “To safely troubleshoot wiring issues in a metal lathe’s tool holder, first, turn off the machine. Next, unplug it to avoid electric shock. Look for any loose or damaged wires. If you find problems, you can fix them with new parts. Always wear safety glasses and gloves while you work!”}},{“@type”: “Question”,”name”: “What Electrical Specifications Should Be Considered When Creating A Wiring Diagram For A Metal Lathe? “,”acceptedAnswer”: {“@type”: “Answer”,”text”: “When making a wiring diagram for a metal lathe, you need to think about the power supply. Check how many volts (a measure of electricity) the lathe needs. You also need to choose the right size of wires. Wires must safely carry the electricity without getting too hot. Finally, consider any safety devices, like fuses, to protect the lathe from damage.”}},{“@type”: “Question”,”name”: “How Do The Wiring Connections Differ Between Various Types Of Tool Holders Used On Metal Lathes? “,”acceptedAnswer”: {“@type”: “Answer”,”text”: “Different tool holders on metal lathes have different designs. This means their wiring connections can change. Some use screws for tight holds, while others might use clamps. You will need to check the instructions for each tool holder. This helps you connect them safely and correctly.”}},{“@type”: “Question”,”name”: “What Common Wiring Mistakes Should Be Avoided When Assembling A Tool Holder For A Metal Lathe?”,”acceptedAnswer”: {“@type”: “Answer”,”text”: “When you make a tool holder for a metal lathe, avoid a few wiring mistakes. First, don’t mix up colors of the wires. This can make it hard to know which wire goes where. Also, make sure your wires are tight and not loose. Loose wires can cause problems or even accidents. Finally, check that you use the right type of wire for the job. Using the wrong wire can be unsafe.”}}]}