Have you ever wondered how a wooden bowl is made? It starts with something called a “bowl blank.” This is a piece of wood that’s just the right size for shaping. The exciting part is that you can make your own bowl blank. It’s like creating your own canvas for art! Learning about wood lathe bowl blank preparation is a fun journey. You get to work with your hands and see something amazing take shape.
Key Takeaways
- Wood lathe bowl blank preparation is the first step in bowl making.
- Choosing the right wood affects the bowl’s look and strength.
- Safety is important when preparing your wood piece.
- Tools like saws and sanders help shape the wood blank.
- Proper bowl blank preparation leads to a smoother process.
Choosing the Right Wood for Bowl Blanks
When preparing for wood lathe bowl blank preparation, the choice of wood is crucial. Different woods have different colors and textures. Some are hard, and some are soft. Hardwoods like maple and oak are popular for making bowls. They are strong and last longer. Softwoods, such as pine, are easier to shape, but they may not be as durable. Picking the right wood depends on what you want your bowl to look like and how it will be used.
- Hardwood is durable for daily use bowls.
- Softwood is easier to carve.
- Maple is popular for its smooth finish.
- Oak is strong and classic.
- Cherry wood has a rich, dark color.
- Walnut is elegant and dark.
- Pine is light and easy to shape.
Once you select the wood, inspect it for any cracks. Cracks can ruin your bowl later. Look for a piece that is even and solid. It’s also important to consider the grain. The grain will affect how your bowl looks when finished. A good grain can add unique patterns and beauty to your bowl. Now that you know what to look for, you can pick the perfect wood for your project.
Fun Fact: Did you know some wood comes from trees over 100 years old?
Understanding Wood Grains
Grain is the pattern you see on the wood’s surface. It’s like the wood’s fingerprint! Different wood types have different grains. Close your eyes and picture a swirling pattern; that’s the grain. Some grains are straight, while others are curly or wavy. These patterns can make your bowl unique. Grain not only affects appearance but also how the wood behaves. A wavy grain can be tricky to work with. Knowing your wood grain helps you plan better.
Why Hardwood is a Great Choice
Hardwood comes from trees like oak and maple. These trees are strong and sturdy. Imagine building a fort! You’d want to use strong wood, right? That’s why hardwood is a good choice for bowls. It can handle daily use without getting damaged. Hardwoods have beautiful grains, adding to their charm. They might be harder to shape, but they make your work last longer. If you want a bowl that lasts a lifetime, hardwood is the way to go.
Softwood: Easy to Shape
Softwood is less dense and easier to cut. Think of it as the soft clay of the wood world. It’s great for practice if you’re new to woodturning. You can make mistakes and learn without worrying too much. Pine is a common softwood. It cuts easily and is light to handle. But remember, it might not last as long as hardwood. So, if you’re practicing or making a decorative bowl, softwood is a good choice.
Preparing the Wood for Bowl Blanks
Before you start shaping, you need to prepare your wood. This step involves cutting and smoothing the wood. You need to make it the right size for the bowl you want. Imagine a sculptor starting with a block of marble. They need to chip away extra bits. For wood lathe bowl blank preparation, you use tools like saws and sanders. These tools help you shape the wood without cracking it. Getting the shape right is important for the bowl’s balance.
- Measure the wood piece carefully.
- Use a saw to cut the wood to size.
- Check for cracks or knots in the wood.
- Make sure the wood is dry to avoid warping.
- Use a sander to smooth the edges.
- Ensure the wood is stable on the lathe.
- Mark the center of the wood for better balance.
After cutting, check for any imperfections. Look for knots or soft spots. These can cause problems when you start turning. It’s also important to dry the wood properly. Wet wood can warp and ruin your work. Once you’re happy with the shape and condition, you’re ready for the lathe. The smoother the wood, the easier it is to work with. Now you’re all set for the exciting part!
Fun Fact: Some woods have natural oils that smell wonderful when cut!
Tools You Need for Cutting
Cutting tools are essential for wood preparation. Think of them as your artist’s brushes. The most common tool is a saw. A saw can cut through wood easily. There are different types of saws, like hand saws and power saws. Each has its purpose. Hand saws give you control but take more effort. Power saws are faster and make smooth cuts. Always be careful and follow safety rules when using these tools.
Smoothing the Edges
Smoothing is like polishing a rough diamond. You need sanders for this step. Sanders make the wood smooth and nice to touch. A smooth surface is easier to work with on the lathe. You can use sandpaper, too. It comes in different grits. Coarse grit removes rough parts, while fine grit gives a polished finish. Smoothing your blank makes it look and feel better.
Drying Your Wood Properly
Drying is crucial to prevent your bowl from cracking. Wet wood can be tricky. It may change shape as it dries. Think of it like baking a cake. You don’t want it to collapse! Let the wood air dry for a few weeks. If you’re in a hurry, use a kiln for faster drying. Remember, patience is key. Proper drying ensures your bowl stays in perfect shape.
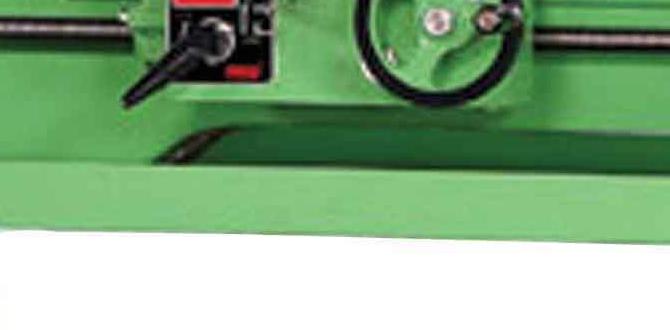
Setting Up Your Lathe for Bowl Blanks
Once your wood is ready, it’s time to set up your lathe. A lathe is a machine that spins the wood. It helps you shape the bowl. Imagine a potter’s wheel but for wood. Proper setup is important for a smooth process. First, make sure the lathe is stable. You don’t want it wobbling! Next, attach your bowl blank securely. It should spin evenly. Always check the speed settings. Too fast or slow can cause trouble.
- Ensure the lathe is on a flat surface.
- Secure the bowl blank tightly.
- Adjust the speed to a safe level.
- Wear safety goggles to protect your eyes.
- Keep your tools sharp for easy cutting.
- Check the lathe’s stability regularly.
- Use clamps if needed for extra security.
Once everything is secure, you’re ready to start turning. Keep your tools handy. They need to be sharp for smooth cuts. Be patient and take your time. Remember, safety first! Pay attention to how the wood reacts. If it vibrates too much, check the setup. A proper setup makes the turning process enjoyable. You’ll see your bowl come to life!
Fun Fact: Lathes have been used for over 3,000 years!
Understanding the Lathe’s Parts
A lathe has many parts that help in wood shaping. The headstock holds the wood and spins it. The tailstock supports the other end. Tool rests help you control your tools while carving. Imagine a car with all its parts working together. Each part has a specific job. Knowing these parts helps you use the lathe better. Familiarize yourself before starting your project.
Importance of Lathe Speed
Speed is crucial in wood turning. Imagine a bike ride. Too slow, and you might fall. Too fast, and you lose control. The same goes for the lathe. Start slow when beginning. This helps to manage any surprises. Gradually increase speed as you gain confidence. Each wood type might need a different speed. Experiment to find the best setting. Safe speed ensures a smooth experience.
Safety Tips for Using a Lathe
Safety is the most important thing when using a lathe. Always wear goggles to protect your eyes. Loose clothing can get caught, so avoid it. Keep your workspace clean. Clutter can lead to accidents. Use sharp tools to avoid slips. Keep a safe distance from the spinning wood. Following these tips helps prevent injuries. Remember, you can’t make a good bowl if you’re hurt!
Tools Needed for Wood Lathe Bowl Blank Preparation
Preparing a bowl blank requires the right tools. Think of them as your superhero gadgets. Each tool has its special power. A bandsaw is great for cutting wood pieces to size. Sanders smooth out rough edges. You’ll need a lathe to spin and shape the bowl. Don’t forget chisels for carving. Each tool helps make the project smoother and easier. Using the right tools makes a huge difference.
- Bandsaw is essential for cutting wood pieces.
- Sanders smooth rough edges and surfaces.
- Lathes help shape and spin the wood.
- Chisels are used for detailed carving.
- Goggles protect your eyes from flying debris.
- Clamps secure the wood in place.
- Tape measures ensure accurate measurements.
Each tool plays a role in the preparation process. For instance, a bandsaw helps you get the right size. Sanders make sure the surface is smooth. A lathe is where the magic happens. It spins the wood, allowing you to shape it carefully. Chisels help add fine details and design. Make sure you have these tools ready before starting. They will make your preparation journey enjoyable and successful.
Fun Fact: The earliest lathes were powered by foot pedals!
Choosing the Right Saw
Choosing a saw can be like choosing a superhero. Each has unique powers. A bandsaw is great for precise cuts. It slices through wood like butter. Circular saws are powerful for larger pieces. Hand saws give you control and feel. Think about your project size. Choose the saw that fits best. Safety is important. Always wear gloves and goggles when using saws. A good saw makes preparation easier.
The Role of Sanders in Preparation
Sanders are like magic wands. They smooth out rough spots on wood. This makes sanding important in preparation. You have belt sanders and orbital sanders. Belt sanders are fast and strong. Orbital sanders are gentle for fine work. Choose based on your needs. Remember to wear a mask. Sanding creates dust. A smooth finish is important for a beautiful bowl.
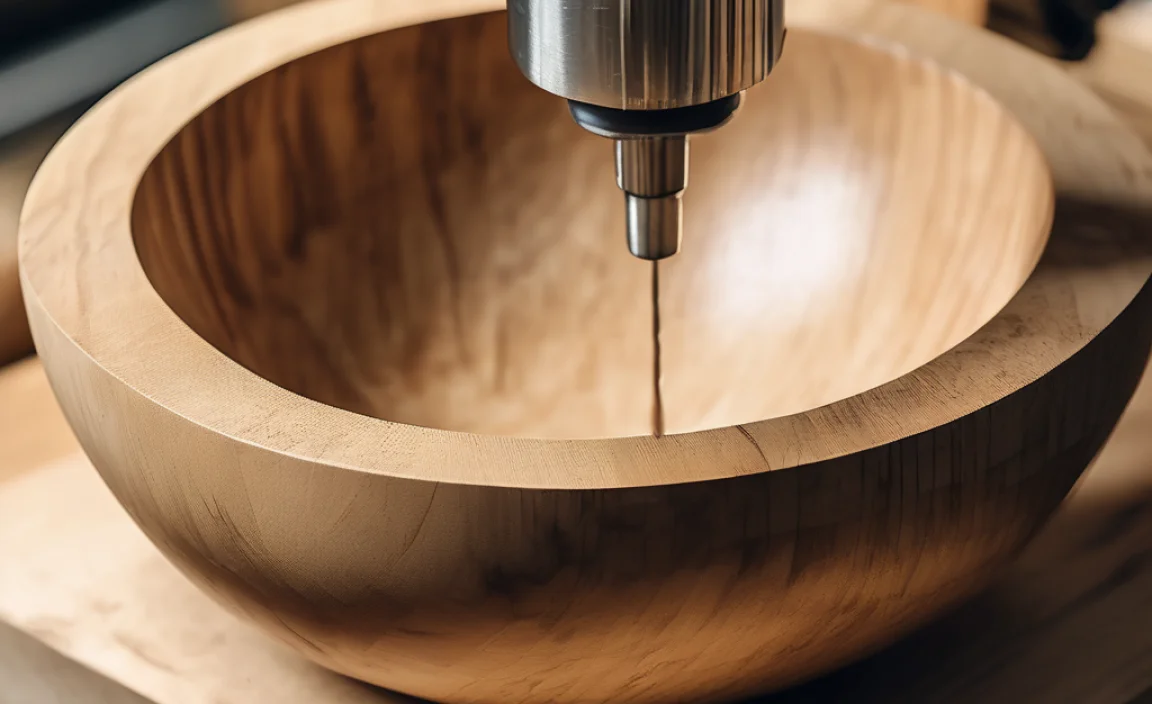
Using a Lathe for Shaping
The lathe is your main tool for shaping bowls. Think of it as a spinning artist’s table. It turns the wood so you can carve evenly. Lathes come in different sizes. Choose one that fits your bowl size. Secure the wood tightly. Use a steady hand to guide your tools. With practice, you’ll create beautiful shapes. The lathe is where your bowl really comes to life. Enjoy the process!
| Tool | Purpose | Safety Tip |
|---|---|---|
| Bandsaw | Cut wood pieces to size | Wear goggles |
| Sander | Smooth wood surfaces | Use a dust mask |
| Lathe | Spin and shape wood | Secure wood tightly |
| Chisel | Carve details | Keep tools sharp |
Finishing Touches on Your Bowl Blank
The final step in wood lathe bowl blank preparation is finishing. This step gives your bowl its shine. Think of it as putting icing on a cake. First, clean the bowl to remove dust. Then, apply a finish like oil or wax. These protect the wood and bring out its color. You can choose from shiny or matte finishes. Each style has a different look. Finishing makes the bowl durable and attractive.
- Clean the bowl to remove dust.
- Choose oil or wax for the finish.
- Apply finish evenly for a smooth look.
- Consider shiny for a bright finish.
- Matte offers a subtle, natural look.
- Let the finish dry completely.
- Apply multiple coats for extra protection.
Finishing is an exciting part of the process. It’s where your hard work truly shines. Applying a finish takes patience. Make sure to cover the entire surface evenly. This helps the bowl look professional. A good finish protects the wood from scratches and stains. Once you’ve applied the finish, let it dry. Now your bowl is ready to use or display. You’ve transformed a simple wood piece into something special.
Fun Fact: Some wooden finishes are made from natural beeswax!
Cleaning Before Finishing
Before you add a finish, cleaning is crucial. Think of it like washing a car before waxing. Dust and dirt can ruin your work. Use a soft cloth to wipe the bowl. Make sure every part is clean. This helps the finish stick better. It also ensures a smooth look. Avoid harsh cleaners that might damage the wood. Once clean, you’re ready for the next step.
Applying Wood Finishes
Applying a finish is like painting a masterpiece. You have many options. Oils like linseed or tung oil work well. They soak into the wood and add depth. Wax gives a soft, smooth feel. Polyurethane offers a tough, shiny surface. Choose based on your desired look. Use a brush or cloth to apply the finish. Make sure it’s even. Let it dry completely for the best results.
Choosing the Right Shine
The shine of your bowl adds to its appeal. A shiny finish reflects light. It’s like a bright, sunny day. Matte finishes are subtle and classic. They’re like a gentle breeze. Your choice affects the bowl’s style. Think about where you’ll use the bowl. Shiny finishes suit modern spaces. Matte finishes fit rustic decor. Experiment to see what looks best.
Conclusion
Making a wooden bowl is an exciting journey. It starts with wood lathe bowl blank preparation. Choosing the right wood, using the right tools, and finishing it well are key. Each step is important for a beautiful and lasting bowl. Remember, practice makes perfect. Enjoy the process and have fun creating something special!
FAQs
Question: What is wood lathe bowl blank preparation?
Answer: Wood lathe bowl blank preparation involves selecting and shaping wood for turning. It includes choosing the right wood, cutting it to size, and ensuring it’s smooth. This preparation is key to making a successful bowl.
Question: Why is wood choice important?
Answer: Wood choice affects the bowl’s appearance and durability. Hardwoods like oak and maple last longer. Softwoods like pine are easier to shape but may not be as durable. Choosing the right wood is essential for the desired outcome.
Question: What tools do I need for preparation?
Answer: You need a bandsaw, sanders, lathe, and chisels for wood lathe bowl blank preparation. Each tool helps shape and smooth the wood. Safety gear like goggles is also important. Having the right tools makes the process easier and safer.
Question: How do I finish my wooden bowl?
Answer: Finishing involves cleaning the bowl and applying oil or wax. This adds shine and protects the wood. Choose finishes based on the desired look, such as shiny or matte. Applying multiple coats can improve durability.
Question: What is the role of a lathe?
Answer: A lathe spins the wood so you can shape it evenly. It helps carve the wood into a bowl shape. Proper setup is crucial for safe and effective turning. Knowing how to use a lathe is key to successful bowl making.
Question: Can I use any wood for bowl making?
Answer: Not all woods are suitable for bowls. Hardwoods like maple and oak are preferred. They are strong and have beautiful grains. Some softwoods can be used for practice. Always choose wood based on the bowl’s intended use.