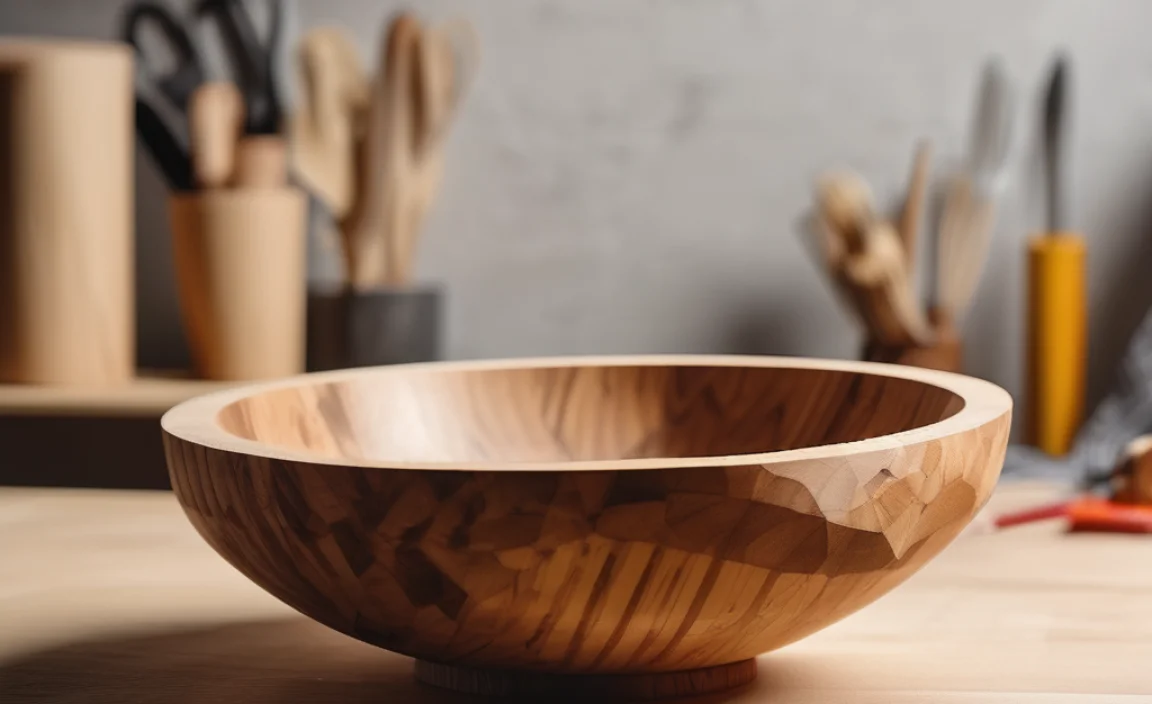
Have you ever wondered how a wooden bowl is made? Woodturning is an exciting art. A wood lathe helps create beautiful bowls. This wood lathe bowl hollowing tutorial will guide you in making your own. Imagine turning a simple block of wood into a masterpiece. Let’s explore the magic of woodturning!
Key Takeaways
- Learn the basics of wood lathe bowl hollowing.
- Understand essential tools for woodturning projects.
- Safety tips are crucial when using a wood lathe.
- This wood lathe bowl hollowing tutorial is beginner-friendly.
- Create beautiful bowls with practice and patience.
Understanding Your Wood Lathe
Before you start, know your wood lathe. It’s a machine that spins wood. You can shape it with various tools. The lathe has several parts. The headstock holds the wood piece. The tailstock supports the other end. The tool rest guides your tools. Speed control lets you adjust how fast the wood spins.
- Read the manual before use.
- Check all parts are secure.
- Start at a slow speed.
- Wear safety glasses.
- Keep hair tied back.
Understanding the lathe is important for safety. It helps you make better bowls too. Always remember to check the lathe before starting. Make sure the wood is attached securely. Practice with the speed settings. It will help you handle the lathe better. Safety is essential in woodturning.
Fun Fact or Stats : The first lathes appeared over 3,000 years ago in Egypt.
Parts of a Wood Lathe
Do you know what makes a wood lathe work? Let’s explore its parts. The headstock and tailstock hold the wood piece. The tool rest helps you guide your tools as you turn the wood. Speed control is also vital. You can adjust how fast the wood spins. This is helpful when working with different materials. Understanding these parts helps you use the lathe safely and effectively.
How to Set Up Your Lathe
Setting up your lathe correctly is key. First, check that your lathe is on a stable surface. This prevents it from moving during use. Attach your wood piece securely between the headstock and tailstock. Adjust the tool rest to the right height. Make sure everything is tight and in place. Always double-check before turning on the lathe. Safety first!
Choosing the Right Speed
How do you know what speed to use? It depends on the wood. Softer woods need slower speeds. Hardwoods can handle faster speeds. Always start slow. Gradually increase the speed as you get comfortable. Pay attention to how the wood behaves. Adjust the speed if you see any problems. Learning to adjust speed is important for both safety and quality.
Essential Tools for Bowl Hollowing
To make bowls, you need more than just a lathe. Different tools help shape the wood. The most common are gouges, chisels, and scrapers. Gouges are curved tools. They remove large amounts of wood. Chisels are flat and used for finer cuts. Scrapers smooth the surface. Each tool has its purpose in bowl hollowing.
- Start with a roughing gouge.
- Use a bowl gouge for shaping.
- Try a skew chisel for detailing.
- Scrapers smooth the inside.
- Keep tools sharp for best results.
It’s important to choose the right tool for each step. Start with a roughing gouge to shape the bowl. Use chisels for details and corners. Scrapers make the bowl’s inside smooth. Keep your tools sharp. Sharp tools are safer and make cleaner cuts. Learning about tools is a big part of this wood lathe bowl hollowing tutorial.
Fun Fact or Stats : Lathes were originally powered by foot pedals.
Gouges and Their Uses
Ever wondered why there are so many gouges? Each has a special use. The roughing gouge quickly removes wood. The bowl gouge shapes the bowl’s curve. Detail gouges help with fine designs. It’s important to choose the right gouge for each job. This ensures a smooth and efficient process. Understanding gouges makes woodturning easier and more fun!
Chisels for Detailed Work
Chisels are vital for fine details. They come in various sizes and shapes. A skew chisel is often used for straight edges. A parting chisel helps with cutting into the wood. Always keep chisels sharp. This makes them safer and more effective. With practice, you’ll learn which chisel works best for each task. Mastering chisels helps you bring life to your wood projects.
Keeping Your Tools Sharp
Sharp tools are a woodturner’s best friend. Why? They make cleaner cuts and are safer to use. Dull tools can slip, causing accidents. Regularly sharpen your tools with a grinder. Use a honing stone for finer edges. Keeping tools sharp saves time and improves your results. With sharp tools, your projects will shine!
Preparing Your Wood Block
Choosing the right wood is important. Different woods create different looks and feels. Always start with a well-dried wood block. Wet wood can warp and crack. Secure the wood block between the headstock and tailstock. This ensures it won’t move during turning. Measure and mark the center. This helps with even shaping. Proper preparation makes the turning process smoother.
- Pick a dry wood block.
- Secure it firmly on the lathe.
- Measure and mark the center.
- Check for cracks or defects.
- Balance the wood for even turning.
Preparing your wood block is crucial. It affects the quality of your bowl. Dry, well-balanced wood spins evenly. This allows for a smooth hollowing process. Always inspect the wood for cracks. Cracks can cause the wood to break while turning. A stable setup means safer and better results.
Fun Fact or Stats : Some exotic woods can sink in water due to density.
Choosing the Right Wood
Do you know what wood to use for bowls? Different woods have different qualities. Hardwoods like oak and walnut are popular. They offer durability and beauty. Softer woods are easier to shape but less durable. Always choose wood that’s dry and free of defects. Good wood leads to good results. Experiment with different types to find your favorite!
Securing Your Wood Block
Securing your wood block is a key step. Place the wood firmly between the lathe’s headstock and tailstock. Tighten until it’s secure. Always double-check for stability. A secure block prevents wobbling or shifting. This ensures even and safe turning. Properly secured wood is the foundation of a successful project.
Balancing Your Wood Block
Balance is important for smooth turning. Unbalanced wood can cause wobbling. This affects the quality of your bowl. To balance, ensure the wood is evenly centered. Rotate it by hand to check for even spinning. Adjust if necessary. Proper balance leads to smoother, safer woodturning. It also makes the process more enjoyable!
Step-by-Step Bowl Hollowing
Ready to hollow out your bowl? Start with a roughing gouge. This removes excess wood quickly. Next, switch to a bowl gouge. Shape the inside of your bowl. Use a scraper for the final smoothing. Check your progress often. Ensure the thickness is even throughout. With practice, hollowing becomes easier and more precise.
- Start with a roughing gouge.
- Switch to a bowl gouge.
- Shape the inside carefully.
- Use scrapers for smoothing.
- Check thickness regularly.
- Practice makes perfect.
Hollowing a bowl is an art. It takes time and patience. Start by removing large chunks of wood. Gradually refine the shape with a bowl gouge. Scrapers help achieve smooth surfaces. Check your bowl often. Uneven thickness can lead to cracks. Practice is key to mastering this skill. Enjoy the process and be proud of your work!
Fun Fact or Stats : The world’s largest wooden bowl is over 10 feet wide!
Starting with the Roughing Gouge
Do you know where to start hollowing? Begin with a roughing gouge. This tool removes large amounts of wood. It helps shape the bowl quickly. Use it to outline the basic form. Keep the gouge steady for even cuts. This initial step sets the stage for detailed work. It’s the foundation of your bowl hollowing journey.
Using the Bowl Gouge
The bowl gouge is essential for shaping. It’s designed to follow the bowl’s curve. Start from the center and work outward. This creates a smooth interior. Keep a firm grip and steady hand. The bowl gouge makes hollowing efficient and precise. It’s a must-have tool in any woodturner’s toolbox.
Smoothing with a Scraper
How do you get a smooth finish? A scraper is your best friend. Use it after shaping with a gouge. The scraper smooths out any rough spots. It ensures a polished and even surface. Always use light, steady pressure. This prevents gouging the wood. A smooth finish is the hallmark of a well-made bowl.
Finishing Touches and Sanding
Once hollowed, you need to finish your bowl. Sanding is the next step. Use different grit sandpapers. Start with coarse grit. Gradually move to fine grit. This process removes tool marks. It also prepares the surface for a finish. Choose a wood finish to protect and enhance the bowl’s beauty.
- Start with coarse sandpaper.
- Progress to finer grits.
- Smooth all tool marks.
- Apply wood finish carefully.
- Let the finish dry completely.
Finishing touches are what make your bowl stand out. Sanding smooths the surface. It prepares the wood for finishing. Choose a finish that highlights the wood’s natural grain. Let the finish dry completely before using the bowl. Finishing adds beauty and durability to your project. Take your time and enjoy the final results!
Fun Fact or Stats : Sandpaper was invented by the Chinese over 2,000 years ago.
Sanding Techniques
Want a smooth bowl? Sanding is the key. Start with coarse sandpaper. This removes rough spots. Gradually switch to finer grits. This polishes the surface. Sand in the direction of the grain. This avoids scratches. Proper sanding makes a big difference. It prepares the bowl for finishing and enhances its beauty.
Choosing the Right Finish
Finishing your bowl adds protection and shine. But how do you choose the right one? Consider the bowl’s use. A food-safe finish works best for kitchen bowls. Oil finishes highlight the wood’s natural grain. Varnishes add a glossy look. Let each coat dry fully before adding more. The right finish enhances and protects your bowl.
Applying the Finish
Applying a finish is the final step. Use a clean, lint-free cloth. Apply the finish in thin, even coats. Let each layer dry before adding another. Lightly sand between coats for extra smoothness. Follow the finish’s instructions for best results. A well-applied finish protects the bowl and brings out its beauty.
Conclusion
Creating a wooden bowl is fun and rewarding. This wood lathe bowl hollowing tutorial is just the start. With practice, you can make beautiful and unique bowls. Remember to be patient and enjoy the process. Each bowl is a chance to improve your skills. Happy woodturning!
FAQs
Question: What is a wood lathe?
Answer: A wood lathe is a machine that spins wood. You use tools to shape it. It’s great for making bowls and other round objects. This machine helps turn simple wood into beautiful pieces.
Question: Why is safety important in woodturning?
Answer: Safety is crucial in woodturning to avoid injuries. Always wear safety gear like goggles. Keep long hair tied back. Secure the wood properly. Check your tools before use. Follow the wood lathe bowl hollowing tutorial for safe practices.
Question: How do I start hollowing a bowl?
Answer: Start with a roughing gouge. This removes large chunks of wood. Then, switch to a bowl gouge for shaping. Use scrapers to smooth the inside. Follow the steps in the wood lathe bowl hollowing tutorial for best results.
Question: What tools are needed for bowl hollowing?
Answer: Essential tools include gouges, chisels, and scrapers. Gouges shape the bowl. Chisels add details. Scrapers smooth the surface. Keep these tools sharp for safe and effective woodturning. Each tool helps achieve a specific part of the process.
Question: How do I finish a wooden bowl?
Answer: First, sand the bowl with various grits of sandpaper. This smooths the surface. Next, apply a wood finish. Choose one that suits the bowl’s purpose. Let each coat dry fully before adding another. A good finish enhances and protects the wood.
Question: Can kids learn woodturning?
Answer: Yes, kids can learn woodturning under supervision. Start with basic projects. Always focus on safety. Ensure proper guidance and teaching. Woodturning can develop creativity and skills. Encourage safe and fun learning.