Have you ever wondered how to keep your wood lathe chisels sharp? Using a DIY sharpening jig can make a big difference. It helps maintain a chisel’s sharpness, which is important for precise woodwork. Imagine your chisel slicing through wood like butter! A homemade wood lathe chisel sharpening jig can help you achieve this.
Crafting your own jig is fun and rewarding. You can save money and learn new skills. Plus, it’s a project you can be proud of. So, why not give it a try? With a bit of guidance, you’ll be sharpening chisels like a pro.
Key Takeaways
- A DIY sharpening jig keeps chisels sharp for longer.
- Sharp chisels make woodworking safer and more precise.
- You can save money by building your own jig.
- Learn new skills with this fun DIY project.
- A wood lathe chisel sharpening jig DIY is easy to make.
Understanding the Wood Lathe Chisel
A wood lathe chisel is a tool used to shape wood on a lathe. It works by cutting or shaving away layers of wood. The design of the chisel determines the type of cut it makes. For example, some chisels create smooth curves, while others carve straight lines. Keeping these tools sharp is crucial for quality woodworking.
- Shapes wood on a lathe.
- Used for cutting or shaving wood.
- Different designs for various cuts.
- Essential for smooth, precise work.
- Sharp tools ensure better results.
Sharp chisels are safer and more efficient. A dull chisel can slip and cause accidents. It also requires more effort to use. A well-sharpened chisel, however, slides easily through wood. This makes your work faster and more enjoyable.
Fun Fact: The first wood lathes date back to ancient Egypt, over 3,000 years ago!
Why Sharp Chisels are Important
Have you ever tried to cut vegetables with a dull knife? It’s hard and frustrating, right? The same goes for woodworking. Sharp chisels are like sharp knives. They make cutting easier and more precise. With a sharp chisel, you can turn wood into beautiful shapes and designs. It also makes your work safer because you have better control.
Different Types of Chisels
There are many types of wood lathe chisels. Each type has a specific purpose. Some common ones are gouges, skew chisels, and parting tools. Gouges are great for rough cuts and shaping. Skew chisels give smooth finishes. Parting tools create grooves in the wood. Knowing which chisel to use is important for the best results.
Maintaining Chisel Sharpness
Keeping your chisels sharp is important for good woodwork. Regular sharpening is key. A sharpening jig makes this task easier. It holds the chisel at the right angle while you sharpen it. This ensures even and consistent sharpening. With a well-maintained chisel, your projects will look professional and polished.
Building Your Own Sharpening Jig
Creating a wood lathe chisel sharpening jig is a fun DIY project. You don’t need to buy expensive tools or materials. Many items can be found around the house or at a hardware store. The jig holds the chisel steady while you sharpen it. This helps ensure a sharp edge every time.
- Easy and fun DIY project.
- Uses simple tools and materials.
- Improves sharpening accuracy.
- Saves money on buying ready-made jigs.
- Enhances woodworking skills.
To build your own jig, you’ll need some basic tools. A saw, drill, and screws are essential. You’ll also need wood for the jig frame. Measure and cut the wood pieces, then assemble them. The jig should hold the chisel at a consistent angle for sharpening.
Fun Fact: The word “chisel” comes from the Latin “cisellum,” meaning “cutting tool.”
Materials Needed
Starting a DIY project is exciting, but do you have the right materials? For your sharpening jig, gather some wood, a saw, a drill, and screws. You might need sandpaper to smooth out any rough edges. With these materials, you can build a simple yet effective jig. It doesn’t take much to get started.
Step-by-Step Guide
Ready to build your jig? First, cut the wood to size. Next, drill holes for the screws. Assemble the pieces to form a stable base. Make sure it’s sturdy enough to hold a chisel. Finally, test the jig with a chisel to ensure a good fit. Adjust as needed for the best results.
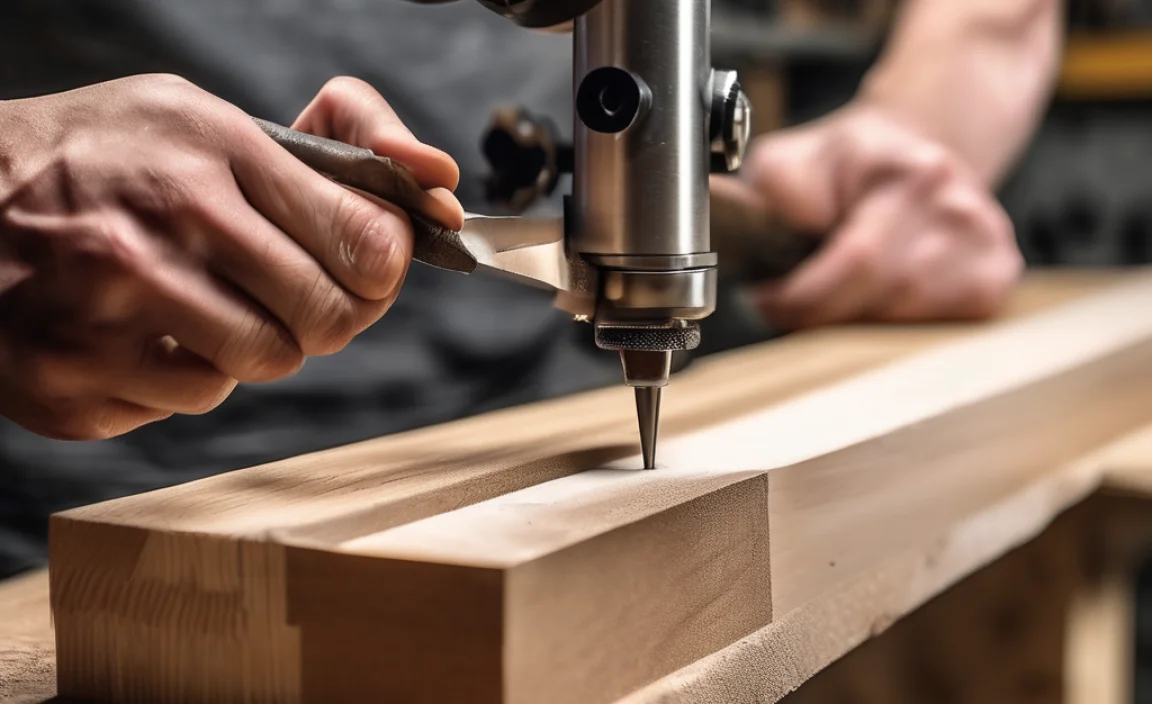
Testing Your Jig
How do you know your jig works well? Try sharpening a chisel! Place the chisel in the jig and use a sharpening stone. The jig should keep the chisel steady. Check the chisel’s edge as you sharpen. Is it even and sharp? If so, your jig is a success.
Sharpening Techniques for Beginners
Sharpening chisels can seem tricky at first. But with practice, it becomes second nature. The key is to hold the chisel at the right angle. Use a sharpening stone for best results. Start with a coarse stone to reshape the edge. Then, switch to a finer stone for finishing.
- Practice makes perfect.
- Hold chisel at correct angle.
- Use a sharpening stone.
- Start with coarse, then fine stone.
- Feel for smooth, sharp edge.
Practice is important for mastering sharpening. Try different angles and pressures. Over time, you’ll develop a feel for the process. Don’t rush; take your time to ensure a sharp and precise edge.
Fun Fact: The sharpest tool in the world is a tungsten needle, with a tip just one atom wide!
Choosing the Right Sharpening Stone
Do you know which sharpening stone to use? There are many types, like water stones and oil stones. Water stones are popular because they’re easy to use. Oil stones are longer lasting. Both can give a sharp edge. Try out different stones to find what works best for you.
Angle Matters
Why is the angle important when sharpening? A proper angle ensures a sharp edge. Too steep or too shallow can dull the chisel. Most chisels need a 25 to 30-degree angle. Use a sharpening guide for accurate angles. This helps maintain the chisel’s edge longer.
Common Mistakes to Avoid
Ever wondered why your chisel isn’t sharp? You might be making some common mistakes. Pressing too hard can damage the edge. Sharpening at the wrong angle can make it dull. Always check your technique. Practice and patience are key to sharpening success.
Benefits of a Sharp Chisel
A sharp chisel offers many advantages. It slices through wood with ease and precision. This makes your work more enjoyable and less tiring. A sharp chisel also reduces the risk of accidents. You’re less likely to slip and hurt yourself with a well-honed edge.
- Effortless and precise cutting.
- More enjoyable woodworking.
- Less tiring on your hands.
- Reduces accident risk.
- Improves project quality.
With sharp chisels, your woodworking projects will look better. Clean cuts and smooth finishes become achievable. This boosts your confidence and inspires more creative designs.
Fun Fact: The Guinness World Record for the largest wooden sculpture is 12 meters tall!
Boosting Confidence in Woodworking
Do you feel more confident using sharp tools? They help you create better projects. You can achieve cleaner cuts and detailed designs. This skill improves your woodworking abilities. A sharp chisel empowers you to try new techniques and challenges.
Improving Work Efficiency
Why work harder when you can work smarter? Sharp chisels make your tasks quicker and more efficient. Less effort is needed to carve and shape wood. This saves you time and energy. With sharp tools, you can complete projects faster and with greater ease.
Creating Professional-Quality Work
Ever wanted your work to look like a pro’s? Sharp chisels can help. They allow for precise cuts and smooth finishes. Your projects will have a polished appearance. This enhances the overall quality, making your work stand out.
Comparison: DIY Jig vs. Store-Bought Jig
Should you make a DIY jig or buy one? Both have their pros and cons. A DIY jig is cost-effective and customizable. You can build it to fit your needs. On the other hand, store-bought jigs are ready to use but may be more expensive.
| Feature | DIY Jig | Store-Bought Jig |
|---|---|---|
| Cost | Low | High |
| Customization | High | Low |
| Ease of Use | Moderate | Easy |
| Durability | Varies | High |
Consider your budget and needs when choosing. A DIY jig offers flexibility and creativity. You can adjust it to suit your chisels perfectly. However, a store-bought jig may last longer and is quicker to set up.
Fun Fact: The most expensive chisel set in the world costs over $2,000!
Cost Considerations
Are you worried about costs? DIY jigs are budget-friendly. You can use materials you already have. Store-bought jigs may be expensive but require no building. Weigh the costs against your time and skills to decide.
Customization Options
Do you like customizing your tools? DIY jigs offer that freedom. You can modify the design to fit specific chisels. Store-bought jigs have limited customization. Think about how much flexibility you need before choosing.
Durability and Longevity
How long will your jig last? DIY jigs vary in durability, depending on materials. Store-bought jigs usually last longer. Consider how often you’ll use the jig. Your choice depends on how much wear and tear it will face.
Conclusion
Creating your own wood lathe chisel sharpening jig DIY is rewarding. It keeps your chisels sharp and ready for action. With sharp tools, you can achieve better results in your woodworking projects. So, gather your materials and start building your jig today!
FAQs
Question: What is a wood lathe chisel sharpening jig?
Answer: A wood lathe chisel sharpening jig holds chisels steady for sharpening. It helps keep the correct angle. This ensures an even and sharp edge every time.
Question: Why is DIY better than buying a sharpening jig?
Answer: A DIY jig is cost-effective and customizable. You can design it to fit your specific tools. Building it also helps you learn valuable skills, making it a fun and rewarding project.
Question: What materials are needed for a DIY sharpening jig?
Answer: You need wood, a saw, a drill, and screws. Sandpaper may be useful to smooth edges. These materials help create a sturdy and effective jig.
Question: How do I use a wood lathe chisel sharpening jig DIY?
Answer: Place the chisel in the jig, ensuring it’s secure. Use a sharpening stone to sharpen the edge. The jig keeps the chisel at the correct angle, aiding a consistent edge.
Question: Can I make a jig without special tools?
Answer: Yes, you can use basic tools like a saw and drill. These are often found at home. With these tools, you can build a simple yet functional jig.
Question: How do I know my chisel is sharp?
Answer: A sharp chisel cuts easily and smoothly. Test it by slicing through wood. If it cuts with little effort, it’s sharp. If it struggles, it needs more sharpening.