Homemade wood lathe chuck jaws can be a surprisingly accessible and rewarding DIY project for any woodturner looking to expand their capabilities without breaking the bank. While commercial chucks and jaw sets offer precision and a wide range of features, there’s a unique satisfaction in crafting your own custom jaws. This approach not only saves money, especially for beginners or those with specific, unusual turning needs, but also allows for unparalleled personalization. Whether you’re hollowing out a deep vessel, securing an irregularly shaped blank, or simply want to understand the mechanics of your lathe a little better, building your own wood lathe chuck jaws homemade DIY solution can open up a world of creative possibilities.
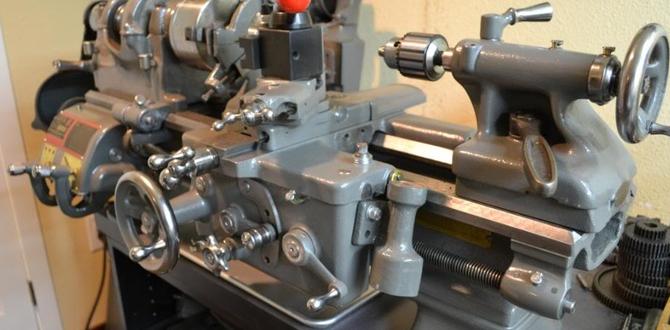
The initial thought of fabricating metal parts might seem daunting, but for basic jaw designs, the requirements are often less demanding than one might expect. The key is to understand the fundamental function of chuck jaws: to grip a workpiece securely and concentrically on the lathe spindle. This gripping action relies on the jaws mating precisely with the chuck body and applying consistent pressure to the wood.
Understanding the Basics of Chuck Jaw Design
Before diving into fabrication, it’s essential to grasp the core principles behind how chuck jaws work. Most modern chucks employ a dovetail or serrated jaw profile that mates with a corresponding channel on the chuck body. This interface is crucial for ensuring rigidity and consistent jaw travel. For homemade wood lathe chuck jaws DIY projects, we’re often looking at simpler designs, perhaps utilizing readily available materials like hardwood or even fabricated metal components designed to clamp within existing chuck jaws.
A common approach for homemade jaws is to create wooden inserts that attach to the base of existing metal jaws. This allows you to customize the gripping surface for specific projects. For example, if you’re turning very thin or delicate items where metal jaws might mar the surface, you could craft soft wooden jaws to provide a gentler grip. Similarly, for irregularly shaped blanks, you can carve out custom hollows within wooden jaws to cradle the workpiece perfectly.
Materials and Tools for Your Homemade Wood Lathe Chuck Jaws
The materials you choose will significantly influence the durability and application of your homemade jaws. For wooden inserts aimed at softer gripping, dense hardwoods like oak, maple, or even some exotic hardwoods are excellent choices. These woods offer good strength and can be carved or shaped with relative ease. If you’re aiming for more robust, standalone jaws, you might consider using thicker hardwood stock or even fabricating metal components.
The toolset required will depend on the complexity of your design. For wooden jaws, you’ll likely need:
A Saw: For cutting lumber to size. A table saw or even a good hand saw can suffice.
Drill and Drill Bits: Essential for creating pilot holes and screw holes.
Chisels and Gouges: For shaping the gripping surfaces, especially if creating custom hollows.
Sandpaper and Files: For refining the shape and ensuring a smooth finish.
Measuring Tools: Calipers, rulers, and pencils for accurate marking.
Screws or Bolts: For attaching your homemade jaws to the chuck base. Ensure they are of appropriate length and strength.
If you’re venturing into metal fabrication for wood lathe chuck jaws homemade DIY solutions, the requirements become more advanced, potentially including:
Metal Lathe: For precise machining of metal components.
Milling Machine: For creating accurate dovetail or serrated profiles.
Grinders and Files: For finishing metal surfaces.
Welding Equipment: Depending on the chosen method.
For most hobbyists, focusing on wooden inserts or simpler hardwood jaw designs will be the most practical and achievable entry point.
Crafting Simple Wooden Inserts for Enhanced Grip
Let’s consider a common scenario: you need to turn a delicate piece that could be damaged by standard metal jaws. Here’s a straightforward method for creating wooden inserts:
1. Measure and Cut: Measure the dimensions of your existing chuck jaws. Cut pieces of hardwood to match these dimensions, ensuring a snug fit. You’ll also need to account for the screw holes. If your chuck jaws have pre-drilled holes for inserts, use those. Otherwise, you’ll need to carefully mark and drill corresponding holes.
2. Drill Attachment Holes: Transfer the screw hole locations from your chuck jaws to your wooden jaw blanks. Drill pilot holes, ensuring they are deep enough for your chosen screws but not so deep as to compromise the structural integrity of the wooden jaw.
3. Shape the Gripping Surface: This is where customization comes in. You can leave the surface flat for a standard grip, or you can carve into it. For bowls, you might create a concave profile. For spindle work, you might create v-shaped notches to hold tenons more securely. Use chisels, gouges, or even a router with a template to achieve your desired shape.
4. Refine and Attach: Sand the shaped surfaces smooth. Attach the wooden jaws to your chuck base using appropriate screws. Ensure they are tightened securely but avoid overtightening, which could strip the wood.
5. Test and Adjust: Mount a scrap piece of wood and test the grip. Make any necessary adjustments to the shape or fit.
Advanced DIY: Custom Serpentine or Dovetail Jaws
For those with machining capabilities, creating custom jaws from scratch offers even greater possibilities. This typically involves working with metal stock from which you can mill dovetail or serrated profiles that mate with the grooves in your chuck body. This is a more advanced undertaking, requiring precision machining to ensure secure and concentric gripping. The key here is to accurately replicate the taper or profile of your chuck’s jaw system. Detailed measurements and careful machining are paramount to achieving safe and effective custom jaws.
When embarking on any wood lathe chuck jaws homemade DIY project, safety should always be your top priority. Always wear appropriate safety glasses and face shield. Ensure your workpiece is securely mounted before turning on the lathe. Start with slow speeds and gradually increase them as you gain confidence and assess the stability of your setup. Never use homemade jaws for high-speed turning until you are absolutely confident in their strength and the security of their mounting.
In conclusion, the world of wood lathe chuck jaws homemade DIY solutions offers a rewarding path for woodturners to innovate and customize their tools. Whether you’re creating simple wooden inserts for delicate work or venturing into more complex fabricated jaws, the benefits of cost savings and tailored functionality are significant. With careful planning, the right materials, and a commitment to safety, you can unlock new levels of creativity on your wood lathe, one custom jaw at a time.