Unleash Precision: Your Ultimate Wood Lathe CNC Attachment Guide
Unleash unparalleled precision and unlock a new dimension of creativity in your woodworking with a wood lathe CNC attachment guide. For centuries, the wood lathe has been a cornerstone of craftsmanship, allowing artisans to shape beautiful forms from raw timber. However, the advent of Computer Numerical Control (CNC) technology has revolutionized this traditional craft, offering hobbyists and professionals alike the ability to achieve intricate designs, perfect repeatability, and a level of detail previously unimaginable. This ultimate guide will walk you through everything you need to know to integrate a CNC attachment with your existing wood lathe.
The concept of a wood lathe CNC attachment might seem complex, but at its core, it’s about translating digital designs into precise, automated movements. Instead of relying solely on manual skill and constant adjustment, a CNC system utilizes motors controlled by a computer to move a cutting tool along multiple axes (typically X and Z for a lathe) with incredible accuracy. This allows for the creation of complex profiles, repeating patterns, and even three-dimensional carvings that would be incredibly challenging, if not impossible, to achieve by hand.
Understanding the Components of a CNC Lathe Attachment
Before delving into specific types and considerations, it’s crucial to understand the fundamental components that make up a typical wood lathe CNC attachment:
Stepper Motors or Servo Motors: These are the “muscles” of the system, responsible for translating digital commands into physical movement. Stepper motors offer precise steps for positioning, while servo motors provide closed-loop feedback for even greater accuracy and speed.
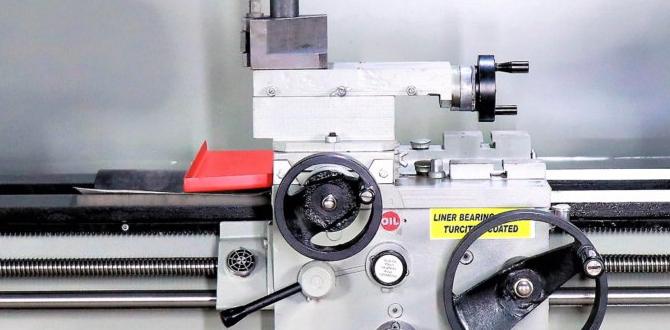
Linear Rails and Bearings: These provide a smooth, low-friction pathway for the cutting tool carriage to move along the lathe’s bed. Quality linear motion components are essential for achieving smooth cuts and minimizing vibration.
Lead Screw or Ball Screw: This component converts the rotational motion of the motor into linear motion for the cutting tool. Ball screws are generally more precise and efficient but also more expensive than lead screws.
Control Board/Driver Board: This acts as the intermediary between your computer and the motors. It interprets the G-code (the language of CNC machines) and sends the appropriate signals to the motors.
Power Supply: Provides the necessary electrical power to operate the motors and control board.
Software: This encompasses both the Computer-Aided Design (CAD) software used to create your 3D models and the Computer-Aided Manufacturing (CAM) software that generates the G-code toolpaths. You’ll also need CNC control software to send the G-code to your attachment.
Types of Wood Lathe CNC Attachments
The market offers a range of CNC lathe attachments, each with its own strengths and suitability for different users:
DIY Kits: For the adventurous and budget-conscious hobbyist, DIY CNC kits provide all the necessary components and instructions to build your own attachment. This requires a good understanding of mechanics and electronics, but the reward is a fully customized system and a sense of accomplishment.
Pre-Assembled Kits: These kits come with most of the fabrication already done, requiring less mechanical assembly. They are a good middle ground, offering a balance of cost-effectiveness and convenience.
Complete Turnkey Solutions: For those prioritizing ease of use and immediate functionality, complete CNC lathe attachment systems are available. These are typically the most expensive option but offer professional-grade performance and minimal setup.
Selecting the Right Wood Lathe CNC Attachment for Your Needs
When choosing a wood lathe CNC attachment, several factors should influence your decision:
Your Lathe’s Size and Swing: The attachment must be compatible with the physical dimensions of your wood lathe. Ensure it can accommodate the “swing” (maximum diameter of the workpiece) and the overall length of your machine.
Accuracy and Tolerances: If you’re aiming for extremely fine details and tight tolerances, invest in a system with high-quality components like ball screws and precision linear rails.
Complexity of Projects: For simple turning operations, a basic stepper motor system might suffice. For intricate carving, 3D profiling, or repeating complex patterns, a more robust system with servo motors and advanced control software will be necessary.
Budget: As with any woodworking tool, your budget will play a significant role. DIY kits are the most economical, while turnkey solutions represent the higher end of the spectrum.
Technical Skill Level: Be honest about your comfort level with electronics, mechanics, and software. If you’re new to CNC, a pre-assembled kit or a user-friendly turnkey system might be a better starting point.
Getting Started with Your Wood Lathe CNC Attachment: A Step-by-Step Approach
Once you’ve acquired your chosen attachment, the journey to CNC-powered woodworking begins. Here’s a general outline of the process:
1. Installation and Calibration: Follow the manufacturer’s instructions meticulously for installing the attachment onto your lathe. This often involves mounting rails, attaching motors, and connecting the control electronics. Crucially, you’ll need to calibrate the system, ensuring the software accurately translates motor movements into desired tool movements.
2. Software Setup: Install your chosen CAD, CAM, and CNC control software. Familiarize yourself with the user interface and basic functionalities.
3. Design Your Project: Use your CAD software to create the 3D model of the item you wish to turn. This could be anything from a simple table leg to an intricate vase.
4. Generate Toolpaths (CAM): Import your CAD model into your CAM software. Here, you’ll define the cutting tools, speeds, feeds, and the sequence of operations (toolpaths) the CNC will follow. This is a critical step that directly impacts the quality of your finished piece.
5. Simulate and Review: Most CAM software allows for simulation of the toolpaths. This is invaluable for identifying any potential collisions, inefficient movements, or errors in your G-code before sending it to the machine.
6. Run the Job: Load the generated G-code into your CNC control software and initiate the machining process. It’s essential to supervise the first few runs closely, observing the machine’s performance and making minor adjustments if necessary.
The Transformative Power of CNC Woodturning
Integrating a CNC attachment with your wood lathe opens up a world of possibilities. It empowers you to:
Achieve Unprecedented Detail: Execute intricate carvings, precise fluting, and complex profiles with ease.
Ensure Perfect Repeatability: Produce identical multiple copies of a design, ideal for furniture components or decorative elements.
Experiment with Complex Geometries: Explore designs that would be prohibitively difficult or time-consuming to create manually.
Save Time and Effort: Automate repetitive tasks, freeing you to focus on design and finishing.
* Elevate Your Craftsmanship: Push the boundaries of what’s possible with woodturning, leading to unique and commercially viable creations.
Your wood lathe CNC attachment guide is just the beginning. As you gain experience, you’ll discover the true transformative power of this technology, allowing you to unlock new levels of precision, creativity, and efficiency in your woodworking endeavors. Embrace the future of woodturning and let your imagination guide you.

