Mastering Wood Lathe Duplicator Attachment Setup: An Easy Guide
Transforming raw timber into identical, intricate designs is a dream for many woodworkers, and the wood lathe duplicator attachment setup is your key to unlocking this precision. This ingenious device allows you to effortlessly replicate shapes, turning a single master piece into a legion of identical components. Whether you’re crafting a set of table legs, a batch of decorative spindles, or multiple identical bowls, a well-configured duplicator can save you countless hours and elevate the consistency of your work.
Setting up a wood lathe duplicator might seem daunting at first, but with a clear understanding of its components and a methodical approach, the process becomes surprisingly straightforward. This guide will walk you through the essential steps, ensuring you get your duplicator ready to roll with confidence.
Understanding Your Wood Lathe Duplicator Attachment
Before diving into the setup, it’s crucial to familiarize yourself with the core components of your duplicator. While specific designs may vary between manufacturers, most systems include these fundamental parts:
Master Template Holder: This is where you’ll securely mount your “master” piece – the original shape you want to replicate.
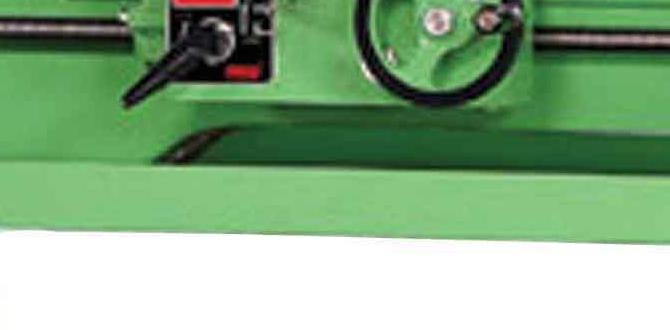
Tool Rest Adapter (or Carriage Mount): This component typically attaches to your lathe’s tool rest or carriage, providing a stable base for the duplicator’s arm.
Follower Arm/Stylus: This arm moves along the contours of your master template. It’s usually equipped with a stylus or follower pin that translates the master’s shape.
Cutting Tool Holder: This is where your lathe’s cutting tool is mounted. The tool’s movement is dictated by the follower arm, ensuring it carves the same shape into your workpiece.
Adjustable Guides/Clamps: These are used to align the tool rest adapter and secure the master template and workpiece accurately.
Taking the time to identify these parts on your specific duplicator will make the setup process much smoother. Consult your owner’s manual if you’re unsure about any component.
Pre-Setup Checks and Considerations
Before you begin attaching anything to your lathe, a few preliminary steps will ensure a safe and efficient wood lathe duplicator attachment setup:
1. Lathe Preparation: Ensure your lathe is clean, stable, and unplugged. Check that the headstock and tailstock are properly aligned. Safety first is paramount when working with machinery.
2. Master Template: Create or select your master template. This can be a piece of wood you’ve shaped by hand, a pre-made template, or even a physical object. Ensure the master is precisely shaped and free of any imperfections you don’t want replicated.
3. Workpiece Material: Prepare your workpiece. It should be securely mounted in the lathe between the headstock and tailstock, just as you would for regular turning. The diameter and length should be sufficient to accommodate the replicated shape.
4. Tools: Have your necessary tools readily available. This includes wrenches, screwdrivers, measuring tape, and of course, your lathe’s cutting tools.
The Core of Wood Lathe Duplicator Attachment Setup
Now, let’s get to the practical steps of setting up your duplicator. The order and specific adjustments might differ slightly based on your model, but the general principles remain consistent.
Attaching the Tool Rest Adapter
This is often the first major step. The tool rest adapter needs to be firmly secured to act as a stable foundation.
Positioning: Most adapters will mount onto the existing tool rest T-slot or directly onto the carriage. Ensure it’s positioned so that the follower arm and cutting tool have clear access to both the master template and the workpiece.
Tightening: Once in place, tighten all locking mechanisms securely. Any wobble or looseness here will translate into inaccuracies in your replicated pieces. Double-check that the adapter is level with the lathe’s bed.
Mounting the Master Template and Workpiece
Accurate alignment is critical for a successful wood lathe duplicator attachment setup.
Master Template Alignment: Securely clamp your master template into its holder. The axis of the template should be perfectly aligned with the axis of your lathe’s rotation. Many duplicators have alignment marks or set screws to aid in this.
Workpiece Alignment: As mentioned, your workpiece should be securely mounted between the centers. Ensure it’s running true and that you have enough material to work with.
Connecting the Follower Arm and Cutting Tool
This is where the magic happens – the linkage between the master and the replication.
Follower Arm Attachment: The follower arm typically attaches to the tool rest adapter or carriage mount. Ensure it moves freely and smoothly throughout its intended range of motion.
Stylus/Follower Placement: Position the stylus so it touches the master template. The distance between the stylus and the cutting tool is a crucial factor in determining the scale of replication. Most duplicators are designed for 1:1 replication, meaning the stylus and tool are equidistant from the pivot point or mounting arm.
Cutting Tool Mounting: Mount your chosen cutting tool (typically a gouge or scraper designed for a specific profile) into its holder. Position it so that as the stylus traces the master, the cutting tool is at the correct distance and angle to remove material from the workpiece, creating the mirrored shape. Some duplicators have adjustable offsets for the cutting tool to fine-tune the cut.
Initial Adjustments and Test Runs
Before you commit to a full cut, performing some initial adjustments and test runs is wise.
1. Zeroing: With both the stylus on the master and the cutting tool engaged with the workpiece (but not cutting deeply), ensure both are at the same “zero” point or starting position.
2. Free Movement Check: Gently move the follower arm to trace the master template. Observe the movement of the cutting tool. It should mirror the stylus’s path smoothly and consistently. There should be no binding or catching.
3. Shallow Test Cuts: Make very shallow test cuts on your workpiece. Don’t try to achieve the final shape immediately. These shallow cuts will help you verify alignment and cutting depth. You can then compare the cut shape to your master for accuracy.
4. Depth Adjustment: If the replicated shape isn’t quite matching, you may need to adjust the cutting depth or the position of the cutting tool. This often involves fine-tuning screws or locking collars on the tool holder or the duplicator arm itself.
Tips for Success with Your Wood Lathe Duplicator
Sharp Tools: Always use sharp cutting tools. A dull tool will drag and create a poor finish, regardless of how well your duplicator is set up.
Consistent Speed: Maintain a consistent lathe speed throughout the replication process.
Gradual Material Removal: Don’t try to remove too much material in one pass. Multiple shallow passes will yield better results and reduce stress on your tools and the duplicator.
Lubrication: If your duplicator has moving parts that require lubrication, don’t neglect it. Smooth operation is key.
* Maintenance: Regularly clean and inspect your duplicator for wear and tear. Keeping it in good condition will ensure longevity and continued accuracy.
By following these steps and paying attention to the details, your wood lathe duplicator attachment setup will be a breeze. This powerful tool will then become an indispensable part of your woodworking arsenal, enabling you to produce perfectly matched components with efficiency and precision. Happy turning!