Wood lathe dust filter installation can seem like a daunting task before you begin, conjuring images of complicated machinery and intricate diagrams. However, the reality is that most modern dust filters are designed with user-friendliness in mind, making the setup process surprisingly straightforward. Whether you’re a seasoned woodturner or just starting out, investing in a good dust collection system is paramount for both your health and the cleanliness of your workshop. This guide will demystify the process, breaking down the typical steps involved in a typical wood lathe dust filter installation to ensure you can get your system up and running with minimal fuss.
The advancements in woodworking technology have extended to dust collection. Gone are the days of clunky, difficult-to-assemble units. Today’s manufacturers understand that their customers want to spend more time turning wood and less time wrestling with equipment. This focus on ease of use translates directly into simpler installation procedures. The core principle is to create a sealed system that efficiently captures airborne wood particulates generated by your lathe. These particulates, often referred to as “wood dust,” can range from fine sawdust to larger shavings, all of which pose respiratory hazards and create an unpleasant working environment if not managed.
Understanding Your Dust Collection System
Before diving into any wood lathe dust filter installation, it’s crucial to familiarize yourself with the components of your specific system. Most portable or shop-style dust collectors for lathes consist of a few key parts:
The Collection Drum or Bag: This is where the dust and debris are collected. It could be a clear plastic drum, a fabric bag, or a combination of both.
The Motor and Impeller: This generates the suction needed to draw dust into the system.
The Filter: This is the critical component that separates the fine dust particles from the air, allowing cleaner air to be exhausted. Filters can be pleated paper, electrostatic, or other specialized materials.
The Inlet Port: This is where the hose connects to the dust collector.
* Hoses and Fittings: These transport the dust from your lathe to the collector.
Take a moment to unpack everything and lay out the parts. Refer to the manufacturer’s manual – this is your most valuable resource. It will provide specific diagrams and instructions tailored to your model. While the general principles discussed here apply broadly, your manual will have the definitive steps.
Pre-Installation Checks and Preparation
A smooth wood lathe dust filter installation begins with preparation. Before you attach any hoses or power up anything, consider the following:
1. Location: Choose a convenient and accessible location for your dust collector. It should be close enough to your lathe to minimize hose length (long hoses can reduce suction efficiency) but not so close that it obstructs your work area or movement. Ensure it’s on a stable, level surface.
2. Power Source: Confirm you have access to an appropriate power outlet. Most dust collectors require a dedicated circuit or a circuit capable of handling the motor’s amperage draw.
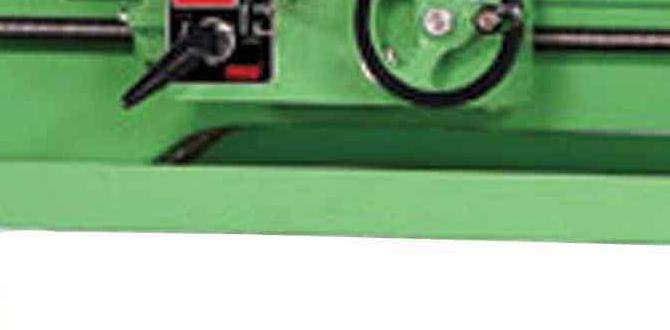
3. Connections: Identify all the ports and connection points on your lathe and your dust collector. Your lathe will likely have a dust extraction port, often located near the headstock or the tool rest.
The Simple Steps to Wood Lathe Dust Filter Installation
Once you’ve reviewed your manual and prepared your space, you’re ready for the actual installation. For most bolt-on style filters, the process is as follows:
1. Attaching the Filter: Many dust collectors have a housing for the filter. This might involve unscrewing a lid or loosening a clamp. Carefully remove the old filter (if replacing one) or unpack the new one. Ensure the filter is oriented correctly – there’s usually an arrow indicating airflow direction. Seat the new filter firmly in its housing, making sure there are no gaps around the seals. If your system uses a bag, ensure it’s securely attached to the frame.
2. Connecting the Hose: This is perhaps the most straightforward step. Locate the inlet port on your dust collector (where the dust enters). Attach one end of your dust collection hose to this port. Secure it with a clamp if provided, ensuring an airtight seal.
3. Connecting to the Lathe: Now, take the other end of the dust collection hose and connect it to the dust extraction port on your wood lathe. Again, a secure, airtight connection is crucial. This might involve a simple push-fit, a bayonet-style connector, or a hose clamp. If your lathe doesn’t have a dedicated dust port, you might need to fashion a temporary adapter using flexible tubing and tape, though a dedicated port is always recommended for optimal performance.
Post-Installation Checks and First Use
After the physical wood lathe dust filter installation is complete, a few final checks are in order before you power up:
1. Component Security: Double-check that all connections are tight and secure. Make sure the collection drum or bag is properly affixed and sealed. Check that the filter is seated correctly.
2. Power On: With the lathe turned off, plug in your dust collector and turn it on. Listen for any unusual noises, such as rattling or excessive vibration. You should feel a strong suction at the dust extraction port on your lathe.
3. Test Run: Turn on your wood lathe and begin a simple turning operation, perhaps with some scrap wood. Observe your dust collection system in action. Any visible dust escaping indicates a potential leak in the system – re-check your hose connections and seals. After a few minutes, turn off the lathe and inspect the collection drum or bag. You should see a noticeable amount of dust and shavings collected.
Maintenance for Longevity
Proper maintenance is key to ensuring your wood lathe dust filter installation continues to perform optimally. Regularly check the dust collection drum or bag and empty it before it becomes too full. A full container significantly reduces suction. Periodically inspect the filter for blockages or damage. A clogged filter will also diminish performance and can strain the motor. Cleaning or replacing the filter according to the manufacturer’s recommendations will extend its life and maintain efficient dust capture.
In conclusion, the process of wood lathe dust filter installation is designed to be accessible to most users. By understanding your system, preparing your workspace, following the simple connection steps, and performing post-installation checks, you can quickly and effectively set up a dust collection system. This not only improves your working environment and reduces cleanup time but, most importantly, safeguards your respiratory health. So, don’t let the thought of installation deter you – embrace the benefits of clean air and a tidy workshop.