Wood Lathe Faceplate Bowl Turning: Crafting Stunning Creations
For woodturners seeking to elevate their craft beyond simple spindle work, tackling the wood lathe faceplate bowl turning opens up a world of artistic possibilities. This technique allows for the creation of larger, flatter, and often more intricately designed bowls than are typically achievable using jam chucks or screw chucks. It’s a method that demands precision, a solid understanding of your lathe, and a willingness to explore the unique challenges and immense rewards of working with faceplates. Whether you’re looking to turn massive platters or delicately thin-walled vessels, mastering faceplate techniques is a crucial step in any serious woodturner’s journey.
One of the primary advantages of wood lathe faceplate bowl turning is the inherent stability it provides. Unlike methods that rely on friction or a temporary connection, a faceplate is a robust metal disc that screws directly onto your lathe’s spindle. This secure attachment allows for higher rotational speeds and the ability to turn larger diameter pieces with significantly less vibration. Furthermore, it enables you to mount your workpiece off-center, a technique essential for creating asymmetrical or eccentric designs that can be incredibly striking. However, this stability comes with a learning curve, and understanding the mechanics of mounting and balancing is paramount to safety and success.
Preparing Your Wood for Faceplate Turning
Before you even approach the lathe, meticulous preparation of your wood is key. For larger bowls, it’s advisable to use well-seasoned lumber. Green wood can be used, but it requires special considerations and often involves hollowing out significantly more to account for the inevitable shrinkage and potential for cracking as it dries. Regardless of whether you’re using green or dry wood, ensure your blank is as round as possible before mounting. A bandsaw is your best friend here. Cut a rough circle, ensuring it’s small enough to be safely held and turned on your lathe. Remember to allow for the space where the faceplate will be attached, typically leaving a central portion of the blank intact for this purpose.
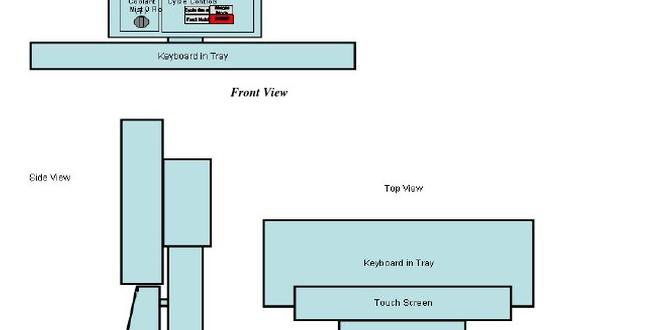
Mounting Your Wood for Wood Lathe Faceplate Bowl Turning
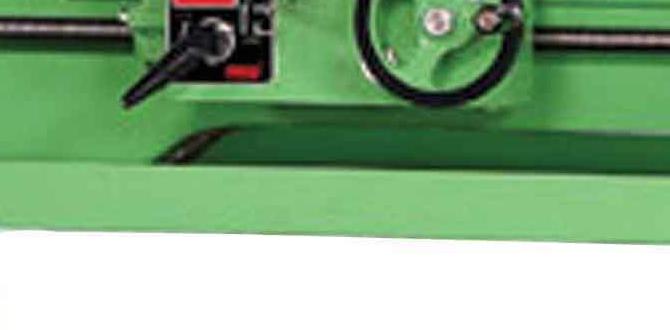
This is arguably the most critical step. Securely attaching your wood to the faceplate is non-negotiable for safe operation. There are several common methods:
Screwing Directly Through the Blank: For thicker blanks, you can drill pilot holes through the wood and then screw the blank directly to the faceplate with robust wood screws. Ensure the screws are long enough to achieve a strong grip but not so long that they protrude through the interior of your intended bowl.
Using a Sacrificial Drive Center: For thinner blanks or when you want to minimize visible screw holes on the finished piece, you can attach a sacrificial piece of wood (or even MDF) to the faceplate first. Then, you can glue or screw your primary blank to this secondary piece. This method offers flexibility and can help protect your main workpiece.
* Bolt-Through Technique: For very large or exceptionally heavy pieces, some turners opt for bolting their blank to the faceplate using carriage bolts. This requires precise drilling and can be more time-consuming but offers unparalleled security.
Regardless of the method chosen, always ensure your screws or bolts are well-seated and that the wood is firmly locked against the faceplate. Before engaging the drive center, give the blank a gentle push and pull to confirm it’s not going to shift.
The Turning Process: Safety and Technique
Once your blank is securely mounted, it’s time for the actual wood lathe faceplate bowl turning. Start at a slow speed, especially with a freshly mounted and potentially unbalanced blank. Gradually increase the speed as you remove material and the piece becomes more balanced. Always wear safety glasses or a full face shield, and consider a dust mask, especially when working with dense hardwoods or prolonged turning sessions.
Initial shaping involves rounding over the exterior and establishing the base. Use a gouge appropriate for the task, such as a roughing gouge or a bowl gouge. Focus on creating a smooth, flowing surface. As you progress to hollowing the interior, remember to be mindful of the grain direction and potential catch points. For thinner bowls, take light passes, especially as you approach the final wall thickness. A caliper is your indispensable tool here to ensure consistent wall thickness.
One of the unique aspects of wood lathe faceplate bowl turning is the ability to remount the piece to refine the exterior or bottom. Once the interior is hollowed and the exterior is roughed out, you can remove the bowl from the faceplate. You can then re-mount it, either by screwing through the interior (which will be discarded later) or by using a jam chuck or a vacuum chuck to hold it for finishing the exterior and the foot. This remounting capability is what truly sets faceplate turning apart and allows for absolute control over the final shape and finish.
Finishing Your Masterpiece
After completing the turning, the sanding and finishing process begins. Start with coarser grit sandpaper and progress to finer grits, working your way up to 400 grit or even higher for a glass-smooth surface. Ensure all tool marks are removed, especially in intricate areas. Apply your chosen finish – be it oil, wax, or lacquer – according to the manufacturer’s instructions. Carefully consider how you’ll deal with the screw holes if you screwed directly through the blank. Filling them with a contrasting epoxy or a wood-matched filler can be an aesthetic choice, or you can strategically place them in an area that will eventually be the foot or is less visible.
Mastering wood lathe faceplate bowl turning is a journey that rewards patience and practice. By understanding the preparation, mounting, turning, and finishing techniques, you can unlock the potential to create truly breathtaking bowls that showcase the natural beauty of wood and your own artistic vision.