Have you ever wondered how to make your wood lathe projects come out perfectly? A wood lathe tool rest adjustment can change everything. Just imagine trying to shape a beautiful bowl or a stunning chair leg, only to find that your tool rest isn’t right. It can be frustrating!
Many beginners face this challenge. They think the lathe is the problem, but often, it’s the tool rest. Did you know that a simple adjustment can improve your work? A well-adjusted tool rest helps your tools glide smoothly. This means cleaner cuts and safer operation. It’s like having a superhero for your wood lathe!
In this article, we will explore the tips and tricks for adjusting your wood lathe tool rest. You will learn how to do it step by step. Soon, you’ll feel confident in your lathe skills. Are you ready to transform your woodturning experience? Let’s dive in!
Wood Lathe Tool Rest Adjustment: Perfecting Your Setup

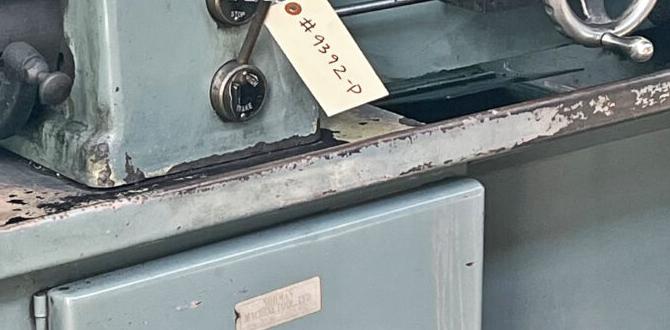
Wood Lathe Tool Rest Adjustment
Adjusting your wood lathe tool rest is easy and vital for safe and efficient turning. A proper height allows smooth tool control and prevents accidents. Did you know that many beginners ignore this step? By ensuring the tool rest is close to your project, you achieve better cuts and finishes. Always check the alignment before starting your work. This simple adjustment can make a huge difference in your woodturning experience and the quality of your projects.Understanding the Tool Rest and Its Importance
Definition and purpose of a tool rest in woodturning. How a proper tool rest adjustment impacts the quality of your work.A tool rest is a crucial part of woodturning. It gives you a steady support for your tools as you shape wood. Imagine trying to write with a wobbly table—frustrating, right? Now, think about your tools while turning wood! A proper adjustment of the tool rest can make a big difference. It not only helps you work faster but also improves the quality of your projects. If the rest isn’t set right, you might end up with some rather lumpy bowls instead of smooth masterpieces!
| Impact of Proper Tool Rest Adjustment | Results |
|---|---|
| Better Control | Smoother cuts |
| Less Fatigue | More fun! |
| Improved Finish | Fewer sandpaper fights! |
Essential Tools and Equipment for Adjusting Tool Rests
List of tools required for adjustments. Safety equipment to use during the process.To adjust your wood lathe tool rest properly, you’ll need some basic tools. First, grab a wrenches or socket set for loosening bolts. A screwdriver is key for finer adjustments. Don’t forget a ruler or measuring tape to get everything perfectly aligned! Safety gear is super important, too. Always wear safety glasses to protect your eyes, and use ear protection—your ears will thank you. Here’s a quick list for your next adjustment:
| Tools | Safety Gear |
|---|---|
| Wrenches | Safety Glasses |
| Screwdrivers | Ear Protection |
| Measuring Tape | Dust Mask |
Remember, safety first! Adjusting your tool rest can be fun, like playing with a big, fancy erector set—just keep your fingers away from those sharp objects!
Step-by-Step Guide to Adjusting Your Tool Rest
Detailed instructions for adjusting height and angle. Common mistakes to avoid during adjustment.Adjusting your tool rest helps you work better. First, check the height. The tool rest should be level with the center of your wood piece. Next, adjust the angle. Keep it close to your work but not too tight. Here’s how:
- Loosen the adjustment knobs.
- Raise or lower the tool rest.
- Set the angle carefully.
- Tighten everything well.
A common mistake is not securing the adjustment properly. This can lead to accidents. Always double-check your adjustments before starting to work.
How do I adjust the height and angle of my tool rest?
To adjust the height and angle of your tool rest, make sure it aligns with the center of your workpiece. Tighten knobs after making changes to keep everything steady.
Maintaining Your Tool Rest for Optimal Performance
Tips for regular maintenance and care. Signs that indicate the need for tool rest adjustments.Regular care for your tool rest keeps it working well. Here are some tips to help you:
- Clean the tool rest after each use.
- Check for any damage or rust.
- Adjust it to the right height before starting.
Watch for signs that your tool rest needs adjustments. If you notice:
- Difficulty in moving the tool
- Uneven cutting surfaces
- Unusual vibrations
It’s time for an adjustment! Taking care of your tool rest helps create great projects.
What are the key signs for tool rest adjustments?
Signs include difficulty in movement, uneven cuts, and vibrations. Adjusting early prevents bigger problems later.
Troubleshooting Common Issues with Tool Rest Adjustments
Identification of frequent problems encountered. Solutions and techniques for resolving these issues.Many users face issues with tool rest adjustments on wood lathes. Some common problems include uneven surface contact and vibrations. These problems can make your work harder. Here are some solutions:
- Check if the tool rest is level. If not, adjust it to be flat.
- Look for loose parts. Tighten any screws that might be wobbly.
- Use a ruler to measure gaps between the rest and the wood.
With these tips, you can fix your tool rest easily and make better wood projects!
What should I do if my tool rest is vibrating?
If your tool rest vibrates, check for loose screws or uneven surfaces. Tightening screws and adjusting the rest can help.
Expert Tips from Professional Woodturners
Insights and best practices shared by experienced artisans. Recommended adjustments based on project types.Professional woodturners have valuable tips to share about adjustments on tool rests. They highlight that the right height can make your work smoother and safer. For smaller projects, keep the rest low for better control. For larger ones, raise it up a bit. Don’t forget to check if the rest is parallel to your tool. If it’s not, your project might end up looking like a wobbly potato! Here’s a simple guide:
| Project Type | Recommended Tool Rest Height |
|---|---|
| Small Items | Low (around 1 inch above center) |
| Medium Items | Medium (about 2 inches above center) |
| Large Items | High (3 inches or more above center) |
Using the wrong height can make even the best piece look silly. So, adjust wisely and keep things steady!
Frequently Asked Questions About Tool Rest Adjustments
Common queries related to tool rest and wood lathe usage. Expert answers to clarify common misconceptions.Adjusting tool rests on a wood lathe can be confusing. Many beginners wonder how high the tool rest should be or why it matters. Let’s clear this up. The tool rest needs to be at the same level as the center of your workpiece. This helps you control your cuts better and avoid flying wood chips—ouch! If it’s too low or too high, you might end up wrestling with your wood.
| Question | Answer |
|---|---|
| What is the perfect height for a tool rest? | It should match the center of the wood you are turning! |
| Can I use a tool rest on any lathe? | Not really. Tool rests are made for specific lathe models, like shoes for your feet! |
Conclusion
In summary, properly adjusting your wood lathe tool rest is essential for smooth and safe turning. You should check the height and position for the best results. Always make small adjustments and test your setup. For more tips, explore guides or videos online. With practice, you’ll become more confident and skilled in using your lathe. Happy turning!FAQs
Here Are Five Related Questions On The Topic Of Wood Lathe Tool Rest Adjustment:To adjust the tool rest on a wood lathe, first, make sure the lathe is off. Then, loosen the screws holding the tool rest in place. You can move the rest up or down to fit your project. Make sure it’s close to your work but not touching it. Tighten the screws again to keep it secure.
Sure! Please provide the question you would like me to answer.
What Is The Proper Height For Adjusting The Tool Rest In Relation To The Workpiece On A Wood Lathe?You should adjust the tool rest so it is level with the center of the workpiece. This way, your tools can move easily and safely. If the tool rest is too low or too high, it can make your work harder. Always check its height before you start turning your wood.
How Can You Ensure That The Tool Rest Is Parallel To The Lathe Bed During Adjustment?To make the tool rest parallel to the lathe bed, you can use a ruler or a measuring tape. First, measure the distance from the tool rest to the bed at both ends. Make sure the distances are the same. If they are not, adjust the tool rest until they match. Always double-check your measurements before using the lathe!
What Are The Potential Consequences Of An Improperly Adjusted Tool Rest When Turning Wood On A Lathe?If the tool rest isn’t set up right, it can cause problems. You might get bad cuts on the wood. The tool could snag or catch, which can be dangerous. You could also hurt yourself if the tool flies out of your hands. Always check the tool rest to stay safe and make good-looking wood projects!
How Often Should You Check And Adjust The Tool Rest On A Wood Lathe For Optimal Performance?You should check the tool rest on your wood lathe before you start working. Make sure it’s close to the wood but not touching it. When you change the shape of the wood, check it again. This helps you work safely and makes your wood projects better.
What Tools Or Techniques Can Be Used To Achieve Precise Adjustments Of The Tool Rest Height And Position?To adjust the tool rest height and position, you can use a few simple tools. A ruler can help you measure how high or low to set it. You can also use a level to make sure it’s straight. Some people like to use a clamp to keep it in place while they work. Finally, adjusting knobs on the tool rest can help you move it easily.
{“@context”:”https://schema.org”,”@type”: “FAQPage”,”mainEntity”:[{“@type”: “Question”,”name”: “Here Are Five Related Questions On The Topic Of Wood Lathe Tool Rest Adjustment:”,”acceptedAnswer”: {“@type”: “Answer”,”text”: “To adjust the tool rest on a wood lathe, first, make sure the lathe is off. Then, loosen the screws holding the tool rest in place. You can move the rest up or down to fit your project. Make sure it’s close to your work but not touching it. Tighten the screws again to keep it secure.”}},{“@type”: “Question”,”name”: “”,”acceptedAnswer”: {“@type”: “Answer”,”text”: “Sure! Please provide the question you would like me to answer.”}},{“@type”: “Question”,”name”: “What Is The Proper Height For Adjusting The Tool Rest In Relation To The Workpiece On A Wood Lathe?”,”acceptedAnswer”: {“@type”: “Answer”,”text”: “You should adjust the tool rest so it is level with the center of the workpiece. This way, your tools can move easily and safely. If the tool rest is too low or too high, it can make your work harder. Always check its height before you start turning your wood.”}},{“@type”: “Question”,”name”: “How Can You Ensure That The Tool Rest Is Parallel To The Lathe Bed During Adjustment?”,”acceptedAnswer”: {“@type”: “Answer”,”text”: “To make the tool rest parallel to the lathe bed, you can use a ruler or a measuring tape. First, measure the distance from the tool rest to the bed at both ends. Make sure the distances are the same. If they are not, adjust the tool rest until they match. Always double-check your measurements before using the lathe!”}},{“@type”: “Question”,”name”: “What Are The Potential Consequences Of An Improperly Adjusted Tool Rest When Turning Wood On A Lathe?”,”acceptedAnswer”: {“@type”: “Answer”,”text”: “If the tool rest isn’t set up right, it can cause problems. You might get bad cuts on the wood. The tool could snag or catch, which can be dangerous. You could also hurt yourself if the tool flies out of your hands. Always check the tool rest to stay safe and make good-looking wood projects!”}},{“@type”: “Question”,”name”: “How Often Should You Check And Adjust The Tool Rest On A Wood Lathe For Optimal Performance?”,”acceptedAnswer”: {“@type”: “Answer”,”text”: “You should check the tool rest on your wood lathe before you start working. Make sure it’s close to the wood but not touching it. When you change the shape of the wood, check it again. This helps you work safely and makes your wood projects better.”}},{“@type”: “Question”,”name”: “What Tools Or Techniques Can Be Used To Achieve Precise Adjustments Of The Tool Rest Height And Position?”,”acceptedAnswer”: {“@type”: “Answer”,”text”: “To adjust the tool rest height and position, you can use a few simple tools. A ruler can help you measure how high or low to set it. You can also use a level to make sure it’s straight. Some people like to use a clamp to keep it in place while they work. Finally, adjusting knobs on the tool rest can help you move it easily.”}}]}