Wood lathe tool sharpening mistakes are common, but easily fixed with the right techniques. Mastering sharp tools means smoother cuts, better finishes, and safer operation. This guide breaks down common errors and provides clear, simple solutions to get your tools razor-sharp.
Hey there, fellow makers! Daniel Bates here from Lathe Hub. So, you’ve got a beautiful piece of wood spinning on your lathe, but the cuts aren’t quite as smooth as you’d hoped? Maybe you’re wrestling with the tool, or the finish looks a bit fuzzy. Often, the culprit isn’t your skill, but your tools. Specifically, they might be dull or improperly sharpened. Sharpening woodturning tools can seem a bit tricky at first, but it’s one of the most important skills you can learn. Getting it wrong can lead to frustration and poor results. Don’t worry, though! We’re going to walk through the most common mistakes beginners make when sharpening their wood lathe tools and show you exactly how to fix them, step-by-step.
Why Sharp Tools Make All the Difference
Think of your wood lathe tools like surgical instruments for wood. A dull chisel or gouge doesn’t cut; it tears. This tearing leads to several problems:
Rough Finishes: You’ll spend more time sanding, and the wood might still look fuzzy.
Increased Effort: You’ll have to push harder, which can be tiring and dangerous.
Tool Degradation: Forcing a dull tool can damage its edge permanently.
Safety Hazards: A dull tool can catch or jump, leading to injuries.
A properly sharpened tool glides through the wood, leaving a clean, smooth surface. It requires less force, is more controllable, and makes your woodworking experience much more enjoyable and safe.
Common Wood Lathe Tool Sharpening Mistakes (and How to Fix Them)
Let’s dive into the most frequent errors beginners make and how to correct them.
Mistake 1: Not Knowing When to Sharpen
Many beginners wait until a tool is completely blunt before sharpening. This is a common mistake because it makes the sharpening process harder and can damage the tool’s edge.
The Fix: Develop a habit of touching up your tools regularly.
Listen to Your Tool: If it starts to sound like it’s ripping the wood instead of slicing it, it’s probably time.
Look for Edge Changes: A quick glance at the cutting edge can reveal a dull or rounded-over appearance.
Test Cut: A brief test cut on a scrap piece of wood can tell you a lot about your tool’s sharpness.
Sharpen After Each Major Project: Even if it doesn’t feel dull, a quick touch-up can maintain the edge.
Consistent, light sharpening is far better than infrequent, heavy grinding. This practice helps maintain the tool’s geometry and extends its life.
Mistake 2: Over-Grinding and Losing the Tool’s Geometry
This is probably the most significant mistake. When you grind too much material off the tool, you change its original shape, or “geometry.” This can be a disaster for specialized tools like bowl gouges or scrapers.
The Fix: Grind only enough to restore the sharp edge.
Use the Right Grinding Wheel: A fine-grit wheel is often best for touch-ups. For heavier work, a coarser wheel might be needed, but be extra careful.
Cool the Tool: Dip the tool in water frequently to prevent overheating, which can “blue” or ruin the temper of the steel.
Focus on the Bevel: The key is to regrind the bevel (the angled cutting surface) to a sharp edge, not to reshape the entire tool unless absolutely necessary.
Use Jigs: For many tools like bowl gouges and skew chisels, using a sharpening jig (like a fingernail jig for gouges) ensures you maintain the correct bevel angle and shape. These jigs guide the tool consistently against the grinding wheel.
Reference charts for specific tool geometry are invaluable. For example, a typical bowl gouge might have a fingernail grind with a specific bevel angle. Losing this can significantly alter how the tool cuts. For more on maintaining tool geometry, resources from organizations like the Woodworking in America can offer detailed insights.
Mistake 3: Incorrect Bevel Angle
Every tool has an optimal bevel angle for its intended purpose. Using the wrong angle can lead to tearing, dulling quickly, or not cutting at all.
The Fix: Understand and use the correct bevel angles for your tools.
Common Angles:
Spindle Gouge: 35-45 degrees
Bowl Gouge (Fingernail Grind): 30-50 degrees (often with a swept-back wing angle)
Skew Chisel: 45-55 degrees (depending on use)
Scrapers: Often sharpened to a very steep angle, sometimes almost 90 degrees.
Check Tool Guides: Many tool manufacturers and woodworking sites provide recommended bevel angles. The Wood Whisperer is a great resource for visual guides on tool bevels.
Consistency is Key: Once you’ve set an angle, try to maintain it during sharpening. Using a protractor or angle gauge can help, but with practice, you’ll develop a feel.
Here’s a quick look at some common bevel angles:
| Tool Type | Typical Bevel Angle | Notes |
|---|---|---|
| Spindle Gouge | 35-45 degrees | For spindle turning. |
| Bowl Gouge (Standard) | 40-45 degrees | General bowl work. |
| Bowl Gouge (Fingernail Grind) | 30-50 degrees | Offers versatility and easier cutting. |
| Skew Chisel | 45-55 degrees | Depends on whether you’re thinning or finishing. |
| Scrapers (Round, Hook) | 80-90 degrees (often with a honed burr) | Requires a different sharpening approach (honing/burnishing). |
Mistake 4: Using the Wrong Sharpening Abrasive
Whether you’re using a grinding wheel, diamond stones, or sandpaper, the abrasive type and grit matter a lot.
The Fix: Choose the right abrasive for the job and grit progression.
Grinding Wheels: Use a white aluminum oxide wheel for most turning tools. They are harder and cooler cutting. For very fine work, consider CBN (Cubic Boron Nitride) or diamond wheels, although these are more expensive.
Stones: Water stones and oil stones are great for honing the edge after grinding. Start with a coarser grit (e.g., 1000) and move to finer grits (e.g., 4000-8000) for a polished, razor-sharp edge.
Diamond Plates: Excellent for keeping tools sharp, especially for carbide-tipped tools or for sharpening directly on the lathe.
Sandpaper: Can be used on foam or leather strops for final honing and polishing. Use fine grits (e.g., 400, 600, 1000).
Progression is Key: Always start with a coarser abrasive to establish the edge and then move to finer abrasives to refine and polish it. This creates a strong, keen edge that lasts longer.
Mistake 5: Forgetting to Hone and Strop
Grinding alone often leaves a microscopic roughness on the edge. This is where honing and stropping come in to create that glass-smooth, razor-sharp finish.
The Fix: Hone and strop after grinding.
Honing: This involves using a fine grit stone (water, oil, or diamond) to remove the burr left by the grinder and align the microscopic teeth of the steel. Hold the tool at the same bevel angle as you did on the grinder, and make light passes.
Stropping: This is the final step, using a leather strop (often with a polishing compound like chromium oxide) to remove any remaining burr and polish the edge to a mirror finish. Again, maintain the correct bevel angle.
A well-honed and stropped edge will shave hair off your arm with ease. This is the mark of a truly sharp tool.
Mistake 6: Inconsistent Pressure or Angle During Sharpening
This is a universal problem, whether you’re using a grinder or stones. If you move the tool unevenly or apply too much pressure, you’ll create an uneven bevel or overheat the edge.
The Fix: Focus on smooth, consistent movements.
Use Jigs and Rests: Proper rests for your tools on the grinder, and jigs for controlled movement, are essential.
Slow and Steady: Don’t rush the process. Smooth, controlled passes are more effective than fast, jerky movements.
Feel the Edge: Develop a feel for the tool’s contact with the abrasive. You should feel a consistent edge forming.
Short Passes: Make short passes over the abrasive, alternating sides if appropriate, to ensure even grinding.
Mistake 7: Overheating the Tool’s Temper
This is a critical mistake that can ruin a good tool. Grinding too aggressively without cooling can heat the steel past its hardening temperature, making it softer and unable to hold an edge. You’ll often see a blue or straw-colored discoloration on the edge if this happens.
The Fix: Keep your tools cool.
Dip Frequently: Dip the tool in water every few seconds of grinding. Don’t wait until you feel the heat.
Don’t Force It: Let the abrasive do the work. Forcing the tool generates more heat.
Use a Coolant: Some grinders have coolant systems. If not, regular dips are your best bet.
Choose the Right Wheel: A white aluminum oxide wheel is generally cooler cutting than a gray silicon carbide wheel.
Spark Testing (Advanced): Experienced users can sometimes judge steel tempering by the color of the sparks produced during grinding. This is an advanced technique and not recommended for beginners.
Mistake 8: Sharpening the Wrong Part of the Tool
Different turning tools have different cutting edges. Sharpening the wrong part or the wrong bevel can render the tool ineffective.
The Fix: Understand the cutting geometry of each tool.
Gouges: You typically sharpen the outer wings or the fingernail grind on the flute.
Skew Chisels: You sharpen the flat bevel on the side of the chisel, maintaining its steep or shallow angle.
Scrapers: For a round scraper, you might hone the edge, then create a burr by burnishing. For a hook scraper, you sharpen the bevel and then create a burr at the tip.
Parting Tools & Knives: These are usually sharpened on their bevels, much like a carving knife.
Always refer to diagrams or videos for the specific tool you are using. The American Association of Woodturners (AAW) offers excellent resources on tool identification and sharpening techniques.
Mistake 9: Neglecting Carbide-Tipped Tools
Carbide-tipped tools are popular because they stay sharp longer. However, many beginners don’t know how to maintain them or think they’re “unsharpenable.”
The Fix: Sharpen carbide-tipped tools safely and effectively.
Diamond Abrasives: Carbide is very hard, so it requires diamond abrasives (diamond grit sandpaper, diamond honing stones, or diamond-coated grinding wheels) for sharpening.
Honing is Key: Often, you don’t need heavy grinding. A few passes on a diamond plate or stone are usually enough to restore the edge.
Avoid Overheating: Even carbide can be damaged by excessive heat, though it’s much less prone than high-speed steel.
Replace When Necessary: Eventually, the carbide tip will wear down or chip significantly, and the tool will need replacement.
Mistake 10: Not Having a Designated Sharpening Setup
Trying to sharpen tools improvisationally in your workshop can lead to uneven results and potential safety issues.
The Fix: Create a dedicated sharpening station.
Grinder Setup: Mount your grinder securely on a sturdy bench. Ensure it has safety guards and a tool rest that can be adjusted to the correct angle.
Stone Station: Have a dedicated area for your sharpening stones, with water or oil readily available. A non-slip mat can be helpful.
Tool Storage: Keep your sharpened tools organized and protected in a tool roll or rack to preserve their edges.
Lighting: Good lighting is crucial for seeing the edge clearly.
A well-organized sharpening station makes the process more efficient, safer, and more enjoyable.
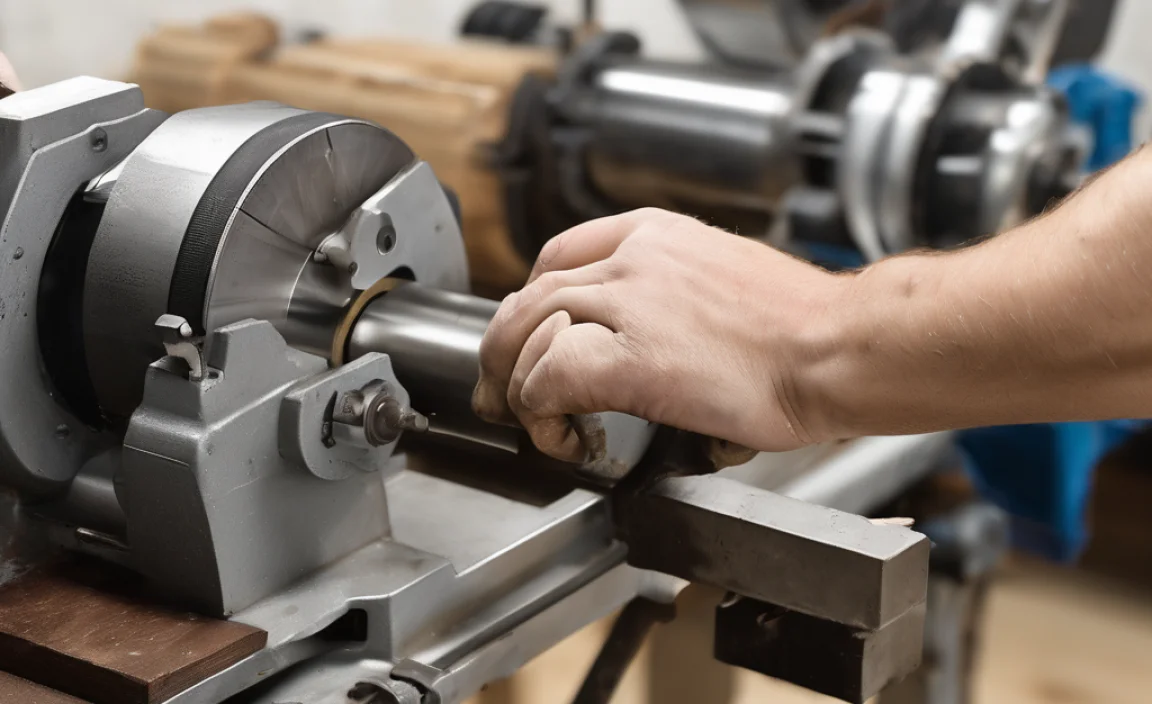
Step-by-Step: Basic Sharpening for a Bowl Gouge
Let’s walk through a common scenario: sharpening a bowl gouge using advice that aims for clarity and safety.
Tools You’ll Need:
Bowl Gouge
Grinder (preferably with a white aluminum oxide wheel)
Bowl Gouge Grinding Jig (highly recommended)
Water for cooling
Leather strop and honing compound
Safety glasses and hearing protection
Steps:
1. Safety First: Put on your safety glasses and hearing protection. Ensure your grinder is stable and the tool rest is set correctly.
2. Set Up the Jig: Adjust your bowl gouge jig according to the manufacturer’s instructions for your desired grind (e.g., fingernail grind). The jig typically controls the distance and angle of the gouge against the wheel.
3. Position the Gouge: Place the gouge into the jig. Many jigs have a specific setting for the flute opening and the side of the gouge.
4. Cooling Strategy: Have a bucket of water nearby. You’ll be dipping the gouge frequently.
5. Grind One Side:
Turn on the grinder.
Gently bring the bevel of the gouge to the spinning wheel. The jig should guide you.
Make smooth, sweeping passes. Let the wheel do the work.
After just a few seconds, lift the gouge and immediately dip it in the water.
Repeat this process, making alternating passes on each flute side until you feel a slight burr forming on the inside edge. The burr is a sign that the steel has been ground all the way to the edge.
6. Check for the Burr: Carefully feel the inside edge of the flute. You should feel a tiny ridge or burr along the entire cutting edge. If you don’t feel it everywhere, continue light passes until you do.
7. Refine the Grind (Optional but Recommended): Some turners like to do a second, lighter pass on the grinder to refine the edge slightly, followed by a quick hone.
8. Hone the Inside:
Remove the gouge from the jig.
Using a diamond or stone hone, hold it against the inside edge of the flute at a steep angle (around 45 degrees) and make a few light passes to knock off the burr and smooth the interior edge.
9. Strop for a Mirror Finish:
Load your leather strop with honing compound.
Hold the gouge at the same bevel angle you ground it to.
Make light, trailing passes on the strop, moving from the inside of the flute outwards.
Do the same for the outside bevel, again using trailing strokes.
Repeat a few times, alternating between inside and outside, until the edge is incredibly sharp and polished.
10. Test the Edge: A properly sharpened gouge should shave paper cleanly and without snagging.
This step-by-step process, especially using a jig, helps ensure consistency and prevents the common mistakes of over-grinding or uneven angles.
FAQ: Wood Lathe Sharpening for Beginners
- What is the most important tool for sharpening wood lathe tools?
- While a grinder is essential for shaping and establishing an edge, a good set of sharpening stones (like water stones or diamond plates) and a leather strop are crucial for achieving a truly sharp, polished edge. For many tools, a sharpening jig greatly improves consistency.
- How often should I sharpen my wood lathe tools?
- It’s best to sharpen them frequently. A good rule of thumb is to touch up your tools every session or even every project, rather than waiting until they are dull. Listen to your tools; if they start to tear the wood instead of cutting cleanly, it’s definitely time.
- How can I tell if my wood lathe tools are sharp enough?
- A truly sharp tool will shave thin curls of wood cleanly and easily. It should also be able to shave paper cleanly without snagging or tearing. A microscopic inspection can reveal a consistent, wire-free edge. For most beginners, the paper-shaving test is a reliable indicator.
- What is a “burr” during sharpening, and why do I need to remove it?
- A burr is a thin, ragged edge of metal that forms on the opposite side of the cutting edge as you grind or hone. While the burr indicates you’ve reached the apex, it’s weak and will quickly break off, leaving a dull edge. Honing and stropping remove and refine this burr to create a durable, sharp cutting edge.
- Can I sharpen all my wood lathe tools on the