Quick Summary:
A ball turning attachment for your lathe is a simple but genius tool that makes creating perfectly spherical shapes easy. It’s essential for anyone wanting to make decorative spheres, handles, knobs, or even parts for specialized projects. This guide will show you exactly how it works and how to use it safely and effectively.
Ever looked at a perfectly round ball on a turned piece and wondered how it was made? Getting a flawless sphere on a metal or woodworking lathe can be tricky. Freehanding it often leads to uneven surfaces or frustratingly imperfect curves. That’s where the ball turning attachment for a lathe shines. It’s a clever device designed to help you achieve beautiful, consistent spheres with ease. Don’t worry if you’re new to this; we’ll break down everything you need to know to use this essential tool confidently.
What is a Ball Turning Attachment for a Lathe?
Simply put, a ball turning attachment is a specialized jig that you mount on your lathe. Its primary job is to guide a cutting tool in a circular arc, allowing you to shape a workpiece into a perfect sphere. Think of it as a mechanical hand that ensures your cuts are smooth, consistent, and precisely round.
Most ball turning attachments consist of a body that clamps onto the lathe tool post or saddle. This body contains a pivot mechanism and a way to hold your cutting tool. As the lathe spins the workpiece, you manually move the attachment’s handle, forcing the cutting tool to follow a precise semicircular path around the material. This controlled movement is the magic behind creating a perfect ball.
Why Would You Need One?
For hobbyists and professionals alike, a ball turning attachment unlocks a new level of creative possibility and precision. Here are some key reasons you might want one:
- Decorative Elements: Add beautiful spherical finials to furniture legs, decorative spheres for artistic projects, or stylish knobs for custom cabinetry.
- Functional Parts: Create spherical bearings, custom handles, billiard ball shapes, or other components where a perfect sphere is required for function.
- Consistency and Speed: Achieving perfect spheres freehand takes immense skill and time. A ball turning attachment makes the process much faster and ensures repeatability, meaning every ball you make will be identical.
- Learning Curve: For beginners, it dramatically lowers the barrier to entry for creating complex shapes, building confidence and encouraging further exploration of lathe work.
Types of Ball Turning Attachments
While the core function is the same, ball turning attachments can vary slightly in design. Understanding these differences can help you choose the right one for your lathe and needs.
1. Saddle-Mounted vs. Tool Post-Mounted
- Saddle-Mounted: These attachments typically clamp directly onto the lathe’s saddle. They offer a robust connection and can sometimes provide a larger range of motion.
- Tool Post-Mounted: These are more common for smaller lathes and clamp onto the existing tool post. They are generally more compact and easier to set up but might have limitations on the maximum ball size.
2. Fixed vs. Adjustable Radius
- Fixed Radius: Some older or simpler designs are set to create a specific ball diameter.
- Adjustable Radius: Most modern attachments feature an adjustable radius. This is incredibly useful as it allows you to create balls of various sizes using the same attachment. You simply adjust a screw or guide to alter the path of the cutting tool.
3. Internal vs. External Ball Attachments
The vast majority of attachments are for turning external spheres. However, specialized attachments exist for turning the inside of a spherical cavity, though these are less common for beginners.
Key Components of a Ball Turning Attachment
Let’s get familiar with the parts you’ll find on most common ball turning attachments:
- Body/Base: The main housing that clamps to the lathe.
- Pivot Point: The central point around which the cutting tool moves.
- Tool Holder: A clamp or slot where you securely mount your cutting tool (often a round-nose or specific ball-forming bit).
- Carriage/Slide: A mechanism that allows the tool holder to move along a predetermined arc.
- Adjustment Mechanism: Usually a screw or dial that controls the radius of the sphere being cut.
- Handle: Used to manually advance the attachment and guide the cutting tool.
Setting Up Your Ball Turning Attachment: A Step-by-Step Guide
Proper setup is crucial for safety and achieving excellent results. Always refer to your specific attachment’s manual, but these general steps will cover most units.
Step 1: Safety First!
Before you do anything, ensure your lathe is clean, all guards are in place, and you are wearing appropriate safety gear: safety glasses (or a face shield), hearing protection, and no loose clothing or jewelry. Confirm the workpiece is securely mounted and the tailstock is engaged for support if needed.
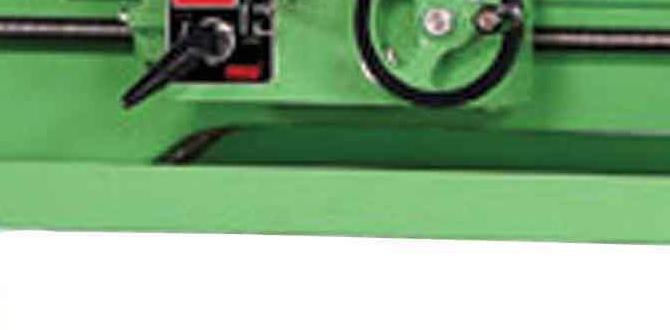
Step 2: Mount the Attachment
Securely clamp the body of the ball turning attachment onto your lathe’s tool post or saddle as per its design. Ensure it is firmly fixed and cannot move during operation. A loose attachment is a serious safety hazard.
Step 3: Insert and Position the Cutting Tool
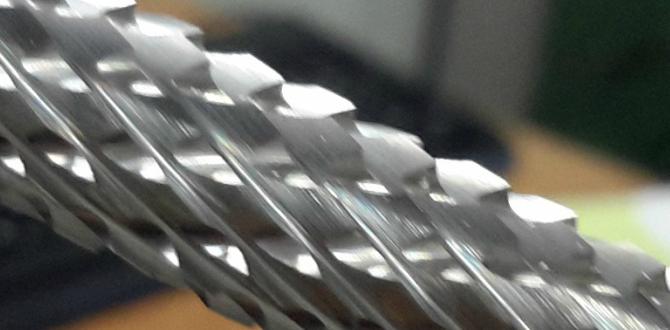
Insert your chosen cutting tool (usually a carbide insert or a ground HSS bit for wood) into the tool holder. For external ball turning, a round-nose scraper or a purpose-made ball turning insert is typical. Position the tool so that the cutting edge is at the correct height and location relative to the attachment’s pivot point. This is critical for setting the sphere’s diameter.
Step 4: Set the Sphere’s Diameter
This is where the adjustable radius comes in. Locate the adjustment screw or guide on your attachment. Most attachments use a screw that, when turned, causes the tool holder to pivot at a specific distance from the pivot point. This distance is the radius of your sphere. Set this screw to half the desired diameter of your finished ball.
Example: If you want to turn a 2-inch diameter ball, set the radius to 1 inch.
Tip: It’s often best to start with a slightly smaller radius and increase it incrementally to avoid taking too deep a cut.
Step 5: Align with the Workpiece
With the tool set, bring the workpiece up to the cutting tool’s position. You might need to do some preliminary turning on your workpiece to create a blank that’s roughly the size of the sphere you want to turn. Ensure the attachment’s pivot point is aligned with the center of the area you intend to sphere. Many attachments have a center mark or feature to help with this.
How to Use the Ball Turning Attachment: The Turning Process
Now for the exciting part! With the attachment set up, you’re ready to start cutting.
Step 1: Engage the Lathe and Make the First Cut
Start the lathe at a slow to medium speed. A good starting point for metal is often between 300-800 RPM, and for wood, it can be faster depending on the wood and the tool. Ensure the cutting tool is engaged with the workpiece. Slowly and smoothly operate the handle of the ball turning attachment, guiding the tool along its arc. Don’t force it; let the cutting tool do the work.
For Metal: Use appropriate cutting fluid. Make very light passes, especially when starting. A round-nose carbide insert is highly recommended.
For Wood: Use a sharp scraper or a specialized ball-turning tool. Gentle, steady pressure is key.
Step 2: Incremental Adjustments
After the first pass, the tool will have made a semicircular groove. You’ll likely need to make several passes to achieve the full sphere. Between passes:
- Stop the lathe.
- Slightly advance the adjustment screw (if your attachment has one for depth) or simply make another pass with consistent pressure.
- Ensure the cutting tool is still at the correct height.
The goal is to remove material gradually, shaping the cylindrical blank into a sphere. You are essentially guiding the tool around the workpiece’s equator, then working your way up and down.
Step 3: Shaping the Sphere
Continue making passes, gradually working the material into a sphere. The ball turning attachment will guide the tool in a perfect arc. You’ll be moving the tool post and the carriage with the attachment engaged, ensuring the tool sweeps across the desired diameter.
Important: Most attachments rely on you feeding the tool into the workpiece by turning a lead screw on the cross slide or by a similar controlled movement. The attachment, in turn, dictates the shape of that cut.
Step 4: Finishing
Once you’re close to the final diameter, make very light finishing passes. For wood, a final scraping pass can leave an incredibly smooth surface. For metal, a sharp carbide insert can give a polished finish. Ensure you don’t “dig” the tool in on the final pass, which can cause catching or tearing.
Tips for Perfect Spheres
Even with an attachment, a few tricks can elevate your ball-turning game.
- Sharp Tools: A dull cutting tool will chatter, tear, and create a rough finish. For both metal and wood, ensure your tools are razor-sharp.
- Lubrication (Metal): Always use appropriate cutting fluid or lubricant when turning metal. This cools the tool and workpiece, reduces friction, and helps achieve a better finish. For wood, dust extraction is more important than lubrication.
- Slow and Steady: Rushing the process often leads to mistakes. Make light, controlled passes.
- Check Alignment: Double-check that your attachment is securely mounted and that the tool is at the correct center height.
- Workpiece Setup: Ensure your workpiece is well-supported. For smaller balls, you might turn them between centers. For larger ones that extend beyond the chuck, the tailstock should often be used to support the far end of the workpiece, although this can interfere with some ball turning setups.
- Practice: Like any machining operation, practice makes perfect. Start with softer materials or scrap pieces to get a feel for the attachment.
Common Issues and Troubleshooting
Even with a ball turning attachment, problems can arise. Here’s how to tackle them:
| Problem | Possible Cause | Solution |
|---|---|---|
| Rough Surface Finish | Dull cutting tool, too much feed rate, insufficient lubrication (metal). | Sharpen or replace the cutting tool, take lighter passes, use lubricant. |
| Ball is Not Perfectly Round (Oval or Egg-Shaped) | Attachment not aligned correctly with the spindle axis, inconsistent feed rate, workpiece slipping. | Re-align attachment, maintain a steady feed rate, ensure workpiece is securely gripped. |
| Attachment Chatter | Loose mounting, dull tool, too aggressive a cut, incorrect spindle speed. | Tighten mounting, sharpen tool, take lighter passes, adjust spindle speed. |
| Tool Catches or Tears Material | Dull tool, incorrect tool geometry, feeding too fast, or trying to take too heavy a cut. | Sharpen tool, use appropriate tool geometry, slow down feed rate, make lighter passes. |
| Sphere Diameter is Incorrect | Incorrect setting of the radius adjustment screw, tool not set to center height. | Re-measure and re-set the radius adjustment screw. Ensure the cutting edge is precisely at center height. |
Ball Turning for Metal vs. Wood
While the attachment functions similarly, there are key differences in application for metal and wood.
Metal Ball Turning
- Tools: Typically uses carbide inserts designed for turning or specific ball-forming inserts. High-speed steel (HSS) can be used but requires frequent resharpening.
- Speeds: Generally slower speeds are used compared to wood to prevent tool wear and ensure a good finish.
- Lubrication: Essential for cooling the tool and workpiece, flushing chips, and improving surface finish.
- Workpiece: Solid metal stock, often pre-machined to a cylinder slightly larger than the desired sphere.
- Precision: Can achieve very high levels of precision and surface finish.
For turning metal with a ball turning attachment, it’s crucial to consult machining guides for appropriate speeds and feeds for your specific material. Resources from organizations like the National Institute of Standards and Technology (NIST) often provide foundational data on material properties and machining parameters.
Wood Ball Turning
- Tools: Often uses specialized scrapers or dedicated ball-turning tools, sometimes with a carbide edge.
- Speeds: Can use higher spindle speeds, especially with sharp tools.
- Lubrication: Not typically used. Dust collection and chip removal are paramount.
- Workpiece: Wood blanks, ranging from softwoods to hardwoods.
- Precision: Excellent for aesthetic spheres, but achieving mirror finishes might require sanding post-turning.
For woodworkers, understanding the grain structure of the wood is as important as the tool. Some woods may be more prone to tear-out than others. Guidance from woodworking associations such as the Woodworkers Guild of America can offer insights into handling different wood types.
Making Your Own (DIY) Ball Turning Attachment
For the enterprising maker, building your own ball turning attachment can be a rewarding project. This typically involves fabricating a sturdy base that can clamp to your lathe, a pivoting arm, and a tool holder. The key is to create a pivot point that is precisely located and a mechanism to control the radius of the arc accurately. Many designs involve modifying cross-slide travel or using a dedicated screw to control the pivot. Online forums and maker communities often feature detailed plans and build logs for DIY attachments. Always prioritize robust construction and precise fitting for safety and effectiveness.
Frequently Asked Questions (FAQ)
Q1: What is the purpose of a ball turning attachment?
A ball turning attachment is a lathe accessory designed to help you create perfect, symmetrical spheres on your workpiece. It guides the cutting tool in a precise arc to achieve a round shape.
Q2: Can I use a ball turning attachment on any lathe?
Most ball turning attachments are designed for specific types or sizes of lathes. It’s crucial to choose an attachment that is compatible with your lathe’s tool post or saddle size and overall machine capacity.
Q3: What kind of cutting tool do I use with a ball turning attachment?
For metalworking, carbide inserts (round-nose or specific ball-forming types) are common. For wood, you’ll typically use a sharp scraper or a dedicated wood ball-turning tool, often with a carbide edge.
Q4: How do I set the size of the ball?
Most attachments have an adjustable radius. You set a screw or guide to half the desired diameter of your sphere. For example, to make a 2-inch diameter ball, you set the radius to 1 inch.
Q5: Is it difficult to learn how to use a ball turning attachment?
While it requires some practice, a ball turning attachment simplifies the process significantly compared to freehanding spheres. With clear steps and careful adjustments, beginners can achieve good results.
Q6: Can I make balls of different sizes with one attachment?
Yes, most modern ball turning attachments have adjustable radius settings, allowing you to make spheres of various diameters as long as they fall within the attachment’s range.
Q7: What is the difference between turning metal and wood with this attachment?
The main differences lie in spindle speed, tool choice, and the use of lubrication. Metal turning requires slower speeds, cooling, and specific inserts, while wood turning can use higher speeds and focuses on sharp scraping tools and chip clearance.
Conclusion
The ball turning attachment for your lathe is truly one of those “genius” accessories that elevates your capabilities. It transforms a challenging task into an achievable and incredibly satisfying one. By understanding its components, properly setting it up, and practicing gentle, controlled passes, you’ll be producing perfectly round spheres for all sorts of creative and functional projects. Whether you’re adding decorative flair to a piece of furniture or crafting a precise component, this tool is an essential addition to any machinist’s or woodworker’s toolkit. So, get your attachment ready, follow these steps, and start turning those perfect spheres!