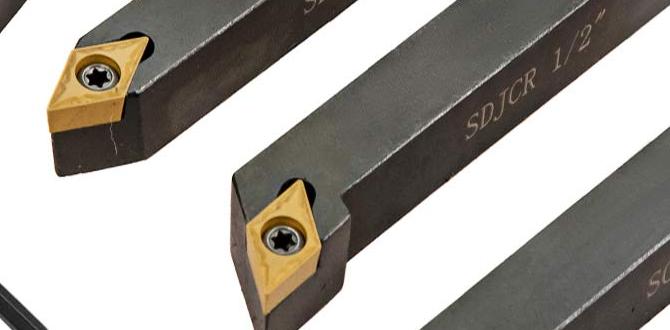
A 1/8 inch carbide end mill is a must-have precision tool for easily and cleanly cutting PMMA (acrylic). It’s designed to prevent melting and grab, ensuring smooth edges and accurate results for your projects.
Working with clear plastics, especially PMMA (or acrylic, as it’s often called), can be a bit tricky. You want those beautiful, clean cuts that show off your material, not melted, fuzzy edges. That’s where the right cutting tool makes all the difference. If you’ve ever struggled with your router bit snagging or melting your PMMA, you’re not alone! Many beginners face this challenge. But don’t worry, with the right knowledge and tool, you can achieve fantastic results. Today, we’re diving deep into a specific tool that’s become a favorite for PMMA: the 1/8 inch carbide end mill. We’ll show you why it’s so effective and how to use it like a pro.
The Magic of a 1/8 Inch Carbide End Mill for PMMA
When you’re a beginner machinist or a DIY enthusiast looking to create precise parts from PMMA, you quickly learn that not all cutting tools are created equal. The material’s properties – its tendency to melt when subjected to heat generated by friction – mean you need something special. This is where the 1/8 inch carbide end mill shines, especially when manufactured with specific features like a 1/4 inch shank and being extra long.
Why Carbide?
Carbide, or tungsten carbide, is an extremely hard and durable material. It’s significantly harder than High-Speed Steel (HSS). This hardness means it can maintain a sharp edge for much longer, especially when cutting abrasive materials like plastics. For PMMA, this translates to cleaner cuts and less heat buildup compared to softer tool materials.
Why 1/8 Inch?
The 1/8 inch diameter is perfect for a variety of tasks. It’s small enough for intricate details, fine lines, and creating small features. For projects where you need to engrave text, cut out small patterns, or create delicate components within a larger piece of PMMA, a 1/8 inch end mill offers the precision required. It’s a versatile size that can handle both roughing out material and finishing passes.
The Importance of a 1/4 Inch Shank
While the cutting diameter is 1/8 inch, many specialized end mills for plastics feature a 1/4 inch shank. Why is this important? A larger shank diameter provides increased rigidity and stability in the collet or tool holder. This means less chatter, less vibration, and a more consistent cut. For delicate work, especially with a smaller 1/8 inch cutting head, a sturdier shank helps prevent breakage and ensures a cleaner finish on your PMMA.
The “Extra Long” Advantage
Some 1/8 inch carbide end mills are designed with an extended reach or “extra long” flute length. This is particularly useful for milling deeper pockets or slots in thicker sheets of PMMA without needing to reposition the workpiece or use multiple passes as frequently. It can also help clear chips more effectively from the cut, reducing the chance of them melting back into the material.
PMMA-Specific Designs
Crucially, end mills designed for PMMA often have specific flute geometries. You’ll often see tools labeled as “single flute,” “two flute,” or with polished flutes and specific rake angles. For PMMA, tools with fewer flutes (often single or two flute) and polished surfaces are generally preferred. These designs help reduce friction and allow chips to evacuate more easily, minimizing the heat that causes melting. Heat-resistant coatings can also enhance performance.
Understanding Key Specifications for PMMA End Mills
When you’re out looking for the perfect end mill for your PMMA projects, you’ll encounter a few key specifications. Knowing what they mean will help you pick the right tool and avoid frustration.
Material: Tungsten Carbide
Diameter: 1/8 Inch (0.125″)
Shank Diameter: Typically 1/4 Inch (0.250″) for stability
Flute Count:
- Single Flute: Excellent for plastics. They provide a large chip gullet for efficient chip evacuation, which is key to preventing melting.
- Two Flute: A good all-around choice. They offer a balance between cutting action and chip evacuation.
- Avoid four-flute tools for most plastics, as they can generate too much heat and clog easily.
Flute Length / Cutting Length:
- Consider if you need to cut deeper than a standard mill offers. “Extra long” variants are available.
Coating:
- Certain coatings (like TiN or specialized plastic coatings) can improve surface finish, reduce friction, and increase tool life. Look for polished or un-coated carbide for PMMA as well, as these can perform very well by minimizing friction.
End Mill Type:
- Square End: Creates sharp internal corners. Versatile for slots, pockets, and general profiling.
- Ball Nose End: Creates rounded internal corners and is ideal for 3D contouring and creating smooth, curved surfaces.
Why Standard End Mills Often Fail on PMMA
If you’ve tried using a general-purpose steel end mill on acrylic, you’ve probably seen the problem. They’re just not designed for it.
- Heat Buildup: Steel (especially HSS) is a poorer conductor of heat than carbide. It tends to retain the heat generated by friction. This heat transfers directly to the PMMA, causing it to soften, melt, and gum up the flutes.
- Dull Edges: Steel dulls faster when cutting harder materials. A duller edge requires more force, generates more heat, and leads to a rougher finish.
- Chip Packing: General-purpose end mills often have smaller chip gullets. As the PMMA melts, it can pack into these flutes, leading to tool breakage or a ruined workpiece.
- Wrong Geometry: Many standard end mills have geometries designed for metal cutting, which can be too aggressive for plastics.
The Advantages of Using a 1/8 Inch Carbide End Mill for PMMA
So, why is the 1/8 inch carbide end mill the hero of our story? Let’s break down the benefits:
- Clean Cuts: Carbide’s hardness and ability to stay sharp result in incredibly clean, crisp edges on your PMMA. No more fuzzy, melted horrors!
- Reduced Melting: Designed for plastics, these end mills minimize friction and heat. This means less melting and a much higher success rate.
- Precision: The 1/8 inch size allows for fine details, intricate designs, and tight tolerance work.
- Durability: Carbide tools last significantly longer than HSS tools when used appropriately.
- Versatility: Suitable for profiling (cutting out shapes), pocketing (removing material to create depths), engraving, and more.
- Improved Chip Evacuation: Many PMMA-specific end mills have polished flutes and optimized geometries to help chips clear out of the cut zone quickly.
Getting Started: Essential Tools and Setup
Before you even touch your PMMA with the new end mill, let’s make sure you’re set up for success.
Your CNC Machine
This guide assumes you’re using a CNC machine (like a desktop CNC router or a small milling machine) that can accept end mills. Ensure your machine is calibrated and running smoothly.
The 1/8 Inch Carbide End Mill (for PMMA)
As discussed, look for single or double-flute, polished, carbide end mills specifically recommended for plastics. A 1/4 inch shank is ideal for rigidity.
Collet and Collet Nut
Ensure you have a clean collet that matches the 1/4 inch shank of your end mill. A clean collet is crucial for a secure grip and to prevent runout (wobble), which can lead to poor finish and tool breakage.
Workholding Solution
This is critical for PMMA. You need to secure your material firmly and flat to the machine bed.
- Double-Sided Tape: For smaller pieces or less aggressive cuts, strong double-sided tape can work.
- Vacuum Table: The best option for larger pieces and repeatable results.
- Clamps: Use clamps specifically designed for CNC machines, ensuring they don’t interfere with the cutting path.
For PMMA, it’s often recommended to place a layer of sacrificial material (like MDF or a specialized plastic sheet) underneath your PMMA. This protects your machine bed and provides a good surface for your hold-down method.
Safety Gear
Never compromise on safety!
- Safety Glasses: Essential. Always wear them when operating any machinery.
- Dust Mask/Respirator: Acrylic dust can be irritating. A good mask will protect your lungs.
- Ear Protection: CNC machines can be loud.
Dust Collection
Acrylic dust can be fine and irritating. A good dust collection system connected to your CNC router or mill is highly recommended.
Step-by-Step: Milling PMMA with Your 1/8 Inch Carbide End Mill
Now for the good part! Let’s walk through the process of cutting PMMA.
Step 1: Secure Your PMMA Sheet
Place your PMMA sheet onto your machine bed, and if possible, onto a sacrificial layer. Use your chosen workholding method (tape, clamps, vacuum) to secure it firmly. Ensure the material cannot move at all during the cut.
Step 2: Install the End Mill
Gently insert the 1/8 inch carbide end mill into your collet. Tighten the collet nut securely. Make sure the end mill is seated properly and there’s no visible runout when you spin the spindle by hand (with power off, of course!).
Step 3: Set Up Your CAM Software (or Machine Controller)
This is where you define your cutting paths.
- Material: Set your material to PMMA or a similar plastic.
- Tool Selection: Choose your 1/8 inch carbide end mill.
- Cutting Parameters: This is crucial.
Let’s look at some recommended cutting parameters. Keep in mind these are starting points and may need adjustment based on your specific machine, end mill, and PMMA thickness.
Recommended Cutting Parameters for 1/8″ Carbide End Mill on PMMA
| Operation | Spindle Speed (RPM) | Feed Rate (IPM or mm/min) | Depth of Cut (DOC) | Stepover (XY) |
|---|---|---|---|---|
| Profiling (Outer Contour) | 12,000 – 18,000 RPM | 20 – 60 IPM (500 – 1500 mm/min) | 0.05″ – 0.1″ (1.2 – 2.5 mm) | 30% – 50% of tool diameter (0.0375″ – 0.0625″) |
| Pocketing (Removing Material) | 12,000 – 18,000 RPM | 20 – 50 IPM (500 – 1250 mm/min) | 0.05″ – 0.1″ (1.2 – 2.5 mm) | 30% – 50% of tool diameter (0.0375″ – 0.0625″) |
| Engraving / V-Carving | 15,000 – 18,000 RPM | 15 – 40 IPM (380 – 1000 mm/min) | 0.01″ – 0.05″ (0.25 – 1.2 mm) | N/A (Set by bit angle) |
Note: Always start with lower feed rates and shallower depths of cut, then gradually increase as you gain confidence.
Spindle Speed (RPM): Higher speeds are generally better for plastics to help the cutter “slice” rather than “drag.” However, extremely high speeds can also generate excess heat if not managed.
Feed Rate (IPM or mm/min): This is how fast the tool moves through the material. Too slow, and you’ll melt. Too fast, and you risk breaking the tool or getting poor adhesion. Listen to the sound of the cut – a consistent, light “shaving” sound is good. A high-pitched squeal often means you’re feeding too fast, and a rough, scraping sound can mean you’re feeding too slow or have dull tool.
Depth of Cut (DOC): For PMMA, it’s best to take lighter depths of cut. This reduces the load on the tool and minimizes heat buildup. For an 1/8 inch end mill, cutting 0.05″ to 0.1″ per pass is a good rule of thumb for most PMMA thicknesses.
Stepover (XY): This is how much the tool moves sideways between passes when clearing out a pocket. A smaller stepover (e.g., 30-50% of the tool diameter) will result in a smoother finish but take longer.
For further information on cutting parameters, consult resources like ISO standards for cutting tools and machining, though specific plastic machining guides are often found from tool manufacturers and CNC forums.
Step 4: Set Your Zero (XY and Z)
XY Zero: Define the origin point for your X and Y axes. This is usually the bottom-left corner of your workpiece or the center of a circular design.
Z Zero: This is critical. You need to set your Z-zero to the top surface of your PMMA. Use your machine’s probe if available, or a manual Z-height setting tool. Do NOT set Z-zero to the spoilboard unless you are cutting all the way through and this is your intention.
Step 5: Perform a Dry Run
Before cutting any material, run your program with the spindle off. Watch the tool path carefully to ensure it’s correct, that the tool isn’t going to crash into clamps, and that the Z-axis movements are appropriate.
Step 6: Start the Cut
Turn on your dust collection.
Turn on the spindle to the programmed speed.
Begin the cutting job.
Listen to the machine. Unusual noises can indicate problems. If you see excessive melting or hear screeching, stop the job immediately.
Step 7: Finishing the Cut
Once the job is complete, let the spindle stop completely before the machine moves the tool away.
Step 8: Remove Your Part
Carefully unclamp or remove your PMMA part from the machine. You should have clean, sharp edges. Use a deburring tool or fine-grit sandpaper to gently clean up any very minor fuzzies, but ideally, the carbide end mill will leave it nearly perfect.
Tips for Achieving the Best Results
Even with the right tool, a few extra tricks can elevate your PMMA milling game.
- Air Blast: A constant stream of compressed air directed at the cutting zone can help cool the bit and blow chips away, significantly reducing melting. Many CNC routers have ports for this.
- Cutting Fluid/Lubricant: While not always necessary for PMMA, a small amount of a plastic-specific cutting fluid or even a light oil applied sparingly can help. Be cautious, as too much can create a mess or affect certain plastics. For most hobbyist use, air blast is preferred.
- Take Lighter Passes: It’s always better to take two shallow passes than one deep one. This is especially true for PMMA.
- Climb vs. Conventional Milling: For plastics, climb milling (where the cutter rotates in the same direction as the feed) often produces a smoother finish and less heat than conventional milling. Your CAM software will typically have options for this.
- Post-Processing: If you have very minor fuzzies, a light sanding with high-grit sandpaper (e.g., 400-800 grit) or a flame polishing technique can give a glass-like finish. Be extremely careful with flame polishing – it requires practice!
- Tool Maintenance: Even though carbide is tough, it’s not indestructible. Keep your end mills clean. Wipe them down after use to remove any plastic residue.
Troubleshooting Common Issues
Even with the best setup, you might hit a snag. Here’s how to fix common problems.
Problem: Melted Plastic / Fuzzy Edges
- Cause: Too much heat.
- Solutions:
- Reduce feed rate (feed faster).
- Increase spindle speed.
- Take shallower depth of cut.
- Improve chip evacuation (ensure flutes are clean, use air blast).
- Ensure you’re using a PMMA-specific or plastic-specific end mill geometry.
- Check if

