Quick Summary
Achieving low runout with a 1/8 inch carbide end mill on a 1/2 inch shank for FR4 is crucial for precise PCB milling. This guide ensures your cuts are clean and accurate by focusing on proper tool selection, machine setup, and machining best practices for small-diameter cutters.
Mastering Precision: Your Guide to Low Runout with 1/8″ Carbide End Mills
Hey there, fellow makers and aspiring machinists! Daniel Bates here from Lathe Hub, and I get it. You’re working on a project, maybe it’s a delicate PCB, a detailed engraving, or a miniature component, and you need those incredibly fine, clean cuts. But then you run into a frustrating issue: your end mill seems to wobble, leaving behind fuzzy edges or inaccurate dimensions. It’s like trying to draw a straight line with a shaky hand – impossible to get that professional finish. This is where understanding and achieving low runout with small carbide end mills, especially those 1/8 inch wonders with a 1/2 inch shank and extra length for FR4 materials, becomes absolutely key. Don’t worry, we’ll break down exactly how to get those super-precise results, step by step.
Why Low Runout is Your Best Friend for Tiny Cuts
When we talk about tools in machining, a few things are paramount: accuracy, repeatability, and finish. For delicate materials like FR4 (which is common in printed circuit boards) and for small-diameter tools like a 1/8 inch end mill, the concept of “runout” can either make or break your project. So, what exactly is runout, and why should it be your top concern in these specific scenarios?
Runout refers to the amount of wobble your cutting tool exhibits as it spins. In an ideal world, the center of the cutting edge would follow a perfect circle. However, in reality, there are always slight imperfections. These can come from the tool itself, the tool holder, or the spindle of your machine. For a large drill bit, a little bit of runout might not be noticeable. But for a tiny 1/8 inch carbide end mill, that same amount of wobble is magnified significantly.
When you have high runout with a small end mill, especially when cutting a material like FR4 that can chip or delaminate easily, several problems arise:
Poor Surface Finish: The tool isn’t cutting cleanly. Instead, it’s bouncing slightly, causing a rough, fuzzy, or torn edge along your cut line. This is particularly problematic for PCBs where you need clean traces.
Dimensional Inaccuracy: If the tool is wobbling, it’s not actually removing material along the intended path. This means your finished part will be larger or smaller than you designed, which can be disastrous for precision assemblies.
Increased Tool Wear: The uneven cutting forces caused by runout can lead to premature wear on the cutting edges, reducing the life of your expensive carbide end mill.
Increased Risk of Tool Breakage: Small diameter end mills are inherently fragile. High runout puts extra stress on the flutes, making them much more susceptible to snapping, especially when a hard material like FR4 is involved.
For an “extra long” shank, which gives you more reach but can also introduce more flex, controlling runout is even more critical. The goal is to get the cutting tip spinning as true and centered as possible.
Choosing the Right 1/8″ Carbide End Mill for FR4
Not all 1/8 inch carbide end mills are created equal, and when you’re dealing with materials like FR4 and striving for low runout, making the right selection is your first victory. Here’s what to look for:
Key Features to Consider:
Material: Always opt for carbide for FR4. Carbide is significantly harder and more heat-resistant than High-Speed Steel (HSS), which is essential for cutting the fiberglass composite in FR4. This hardness also helps maintain a sharp edge for longer, contributing to cleaner cuts and less runout.
Flute Count: For FR4, a 2-flute or 3-flute end mill is generally recommended.
2-flute: Offers excellent chip evacuation, which is crucial for preventing heat buildup and ensuring a clean cut. They also tend to be more rigid.
3-flute: Can provide a smoother finish because the cutting load is distributed. However, chip evacuation can be a bit more challenging with small end mills, so you might need to adjust your feed rates and speeds.
Coating: While not always necessary for hobbyist use, coatings like TiN (Titanium Nitride), AlTiN (Aluminum Titanium Nitride), or ZrN (Zirconium Nitride) can improve performance, reduce friction, extend tool life, and help manage heat when cutting tougher materials or running at higher speeds. For FR4, AlTiN or ZrN are often good choices for improved wear resistance.
Helix Angle: A standard helix angle (around 30 degrees) is common. For FR4, a slightly higher helix angle can sometimes help to shear the material more cleanly, reducing the risk of delamination.
“Low Runout” or “High Precision” Designation: Some manufacturers specifically design and grind their end mills for high precision, aiming for very tight tolerances in their manufacturing. Look for descriptions like “toolmaker’s grade,” “high precision,” or explicitly stated low runout specifications if available.
The 1/2″ Shank Advantage (and Challenge):
You mentioned a 1/2 inch shank. This is a common shank size, offering good rigidity compared to smaller shanks. The larger diameter means it can be held more securely in your tool holder. However, the “extra long” aspect of the shank is where potential issues can creep in.
Benefit: Extra length provides greater clearance, allowing you to machine deeper features or reach into awkward areas without the tool holder crashing into your workpiece.
Challenge: A longer tool, especially a slender end mill, is more prone to vibration and deflection. This makes controlling runout and preventing chatter even more important.
The Heart of the Matter: Achieving Low Runout
Getting your tool to spin perfectly true isn’t magic; it’s a combination of having the right equipment and using it correctly. Here’s how to tackle low runout head-on.
1. Ensure Your Machine is Capable and Cooled
Before you even touch an end mill, your machine needs to be ready. Many hobbyist CNC machines, particularly desktop models, have spindles that are not designed for ultra-high precision.
Spindle Quality: Higher-end spindles (e.g., those with precision bearings and a well-balanced rotor) will naturally have lower runout. Unfortunately, this is often not an upgradeable component on many machines.
Runout Compensation: Some advanced CNC controllers offer runout compensation, but this is rare for beginners.
Cooling: While not directly about runout, proper cooling (using air blast, mist, or flood coolant) is vital for FR4. It keeps the cutting edge sharp, prevents melting the resin, and reduces the buildup of chips, all of which contribute to a cleaner cut and can indirectly manage forces that might exacerbate runout effects.
The National Institute of Standards and Technology (NIST) offers excellent resources on metrology and precision machining practices, which often touch upon spindle accuracy and alignment.
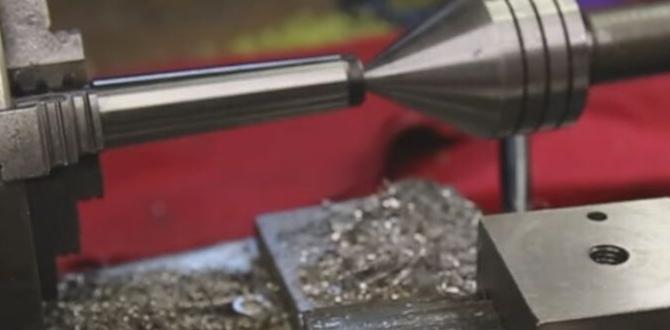
2. The Critical Role of the Tool Holder
This is arguably the most significant factor you can control for reducing runout. The tool holder grips the end mill and inserts it into the spindle. If the holder is not perfect, your tool won’t be either.
Collets and Collet Chucks:
Collets: These are tapered sleeves that grip the tool shank precisely. When compressed by a collet chuck, they provide excellent concentricity. A common setup for small end mills is a ER collet system.
Collet Chucks: These are the devices that hold the collets and fit into your spindle. For the best results, use a high-precision collet chuck. Look for ones rated for tight tolerances.
Matching Shank to Collet: Ensure the collet you use is the correct size for your 1/2 inch shank. If you’re using a 1/8 inch end mill, you’ll need an ER collet that can accurately grip that 1/8 inch diameter. Don’t try to force a slightly smaller or larger end mill into a collet that isn’t designed for it.
Tool Holder Condition: Inspect your collets and collet chucks regularly.
Cleanliness: Any dirt, oil, or debris on the collet, collet chuck, or the end mill shank will introduce runout. Clean them thoroughly with a solvent like isopropyl alcohol before insertion.
Wear and Damage: Cracked collets, worn threads on collet chucks, or damaged gripping surfaces will all contribute to higher runout. Replace them if they show signs of damage.
Taper Fit: Ensure the taper of your collet chuck fits cleanly and snugly into your machine’s spindle taper. A poor fit here is a source of significant runout.
A good set of high-precision ER collets (e.g., from a reputable tool manufacturer) covering your specific end mill shank diameter is a worthwhile investment.
3. Proper Tool Installation Technique
Even with the best tools, poor installation can ruin everything.
Clean Everything Religiously: I can’t stress this enough! Shank of the end mill, inside of the collet, inside of the collet chuck.
Insert the End Mill Correctly: Insert the end mill into the collet, then insert the collet into the chuck. Tighten the collet nuts securely following the manufacturer’s recommendations. Do not overtighten, as this can deform the collet.
Tighten in the Spindle: Once the collet holding the end mill is in the chuck, insert the chuck into the spindle. If it’s a drawbar system, ensure the drawbar is properly engaged. Tighten the chuck into the spindle. For ER collet systems, there’s often a specific tightening procedure involving a wrench and sometimes a special holder/fixture. Always follow the instructions for your specific system.
Runout Check (Optional but Recommended): If you have a dial indicator, you can (carefully) check the runout of your setup. With the spindle off, mount the dial indicator so its probe lightly touches the cutting flute of the end mill. Gently rotate the spindle by hand. The total indicator reading (TIR) is your runout. For critical applications, you might aim for less than 0.001 inches (0.025 mm).
4. Material Clamping and Rigidity
It might seem odd, but how you hold your workpiece also plays a role.
Secure Clamping: FR4 needs to be clamped down very securely. If the material shifts or vibrates during cutting, it exacerbates any existing runout and leads to poor results. Vacuum tables or robust mechanical clamps are ideal.
Support: Ensure the FR4 is well-supported underneath, especially around the areas being cut. A backing board can prevent delamination.
Minimize Z-Axis Travel: For small diameter tools, try to keep your Z-axis movement to a minimum. The longer your tool stickout (the distance from the tool holder to the cutting tip), the more it’s prone to vibration.
Step-by-Step Milling Guide for FR4 with a 1/8″ Carbide End Mill
Let’s put it all together for a practical guide. This assumes you have a CNC mill or a manual mill setup for milling operations.
Step 1: Machine Preparation
1. Clean the Machine: Thoroughly clean the spindle, tool changer (if applicable), and the work area. Remove any dust, chips, or coolant residue.
2. Inspect Tool Holder: Check your chosen collet and collet chuck for any signs of wear or damage. Ensure they are clean.
3. Select Correct Collet: Choose a collet that is designed to grip a 1/8 inch shank accurately.
4. Mount Tool Holder: Securely mount the collet chuck into your machine’s spindle according to the manufacturer’s instructions.
Step 2: Installing the End Mill
1. Clean End Mill Shank: Wipe down the 1/8 inch shank of your extra-long carbide end mill with isopropyl alcohol.
2. Insert End Mill into Collet: Place the end mill into your chosen collet.
3. Insert Collet into Chuck: Insert the collet (with the end mill in it) into the collet chuck.
4. Tighten Collet: Use the appropriate wrench to tighten the collet nut. Ensure it’s snug but avoid excessive force.
5. Insert Chuck into Spindle: Carefully insert the collet chuck with the end mill installed into the machine’s spindle.
6. Secure Chuck: Engage and tighten the spindle mechanism (e.g., tighten drawbar, lock collet chuck) as per your machine’s manual.
Step 3: Workpiece Setup
1. Clean Work Surface: Ensure the surface where your FR4 will be mounted is clean and flat.
2. Secure FR4: Firmly clamp your FR4 sheet to the machine bed. Use as many clamps as necessary to prevent any movement or lifting during cutting. Consider using double-sided tape in conjunction with clamps for extra hold.
3. Add Backing Board (Recommended): Place a piece of MDF or sacrificial material underneath your FR4 to support it directly below the cutting area. This reduces fraying and delamination.
Step 4: Software and Settings
1. CAD/CAM Software: Design your part in CAD software and generate toolpaths in CAM software. For components like PCBs, specialized software like KiCad (open-source) or Eagle is common.
2. Tool Definition: In your CAM software, accurately define the 1/8 inch carbide end mill. Include its diameter, flute count, and material type.
3. Cutting Strategy:
Stepover: For FR4 and small end mills, a stepover of 20-40% of the tool diameter is often a good starting point for detail work. For rougher material removal, you might increase this slightly, but for precision, keep it conservative.
Depth of Cut (DOC): This is critical! For a 1/8 inch end mill in FR4, a conservative DOC is usually between 0.010″ and 0.020″ (0.25 mm to 0.5 mm). You may be able to go deeper depending on your machine’s rigidity, but always start shallow and increase if results are good. In some cases, especially for trace milling, you might even use a very shallow DOC for multiple passes.
Peck Drilling (for holes): If drilling holes, use peck drilling to clear chips effectively.
4. Speeds and Feeds: This is where experience and experimentation come in. For general guidance:
Spindle Speed (RPM): For a 1/8 inch carbide end mill in FR4, a common starting point is between 15,000 and 25,000 RPM. Higher RPMs generally allow for faster cutting if your machine can handle it and chip evacuation is good.
Feed Rate (IPM or mm/min): This is highly dependent on your DOC, stepover, and spindle speed. A rough starting point might be around 15-30 inches per minute (380-760 mm/min).
Chip Load: A good target chip load for small carbide end mills is often around 0.001″ to 0.003″ (0.025 mm to 0.075 mm). Chip load = (Feed Rate) / (RPM Number of Flutes). If your chip load is too small, you’re rubbing, not cutting, and generating heat. If it’s too large, you risk breaking the tool.
Consult Resources: Refer to machining calculators or manufacturer charts for specific recommendations. For example, a quick search for “carbide end mill calculator” will yield many useful tools.
Example: For a 1/8″ (0.125″) carbide end mill with 2 flutes, RPM of 20,000, and a target chip load of 0.002″, your feed rate would be: `Feed Rate = RPM Number of Flutes Chip Load = 20000 2 0.002 = 80 IPM` (approx. 2032 mm/min). You’d then adjust DOC and stepover.
5. Cooling/Lubrication: Set up your preferred cooling method (air blast, mist, etc.) to keep the cutting area cool and help evacuate chips.
Step 5: The Milling Operation
1. Dry Run (Mandatory): Perform a “dry run” of your G-code. This means running the program with the spindle OFF and the Z-axis slightly raised so the end mill doesn’t touch the material. Watch the toolpath to ensure it matches your expectations and that there are no collisions.
2. Set Zero: Carefully set your X, Y, and Z zero points on your workpiece. For Z-zero, it’s often best to use a touch plate or an electronic probe to ensure accuracy, especially for FR4 where precise depth is crucial.
3. Start the Spindle: Bring your spindle up to the programmed RPM. Ensure it reaches speed before the tool engages.
4. Begin Cutting: Start the milling program.
5. Monitor Closely: Watch and listen to the cut.
* Listen for Chattering:** If you hear a high-pitched squeal or chatter, your speeds or feeds are likely off, or your machine/tool