For cutting polycarbonate, a 1/8-inch carbide end mill is essential. Specifically, a standard length, 1/4-inch shank, heat-resistant type provides clean cuts, prevents melting, and offers durability. This guide shows why and how to use it effectively.
Mastering Polycarbonate: Why a 1/8-Inch Carbide End Mill is Your Go-To Tool
Hey everyone, Daniel Bates here from Lathe Hub! If you’ve ever tried to machine polycarbonate, you know it can be a bit… sticky. It’s a fantastic material – tough, clear, and incredibly versatile – but it can also be a real pain to cut cleanly. Many beginners find themselves battling melted edges and chipped tools, which is frustrating and can ruin a project before it even begins. The good news is, there’s a simple solution that makes working with polycarbonate much easier. With the right tool, you can achieve smooth, professional-looking results every time. Today, we’re going to dive deep into why a specific type of end mill, the 1/8-inch carbide end mill, is absolutely essential for anyone working with this material. We’ll cover what makes it special, how to choose the right one, and the best practices for using it safely and effectively. Get ready to transform your polycarbonate projects!
Understanding Polycarbonate’s Machining Challenges
Before we talk about the solution, let’s quickly touch on why polycarbonate can be so tricky. Unlike many metals or softer plastics, polycarbonate has a relatively low melting point. When you machine it with the wrong tools or incorrect settings, the friction generated can start to melt the plastic. This melted plastic then clings to the cutting edge of your tool, creating a gummy mess. This process, known as “chip welding,” not only produces a rough, unsightly finish but can also quickly dull or damage your cutting tool. Furthermore, polycarbonate can be prone to cracking or chipping if subjected to excessive force or vibration.
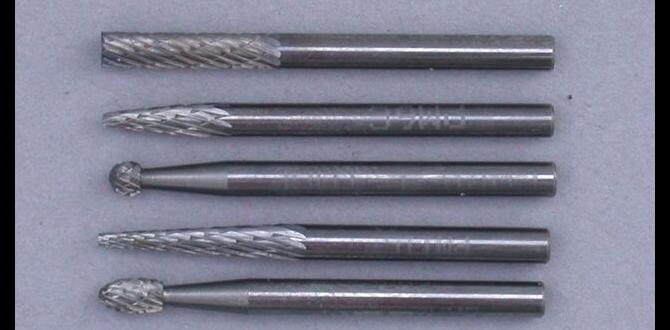
The Hero of the Story: The 1/8-Inch Carbide End Mill
So, what makes a 1/8-inch carbide end mill the star player for polycarbonate? It boils down to a few key characteristics:
- Material: Carbide is significantly harder and more heat-resistant than High-Speed Steel (HSS). This means it can withstand the higher temperatures generated during machining without deforming or becoming dull as quickly, which is crucial for a plastic like polycarbonate that tends to melt.
- Size (1/8 Inch): This precise diameter is often ideal for the types of details and precision cuts needed for many polycarbonate projects, whether you’re making intricate models, custom enclosures, or functional parts. It allows for fine detail work and can be used with a wide range of CNC machines and small milling setups.
- Geometry: The specific cutting geometry of an end mill designed for plastics, often featuring fewer flutes and a sharper cutting angle, helps to shear the material cleanly rather than pushing and melting it.
- Shank Diameter (1/4 Inch): A 1/4-inch shank is a very common size, meaning it will fit a vast array of milling machine collets and tool holders, making it readily accessible for most hobbyists and workshops.
- Heat Resistance: While carbide is inherently heat resistant, specific grades and coatings can further enhance this property, making them even better suited for materials that build up heat.
Choosing Your 1/8-Inch Carbide End Mill: Key Features to Look For
Not all 1/8-inch carbide end mills are created equal, especially when it comes to polycarbonate. Here’s what to zero in on:
Flute Count
For plastics like polycarbonate, you generally want an end mill with fewer flutes. Typically, two or three flutes are ideal. Why? More flutes mean more cutting edges packed into the same diameter. While this is great for clearing chips in some materials, in polycarbonate, it can lead to increased friction and heat buildup, encouraging melting. Fewer flutes allow for better chip evacuation and reduce the tendency to gum up.
Helix Angle
A steeper helix angle (often around 30-45 degrees) is generally preferred for plastics. This steep angle helps to “screw” the chips out of the cut, improving chip ejection and reducing the chance of them re-welding to the workpiece or the tool. It provides a cleaner shearing action.
Coating
While not always strictly necessary, some specialized coatings can further improve performance. Coatings like TiN (Titanium Nitride) or TiCN (Titanium Carbonitride) can add a layer of hardness and lubricity, helping to reduce friction and resist wear, further combating heat buildup and chip welding.
Material Grade
Look for end mills made from high-quality carbide. The manufacturer will usually specify the grade, but for general machining, a standard micro-grain carbide is usually sufficient. For extremely demanding applications, micro-grain carbide offers superior toughness and edge retention.
Standard Length vs. Extended Length
For general polycarbonate machining, a “standard” length end mill is usually sufficient. Extended length tools are useful for reaching deeper into workpieces but can also suffer from increased chatter and deflection, which you want to avoid when cutting a material like polycarbonate. Stick to standard lengths unless you have a very specific need.
Key Specification Summary:
| Feature | Recommendation for Polycarbonate | Why it Matters |
|---|---|---|
| Material | Carbide | Superior hardness and heat resistance prevents melting and tool wear. |
| Diameter | 1/8 inch | Ideal for detail work and common for polycarbonate projects. |
| Shank Diameter | 1/4 inch | Widely compatible with standard tool holders and collets. |
| Flute Count | 2 or 3 flutes | Improves chip evacuation and reduces friction, preventing melting. |
| Helix Angle | Steep (30-45 degrees) | Enhances shearing action and chip removal. |
| Length | Standard | Minimizes chatter and deflection for cleaner cuts. |
| Coating | Optional (e.g., TiN, TiCN) | Can further reduce friction and increase tool life. |
Essential Tools and Setup for Machining Polycarbonate
Beyond the end mill itself, a few other things will make your polycarbonate machining experience smoother:
- A CNC Mill or Router: While manual milling is possible, a CNC machine offers the precision and repeatability needed for consistent results, especially with plastics. Ensure your machine is rigid and well-maintained.
- Collet Chuck/Holder: A good quality collet chuck is essential for a secure and precise grip on the 1/8-inch shank. Runout (wobble) in the tool holder is a major cause of poor finish and tool breakage.
- Workholding: You need to securely hold your polycarbonate. Depending on the thickness and size, this could involve clamps, a vacuum table, or a fixture. Avoid overtightening, which can stress and crack the plastic underneath.
- Coolant/Lubricant (Optional but Recommended): For polycarbonate, a light mist of coolant or a specialized plastic cutting lubricant can make a big difference. It helps to wash away chips and further reduce heat buildup. Compressed air can also be effective. Avoid oil-based lubricants that might react with or fog the plastic. Check out resources like the Machinery Lubricants website for general information on coolants, but be sure to select one appropriate for plastics.
- Dust Collection: Machining plastic creates chips and dust. Ensure you have a robust dust collection system to keep your workspace clean and your lungs healthy.
Setting Up Your CNC Machine for Polycarbonate
This is where the magic happens! Getting the feed rate, spindle speed, and depth of cut right is crucial. Here’s a general starting point, but remember that actual settings will vary based on your specific machine, the exact type of polycarbonate, and the end mill you’re using. Always start conservatively and test on scrap material!
Recommended Cutting Parameters (Starting Points)
These are general guidelines for a 1/8-inch, 2-flute carbide end mill in standard polycarbonate. You’ll want to adjust based on your experience.
| Parameter | Starting Value | Explanation |
|---|---|---|
| Spindle Speed (RPM) | 18,000 – 24,000 RPM | Higher speeds help create a shear rather than melt. Fine-tune based on sound and chip formation. |
| Feed Rate (IPM) | 15 – 40 IPM | This is the speed the tool moves through the material. Too slow causes heat; too fast can break the tool or cause chatter. |
| Depth of Cut (DOC) | 0.010 – 0.030 inch (per pass) | Take shallow passes. Removing too much material at once generates excessive heat and stress. |
| Stepover (Side Engagement) | 20% – 50% of tool diameter | For profiling. A wider stepover on a finish pass might be used, but start narrow for roughing. |
| Cooling | Compressed Air or Plastic-Specific Mist Coolant | Crucial for heat management and chip removal. |
Important Note: Always refer to the end mill manufacturer’s recommendations if available. For more in-depth machining data, consult resources like Sandvik Coromant’s cutting data, though you may need to adapt for plastic.
Step-by-Step Guide to Machining Polycarbonate
Let’s walk through the process. Safety first – always wear safety glasses!
- Secure Your Workpiece: Mount the polycarbonate sheet firmly to your machine bed. Ensure it’s flat and won’t move during machining. Double-check that clamps aren’t excessively close to the cutting path or distorting the material.
- Install the End Mill: Insert the 1/8-inch carbide end mill into your collet chuck. Tighten it securely. Ensure the tool is centered and has minimal runout.
- Set Your Zero Point (Origin): Carefully jog your machine to establish the X, Y, and Z zero points. This is critical for accuracy. Ensure the Z-axis zero is set on the surface of the polycarbonate.
- Load Your G-Code: Load your machining program into your CNC controller. It’s highly recommended to simulate the toolpath first if your controller software allows.
- Initial Air Cut (Optional but Recommended): Perform an “air cut” – run the program with the spindle off and the Z-axis set slightly above the material. This lets you visually confirm the toolpath and ensure everything is positioned correctly.
- Start the Spindle and Cooling: Turn on your spindle to the programmed speed and activate your cooling system (compressed air or mist).
- Begin Machining: Start the cutting program. Listen to the machine. You should hear a relatively clean cutting sound, not a high-pitched whine or a grinding noise.
- Monitor Chip Formation: Observe the chips being produced. They should be relatively small and clear, not long, stringy, melted, or gummy. If you see melting or buildup, stop the machine and adjust your feed rate (increase it slightly) or depth of cut (decrease it).
- Take Shallow Passes: Always use the recommended shallow depth of cut. Multiple shallow passes are far better than one deep pass for polycarbonate. This helps manage heat and reduces stress on the tool and material.
- Break the Chips: For longer cuts, consider programming small “dwells” or “peck” moves to help break the chips, especially if using a 2-flute end mill.
- Inspect and Finish: Once machining is complete, carefully remove the part. Inspect the edges for any signs of melting, chipping, or fuzziness. Minor cleanup can often be done with fine-grit sandpaper or a deburring tool.
Troubleshooting Common Issues
Even with the right tools, you might run into problems. Here’s how to fix them:
- Melting/Gummy Chips:
- Cause: Too much friction, not enough chip clearance, or too slow a feed rate.
- Solution: Increase feed rate, decrease depth of cut, ensure adequate cooling/chip evacuation, try a tool with fewer flutes or a steeper helix.
- Chipping/Cracking:
- Cause: Tool is dull, excessive feed rate, too deep a cut, poor workholding, or brittleness of the material (especially if it’s old or has been stressed).
- Solution: Use a sharp tool, reduce feed rate, take shallower cuts, ensure firm but not excessive workholding, consider re-annealing thicker polycarbonate parts if cracking is a persistent issue (though this is advanced).
- Poor Surface Finish:
- Cause: Tool wear, tool runout, incorrect cutting parameters, or material inconsistencies.
- Solution: Use a sharp, high-quality tool. Ensure your collet and holder are clean and provide minimal runout. Adjust feed/speed. Try a dedicated plastic finishing end mill if necessary (often with more flutes but designed for high surface speeds).
- Tool Breakage:
- Cause: Too aggressive depth of cut, too fast a feed rate, chatter due to loose workholding or machine vibration, plunging too fast into the material.
- Solution: Reduce depth of cut and feed rate. Ensure everything is rigid. Avoid plunging cuts where possible; use a ramping move instead.
Beyond the Basics: Advanced Tips
Once you’re comfortable, you can refine your technique:
- Ramping Moves: Instead of plunging straight down, program your tool to enter the material at an angle (a ramp). This is much gentler on the tool and the workpiece, reducing stress and heat.
- Finishing Passes: For very critical surfaces, consider a two-stage cut. Use a slightly more aggressive setting for a roughing pass, then a very shallow, high-feed-rate finishing pass with a very light chip load to achieve an exceptionally smooth surface.
- Tool Path Strategy: For internal corners, remember that the smallest radius you can achieve will be dictated by the radius of your end mill. If you need sharp internal corners, you’ll have to consider EDM or laser cutting, or design around the limitations of milling.
- Material Temperature: Polycarbonate’s properties change significantly with temperature. If you are doing a lot of cutting, the material itself can get warm, making it even more prone to melting. Adequate cooling is key.
Frequently Asked Questions (FAQ)
Q1: Can I use a regular end mill for polycarbonate?
A1: You can try, but it’s not ideal. Standard steel or even carbide end mills not designed for plastics often have geometries that lead to melting and poor chip evacuation. A specialized end mill (like the 1/8-inch carbide we discussed) will yield far better results.
Q2: How do I prevent polycarbonate from melting when I mill it?
A2: The key is to manage heat and clear chips effectively. Use a sharp carbide end mill designed for plastics (fewer flutes, steep helix), take shallow cuts, use a fast feed rate, and employ good cooling (compressed air or mist coolant).
Q3: What’s the difference between a 1/8 inch 2-flute and a 1/8 inch 4-flute carbide end mill for polycarbonate?
A3: A 2-flute end mill is generally preferred for polycarbonate because it has more space between the flutes for chip evacuation, reducing the chance of melting. A 4-flute might be used for finishing in some cases, but generally, fewer flutes are better for plastics.
Q4: Do I need coolant when milling polycarbonate?
A4: It’s highly recommended. While some users get by with just compressed air, a mist coolant specifically designed for plastics will significantly improve chip evacuation and reduce heat buildup, leading to cleaner cuts and longer tool life.
Q5: What are the best feed and speed settings for a 1/8 inch carbide end mill in polycarbonate?
A5: As a starting point, try 18,000-24,000 RPM spindle speed and a feed rate of