For milling Delrin with a 1/8-inch carbide end mill, a stub-length, two-flute end mill with a 10mm shank is ideal. This combination minimizes deflection, ensures a clean cut, and is perfect for beginners working with this machinable plastic.
Working with plastics like Delrin can sometimes feel a bit tricky, especially when you’re just starting out with your milling machine. You might get chatter, melting, or just not the clean cut you were hoping for. That’s where choosing the right cutting tool makes all the difference. Specifically, understanding which 1/8-inch carbide end mill works best for Delrin can turn a frustrating job into a smooth, successful one. Don’t worry, it’s simpler than it sounds! We’ll walk through exactly what to look for and why it matters, so you can get back to making awesome projects with confidence.
Why a 1/8-Inch Carbide End Mill is Great for Delrin
Delrin, also known as acetal or POM (polyoxymethylene), is a fantastic engineering thermoplastic. It’s known for its strength, stiffness, low friction, and excellent wear resistance. This makes it a favorite for makers and machinists creating parts like gears, bushings, bearings, and intricate components. But, because it can soften and melt at relatively low temperatures, you need to use the right cutting tools and strategies.
A 1/8-inch carbide end mill is a popular choice for Delrin for several reasons:
- Precision Detail: The small diameter allows you to machine fine features, tight corners, and intricate patterns that larger tools can’t achieve.
- Material Properties: Carbide is a very hard and heat-resistant material. This means it stays sharp longer and can handle the higher speeds sometimes needed to cut plastics cleanly without excessive melting.
- Versatility: It’s suitable for a range of operations, from pocketing and profiling to slotting and facing.
Understanding the Key Features for Delrin Milling
When you’re looking at 1/8-inch carbide end mills for Delrin, a few specific features will significantly impact your success. It’s not just about the size; the design of the end mill matters a lot.
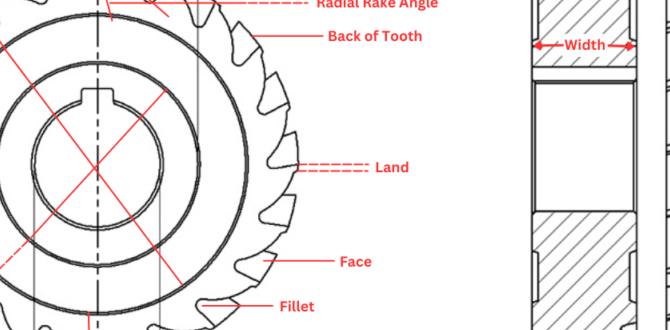
Flutes: The Cutting Edges
Flutes are the spiral grooves that run along the end mill. They do two main jobs: cutting the material and clearing away the chips (swarf) that are produced. For Delrin, the number of flutes is important:
- Two Flutes: This is generally the best choice for milling Delrin and other plastics. With fewer flutes, there’s more space between them for chip evacuation. This is crucial because Delrin can produce long, stringy chips that can easily clog up the flutes, cause melting, and lead to a poor finish or broken tool. The two-flute design allows chips to escape easily, keeping the cut area clear and the temperature down.
- Four Flutes (or more): While often great for harder metals, more flutes can lead to poorer chip evacuation in softer plastics like Delrin. They can pack chips tightly, increasing the risk of melting and tool breakage.
Length: Standard vs. Stub Length
The length of the end mill, measured from where it grips in the collet to the cutting tip, is another vital factor, especially when dealing with softer materials like Delrin.
- Standard Length: These are common and versatile. However, they are longer and thinner relative to their diameter. This means they are more prone to deflection (bending) when cutting forces are applied. In Delrin, this deflection can lead to inaccurate cuts and a rough surface finish.
- Stub Length: This is where the magic happens for Delrin. A stub-length end mill is shorter and often has a thicker core for its diameter. This makes it much more rigid. For a 1/8-inch end mill, a stub length significantly reduces deflection. This rigidity is key to maintaining accuracy and achieving a clean, smooth surface finish when milling Delrin.
Shank Diameter: The Hidden Advantage
While we’re focusing on a 1/8-inch cutting diameter end mill, the diameter of the shank (the part that goes into your collet or tool holder) can also have implications.
- 1/8-inch Shank: This fits standard 1/8-inch collets and is convenient for many small-scale machines. However, a 1/8-inch shank on a 1/8-inch cutting diameter end mill is quite slender and very prone to deflection.
- 8mm or 10mm Shank: Many end mills designed for precision work come with a larger shank diameter than their cutting diameter for added rigidity. For a 1/8-inch (approx. 3.175mm) cutting diameter, an end mill with an 8mm or 10mm shank is substantially more robust. While you’ll need an adapter or a collet that can hold this larger shank size, the gain in rigidity is significant. For machining Delrin where minimizing deflection is key, this is a highly recommended feature. You might see these specified as “1/8 inch cutting diameter, 10mm shank” or similar.
Coating: Does it Matter for Delrin?
End mills can have various coatings (like TiN, TiAlN, ZrN) that are designed to improve hardness, reduce friction, and increase tool life when cutting metals. For Delrin:
- Uncoated: For Delrin, an uncoated, high-quality carbide end mill is often perfectly sufficient and sometimes even preferable. The primary goal is clean chip evacuation and a sharp edge.
- Specialized Coatings: Some manufacturers offer coatings specifically designed for plastics. These coatings can further reduce friction and prevent material buildup. If you plan on extensive plastic milling, looking for a plastic-specific coating could be beneficial, but it’s not essential for good results with Delrin. For most beginner projects, a highly polished, uncoated carbide end mill will perform wonderfully.
Edge Preparation
The cutting edge itself can have different geometries. For Delrin, you want sharp edges that cut cleanly rather than scrape or rub. End mills designed for aluminum or plastics often have highly polished flutes and sharp, un-chamfered cutting edges, which are excellent for Delrin.
Recommended Carbide End Mill Specifications for Delrin (1/8 Inch)
Based on the above, here’s a summary of what to look for when selecting your 1/8-inch carbide end mill for Delrin:
| Feature | Recommendation for Delrin | Why it Matters |
|---|---|---|
| Diameter | 1/8 inch (3.175mm) | For detailed work and small features. |
| Material | Solid Carbide | Hardness, heat resistance, sharp edge retention. |
| Flutes | 2 Flutes | Optimal chip clearance to prevent melting & binding. |
| Length | Stub Length | Maximizes rigidity, minimizes deflection for accuracy. |
| Shank Diameter | 8mm or 10mm (if possible) | Further enhances rigidity, especially with a 1/8″ cutting diameter. |
| Edge/Coating | Bright/Polished, Uncoated or Plastic-Specific Coating | Reduces friction and material adhesion for a clean cut. |
| Helix Angle | Standard (e.g., 30-45 degrees) or Low Helix | A lower helix angle can provide more support, but standard is fine. The flute count is more critical for Delrin. |
| Corner Radius | Square (0.000″ radius) or slight radius (e.g., 0.005″) | Square corners for sharp internal corners, a slight radius can add strength. For Delrin, square is usually preferred for maximum detail. |
Finding an end mill precisely described as “1/8 inch cutting diameter, 2 flute, stub length, 10mm shank, for plastics” would be your ideal target. Sometimes, you might find a 1/8″ cutting diameter with an 8mm shank; this is also a great choice for rigidity.
Where to Find the Best 1/8-Inch Carbide End Mills for Delrin
Specialty tool suppliers and reputable online machining supply stores are your best bet. Look for brands that are known for quality tooling. Some online retailers focus specifically on CNC tooling and will have detailed specifications listed, making it easier to find what you need. Always check the product descriptions carefully!
For example, companies like McMaster-Carr, Grainger, or specialized CNC tooling stores will list precise dimensions and flute counts. When searching, use terms like “2 flute plastic end mill” or “carbide end mill for plastics.” You’ll likely find options that fit the bill. Remember to factor in the shank diameter if you have the collet capacity for it.
Setting Up Your Milling Machine for Delrin
Once you have the right end mill, the next step is setting up your machine correctly. This involves a few key parameters:
Spindle Speed (RPM)
This is how fast the end mill spins. For Delrin with a 1/8-inch carbide end mill, a good starting point for spindle speed is often between 10,000 and 20,000 RPM. Higher speeds help the carbide cut cleanly, but you need to balance this with feed rate.
- Too slow: Can lead to rubbing, melting, and poor finish.
- Too fast: Can increase friction and wear if not paired with a proper feed rate.
It’s always best to consult the end mill manufacturer’s recommendations if available, or start at the lower end of the recommended range and gradually increase while monitoring how the chip is forming and the surface finish.
Feed Rate (IPM or mm/min)
This is how fast the end mill moves through the material. For Delrin and a 1/8-inch end mill, you’ll want a relatively fast feed rate. This ensures that each flute takes a small chip rather than rubbing. A common mistake is feeding too slowly, which causes melting.
- Typical Range: For this setup, feed rates can range anywhere from 15 to 40 inches per minute (IPM), or about 380 to 1000 mm/min.
- Chip Load: A good way to think about feed rate is through “chip load,” which is the thickness of the chip being removed by each cutting edge. For plastics with small end mills, you want a chip load that’s just enough to create a distinct chip, not just dust or melted plastic.
Again, consult manufacturer charts, but starting with a moderate-to-fast feed rate and adjusting based on chip formation is key. If you see melting, increase your feed rate or spindle speed. If you hear chattering, you might need to decrease feed rate or ensure your setup is rigid.
Depth of Cut (DOC) and Stepover
These parameters control how much material you remove with each pass.
- Depth of Cut (DOC): For Delrin, it’s usually best to take lighter depths of cut, especially with a small end mill held in a less rigid setup. A DOC of 0.030″ to 0.060″ (0.75mm to 1.5mm) is often a good starting point. Avoid trying to hog out material quickly.
- Stepover: This is the distance the end mill moves sideways for each parallel pass when milling a larger area. For profiling or milling pockets, a stepover of 30-50% of the tool diameter is common. For finishing passes, a smaller stepover (e.g., 10-20%) will yield a smoother surface.
Climb Milling vs. Conventional Milling
For plastics like Delrin, climb milling is generally preferred. In climb milling, the cutter rotates in the same direction as it moves into the material. This results in a shearing action that produces a cleaner cut and reduced rubbing compared to conventional milling, where the cutter rotates against the direction of material feed.
- Climb Milling: Recommended for plastics to minimize friction and heat.
- Conventional Milling: Can increase heat and friction, potentially leading to melting.
Make sure your CNC controller or manual machine setup is configured for climb milling where appropriate.
A Step-by-Step Guide to Milling Delrin with Your 1/8-Inch End Mill
Let’s walk through a typical pocketing operation. This assumes you have a CNC mill, but the principles apply largely to manual milling as well.
Step 1: Prepare Your Material and Machine
- Secure the Delrin: Make sure your Delrin block is firmly clamped to the machine bed. Use appropriate workholding such as clamps, a vise, or double-sided tape designed for machining. Avoid flexing the material.
- Install the End Mill: Insert your chosen 1/8-inch, 2-flute stub-length carbide end mill into a quality collet. Ensure the shank is clean and the collet is tightened securely to prevent any slippage. Check that your collet can hold the shank size specified (e.g., 10mm shank).
- Set Zero (Work Origin): Carefully set your X, Y, and Z zero points on the workpiece according to your CAM program or manual setup. For Z zero, it’s often best to touch off on the top surface of the Delrin.
Step 2: Program or Set Cutting Parameters
- CAM Software: If using CAM software, import your design. Select a pocketing or contour toolpath. Choose your 1/8-inch end mill as the tool. Input the recommended speeds and feeds:
- Spindle Speed: 10,000 – 20,000 RPM
- Feed Rate: 15 – 40 IPM (adjust based on chip formation)
- Depth of Cut: 0.030″ – 0.060″
- Stepover: 30-50% of diameter for roughing, 10-20% for finishing.
- Milling Strategy: Climb Milling.
- Manual Machine: Set your DROs (Digital Readouts) or dials for the desired starting positions. Set your Spindle Speed and engage the feed at your chosen rate.
Step 3: Perform a Dry Run (Optional but Recommended)
Before cutting into the Delrin, run your program with the spindle off. This allows you to visually inspect the toolpath and ensure it’s following the intended path and not crashing into clamps or the workpiece in an unexpected way.
Step 4: Make Your First Cut
- Engage Spindle: Start your spindle up to the programmed speed.
- Begin Cutting: If on a CNC, start the program. If on a manual machine, smoothly engage the feed rate, moving into the material in X and Y. Move down into the Z-axis at your programmed depth. You should hear and feel a clean cutting sound.
- Monitor Chip Formation: Watch the chips being produced. They should be relatively small, clean, and flowing freely. If they are stringy, melting, or building up on the tool, you may need to increase your feed rate, adjust spindle speed, or reduce depth of cut.
Step 5: Complete the Pocketing Operation
- Multiple Passes: The machine will automatically take multiple passes to reach the full depth. Each pass should involve taking the set depth of cut and then moving across the area with the set stepover until the pocket is cleared.
- Finishing Pass: For a very smooth surface, you might program a final finishing pass with a small stepover (e.g., 10-20%) at a slightly shallower depth and potentially a bit higher feed rate.
Step 6: Eject the Part and Inspect
- Retract Tool: Once the operation is complete, the tool will retract to a safe Z height.
- Turn Off Spindle: Stop the spindle.
- Remove the Part: Carefully unclamp and remove your milled Delrin part.
- Inspect Finish: Examine the walls and floor of the pocket. They should be smooth, with no signs of melting, excessive fuzziness, or chatter marks.
Troubleshooting Common Delrin Milling Issues
<