1/8 inch 10mm shank carbide end mills are indeed proven for PVC, especially extra-long versions for tight tolerances. They offer precision and durability for cutting this versatile plastic, making them a go-to choice for many DIY and professional projects.
Working with PVC can sometimes feel a bit tricky, especially when you need to achieve those perfect, clean cuts for your projects. Many of us have faced the frustration of melted plastic, jagged edges, or tools that just don’t seem to cut quite right. It’s a common challenge, but the good news is, the right tool makes all the difference. Today, we’re diving deep into a fantastic solution: the 1/8 inch shank, 10mm head carbide end mill, particularly those designed to handle PVC with impressive results. Get ready to discover how this specific tool can transform your PVC cutting experience, bringing precision and ease to your workshop.
Why the 1/8 Inch Shank, 10mm Head Carbide End Mill Excels with PVC
When you’re aiming for clean, precise cuts in PVC, the choice of cutting tool is paramount. Not all end mills are created equal, and what works wonders for metal might not be ideal for plastics. The 1/8 inch shank, 10mm head carbide end mill has carved out a niche for itself in PVC fabrication for several compelling reasons. It’s a combination of material, size, and design that makes it a standout performer.
Carbide is known for its hardness and heat resistance. This is crucial when cutting plastics like PVC, which can soften and melt if too much heat is generated during the cutting process. The hardness of carbide allows it to slice through the material cleanly, minimizing friction and heat buildup. The 1/8 inch shank offers a good balance for smaller, detailed work, while the 10mm head (which refers to the cutting diameter) provides enough surface area for efficient material removal. For those extra-long applications where you need to reach deeper into a workpiece or create intricate pockets, the extra-long variants of this end mill are particularly valuable.
Understanding the Anatomy of a Carbide End Mill
Before we get into the specifics of using it on PVC, let’s quickly understand what makes up a carbide end mill, especially the kind we’re focusing on. This knowledge helps appreciate why it performs so well.
- Carbide Material: This is a composite material, typically tungsten carbide mixed with a binder like cobalt. It’s extremely hard and wear-resistant, meaning it stays sharp for longer and can handle tougher materials and higher speeds than high-speed steel (HSS).
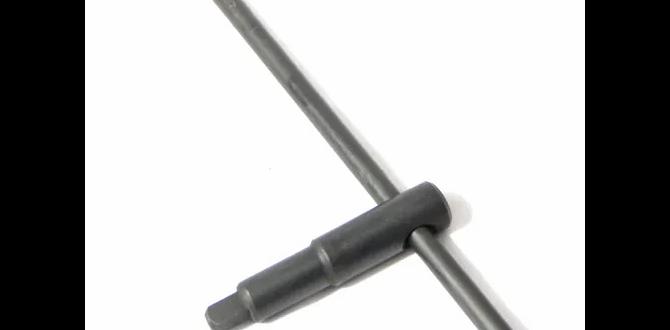
- Shank: This is the part of the end mill that’s held by the tool holder in your milling machine. We’re focusing on a 1/8 inch shank, which is common for smaller, precise tools, especially in hobbyist or benchtop milling machines.
- Cutting Diameter: This is the actual width of the end mill’s cutting edges. In our case, it’s 10mm. This diameter is important for determining the width of the cut or pocket you can create.
- Flutes: These are the spiral grooves that run up the cutting end of the mill. They serve to evacuate chips (the material being cut away) from the cutting area. For plastics like PVC, fewer, wider flutes are often better for chip clearance and preventing melting.
- Coating: Some carbide end mills have special coatings (like TiN, TiAlN, or ZrN) that further improve hardness, reduce friction, and extend tool life.
Why Length Matters: The Extra-Long Advantage for PVC
When we talk about the “1/8 inch shank, 10mm head carbide end mill for PVC”, the mention of “extra-long” often comes up. Why is this significant? For PVC projects, especially those involving deeper cuts or working with thicker stock, an extra-long end mill can be a game-changer. Standard end mills have a limited reach. If you need to mill a pocket that’s deeper than the standard flute length, you’ll have to do it in multiple passes, or you might not be able to reach the desired depth at all.
An extra-long end mill, while still having the same shank diameter and cutting head, has a significantly longer flute length. This allows you to:
- Reach deeper into the material in a single setup.
- Mill deeper pockets with fewer passes, saving time and reducing the chance of accumulating heat.
- Reduce the need for specialized tooling for deeper cuts.
It’s important to note that longer tools can be more prone to deflection or vibration. This is where the rigidity of carbide and proper machining practices come into play to ensure good results.
Choosing the Right 1/8 Inch Shank, 10mm Head Carbide End Mill for PVC
With PVC in mind, not all carbide end mills are created equal. For this particular plastic, certain features will make an end mill perform significantly better. When you’re shopping, look for these specifications:
Key Specifications to Look For
When selecting an end mill specifically for PVC applications, keep these characteristics in mind:
- Number of Flutes: For plastics, a 2-flute end mill is often preferred. The larger chip gullets (the space between the flutes) allow for better chip evacuation, which is critical for preventing melting and sticking. While 4-flute mills are common for metals, they can sometimes pack chips more easily in plastics. However, some specialized 4-flute designs with optimized flutes exist for plastic machining, so always check the manufacturer’s recommendations.
- Coating: While not strictly necessary, coatings like Zirconium Nitride (ZrN) or Titanium Aluminum Nitride (TiAlN) can be beneficial. They reduce friction and heat, further preventing plastic from melting and sticking to the cutting edges.
- Helix Angle: A steeper helix angle (e.g., 45 degrees or more) can provide a cleaner, shearing cut, which is excellent for plastics.
- End Type: For general-purpose cutting and pocketing in PVC, a square end is standard. If you need to create fillets (rounded internal corners), you’d look for a corner radius end mill.
- Material Consistency: Ensure it’s solid carbide. Compregne (composite) carbide tools might be an option for specialized applications, but solid carbide is the most common and reliable choice for this kind of work.
End Mill Types for PVC: A Quick Comparison
Here’s a table to help you visualize different types of end mills and where the 1/8 inch shank, 10mm head carbide end mill fits in for PVC:
| End Mill Type | Pros for PVC | Cons for PVC | Best For |
|---|---|---|---|
| 2-Flute Solid Carbide Flat End Mill (1/8 Shank, 10mm Head) | Excellent chip evacuation, good for preventing melting, clean cuts. | Can be slightly less rigid than 4-flute on larger cuts, but good for precision. | General pocketing, profiling, slotting, and detailed work in PVC. The “extra-long” version adds depth capability. |
| 4-Flute Solid Carbide Flat End Mill (1/8 Shank, 10mm Head) | More rigidity for heavier cuts. Good surface finish when programmed correctly. | Can pack chips more easily in softer plastics if feed rates/speeds aren’t dialed in. | When rigidity is needed, or for specific plastics designed for multi-flute cutting. Requires careful speed/feed selection for PVC. |
| High-Speed Steel (HSS) End Mill | Less expensive. | Generates more heat, dulls faster on plastics, can lead to melting. Not ideal for precision or volume work on PVC. | Very occasional, light-duty plastic work where heat isn’t a major concern. |
| Ball End Mill (Carbide) | Creates rounded internal corners (fillets). | Not ideal for flat-bottomed pockets. | 3D contouring, carving, and creating radiused internal features. Available with 1/8 shank and 10mm diameter. |
For most PVC applications requiring precision and a good finish, a 2-flute solid carbide end mill is your best bet. The 1/8 inch shank is ideal for smaller CNC machines, and the 10mm cutting diameter offers a good balance of material removal and detail capability. The “extra-long” designation simply enhances its versatility for deeper work.
Preparing Your Machine and Workspace
Before you can start cutting, it’s essential to have your machine and workspace set up correctly. This not only ensures good results but, more importantly, prioritizes your safety. Think of this as laying the groundwork for a successful machining operation.
Essential Tools and Setup Checklist
Here’s what you’ll need and how to prepare:
- CNC Milling Machine: Whether it’s a benchtop model or a larger machine, ensure it’s calibrated and stable.
- ER Collet Chuck: To securely hold the 1/8 inch shank end mill. Make sure you have the correct size collet for a 1/8 inch shank. An ER11 or ER16 collet system is common.
- Workholding: You need a reliable way to secure your PVC workpiece. This could be clamps, a vise, or sacrificial spoilboard. Ensure the PVC cannot move at all during machining.
- Dust Collection: PVC dust can be harmful. A vacuum system connected to your CNC is highly recommended. Many CNC machines have built-in dust shoe provisions.
- Safety Glasses: Always wear good quality safety glasses.
- Hearing Protection: Recommended, especially for extended machining sessions.
- Appropriate Ventilation: Ensure good airflow in your workshop.
- Coolant/Lubrication (Optional for PVC): While often used for metals, for PVC, a light mist of water or specialized plastic machining fluid can sometimes help, but often dry machining with good chip evacuation is preferred. Experimentation might be needed.
Securing Your PVC Workpiece
This is a critical step. Any movement of the material during Machining will lead to inaccurate cuts, tool breakage, or even a dangerous situation. Ensure your clamps are robust and positioned so they don’t interfere with the cutting path of the end mill. For thin sheets, using double-sided CNC tape or a vacuum table can be effective, alongside minimal clamping.
Installing the End Mill
Make sure your machine is powered off or in a safe state before installing or removing the end mill.
- Loosen the nut on your collet chuck.
- Insert the 1/8 inch shank end mill into the correct size collet. Ensure the shank is seated properly and not bottomed out if possible, allowing for some adjustment.
- Insert the collet with the end mill into the collet chuck.
- Tighten the collet chuck nut firmly. An ER collet system will provide a very secure grip.
- Mount the collet chuck into your milling machine’s spindle.
Important Note: Always ensure the end mill shank is gripped by the collet for a significant portion of its length to maximize rigidity, especially with extra-long end mills. Avoid gripping only a tiny edge of the shank.
Machining PVC: Settings and Best Practices
Now for the exciting part – using your carbide end mill to cut PVC! Getting the settings right is key to achieving those clean, precise results without melting or damaging your material.
Recommended Speeds and Feeds for PVC
Finding the perfect “speed and feed” is a combination of spindle speed (RPM) and the rate at which the cutting tool moves through the material (feed rate). These are not rigid numbers and can vary based on the specific type of PVC, the rigidity of your machine, and the exact geometry of your end mill. However, here are some starting points for a 10mm 2-flute carbide end mill on general-purpose PVC:
- Spindle Speed (RPM): Start between 12,000 – 18,000 RPM. PVC can melt easily, so a higher RPM with a controlled feed rate is often better to make a clean shearing cut.
- Feed Rate (mm/min or in/min): Aim for a feed rate that allows the end mill to take a good chip. A starting point could be 400 – 800 mm/min (approx. 15 – 30 in/min). If you hear screaming or see melting, you’re likely feeding too slowly or taking too deep a cut.
- Depth of Cut (DOC): This is how deep the end mill cuts in each pass. For a 10mm end mill, start conservatively. For roughing, you might try 1-2mm. For finishing, aim for 0.1-0.5mm. Taking a lighter finishing pass after roughing often yields the best surface finish.
- Stepover: This is the distance the end mill moves sideways between passes when pocketing or profiling. For pocketing, a stepover of 30-50% of the tool diameter (3-5mm for a 10mm end mill) is typical for roughing. For finishing, a smaller stepover (e.g., 10-20% or 1-2mm) will give a smoother surface.
Tip: Always consult the end mill manufacturer’s recommendations if available. Some manufacturers provide suggested cutting parameters for specific materials.
Cutting Strategies for Clean Results
Beyond just speeds and feeds, how you program your tool paths matters. For PVC, these strategies can help:
- Climb Milling vs. Conventional Milling: For plastics, climb milling often produces a better surface finish and reduces the tendency for the plastic to grab the tool. In climb milling, the cutter rotates in the same direction as the feed. This pushes the chip away from the cut as it’s formed. Conventional milling pushes the chip up and can sometimes lead to tearing.
- Finishing Pass: After roughing out a pocket or profile with slightly larger stepover and depth of cut, always perform a final “clean-up” or finishing pass. This pass should use a much smaller depth of cut (0.1-0.3mm) and often a slightly slower feed rate or reduced stepover to achieve a very smooth surface finish.
- Avoid Dwell Time: Minimize any time the tool spends stationary in the material. This is where melting usually occurs.
- Chip Evacuation: Ensure your dust collection is effective. If you see chips building up and melting, reduce your depth of cut or feed rate, or increase your spindle speed.
Common Issues and How to Solve Them
Even with the best intentions, problems can arise. Here are common issues when machining PVC and how to address them:
- Melting/Gooey Cuts: This is the most common problem.
- Cause: Too much heat being generated.
- Solutions:
- Increase spindle speed (RPM).
- Increase feed rate.
- Reduce depth of cut (DOC).
- Ensure 2-flute end mill with good chip clearance.
- Consider a blast of compressed air onto the cutting zone.
- A light mist of coolant might help, but test this.
- Jagged Edges/Tearing:
- Cause: Tool is dull, feeding too slowly, or plastic is too soft for the cutting strategy.
- Solutions:
- Ensure your end mill is sharp.
- Increase feed rate.
- Try climb milling.
- Use a finishing pass with a light DOC.
- Consider a different grade of PVC or a harder plastic if possible.
- Tool Breakage:
- Cause: Taking too deep a cut, insufficient support for workpiece, plunging too fast, rigidity issues.
- Solutions:
- Reduce depth of cut and stepover.
- Ensure workpiece is securely fixtured.
- Avoid plunging straight down into the material; use a ramp or helical interpolation if possible for deeper cuts.
- For plunge cuts, use a very slow feed rate or a specialized “plunge” end mill.
- Ensure the end mill shank is securely gripped in the collet.
The key is iterative adjustment. Make one change at a time and observe the results. It’s often a dance between RPM, feed rate, and depth of cut to find the sweet spot for your specific setup.
Advanced Techniques and Considerations
Once you’re comfortable with the basics, you can explore more advanced ways to use your 1/8 inch