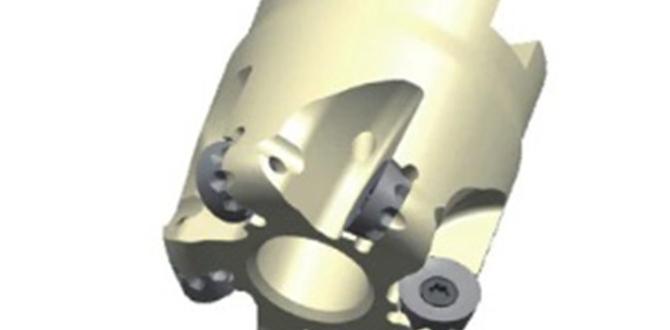
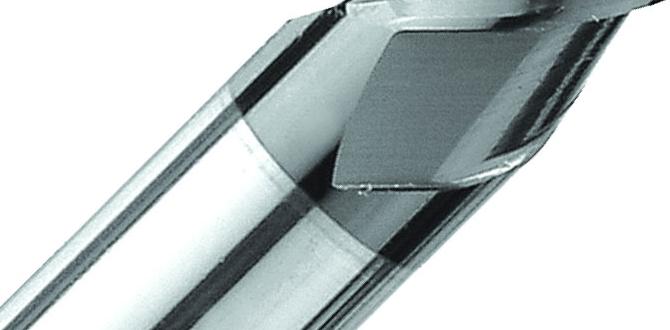
For polycarbonate chatter with a 1/8″ end mill, a specialized carbide end mill designed for plastics, with a specific flute geometry and a sharp cutting edge, is the genius solution. Look for end mills with fewer flutes (like 2-flute) and a high polish, which effectively clear chips and reduce friction, minimizing the vibration that causes chatter.
Working with polycarbonate on a mill can be a bit tricky, especially when you’re just starting out. One of the most common frustrations you might run into is something called “chatter.” It’s that annoying, high-pitched squeal or vibration you hear and feel as the tool cuts, and it leaves behind a rough, fuzzy finish. For many beginners, it feels like a roadblock. But don’t worry! There’s a simple, brilliant solution using the right tool. We’re going to dive into why chatter happens and how a specific type of 1/8″ carbide end mill can be your secret weapon against it. Get ready to make cleaner, smoother cuts in polycarbonate.
Understanding Polycarbonate Chatter
Chatter, in milling, is basically unwanted vibration. It happens when the cutting tool doesn’t have a smooth, continuous engagement with the material. Instead, it bounces, digs in, and then pulls away rapidly. This rapid back-and-forth creates that noisy, rough finish. Several factors can contribute to chatter, especially when milling softer, more flexible plastics like polycarbonate:
- Tool Geometry: A blunt or poorly designed cutting edge can snag the material.
- Material Properties: Polycarbonate is a thermoplastic, meaning it can melt and gum up flutes if not handled correctly. This gumming can increase friction and lead to vibration.
- Cutting Speed & Feed Rate: Mismatched speeds and feeds mean the tool is either moving too fast or too slow for the material, leading to inefficient chip formation and vibration excitation.
- Machine Rigidity: A less rigid machine or setup can amplify even small vibrations.
- Tool Runout: If the end mill isn’t perfectly centered in the collet, it will wobble, causing inconsistent cutting and chatter.
For beginners, trying to diagnose and fix chatter can feel overwhelming. You might think it’s your machine or your skill, but often, the real culprit is the humble end mill itself. The good news is that by selecting the correct end mill, you can often eliminate chatter with surprising ease.
The “Genius” 1/8″ Carbide End Mill for Polycarbonate
When it comes to milling polycarbonate and battling chatter, the star of the show is a specialized 1/8″ carbide end mill designed specifically for plastics. What makes it so effective? It boils down to its unique design features which address the core reasons polycarbonate tends to chatter.
Key Features of a Chatter-Busting End Mill:
- Material: Carbide is crucial. It’s much harder and more rigid than High-Speed Steel (HSS), meaning it holds its edge better and is less likely to flex, which helps resist vibration.
- Number of Flutes: For plastics like polycarbonate, fewer flutes are generally better. A 2-flute end mill is ideal. More flutes can lead to chip congestion in softer materials, increasing friction and heat, which then leads to chatter. With only two flutes, there’s plenty of space for chips to escape.
- Helix Angle: A higher helix angle (often around 30-45 degrees) is beneficial for plastics. This helps to “shearcut” the material, producing smaller, more manageable chips. It also helps to lift chips away from the cutting edge effectively, preventing buildup.
- Rake Angle: Plastics benefit from a sharp, positive rake angle. This means the cutting edge is angled forward, allowing it to slice into the material with less force and chip formation.
- Surface Finish: Look for end mills with a highly polished finish, especially on the flutes. A mirror-like finish reduces friction between the tool and the workpiece, allowing chips to flow more freely and further minimizing the chances of sticking and chattering.
- “Up-Cut” vs. “Down-Cut” vs. “Compression”: For polycarbonate, an “up-cut” spiral flute is generally preferred. This style of end mill pulls chips upwards and out of the cut. This is vital for plastics because it helps to evacuate the melted material and prevent it from re-welding onto the workpiece. Some specialized “plastic” end mills might have unique geometries that combine features of up-cut and down-cut for optimal chip evacuation and edge finish.
The “1/8 inch” size is common for intricate work or smaller projects, making it versatile. However, not just any 1/8″ end mill will do. You need one engineered for plastics that features these specific design elements. The “extra long” aspect mentioned in keyword searches can sometimes be helpful for deeper cuts or reaching into pockets, but for reducing chatter, the flute design and sharpness are far more critical than the length itself.
Why 2 Flutes Are Often Best for Plastics
When you’re milling softer, gummy materials like polycarbonate or ABS, chip evacuation is your biggest challenge. If chips don’t get out of the flute quickly, they can melt, stick to the cutting edge, and then re-weld onto your workpiece, creating a nasty finish and significantly increasing the tendency for chatter.
With a 2-flute end mill:
- Larger Chip Gullets: The space between the cutting edges (the gullet) is larger compared to a tool with more flutes. This allows chips to pass through more easily without clogging.
- Better Heat Dissipation: With fewer cutting edges in contact at any given moment, there’s less overall friction being generated. This helps to keep the tool and the material cooler, reducing melting.
- Efficient Chip Evacuation: Designed with a good helix angle, a 2-flute end mill can effectively lift chips away from the cut zone, out of the hole, and away from the tool.
While 3-flute or 4-flute end mills are great for aluminum or harder plastics because they can remove material faster and offer better stability, they often lead to chip packing in softer materials like polycarbonate. This packing is a direct pathway to heat buildup, melting, and the dreaded chatter.
Essential Setup for Chatter-Free Polycarbonate Milling
Even with the perfect end mill, your setup needs to be right to avoid chatter. Think of it like tuning a musical instrument – everything needs to be in harmony for a smooth sound (or, in our case, a smooth cut!).
1. Secure Your Workpiece Firmly
Loose material is a chatter magnet. Polycarbonate can flex, and if it moves even slightly during a cut, it will upset the cutting action. Use clamps, a vise, or double-sided tape (if appropriate for the job and material thickness) to ensure the polycarbonate is absolutely still.
2. Minimize Tool Extension
The longer the end mill sticks out of the collet or holder, the more it’s able to vibrate. Use the shortest possible length of the end mill to reach your desired depth. This is often referred to as tool stick-out or overhang. Keep it as minimal as your cutting depth allows for maximum rigidity.
3. Ensure a Clean Collet and Spindle
Any debris or damage in your collet or the milling machine’s spindle taper can cause the end mill to run out (wobble). This runout introduces an inconsistent cutting diameter, leading to uneven pressure and vibration. Always clean your collets and spindle before inserting an end mill.
4. Proper Speeds and Feeds
This is crucial. For polycarbonate, you generally want to run at higher spindle speeds (RPM) and relatively faster feed rates compared to metals. This helps to create a shearing action rather than rubbing, and it ensures that chips are cleared effectively.
General Guidelines (Always test and adjust!):
- Spindle Speed (RPM): Start around 20,000 – 30,000 RPM. Plastics generate heat, and a higher RPM can help cut quickly before heat builds up too much.
- Feed Rate (IPM or mm/min): Aim for a feed rate that results in small, consistently sized chips. A good starting point might be 0.001″ to 0.003″ (0.025mm to 0.075mm) per tooth. Since we’re often using a 2-flute end mill, this translates to 0.002″ to 0.006″ (0.05mm to 0.15mm) total feed per revolution.
- Depth of Cut (DOC): For polycarbonate, keep your depth of cut relatively shallow. A common recommendation is 0.010″ to 0.030″ (0.25mm to 0.75mm). Taking too deep a cut will overload the end mill and increase chatter.
- Width of Cut (WOC): For full slotting operations (cutting a full-width slot), use a narrow WOC to prevent chip packing. For profiling around an edge, a WOC of about 50% of the tool diameter is a good starting point.
Finding the sweet spot requires experimentation. Feeds and speeds charts are a good starting point, but remember that the exact grade of polycarbonate, its thickness, and your specific machine can all influence the ideal settings. A good rule of thumb is to listen to the cut: a smooth, consistent sound is good; a high-pitched squeal or loud “thwacking” indicates chatter and that you need to adjust.
For more advanced information on calculating speeds and feeds, you can refer to resources like the NASA Machining Handbook, which provides detailed engineering principles, though you’ll need to adapt the plastics section.
5. Use a Lubricant/Coolant (Optional but Recommended)
While not always strictly necessary, a mist coolant system or a specialized plastic cutting fluid can significantly help. It cools the cutting zone, reducing melting, and can help lubricate the cut, further reducing friction and chip welding. For polycarbonate, avoid heavy oils that can stain or warp the plastic. A light, air-fed mist is often ideal.
Step-by-Step: Milling Polycarbonate Chatter-Free
Let’s walk through the process of using your genius 1/8″ carbide end mill to achieve smooth cuts in polycarbonate.
Step 1: Select the Right End Mill
As we’ve discussed, choose a 1/8″ carbide end mill with a polished finish, ideally 2 flutes, and a high helix angle designed for plastics. Ensure it’s sharp and free of any damage.
Step 2: Fixture Your Polycarbonate
Carefully secure your workpiece. Make sure it cannot move or vibrate during the cutting process. Double-check that your clamps won’t interfere with the end mill’s path.
Step 3: Set Up Your Mill
- Insert the end mill into a clean collet and then into your milling machine’s spindle.
- Ensure minimal tool stick-out.
- Set your desired spindle speed and feed rate. For a starting point, try 20,000 RPM and a feed rate of about 0.004″ per revolution (for a 2-flute, this would be 0.008″ IPM, or about 0.2 mm/min).
- Set your depth of cut to be shallow, say 0.020″ (0.5mm) for a profiling cut. For slotting, you might use a similar depth or slightly more if the material and machine allow.
Step 4: Perform a Dry Run (Optional but Smart)
Before engaging the material, jog the mill to the starting point. Lower the spindle to just above the surface of the polycarbonate. Run the spindle and the rapid traverse down to the cutting depth. This lets you hear the spindle and check for any unusual noises or vibrations even before touching the material. Then, move the spindle back up.
Step 5: Make Your First Cut
Start the spindle and engage the feed. Move the end mill into the polycarbonate at your programmed feed rate and depth of cut. Pay close attention to the sound and feel of the cut. Is it smooth? Are you hearing chatter? If you hear chatter:
- Slow down your feed rate slightly.
- Increase your spindle speed slightly.
- Or, reduce your depth of cut.
Often, a combination of these adjustments will smooth out the cut. The goal is to create thin, continuous chips.
Step 6: Chip Evacuation
As the end mill cuts, watch the chips being ejected. They should be small, relatively clean, and not melted. If you see a lot of plastic gumming up the flutes, your feed rate might be too slow, or your spindle speed too low. If the chips are large and stringy, your feed rate might be too high, or your depth of cut too aggressive.
Step 7: Complete the Operation
Continue with your programmed path, making multiple passes if necessary to achieve your final dimensions. Always aim to finish with a light “climb mill” pass (if profiling) to get the cleanest edge. A climb mill means the tool is rotating in the same direction as the feed, which results in a finer chip and a better surface finish.
Step 8: Inspect Your Work
Once the machining is complete, inspect the edge of your cut. It should be smooth, clean, and free from fuzzy material or melted plastic. If you still have minor chatter marks, try a slower feed rate or a slightly higher spindle speed on your next attempt.
Tool Comparison: Standard vs. Plastic-Specific End Mills
To really highlight why the specialized end mill is so important, let’s compare it to a more general-purpose tool.
| Feature | Standard 2-Flute Carbide End Mill (General Purpose) | Specialized Plastic/Polycarbonate 1/8″ Carbide End Mill |
|---|---|---|
| Material | Carbide (often uncoated) | Carbide (often with a special coating or highly polished) |
| Flute Design | Standard helix angle (e.g., 30°) | High helix angle (30°-45°+), large chip gullets, sharp positive rake angle |
| Surface Finish | Standard machined finish | Mirror-polished flutes |
| Ideal For | Metals (aluminum, mild steel), some harder plastics | Polycarbonate, acrylic, ABS, softer plastics |
| Chip Evacuation | Good for metals, can pack in soft plastics | Excellent; designed to prevent chip welding and clogging |
| Chatter Tendency in Polycarbonate | High | Low to None |
| Cutting Action | Can rub and generate heat in soft plastics | Shearcuts, minimizes heat buildup |
As you can see, while a standard end mill might work, it’s not optimized. The specialized end mill is built from the ground up to tackle the unique challenges of plastics. The polished, high-helix flutes and sharp geometry are specifically designed to slice through the material cleanly, evacuate chips efficiently, and minimize the friction and heat that lead to melting and chatter.
Beyond the End Mill: Other Considerations
While the right end mill is the primary solution, a few other factors can contribute to a successful polycarbonate milling experience:
Spindle Quality and Runout
Even the best end mill will perform poorly if the spindle has excessive runout. Runout is the wobble of the spindle when it rotates. If your spindle isn’t running true, the end mill will engage the material unevenly, causing vibration. High-quality routers or milling machines with good bearings will have very low runout.
For hobbyist machines, a dial indicator can be used to check spindle runout by firmly attaching it to the spindle and rotating it slowly. While some runout is unavoidable (often a few thousandths of an inch is acceptable), excessive wobble will guarantee chatter. Here’s a helpful guide from CNCCookbook on measuring runout which can be applied to understanding your machine’s setup.
Tool Holder Rigidity
The collet and collet nut system is what holds your end mill. If the collet itself is of poor quality or damaged, it won’t grip the end mill properly, leading to runout and chatter. Always use quality collets designed for your machine.
Feed Rate Optimization
Getting the feed rate right is often a balancing act. Too slow,


