Carbide end mills make machining Inconel 718 easier by efficiently cutting this tough alloy, minimizing deflection for precise results, even with smaller shank sizes like 1/8 inch or 10mm extra-long options specifically designed for the challenge.
Hey makers! Daniel Bates here from Lathe Hub. Ever looked at Inconel 718 and thought, “Wow, that looks tough to cut!”? You’re not alone. This superalloy is famous for its incredible strength and heat resistance, which makes it awesome for aerospace and high-temp applications, but a real headache for your milling machine. Trying to mill Inconel can feel like wrestling a bear – it fights back, chatters, and can quickly ruin your tools. But what if I told you there’s a way to make it much, much smoother? Today, we’re diving into how a special kind of cutting tool, the carbide end mill, can be your secret weapon for tackling Inconel 718. We’ll explore how the right carbide end mill, even a slender 1/8 inch or a long 10mm shank, can tame this beast and achieve surprisingly accurate results. Get ready to turn that frustrating machining challenge into a rewarding success!
Why Is Machining Inconel 718 So Tricky?
Inconel 718 isn’t your average chunk of metal. It belongs to a class of materials called nickel-based superalloys, and they’re built tough. This toughness comes from a special heat treatment process that gives them their incredible strength, especially at high temperatures. Think of it like this: while other metals might soften and deform easily, Inconel 718 stays strong and rigid, even when things get hot. This is fantastic for jet engines and gas turbines where parts experience extreme heat and stress. However, for us machinists, this means Inconel is incredibly hard, gummy, and prone to work hardening. Work hardening is like the metal getting tougher and tougher the more you try to cut it, making subsequent cuts even harder. This often leads to increased tool wear, chatter (annoying vibrations that ruin your finish and accuracy), and can quickly dull even the most robust cutting tools.
The Magic of Carbide: Your Inconel Milling Ally
When it comes to cutting tough materials like Inconel 718, standard High-Speed Steel (HSS) tools often just can’t keep up. That’s where carbide end mills come in. Carbide, or more precisely, tungsten carbide, is a ceramic-metal composite that’s significantly harder and more rigid than steel. This superior hardness means carbide tools can maintain their sharp edge at higher cutting speeds and temperatures, which are often necessary for machining superalloys. Its rigidity also helps resist deflection, a critical factor when milling a material that deforms your tool. For Inconel, using a carbide end mill isn’t just a suggestion; it’s practically a necessity for efficient and successful machining.
Carbide vs. HSS for Superalloys
- Hardness: Carbide is much harder than HSS, allowing it to cut through tough materials without rapidly dulling.
- Rigidity: Its stiffness helps prevent the tool from bending or deflecting under heavy cutting loads.
- Heat Resistance: Carbide can handle higher cutting temperatures, essential for preventing Inconel from work hardening.
- Tool Life: While initially more expensive, a carbide tool will typically last far longer when machining Inconel compared to HSS.
Choosing the Right Carbide End Mill for Inconel 718
Not all carbide end mills are created equal, especially when you’re aiming to mill a challenging material like Inconel 718. The key is to select a tool specifically designed or well-suited for this type of application. This often involves specific geometries, coatings, and materials. For Inconel, we’re generally looking for end mills with:
Key Features to Look For:
- Material: Solid carbide is paramount.
- Geometry: Look for end mills with a higher number of flutes (e.g., 4 or 6 flutes) for Inconel. More flutes provide better surface finish and chip evacuation in some applications, but for deep cuts in gummy materials, fewer flutes might allow for larger chip loads. Often, 4 flutes are a good starting point for general Inconel milling.
- Edge Preparation: Tools with a slightly rounded or “honed” cutting edge (a small radius) can improve strength and reduce chipping.
- Coatings: Specialized coatings are your best friend. For Inconel, coatings like TiAlN (Titanium Aluminum Nitride), AlTiN (Aluminum Titanium Nitride), or others designed for high-temperature alloys can significantly reduce friction and heat, extending tool life.
- Helix Angle: A common helix angle for Inconel is around 30-45 degrees. However, some manufacturers offer specialized “high helix” or variable helix end mills designed for improved chip evacuation and reduced chatter in tough materials.
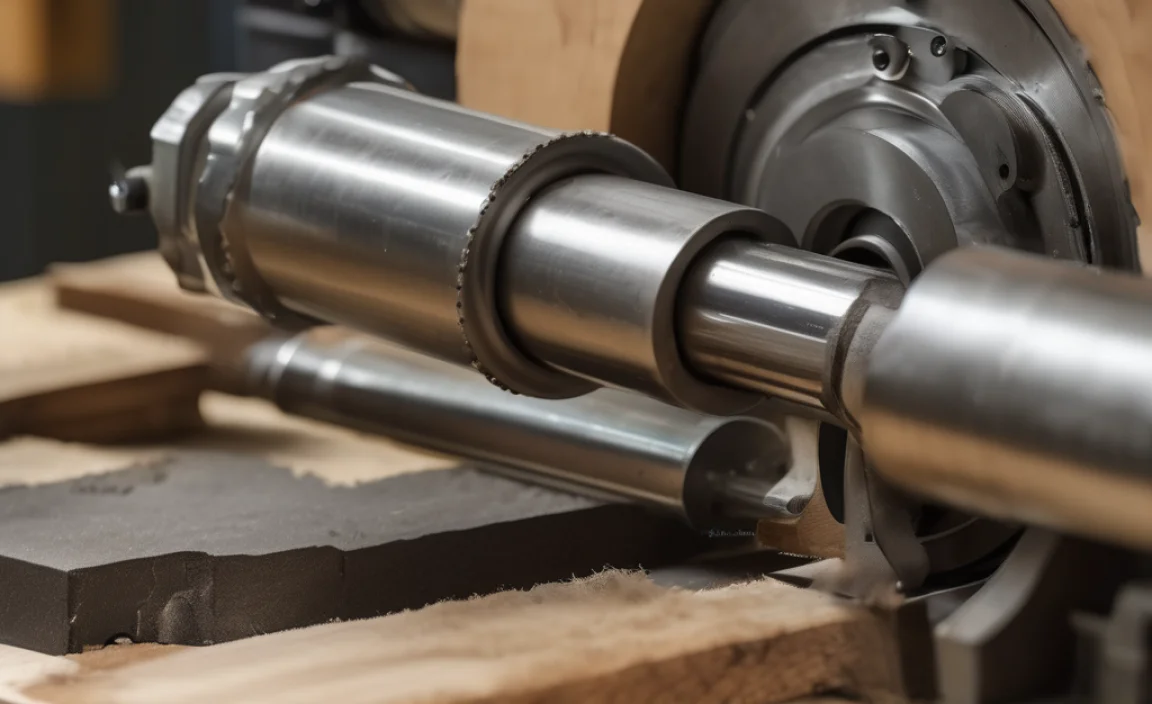
The Significance of Shank Diameter and Length
This is where our specific keywords come into play. When milling Inconel, minimizing deflection is crucial for accuracy and tool life. Deflection happens when the cutting forces push the end mill away from its intended path. Several factors influence this:
- Shank Diameter: A larger shank diameter is inherently more rigid. So, if possible, using an end mill with a larger shank (e.g., 1/4″, 1/2″, or 12mm, 16mm) is always a good idea.
- “Extra Long Reach”: This term can be a bit misleading. While “extra long” might sound beneficial, for Inconel, we often want the shortest possible flute length and tool overhang to maximize rigidity. However, sometimes an application absolutely requires reaching into a cavity, necessitating a longer tool. In these cases, a “longer reach” end mill might be unavoidable, but you’ll need to be exceptionally careful with cutting parameters.
- 1/8 Inch (approx. 3mm) Shank: Using a 1/8 inch shank end mill for Inconel 718 presents a significant challenge due to its small diameter. These are typically used for very fine detail work or small slots. Machining Inconel with such a small tool requires extreme caution, very conservative cutting speeds and feed rates, and a very rigid setup to compensate for the inherent lack of stiffness.
- 10mm Shank: A 10mm shank (approximately 3/8 inch) offers a reasonable balance. It’s more rigid than a 1/8 inch shank but still allows for machining smaller features. When selecting a 10mm shank, opting for an “extra long” version only if specifically required by the geometry – otherwise, prioritize shorter flute lengths for rigidity.
The “genius” part comes from understanding when and how to use these tools effectively. For Inconel, the ideal scenario for minimal deflection is a shorter flute length relative to the shank diameter. If your task demands a longer reach, selecting a tool with a robust shank diameter (like 10mm or larger) and a premium carbide grade with appropriate coatings becomes even more critical. Manufacturers often produce specific cutters designed for nickel alloys, which will be your best bet.
Optimizing Cutting Parameters for Inconel 718
Even with the perfect carbide end mill, you won’t succeed with Inconel if your cutting parameters are wrong. This is where patience and careful adjustments are key. The general strategy is to use slower spindle speeds (RPM) and relatively slower feed rates compared to machining softer materials like aluminum. However, it’s a delicate balance.
General Guidelines:
- Surface Speed (SFM): For carbide end mills machining Inconel 718, typical surface speeds might range from 30-80 SFM (Surface Feet per Minute). This is much lower than for steel or aluminum. Always consult the end mill manufacturer’s recommendations.
- Rounds per Minute (RPM): Calculate this based on your tool diameter and the recommended SFM.
RPM = (SFM × 3.82) / Tool Diameter (inches) - Feed Rate (IPM): Aim for a chip load that’s appropriate for the tool size and material. Chip load is the thickness of the material removed by each cutting edge of the tool per revolution. For Inconel, you generally want a chip load that’s substantial enough to prevent work hardening but not so aggressive that it overloads the tool. This often translates to feed rates that feel “slow” by conventional machining standards, but generate a noticeable chip. A good starting point might be 0.001″ to 0.005″ per tooth, drastically varying based on tool diameter and depth of cut.
- Depth of Cut (DOC) and Width of Cut (WOC): This is critical for Inconel. You want to take a light radial (width) and axial (depth) cut when possible.
- Axial DOC: Often, a full slotting cut (where WOC = Tool Diameter) can lead to excessive heat and friction. Try to take shallower depths of cut, perhaps <0.100" for a 1/4" end mill, or even less for smaller tools.
- Radial WOC: Aim for a radial engagement (stepover) that is a fraction of the tool diameter – for Inconel, this might be 10-30% of the tool diameter. This is often called “high-efficiency machining” or “trochoidal milling” when using software that can generate these toolpaths automatically.
- Coolant/Lubrication: This is absolutely vital. Inconel generates a lot of heat. A robust coolant flood, or preferably a high-pressure coolant system, is highly recommended to keep the cutting edge cool and evacuate chips. A suitable cutting fluid designed for titanium and high-temp alloys is essential. For difficult-to-reach areas, a good quality synthetic coolant or even a specialized spray mist system can help.
Always start conservatively with your speeds and feeds, and listen to your machine. If you hear screeching, chattering, or see chips welding to the tool, slow down and adjust. The goal is to achieve a nice, golden-brown chip. Black chips indicate overheating.
Machining Strategies for Inconel 718 with Carbide End Mills
Beyond just speeds and feeds, the way you approach the machining operation itself can make a huge difference. Here are some strategies to consider:
1. High-Efficiency Machining (HEM) / Trochoidal Milling
This technique involves using a toolpath where the end mill moves in a series of overlapping arcs (like a constant radius). This keeps the chip load consistent and the engagement angle low, which dramatically reduces heat buildup and cutting forces. Many CAM software packages have options for HEM toolpaths. The benefit here is that even with a smaller diameter shank (like 1/8 inch or 10mm), you can achieve more efficient material removal because the forces are distributed differently and the tool experiences less stress. This method is generally much more effective for Inconel than traditional pocketing with large stepovers.
2. Climb Milling vs. Conventional Milling
For Inconel, climb milling is almost always preferred when possible. In climb milling, the cutter rotates in the same direction as the feed motion. This results in a shallower, thinner chip being taken, which reduces the tendency for the material to “dig in” and work harden in front of the cutter. Conventional milling, where the cutter rotates against the feed motion, tends to lift and dig into the material, increasing cutting forces and heat. Always ensure your machine can handle climb milling with minimal backlash.
3. Use of a Stable Setup
A wobbly setup is the enemy of machining Inconel. Ensure your workpiece is securely clamped with no possibility of movement. Your end mill should be held in a high-quality collet or tool holder – avoid press-fit holders if possible, as they can introduce runout. Minimize the tool overhang as much as possible. If you’re using an end mill that’s longer than necessary for rigidity, you’ll experience significantly more deflection, especially with smaller shank sizes like 1/8 inch.
4. Chip Evacuation is Critical
As mentioned, Inconel is gummy. If chips don’t evacuate properly from the cutting zone, they can re-cut, leading to increased heat, tool wear, and poor surface finish. Using through-spindle coolant (if your machine has it) is incredibly beneficial. Blowing compressed air can also help clear chips, but coolant provides essential cooling. For deep pockets where chips can get trapped, consider adding “peck” moves to your drilling or plunging cycles to clear chips periodically. Some end mills are designed with chip-breaker features on the flutes, which can help.
For users of metal lathes and milling machines, understanding these strategies opens up possibilities. For instance, performing a secondary op on a lathe after initial milling can ensure critical features are dimensionally accurate, as Inconel can distort slightly after stress relief from milling.
Tools and Fixturing for Inconel Milling Success
Beyond the carbide end mill itself, the ancillary tools and your fixturing setup play a massive role in successfully milling Inconel 718. Investing in quality here will save you headaches and broken tools.
Essential Tools and Fixturing Components:
- Rigid Milling Machine: A Bridgeport-style knee mill, a CNC mill, or even a very robust manual mill is essential. Lightweight or unsturdy machines will amplify vibration and make Inconel machining nearly impossible.
- High-Quality Tool Holder: Use ER collets, TG collets, or shrink-fit tooling for the best runout (<0.0005"). Avoid standard drill chucks for end mills, as they offer poor runout and gripping force.
- Workholding: A sturdy vise, specifically designed for milling, is crucial. Ensure the vise jaws are clean and provide ample and even clamping force. For larger parts, consider toe clamps or fixture plates for maximum stability.
- Coolant and Lubricant System: A flood coolant system is highly recommended. If you don’t have one, consider a good quality spray mist system or even manual application of a specialized cutting fluid designed for high-temp alloys.
- Dial Indicator: Essential for checking spindle runout and workpiece alignment.
- Solid Fixturing: Avoid soft jaws where possible for critical operations unless they are compensating for an uneven surface. Ensure your part is firmly seated on parallels or a fixture plate.
This is where the world of metalworking tools really complements each other. The stability provided by a good metal lathe setup might be an alternative for certain features, but for milling slots, pockets, or complex 3D forms in Inconel, a rigid milling machine and proper fixturing are non-negotiable. You can learn more about stable workholding on the Metal Form website, which offers insights into material handling and forming.
Table: Carbide End Mill Specifications for Inconel 718 Milling
The table below offers a starting point for Inconel 718 milling with carbide end mills. Always consult the specific end mill manufacturer’s recommendations for your chosen tool, as variations in coatings, flute geometry, and carbide grade exist.
| Parameter | Recommended Range/Type | Notes |
|---|---|---|
| End Mill Material | Solid Carbide | Required for hardness and rigidity. |
| Coating | TiAlN, AlTiN, ZrN, CrN (or specialized Ni-Alloy coatings) | High-temperature coatings that reduce friction and heat. |
| Number of Flutes | 2 or 4 (sometimes 6) | 4 flutes are a good balance. 2 flutes allow for aggressive chip thinning but can chatter. High flute counts increase heat build-up in corners. |
| Helix Angle | 30° – 45° (High helix up to 60° possible) | Standard helix is robust. High helix can improve chip evacuation but might reduce edge strength. |
| Edge Prep | Honed or Slightly Radiused | Improves edge strength and reduces chipping. |
| Shank Diameter | 1/8″ (3mm), 10mm, 1/4″ (6mm), etc. | Larger diameters offer more rigidity. Smaller shank tools (like 1/8″) require very cautious parameters and minimal overhang. |
| Flute Length / Overall Length | Short flute length preferred for rigidity. | Minimize overhang where possible. “Extra long” reach tools should only be used if dictated by part geometry and with extreme caution. |
| Surface Speed (SFM) | 30 – 80 SFM | Start low and increase cautiously. |
| Chip Load per Tooth (CLT) | 0.001″ – 0.005″ (Varies greatly by diameter) | Crucial for efficient cutting; aim for a healthy chip. |