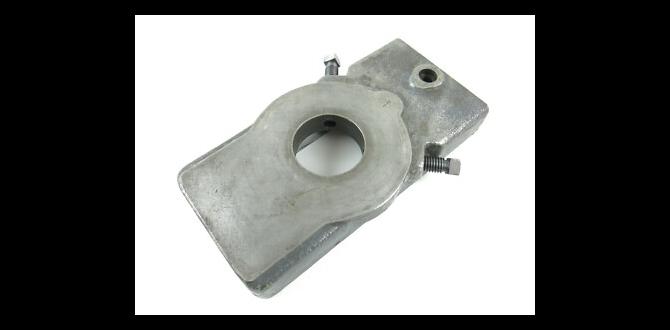
Carbide End Mill 1/8 Inch 3/8 Shank Extra Long for Plywood: Your Beginner’s Guide
Quick Summary: Unlock precise plywood cuts with a 1/8 inch carbide end mill featuring a 3/8 inch extra-long shank. This guide simplifies choosing, using, and caring for this specific tool to achieve tight tolerances and smooth finishes in your projects.
Hey there, fellow makers! Daniel Bates here, your guide from Lathe Hub. Ever looked at a piece of plywood and thought, “How can I get a perfectly clean cut in here, especially with those intricate details?” It’s a common challenge for us woodworkers, whether we’re just starting out or have been at it for a while. Getting those precise shapes and tight tolerances doesn’t have to be a headache. We’re going to dive deep into a specific tool that can make a world of difference for your plywood projects: the 1/8 inch carbide end mill with a 3/8 inch extra-long shank. Stick around, and by the end of this, you’ll be cutting plywood with confidence and amazing results.
Why This Specific End Mill Matters for Plywood
When you’re working with plywood, you’re dealing with a material that’s both fantastic for projects and a bit tricky to cut cleanly. The layers can chip if you’re not careful, and achieving those crisp edges for joinery or decorative elements requires the right tool. That’s where our star player comes in: the 1/8 inch carbide end mill with an extra-long 3/8 inch shank.
Why this combination? Let’s break it down:
- 1/8 Inch Diameter: This smaller diameter is perfect for fine details, tight corners, and creating those delicate patterns that make your projects stand out. It’s like having a precise pencil for your CNC.
- Carbide Material: Carbide is tough stuff! It stays sharp longer and can handle the heat generated when cutting harder materials like plywood, meaning cleaner cuts with less tear-out and a longer tool life.
- Extra-Long Shank: This is your secret weapon for deeper cuts or reaching into less accessible areas of your workpiece without needing to re-fixture. It also provides a good grip on your collet.
- 3/8 Inch Shank Diameter: This is a common size that fits many CNC routers and spindle collets, offering a balance of rigidity and accessibility.
Together, these features mean you can achieve those “tight tolerances” and clean cuts that can feel almost magical when they work. We’re talking about edges so crisp they look factory-made, and details so fine they’ll impress anyone. This isn’t just about cutting; it’s about precision craftsmanship, made accessible.
Choosing the Right Carbide End Mill: What to Look For
Not all 1/8 inch end mills are created equal, especially when you need that tight tolerance for plywood. Here’s what to keep in mind as you shop:
Types of End Mills for Plywood
For plywood, you generally want an end mill designed for softer woods and composites. The key is to minimize chipping:
- Single Flute: Often excellent for plastics and softer woods like plywood because they allow for efficient chip evacuation, which is crucial at smaller diameters. Less chip packing means cleaner cuts.
- Two Flute: A good all-rounder that can also work well. They provide a bit more support and can handle slightly faster feed rates than single flute in some cases.
- Compression Bits: While not strictly an ‘end mill’ in the single-piece cutting tool sense, compression bits combine up-cut and down-cut spirals. They are FANTASTIC for plywood as the top part pulls the material up, and the bottom part pushes it down, effectively creating a smooth finish on both the top and bottom surfaces with a single pass. If you see a 1/8 inch compression bit with an extra-long shank, that’s often the top choice for plywood.
Material and Coatings
As mentioned, carbide is your go-to. It’s hard and handles heat well. You might also see coatings like:
- Uncoated: Perfectly fine for wood and general-purpose use.
- Titanium Nitride (TiN): A common coating that adds a bit of hardness and lubricity, helping to reduce friction and heat.
- Zirconium Nitride (ZrN): Offers even better wear resistance and heat tolerance than TiN, often preferred for more demanding applications.
For plywood, an uncoated or TiN-coated carbide end mill will serve you very well. Don’t overthink the fancy coatings initially; focus on flute design and quality carbide.
Flute Count and Helix Angle
This directly impacts chip removal and cut quality:
- Chip Load: Smaller diameter end mills have a very small chip load capacity. You want flutes that can effectively clear chips without getting clogged.
- Helix Angle: A steeper helix angle (like 30-45 degrees) can help with smoother cutting and chip evacuation in softer materials.
The “Extra-Long” Factor
When we talk about an “extra-long” shank, it’s relative. For a 1/8 inch end mill, a standard shank might be 1.5 to 2 inches long. An “extra-long” version could be 3 inches or even more. This allows for:
- Deeper cuts in a single pass.
- Reaching into recessed areas on a workpiece.
- Better support from the collet if you’re only using a small portion of the end mill’s cutting length.
However, be mindful: longer shanks can be more prone to vibration or “chatter” if not supported well or if feed rates are too high. We’ll cover how to manage this later.
Where to Buy Quality Tools
Look for reputable tool manufacturers or suppliers. Some well-regarded brands for CNC tooling include:
- Amana Tool
- Bits & Bits CNC
- MLCS Woodworking
- Onsrud Cutter
For a good starting point on tool selection and understanding CNC bits, CNC Cookbook’s guide to router bits is an excellent resource.
Setting Up Your Machine for Success
Getting the right end mill is only half the battle. How you set it up on your CNC router or milling machine is equally important for achieving those tight tolerances and a smooth finish on plywood.
1. Secure Your Workpiece
This is non-negotiable. Plywood needs to be held down firmly to prevent any movement during cutting. Any shifting means lost precision.
- Double-Sided Tape: For smaller pieces or lighter cuts, strong double-sided carpet tape can work wonders. Ensure the surface you’re taping to is clean.
- Clamps: Use clamps strategically placed so your end mill won’t hit them. Consider using low-profile clamps or cam clamps that sit below the cutting surface.
- Vacuum Table: If your machine has one, this is the ideal solution for plywood, ensuring even pressure across the entire workpiece.
- Screws: For less critical areas (like waste areas or where they can be easily filled), small screws can secure the material.
Always ensure your workpiece is clamped on a stable and flat spoilboard or base. A warped base means warped cuts.
2. Collet and Spindle Check
Ensure your collet is clean, free of dust or debris, and properly seated in the spindle. A dirty collet can lead to runout, meaning your end mill won’t spin perfectly true, resulting in a rougher cut and reduced accuracy.
- Correct Collet Size: Use the collet that matches your shank diameter (3/8 inch in this case). A slight mismatch can cause wobble.
- Proper Tightening: Tighten the collet nut securely according to your machine’s instructions.
3. Depth of Cut and Stepover Settings
This is where achievable tight tolerances become a reality. For plywood with a 1/8 inch end mill, you often need to take lighter cuts than you might for solid wood.
Depth of Cut (DOC):
- Roughing: For initial material removal, aim for a DOC that’s typically no more than 50% of the end mill’s diameter. So, for a 1/8 inch (0.125 inch) end mill, try a DOC of around 0.0625 inches (1/16th inch).
- Finishing: For the final pass to achieve those super-smooth edges, you might even reduce the DOC further, perhaps to 0.03125 inches (1/32nd inch). This “peeling” action gives a very clean finish.
Stepover:
- For Pocketing/Contour: This is how much the end mill moves sideways between each cutting pass. For a detailed, clean finish on plywood, a smaller stepover is better. Try between 20-40% of the end mill diameter (0.025 to 0.05 inches).
- For 3D Carving: If you’re doing any sort of surface contouring, you might use a slightly larger stepover for the roughing pass and a smaller one for the finishing pass.
These are starting points. You might need to adjust based on your specific plywood type, your CNC’s rigidity, and the desired finish.
4. Feed Rate and Spindle Speed (RPM)
These two are intertwined with chip load. The goal is to create a small, clean chip. For plywood with a 1/8 inch end mill:
- Feed Rate: This is how fast the machine moves through the material. Start conservatively. A good starting point for plywood might be around 30-60 inches per minute (IPM). Too fast, and you’ll get scorching or tear-out. Too slow, and you can rub the wood, causing heat and burning.
- Spindle Speed (RPM): This is how fast the end mill spins. For a 1/8 inch carbide end mill in plywood, speeds in the range of 18,000-24,000 RPM are common. More spindle speed generally means you can use a faster feed rate for the same chip load.
A handy concept here is “Chip Load,” which is the thickness of the material removed by each cutting edge of the tool per revolution. For softwoods and plywood with a 1/8 inch end mill, you’re looking for a chip load of around 0.001 to 0.003 inches.
You can calculate your feed rate using this formula: Material Feed Rate (IPM) = End Mill Diameter (inches) × Number of Flutes × Desired Chip Load (inches) × Spindle Speed (RPM). However, it’s often easier to find calculators online or rely on software presets and then test.
For excellent insights into spindle speed and feed rate calculation, Haas Automation offers great foundational knowledge that applies even to smaller CNC machines.
Mastering the Cut: Techniques for Plywood
Now that your machine is set up, let’s talk about the actual cutting process with your extra-long shank 1/8 inch carbide end mill.
1. The Two-Pass Finishing Strategy
This is key for those tight tolerances and pristine edges, especially if you aren’t using a compression bit. It separates material removal from surface finishing.
Pass 1: Roughing/Demarcation Pass
- Use a slightly larger depth of cut (e.g., 0.0625 inches).
- You can use a slightly more aggressive stepover (e.g., 40-50% of diameter).
- The goal here is to accurately cut the shape, removing the bulk of the material, but leaving a small amount of material (e.g., 0.015-0.030 inches) for the finishing pass.
Pass 2: Finishing Pass
- Use a very shallow depth of cut (e.g., 0.015-0.030 inches).
- Use a small stepover (e.g., 10-20% of diameter).
- Cut exactly on the desired line. This shallow “peeling” action leaves a smooth, almost polished surface with minimal tear-out.
This results in incredibly clean edges and allows for very precise fits. You’re essentially using the tool to dial in the final dimension.
2. Climb Milling vs. Conventional Milling
For most CNC routing operations, especially with softer materials like plywood, climb milling is preferred.
- Climb Milling: The cutter rotates in the same direction as the workpiece is moving. This results in a shallower chip thickness at the start of the cut and can lead to a smoother finish with less heat buildup. It’s generally the default for CNC machines because it puts less stress on the machine’s drive system.
- Conventional Milling: The cutter rotates against the direction of the workpiece movement. This creates a thicker chip at the start and can cause the cutter to “dig in,” leading to chatter and a rougher finish. Usually avoided on CNC unless specific cutting conditions demand it.
Ensure your CAM software is set to climb milling for the best results with your end mill in plywood.
3. Managing the Extra-Long Shank
An extra-long shank offers reach but can also amplify issues like vibration if not handled carefully.
- Minimize Stick-Out: Use only as much of the extra-long shank as you absolutely need. If you can achieve your depth with only 1.5 inches of the shank engaged, do that. The less tool exposed, the more rigid the system.
- Rigidity of Your Machine: A very long shank demands a rigid machine. If your CNC is a lighter-duty hobby machine, you might need to reduce feed rates even further and take shallower depths of cut to prevent chatter.
- Listen to Your Machine: Grinding or chattering sounds are signs of vibration. Slow down your feed rate or reduce your depth of cut if you hear them.
4. Cutting Different Plywood Types
Plywood isn’t all the same:
- Baltic Birch: Known for its solid core and minimal voids, it generally cuts very cleanly.
- Birch Plywood (Standard): Good quality, usually cuts well.
- Pine Plywood: Softer, can be prone to tear-out. Requires careful feed rate and depth of cut settings.
- Hardwood Plywood: Often has a hardwood veneer (like oak or maple) over a softwood core. The veneer can be prone to chipping. A two-pass finish is almost essential here.
Always test your settings on a scrap piece of the same material before cutting your final project. This is part of safe and reliable machining practice.
Maintenance and Care for Your End Mill
Your tools are an investment. Taking care of your carbide end mill ensures it performs its best and lasts longer.
Cleaning
After each use, clean your end mill thoroughly:
- Remove Dust and Debris: Use compressed air and a soft brush.
- Residue Removal: For stubborn resin or glue, a specialized CNC tool cleaner or a bit of isopropyl alcohol on a clean cloth can help. Avoid abrasive cleaners.
Inspection
Regularly inspect your end mill for:
- Dulling: Look for a shiny edge or signs of wear. A dull end mill will cause burning, tear-out, and require more force, leading to poor cuts.
- Chipping: Tiny chips on the cutting edges mean the end mill is compromised and can lead to poor cut quality.
- Build-up: Resin or wood particles can embed in the carbide, reducing its cutting efficiency.
Sharpening (Professional Service)
Carbide is very hard, and sharpening it requires specialized equipment. For most hobbyists, it’s more cost-effective to replace a worn-out end mill. However, if you have high-value tools or are doing extensive work, professional sharpening services are available. They can restore the cutting edges to their original specifications.
Storage
Store your end mills properly to prevent damage:
- Protective Cases: Many end mills come in plastic or foam cases. Use them!
- Tool Holders: