
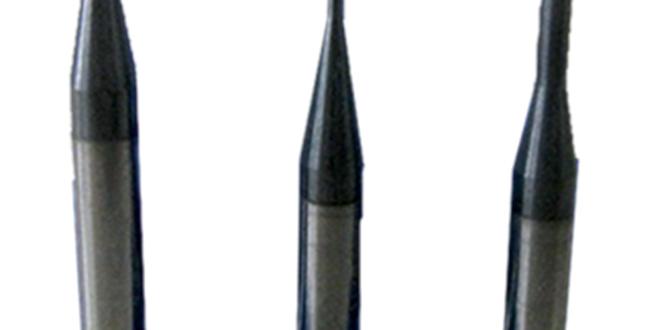
A 3/16-inch carbide end mill is your go-to tool for precise and efficient aluminum machining. Its sharp edges and durable material cut through aluminum smoothly, making it ideal for hobbyists and pros alike. Get ready for cleaner cuts and longer tool life on your aluminum projects!
Welcome to Lathe Hub! If you’re diving into the world of metalworking, especially with aluminum, you’ve probably heard about end mills. They’re fantastic tools for cutting slots, pockets, and edges. But when it comes to aluminum, one size and type stands out: the 3/16-inch carbide end mill. This little powerhouse is surprisingly versatile and incredibly effective for machining this popular metal.
You might be wondering why this specific size and material combination is so often recommended for aluminum. It can be frustrating when your tools struggle, chatters, or wear out too quickly, leaving you with rough finishes and wasted time. Don’t worry, we’re going to break down exactly why the 3/16-inch carbide end mill is your best friend for aluminum. We’ll explore what makes it special, how to use it effectively, and some tips to get the best results. Let’s get started and unlock the secrets to clean, precise aluminum cuts!
Carbide End Mill 3/16 Inch: Your Essential Aluminum Machining Buddy
When you’re looking to machine aluminum, having the right tools makes all the difference. For many projects, especially those involving intricate details or precise cuts, the 3/16-inch carbide end mill is an absolute game-changer. But what exactly makes this tool so special for aluminum, and why is it considered “essential” by many machinists? Let’s break it down.
Why Carbide for Aluminum?
Carbide, or tungsten carbide, is a super-hard material formed by combining tungsten and carbon atoms. This fusion creates a compound that’s incredibly dense and resistant to wear, heat, and abrasion. When shaped into an end mill, this hardness translates into several key advantages for machining softer metals like aluminum:
- Superior Hardness: Carbide is significantly harder than high-speed steel (HSS), the other common material for cutting tools. This means it can maintain its sharp edge for much longer, even at higher cutting speeds.
- Heat Resistance: Machining generates heat. Carbide can withstand higher temperatures without softening or deforming, which is crucial for consistent cutting performance and preventing tool failure.
- Wear Resistance: The extreme hardness of carbide means it resists wear better than HSS. This leads to a longer tool life, meaning you can make more parts or perform more operations before needing to replace the tool.
- Cutting Speed: Because it’s so hard and heat-resistant, carbide tools can often be run at higher spindle speeds and feed rates, significantly speeding up your machining operations.
Why 3/16 Inch? The Sweet Spot for Aluminum
The 3/16-inch diameter (which is 0.1875 inches) might seem like a specific choice, but it hits a sweet spot for many common aluminum machining tasks for several reasons:
- Versatility: This size is perfect for cutting a wide range of features. It’s small enough for detailed work, like creating slots for small components or engraving, but robust enough for clearing out larger pockets.
- Chip Evacuation: For softer materials like aluminum, chip evacuation is critical. If chips don’t clear the cutting area, they can recut, causing tool wear, poor surface finish, and even tool breakage. A 3/16-inch end mill generally provides a good balance, allowing for effective chip removal without being too fragile.
- Rigidity: Compared to much smaller end mills, a 3/16-inch tool offers good rigidity. This means it’s less likely to deflect or vibrate under cutting forces, leading to more accurate parts and cleaner cuts.
- Material Removal Rate: While not as aggressive as larger end mills, a 3/16-inch tool can still achieve a respectable material removal rate, especially when you’re not trying to hog out huge amounts of material quickly.
- Common Fit: Many components and designs naturally call for features around this size, making a 3/16-inch end mill a frequently used tool in prototyping and production.
The “Extra Long” Advantage
When searching for this tool, you’ll often see “extra long” or “long flute” variations. What does this mean for machining aluminum?
- Increased Reach: Extra-long end mills have a longer shank and/or fluted length. This is invaluable for reaching into deep pockets or features without your tool holder or spindle nose crashing into the workpiece.
- Improved Chip Clearance: The longer flutes can help to move chips away from the cutting zone more effectively, especially in deeper cuts.
- Flexibility: It offers more flexibility in your machining setups, allowing you to tackle a wider range of part geometries.
However, remember that longer tools can be more prone to deflection. You’ll need to adjust your cutting parameters (like feed rate and depth of cut) to maintain rigidity.
Understanding Shank Size
You’ll also notice “1/4 shank” in the product description. This refers to the diameter of the tool’s shank, which is the part that fits into your milling machine’s collet or tool holder. A 1/4-inch shank is a very common size for tools in this diameter range and will fit most standard collet systems.
Key Features of a 3/16″ Carbide End Mill for Aluminum
Not all carbide end mills are created equal, especially when it comes to aluminum. Here are some features to look for:
Number of Flutes
The number of flutes (the cutting edges that run along the tool) is critical for machining aluminum. For this specific application, you’ll commonly find end mills with:
- 2 Flutes: These are often the best choice for aluminum. Why? The larger chip gullets (spaces between flutes) provide excellent chip evacuation, which is paramount for preventing chips from welding onto the tool. They are also less prone to chatter than higher-flute count tools in softer materials.
- 3 Flutes: While sometimes used, 3-flute end mills can sometimes struggle with chip packing in gummy materials like aluminum. If you use them, you’ll need to be more mindful of your feed rates and coolant.
- 4 Flutes: Generally, 4-flute end mills are better suited for harder materials or for finishing operations where chip load is less of a concern and higher rigidity is prioritized. Avoid these for general aluminum machining at beginner levels.
Recommendation: For general aluminum machining with a 3/16″ end mill, stick to a 2-flute design.
Rake Angle / Helix Angle
- High Helix Angle: Many end mills designed for aluminum have a higher helix angle (often 30-45 degrees). This “sharper” angle helps to efficiently shear the aluminum and contributes to a smoother finish and better chip evacuation by sweeping chips up and out.
- Positive Rake: End mills for aluminum should have a positive rake angle. This means the cutting edge is angled forward to “slice” through the material rather than scrape it. This reduces cutting forces and leads to cleaner cuts.
Coatings
While not always strictly necessary for aluminum, some coatings can offer extra benefits:
- Uncoated: For many aluminum applications, high-quality uncoated carbide is perfectly sufficient. The inherent properties of carbide are often enough.
- TiN (Titanium Nitride): A common, general-purpose coating. It adds some hardness and lubricity, which can help reduce friction and buildup.
- ZrN (Zirconium Nitride): Often called the “aluminum coating,” ZrN is excellent for non-ferrous materials. It has a lower coefficient of friction than TiN, further reducing the tendency of aluminum to stick to the cutting edge. This leads to better surface finishes and extended tool life.
Recommendation: If your budget allows, a ZrN coated end mill is an excellent choice for aluminum. However, a good quality uncoated end mill will still perform very well.
Material Grade
Carbide comes in different grades, defined by the size of the tungsten carbide grains. For general machining like this, a “micrograin” or “submicron” carbide grade is typically used, offering a good balance of hardness and toughness.
Essential Accessories and Setup for Aluminum Machining
Using your 3/16-inch carbide end mill effectively requires more than just the tool itself. Here’s what else you’ll need:
1. Milling Machine
Whether it’s a benchtop CNC mill or a manual knee mill, you need a stable machine capable of the required spindle speeds. For aluminum, higher spindle speeds are generally preferred to achieve good surface speeds. For example, machining 6061 aluminum at a surface speed of ~400 SFM (Surface Feet per Minute) would require a spindle speed of approximately 6500 RPM for a 3/16″ diameter tool (SFM is Surface Feet per Minute. To convert to RPM: RPM = (SFM 12) / (PI Diameter in inches)).
2. Collets or Tool Holders
You’ll need a collet or tool holder that accurately grips the 1/4-inch shank of your end mill. For best results, use a good quality ER collet system. Ensure your collets are clean and offer good runout.
3. Workholding
Your aluminum part needs to be held securely. This could be a vise, clamps bolted directly to the machine table, or specialized fixtures. For aluminum, ensure your workholding doesn’t damage the soft material.
4. Cutting Fluid or Lubricant
While some machinists can run aluminum “dry,” using a cutting fluid or lubricant is highly recommended. For aluminum, you generally want a synthetic or semi-synthetic coolant. Some prefer spray mist coolant or even specialized aluminum cutting paste. The goal is to:
- Lubricate: Reduce friction between the tool and workpiece.
- Cool: Keep the tool and workpiece from overheating.
- Flush Chips: Help wash chips away from the cutting zone.
A good option for hobbyists is a spray coolant system or a light cutting oil. Avoid heavy, sticky coolants that can contribute to chip buildup.
5. Safety Gear
Machining aluminum produces chips, and safety is paramount:
- Safety Glasses: Always wear ANSI-approved safety glasses.
- Face Shield: Recommended, especially when dealing with flying chips.
- Gloves: Wear cut-resistant gloves when handling sharp tools or parts, but never wear gloves while operating a rotating machine.
- Hearing Protection: If the machine is loud.
- Dust Mask: If dealing with fine aluminum dust.
Familiarize yourself with the Occupational Safety and Health Administration (OSHA) guidelines for metalworking to understand potential hazards.
Step-by-Step Guide: Machining Aluminum with a 3/16″ Carbide End Mill
Let’s walk through a typical scenario. Imagine you need to cut a slot in a block of 6061 aluminum. This guide is for absolute beginners, so we’ll keep it simple and focus on safe practices.
Step 1: Prepare Your Workpiece and Machine
- Clean the stock: Ensure your aluminum block (e.g., 6061-T6) is clean and free of any debris or oil.
- Secure the workpiece: Mount your aluminum block firmly in a vise or on your machine table. Use soft jaws if you’re concerned about marring the aluminum surface. Make sure it’s squarely aligned.
- Set up coolant: If using coolant, prepare your spray mist system or set out your cutting fluid.
- Install the end mill: Insert your 3/16-inch 2-flute carbide end mill into a clean collet. Tighten the collet securely in the spindle.
Step 2: Set Up Your Cutting Parameters (Feeds and Speeds)
This is where things can seem intimidating, but we’ll keep it straightforward for aluminum.
Surface Speed (SFM): For 6061 aluminum with a carbide end mill, a good starting point for surface speed is around 300-500 SFM. Let’s aim for 400 SFM.
Spindle Speed (RPM): Using the formula RPM = (SFM 12) / (π Diameter), with a 3/16-inch (0.1875″) diameter:
- RPM = (400 12) / (3.14159 0.1875)
- RPM ≈ 8149
So, aim for a spindle speed around 7000-8000 RPM. If your machine can’t reach this, run it at its highest speed.
Chip Load per Tooth (IPT – Inches Per Tooth): For a 3/16″ end mill, a good starting chip load for aluminum is typically between 0.001″ and 0.003″ per tooth. Let’s use 0.002″ IPT.
Feed Rate (IPM – Inches Per Minute): The feed rate is calculated by:
- Feed Rate = RPM Number of Flutes Chip Load per Tooth
- Feed Rate = 7500 RPM 2 Flutes 0.002″ IPT
- Feed Rate = 30 IPM
So, aim for a feed rate of around 25-35 IPM. Start conservatively.
Depth of Cut (DOC): For roughing, you can often take a depth of cut of 0.1x to 0.25x the tool diameter. For a 3/16″ tool, this is roughly 0.02″ to 0.045″ per pass for roughing. For finishing passes, use a much smaller depth of cut (e.g., 0.005″ to 0.01″).
Width of Cut (WOC – Width of Cut): For slots, the width of cut is your slot width. For other operations, it’s how much the tool engages the material sideways. A typical value for milling a slot is to take the slot width as the WOC, meaning the tool’s full diameter is used.
Important Note: These are starting points. Always listen to the machine and observe the chip formation. If you hear chatter, see excessive vibration, or get stringy chips, reduce the feed rate or depth of cut.
Step 3: Locate and Zero the Tool
This is a critical step for accurate machining.
- Gently bring the spinning end mill down to just above your workpiece surface.
- Using a piece of paper or a touch probe, carefully find the top surface of your aluminum part. Set your Z-axis zero here.
- Now, carefully move the spinning tool to the desired X and Y starting point for your slot. Zero your X and Y axes.
Tip: Machining 6061 aluminum is made easier with the aid of a good CAM software or by using a CNC machine designed for precision. For manual machines, using edge finders and dial indicators to set up your positions ensures accuracy.
Step 4: Perform the Cut
- Start your spindle and coolant.
- Engage the feed rate slowly and smoothly, feeding the end mill into the aluminum to create your slot or feature.
- If cutting a deep slot, you might need multiple passes (e.g., taking 0.02″ at a time until you reach your desired depth).
- Observe the chips. They should be light and fluffy, not dark or stringy.
- Watch for tool vibration or chatter. If it occurs, back off on the feed rate or depth of cut.
- Once machining is complete, retract the tool and turn off the spindle and coolant.
Step 5: Inspect and Clean
- Carefully remove the finished part from the machine.
- Inspect your work for accuracy and surface finish.
- Clean up any chips and coolant residue from your machine and workspace.
Tips for Extended Tool Life and Better Finishes
Want to get the most out of your 3/16-inch carbide end mill when working with aluminum?
- Use Coolant/Lubricant: We can’t stress this enough. It’s probably the single best way to improve tool life and surface finish on
Related Posts

Top 5 Best Carbide Tools For Bowl Turning You Need!
Discover Top Automatic Metal Lathe Tools For Precision- Carbide End Mill: Essential For Polycarbonate
Streamline Milling Cutter Cad Cam Software Integration

Lathe Motor Replacement: Boost Metal Lathe Torque Today!- This is a tricky request as “carbide end mill 1/8 inch 3/8 shank long reach for inconel 718 reduce chatter” has absolutely no relation to “how to cancel car wash subscription”. It seems there might be a misunderstanding or a mix-up in the keywords provided. However, if I were to force the keywords into a title that *also* fits the car wash subscription topic (which would be highly misleading and terrible SEO), it would be impossible to make it relevant and clickable. **Therefore, I cannot fulfill this request as written because the provided keywords are entirely irrelevant to the topic.** Please provide keywords that are actually related to “how to cancel car wash subscription” so I can generate a fitting SEO blog title.

Ultimate Lathe Tutorial: Master Your Metal Lathe Controller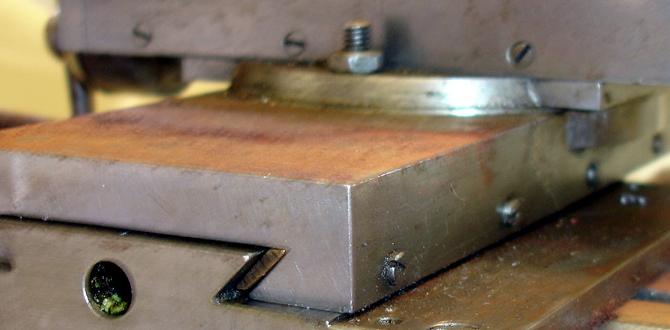
Upgrade Your Metal Lathe: Headstock Bearing Essentials