Your end mill choice dramatically impacts your cuts. Using a specially designed “carried” or “compression” end mill on acrylic is a proven way to eliminate frustrating chatter, leading to cleaner, smoother edges and a better finish.
Cutting acrylic on a CNC or milling machine can be a real challenge. Ever get those wavy, fuzzy lines on your workpiece? That’s called chatter, and it’s incredibly annoying. It happens when the cutting tool vibrates as it moves through the material. This not only ruins the look of your project but can also damage your tool and machine. But don’t worry! There’s a simple, effective solution that many experienced machinists swear by: the carried end mill.
This special type of end mill is designed to tackle chatter head-on, especially in plastics like acrylic. We’ll show you exactly why it works and how to use it to get those glassy-smooth cuts you’ve been dreaming of. Get ready to say goodbye to chatter and hello to perfect acrylic projects!
What is Chatter and Why Does it Hate Acrylic?
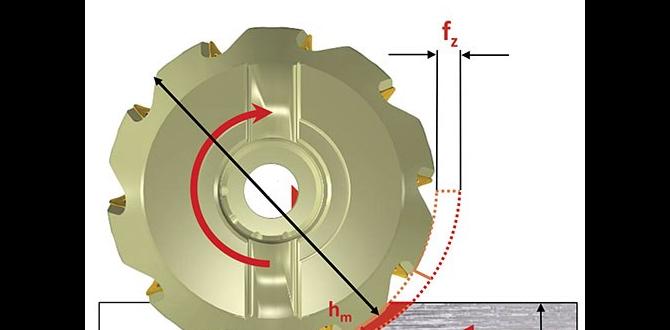
Chatter is that nasty vibration that occurs during a machining process. Think of it like skipping on a vinyl record, but for your workpiece. In milling, it happens when the cutting edge of your tool engages and disengages from the material in an unstable, repeating cycle. This causes rapid, unwanted movement of the tool and workpiece, leading to visible marks on the surface of the cut.
Acrylic is particularly prone to chatter for a few reasons:
- It’s a plastic: Unlike metal, acrylic is softer and more flexible. This means it can deflect and vibrate more easily under the stress of cutting.
- Melting issues: Acrylic has a relatively low melting point. The friction from cutting can generate heat, which can soften the material. This softened material sticks to the tool, increasing cutting forces and the likelihood of vibration.
- Brittleness: While flexible, acrylic can also be brittle. Excessive vibration can lead to chipping or even cracking, which is a more severe problem than just chatter.
Introducing the Carried End Mill: Your Acrylic Chatter Fighter
A “carried” end mill, often referred to as a “compression” end mill, is your secret weapon against acrylic chatter. The name “carried” comes from the way the cutting edges are designed to “carry” the chips away and manage the material removal process more smoothly. They combine two types of flutes: up-cut and down-cut, in a single tool. This clever design offers significant advantages for cutting plastics.
Imagine trying to push a pile of sawdust. If you just push it straight forward, it piles up in front of you. But if you could push some down and some up at the same time, you could clear a path more effectively. That’s a simplified idea behind a carried end mill.
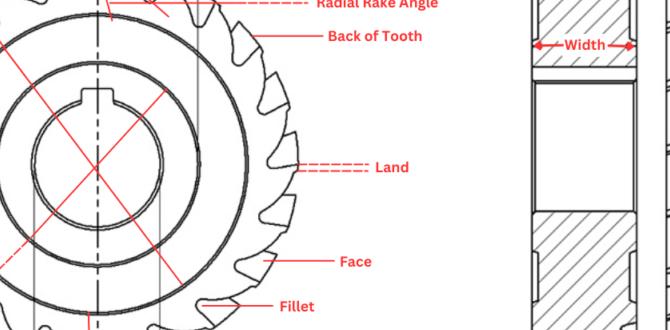
The key feature of a carried end mill is its hybrid flute geometry. The top portion of the cutting edge often has a down-cut helix, while the bottom portion has an up-cut helix. This unique combination works to:
- Hold chips down: The up-cut portion helps to pull chips away from the bottom of the cut, preventing them from re-welding to the acrylic.
- Clear chips up: The down-cut portion helps to push chips away from the top surface, keeping the cutting area clean and reducing the chance of melting.
- Provide down-force: This down-force helps to hold the material firmly against the cutting bed, reducing the possibility of it lifting and buzzing, which contributes to chatter.
Why a Standard End Mill Often Fails with Acrylic
Before we dive deeper into carried end mills, let’s quickly look at why standard end mills can struggle with acrylic:
- Up-cut End Mills:
- These are great for pulling chips out of a deep slot. However, when cutting the surface of acrylic, the up-cut action can actually pull the material upwards, leading to edge chipping and lifting, which destabilizes the cut and encourages chatter.
- Down-cut End Mills:
- These push chips down, which can be good for keeping the top surface clean. But, they can pack chips into the bottom of a slot, leading to overheating and melting. For surface cuts, they can sometimes cause a “rubbing” effect rather than a clean shearing action, which can also lead to chatter.
Standard, single-helix tools just don’t have the nuanced chip evacuation and material control needed for delicate materials like acrylic.
Key Features of a “Carried” or Compression End Mill for Acrylic
When selecting a carried end mill for your acrylic projects, keep these features in mind. They are crucial for optimal performance:
1. Helix Angle
The angle of the spiral flutes matters. A steeper helix angle (often found in compression end mills) can improve chip evacuation and surface finish. For acrylic, a moderate to steep helix is generally preferred.
2. Number of Flutes
- 2-Flute: Generally recommended for plastics like acrylic. Fewer flutes mean more space for chips to evacuate, reducing the risk of melting and re-welding. They also tend to cut more aggressively.
- 3-4 Flutes: While common in metal machining, 3 or 4 flutes can sometimes lead to chip packing and overheating in softer plastics. However, some high-performance compression end mills with special geometries can work well with 3 or 4 flutes. Stick with 2-flute for absolute beginner confidence.
3. Coating
A coating can drastically improve tool life and performance. For acrylic, coatings that reduce friction and prevent material buildup are ideal. Look for:
- Uncoated: Often sufficient for hobbyist use, especially if you use good cutting practices.
- AlTiN (Aluminum Titanium Nitride): Can offer good performance and heat resistance.
- ZrN (Zirconium Nitride): A thin, hard coating that provides excellent lubricity and chip release, making it a great choice for plastics.
- Diamond-like Carbon (DLC): The ultimate for plastics, providing extreme hardness and non-stick properties, but more expensive.
4. Material
For acrylic, you’ll almost always want a Carbide end mill. Solid carbide tools offer superior rigidity, heat resistance, and edge retention compared to High-Speed Steel (HSS). This means they can cut faster, cleaner, and last much longer.
5. Shank Diameter and Reach
The prompt keyword hints at a specific size: “carbide end mill 3/16 inch 10mm shank long reach for acrylic reduce chatter”. This tells us we’re focusing on a smaller tool, ideal for detailed work, potentially on hobbyist or desktop CNC machines.
- 3/16 inch vs. 10mm Shank: Note that 3/16 inch is approximately 4.76mm. A 10mm shank is quite a bit larger. The keyword might be indicating either alternative sizes, or perhaps a specific tool offering both. For acrylic cutting, especially for detail, a smaller shank (like 3/16″ or 1/8″) is common. A 10mm shank would be for larger, more robust machines. For this article, let’s focus on the principles, but a 3/16″ shank is very common for hobbyist acrylic cutting.
- Long Reach: For acrylic, “long reach” isn’t usually a primary concern unless you’re trying to cut a very deep pocket or reach into an awkward area. For most surface-level cutting and profiling, standard length is fine. If you need “long reach,” ensure the tool is sufficiently rigid to prevent deflection and vibration.
How to Use a Carried End Mill for Acrylic: Step-by-Step
Using a compression end mill correctly will make all the difference. It’s not just about having the right tool; it’s about using it properly. Here’s how to get the best results in your home workshop:
Step 1: Choose the Right Tool
Select a 2-flute, solid carbide compression (carried) end mill. For a 3/16 inch shank, look for tools specifically designed for plastics or general-purpose routing. Ensure it has a good coating if possible, but a sharp, uncoated tool can also work wonders.
Step 2: Secure Your Workpiece
This is critical for preventing chatter and ensuring safety. Acrylic must be held down absolutely firmly. Use clamps, vacuum hold-down, or double-sided tape. Ensure there’s no gap or movement whatsoever. A CNC machine bed or a sturdy workbench is ideal. A sacrificial spoilboard underneath is always a good idea.
Step 3: Set Your Spindle Speed (RPM)
Spindle speed is crucial. Too slow, and you’ll melt. Too fast, and you’ll chatter. For a 3/16 inch carbide end mill cutting acrylic, a good starting point is:
- RPM: 15,000 – 24,000 RPM.
Always consult the end mill manufacturer’s recommendations if available. It’s better to start at the higher end of the recommended RPM range for plastics to ensure chips are cleared quickly.
Step 4: Set Your Feed Rate
Feed rate is how fast the tool moves through the material. This works hand-in-hand with spindle speed. For acrylic and a 2-flute compression end mill, aim for:
- Feed Rate: 300 – 600 mm/min (approximately 12 – 24 inches/min).
A good rule of thumb is to maintain a consistent chip load. Chip load is the thickness of the material removed by each cutting edge per revolution. For acrylic, you want a relatively light chip load to avoid excessive heat and material stress. A good target chip load is typically between 0.002 to 0.005 inches (0.05 to 0.13 mm) for a 3/16 inch cutter.
Step 5: Determine Depth of Cut (DOC)
For acrylic, it’s best to use a shallow depth of cut to minimize heat buildup and cutting forces. This also helps prevent vibration.
- Depth of Cut: 0.06 inches to 0.125 inches (1.5 mm to 3 mm) per pass.
On smaller machines or with less rigid setups, even shallower cuts might be necessary.
Step 6: Consider Climb Milling vs. Conventional Milling
With a compression end mill, you often get the best results with a combination. For profiling (cutting around the outside of a shape), starting with climb milling on the entry side and conventional on the exit side can be beneficial. For pocketing, many CNC control systems will automatically manage the toolpath to optimize chip evacuation and minimize cutting forces. Generally, for plastics, climb milling often provides a cleaner finish as it reduces the tendency for the material to “dig in”.
Step 7: Cooling and Chip Evacuation
While compression end mills help, acrylic still generates heat. Good chip evacuation is your best friend.
- Air Blast: A blast of compressed air directed at the cutting zone is highly effective at clearing chips and cooling the tool.
- Mist Coolant: For more demanding jobs, a light mist coolant can help significantly, but be aware that it can make a mess and requires proper setup. Avoid flooding acrylic with liquid coolant, as it can cause thermal shock and cracking.
- Vacuum: A vacuum hold-down system can simultaneously secure your part and help pull chips away from the cutting zone.
Step 8: Test Cuts
Always perform test cuts on scrap material before cutting your final project. This allows you to fine-tune your speeds and feeds without risking your valuable piece. Listen to the sound of the cut – a smooth, consistent hum is good; a high-pitched squeal or a rough grinding noise indicates chatter or other problems.
Optimizing Your CNC Settings for Acrylic
When using a Computer Numerical Control (CNC) machine, your software settings are paramount. Here’s a breakdown of how to optimize them for acrylic using a carried end mill:
Feeds and Speeds Calculator
While we’ve provided starting points, no two machines or end mills are exactly alike. A Feeds and Speeds calculator can be an invaluable tool. Many online resources are available, like the one from ISO (International Organization for Standardization) which provides fundamental principles for machining data, or more specialized machinist calculators. You input your material, tool diameter, number of flutes, and desired chip load, and it suggests RPM and feed speed. Always use these as a starting point and adjust based on your observations.
Material Stepover
This setting affects how much the end mill overlaps on consecutive passes when pocketing. For acrylic:
- For roughing: A stepover of 30-50% of the tool diameter is often suitable.
- For finishing: A stepover of 10-20% of the tool diameter will result in a much smoother surface finish with fewer visible lines.
A smaller stepover means more passes but a superior finish and less stress per pass.
Ramps and Plunge Moves
Avoid plunging the end mill straight down into acrylic. Instead, use ramp moves. A ramp is a gradual entry into the material, like a gentle slope. This reduces the shock load on the tool and prevents chipping.
- Ramp Angle: Aim for a shallow ramp angle (e.g., 3-5 degrees) to ease into the material.
Common Problems and Solutions
Even with the right tool, you might encounter issues. Here’s how to troubleshoot:
Problem: Visible Chatter Marks
- Cause: Tool vibration, loose workpiece, incorrect feeds/speeds, dull tool.
- Solution: Ensure workpiece is absolutely secure. Try reducing depth of cut. Reduce feed rate slightly. Increase spindle speed slightly (if not already maxed out). Check tool for wear or damage. Try a brand new, high-quality end mill.
Problem: Melting or “Welding” of Acrylic to the Tool
- Cause: Too much friction, inadequate chip evacuation, incorrect feeds/speeds.
- Solution: Increase spindle speed. Decrease feed rate. Use compressed air or mist coolant. Ensure you are using a compression end mill specifically designed for plastics. Take shallower cuts.
Problem: Chipped Edges or Cracking
- Cause: Too aggressive a cut, tool grabbing the material, excessive vibration, brittle acrylic.
- Solution: Reduce depth of cut and feed rate. Ensure workpiece is firmly held down. Use a specific acrylic-cutting end mill. Try climb milling for profile cuts. If you’re cutting thin acrylic, consider supporting it from underneath with a sheet of thicker material.
Problem: Tool Breaking
- Cause: Excessive side load, plunging too aggressively, dull tool, inadequate rigidity in the machine or setup.
- Solution: Reduce depth of cut and feed rate. Use ramp moves instead of plunging. Ensure tool is sharp. Check for any play in your machine’s spindle or axes.
When to Consider a Different Tool or Approach
While a carried end mill is excellent, sometimes other factors come into play:
- Very Thick Acrylic: For thicker sheets (over 1/4 inch or 6mm), you might need specialized longer-reach tools or plan for multi-pass cutting with very conservative depths.
- Very Thin Acrylic (Sheets/Films): For extremely thin acrylic, specialized routing bits or laser cutting might be more appropriate to avoid distortion and vibration.
- Extruded vs. Cast Acrylic: Cast acrylic is generally easier to machine and less prone to melting than extruded acrylic, which can be stringier.
For reference, learning about advanced machining principles can sometimes involve understanding standards like those set by the International Organization for Standardization (ISO), which often guide best practices for tool selection and usage across various materials, including plastics.
Table: Carried End Mill vs. Standard End Mill for Acrylic
Here’s a quick comparison to highlight why the carried end mill is superior for acrylic:
| Feature | Carried/Compression End Mill | Standard Up-Cut End Mill | Standard Down-Cut End Mill |
|---|---|---|---|
| Primary Benefit for Acrylic | Reduces chatter, superior surface finish, chip control. | Excellent chip evacuation from slots. | Clean top surface finish, pushes chips down
Related Posts |