For MDF projects, a 3/16 inch carbide end mill with specific features like a reduced neck and optimized flute geometry is your go-to solution to combat frustrating chatter. This guide shows you how to select and use it for smooth, clean cuts in MDF.
You’ve got an exciting project planned for MDF, but that annoying chatter is making your cuts look like a bucking bronco rode through them. It’s a common headache for many makers, especially when working with materials like Medium-Density Fiberboard (MDF). The fine dust and consistent, slightly yielding nature of MDF can be tricky. Chatter, those visible vibrations on your workpiece, leaves rough surfaces that are a pain to sand smooth. But don’t worry! With the right tool and a few simple adjustments, you can achieve those crisp, clean edges you’re aiming for. This guide will walk you through selecting the perfect 3/16 inch carbide end mill for MDF and how to use it effectively to banish chatter for good.
Why Does MDF Chatter Happen?
MDF is a fantastic material for many projects, from furniture to decorative pieces, because it’s uniform, easy to machine, and affordable. However, its composition – finely ground wood fibers mixed with resin – makes it prone to vibration when cut. This vibration, known as chatter, occurs when the cutting edge of your tool isn’t slicing through the material cleanly. Instead, it’s bouncing or skipping.
Several factors contribute to this:
Tooling: A dull or improperly designed end mill can easily cause chatter.
Feed Rate: Feeding too fast or too slow can lead to the tool digging in or bouncing.
Spindle Speed (RPM): The speed at which your tool spins can excite natural frequencies in your machine or the workpiece.
Machine Rigidity: A less rigid machine or a wobbly setup is more susceptible to vibrations.
Workholding: If your MDF isn’t clamped down securely, it can vibrate along with the tool.
Material Properties: The density and binder content of MDF can influence how it cuts.
The Solution: Choosing the Right 3/16 Inch Carbide End Mill
When tackling MDF chatter, your primary weapon is the right end mill. For a 3/16 inch size, here’s what to look for:
Key Features to Combat MDF Chatter:
Carbide Material: Solid carbide tools are harder and more rigid than high-speed steel (HSS) counterparts. This extra rigidity is crucial for resisting vibrations and maintaining a sharp edge, which is paramount for clean MDF cuts. For MDF, a general-purpose carbide is usually sufficient, but sometimes a slightly more specific coating can help with chip evacuation and tool life.
Flute Count: For MDF, a single-flute or two-flute (2-flute) end mill is generally preferred.
Single-Flute: These excel at high feed rates and excellent chip evacuation. Because MDF produces a lot of fine dust, good chip clearing is vital to prevent chip recutting, which can worsen chatter. A single flute has more open space.
Two-Flute: These offer a good balance of cutting action and chip room. They can be a good all-around choice for MDF.
Fewer flutes mean more space for chips to escape, preventing packing. Avoid end mills with 3 or 4 flutes for MDF unless you’re using very specific high-feed or finishing end mills designed for composites.
Up-Cut vs. Down-Cut vs. Compression:
Up-Cut: These spiral upwards, pulling chips away from the bottom of the cut and up towards the spindle. They are general-purpose and good for many applications, including drilling (plunging). They often provide excellent chip evacuation.
Down-Cut: These spiral downwards, pushing chips down into the cut. They are excellent for creating a clean top surface finish because they press the material down, reducing the risk of edge fuzzing. However, they can pack chips at the bottom of the cut if not managed, which might lead to issues. For MDF, they are great for top surface finish but require careful consideration for depth and chip removal.
Compression: These mills have an up-cut helix on the lower portion and a down-cut helix on the upper portion. They are designed to provide a clean top and bottom edge, making them ideal for cutting through materials like plywood and laminates where you want a perfect finish on both sides without tear-out. While effective, they can be more prone to chip packing than a standard up-cut.
For MDF Chatter Reduction: An up-cut often provides the best balance of chip evacuation and cutting action. A down-cut can be excellent for the top surface finish, but you might need to experiment with speeds and feeds to avoid chip loading. A compression bit is also a strong contender for a clean finish on both sides, especially if you’re cutting through the material and want to avoid a fuzzy bottom edge.
Helix Angle: A steeper helix angle (e.g., 45 degrees or more) can provide a shearing action that results in a smoother cut. However, very steep helix angles can reduce rigidity. For MDF, a standard helix angle of around 30 degrees is common and works well. Some specialized single-flute bits for plastics and composites might have higher helix angles to promote chip ejection.
Coating: While not strictly necessary for MDF, coatings like TiN (Titanium Nitride) or AlTiN (Aluminum Titanium Nitride) can improve tool life and reduce friction by creating a slicker surface. However, for hobbyist CNCs and typical MDF use, an uncoated solid carbide end mill is often perfectly adequate and more cost-effective.
Diameter: You specified 3/16 inch. This is a good medium size for detailed work without being so small that it lacks rigidity.
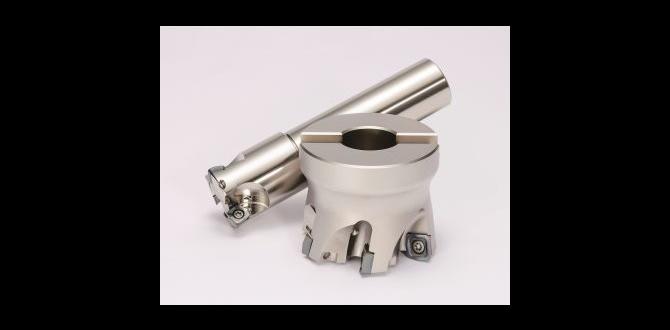
Reduced Neck / Straight Shank: This is potentially crucial for reduced neck versions. Some specialized end mills designed for foams, plastics, and composites feature a slightly reduced shank diameter behind the cutting edges. This “neck relief” allows the body of the end mill to spin without rubbing against the walls of a slot or pocket when cutting deeper. For general profiling of MDF, this might not be strictly necessary, but if you’re doing any pocketing or slotting where the tool diameter is close to the desired width, it can prevent rubbing and improve cut quality. Often, you’ll see descriptions like “3/16 inch diameter, 8mm shank, reduced neck.” The 8mm shank (about 0.315 inches) is a common shank size that fits many collets. The “reduced neck” part refers to a feature that might be present on some specialized bits.
Consider a 3/16 inch, 2-flute, solid carbide, up-cut end mill as your first choice. If you’re struggling with top surface fuzz, try a down-cut or a compression bit.
Here’s a quick comparison table for common flute counts when cutting MDF:
| Flute Count | Pros for MDF | Cons for MDF | Best For |
|---|---|---|---|
| 1-Flute | Excellent chip evacuation, high feed rates possible, good shear angle. Less prone to packing. | Can be less rigid than 2-flute, might struggle with very aggressive plunging. | Fast roughing, slotting, materials that produce fine dust like MDF. |
| 2-Flute | Good balance of cutting action and chip room, generally more rigid than 1-flute. | Chip evacuation is good but not as aggressive as 1-flute. Can pack chips if feed/speed are not dialed in. | General purpose cutting, profiling, pocketing, and slotting. A great all-around choice. |
| 3-4 Flute | More cutting edges for smoother finish at lower feed rates, generally more rigid. | Significantly reduced chip evacuation space, high risk of chip packing and chatter on MDF. | Primarily for metals or harder plastics, rarely ideal for MDF unless specifically designed. |
Setting Up for Success: The Right Tools and Techniques
Choosing the right end mill is only half the battle. Proper setup is crucial for preventing chatter and achieving a perfect cut in MDF.
Essential Tools and Setup Checklist:
3/16 inch Carbide End Mill: As discussed, preferably 1 or 2 flutes, with an up-cut or down-cut helix depending on your finish requirements.
CNC Router or Milling Machine: Ensure your machine is robust and well-maintained.
Collet Chuck or Collet: A high-quality collet system ensures the end mill is held perfectly concentric. A runout of even a few thousandths of an inch can induce chatter.
Strong Workholding: Use clamps, double-sided tape, or a vacuum table to hold the MDF firmly. The material should not move, vibrate, or lift during machining.
Dust Collection: A good dust collection system is essential for MDF. It helps clear chips and dust, preventing buildup that can cause issues.
Calipers or Measurement Tools: For accurately measuring and setting your cutting parameters.
Safety Glasses: Always wear safety glasses.
Step-by-Step Guide to Reducing MDF Chatter:
1.
Mount the End Mill Securely:
Insert the 3/16 inch carbide end mill into a clean collet.
Tighten the collet in the spindle of your CNC router or milling machine. Ensure it’s snug and the shank of the end mill is properly seated. A worn collet or an improperly seated tool is a major cause of runout and vibration.
2.
Secure Your MDF Workpiece:
Place your MDF sheet on the spoilboard or worktable.
Use clamps, screws (in sacrificial areas), or a strong double-sided tape to ensure the MDF is absolutely immobile. Any movement will contribute to chatter. For best results, ensure the clamps are not positioned where they will interfere with the cutting path.
3.
Determine Initial Cutting Parameters (Speeds and Feeds):
Finding the right balance of spindle speed (RPM) and feed rate (how fast the tool moves through the material) is critical. This is where you’ll likely do some experimenting.
Spindle Speed (RPM): For a 3/16 inch carbide end mill in MDF, start with a relatively high RPM. A common starting point is 18,000 – 24,000 RPM. Higher RPMs can sometimes lead to a smoother cut by allowing the tool to slice rather than tear.
Feed Rate: This is often more critical than RPM for chatter. For a 3/16 inch 2-flute end mill, a good starting feed rate range is 30-60 inches per minute (IPM).
A chipload is the amount of material removed by each cutting edge per revolution. For MDF with a 2-flute carbide bit, aim for a chipload of roughly 0.003 – 0.005 inches per flute.
You can calculate feed rate using this formula: `Feed Rate (IPM) = Chipload (inches) Number of Flutes Spindle Speed (RPM)`.
So, for a 0.004 inch chipload, 2 flutes, at 18,000 RPM: `Feed Rate = 0.004 2 18000 = 144 IPM`. This is a high starting point, and for MDF, it’s often better to start a bit more conservatively.
Let’s try a more manageable starting point: For a 3/16 inch 2-flute carbide end mill, try 18,000 RPM and a feed rate of 40 IPM.
4.
Set Your Depth of Cut (DOC):
For MDF, avoid taking very deep cuts. This puts more stress on the tool and machine, increasing the chance of chatter.
Stepover: This is the distance the cutter moves sideways on each pass. For profiling, it’s typically 100%. For pocketing, it’s the distance between adjacent cutting paths. A smaller stepover (e.g., 30-50%) can lead to a smoother finish in pockets but will increase machining time.
Depth of Cut (DOC): A good starting point for DOC is 1/4 to 1/2 of the tool diameter. For a 3/16 inch (0.1875 inch) end mill, this means a DOC of roughly 0.060 – 0.090 inches. You can also experiment with taking multiple shallow passes instead of one deep one. For example, if you need to cut 0.5 inches deep, make 5-6 passes of 0.08 inches each. This is often called “peck drilling” or “ramping” in some contexts and is much gentler on the machine and tool.
5.
Perform a Test Cut:
Before committing to your main project, use a scrap piece of MDF.
Set up a simple test shape (like a square or a circle) and run your chosen cutting parameters.
Listen for unusual noises, and observe the surface finish of the cut edge.
6.
Analyze the Test Cut and Adjust:
Still Chattering?
Increase Feed Rate Gradually: If the cut is too slow and making fuzzy edges, try increasing the feed rate incrementally (e.g., by 5-10 IPM at a time). This pushes more material per revolution, potentially leading to a cleaner cut.
Decrease Spindle Speed Slightly: If increasing feed doesn’t help, sometimes reducing RPM slightly can change the natural frequency of vibration. Try going down in 1,000 RPM increments.
Reduce Depth of Cut: If you’re taking a deeper cut, try making it shallower.
Check Tool Rigidity: Ensure your end mill isn’t too long for the cut (high tool stick-out) and is securely held.
Chip Packing or Fuzzing?
Improve Chip Evacuation: Ensure your dust collection is working effectively. If using a down-cut or compression bit, you might need wider slots or shallower depths to allow chips to escape. Using an up-cut can resolve this.
Slow Down Feed Rate: Sometimes, feeding too fast can cause chip packing.
Surface Finish Looks Good?
You’ve found a good starting point! You can now adjust for speed or further refine the finish if needed.
7.
Consider Climb Milling vs. Conventional Milling:
Conventional Milling: The cutter rotates against the direction of feed. This is the default for many CNC routers and is generally safer.
Climb Milling: The cutter rotates in the same direction as the feed. This can result in a much smoother finish because the cutting edge shears the material rather than tearing it. However, it puts a greater force on the cutter and can be more prone to causing chatter if not set up correctly or if there’s any backlash in the machine.
For MDF, especially with a sharp carbide bit, climb milling can significantly improve surface finish and reduce chatter. Your CNC software should have an option for this. If you’re experiencing chatter with conventional milling, try switching to climb milling after ensuring your workholding and tool rigidity are excellent.
8.
Refine with Advanced Techniques (If Necessary):
Ramping into Cuts: Instead of plunging straight down, have your CNC router “ramp” into the material at an angle. This is gentler on the tool and produces fewer chips in one spot. Many CAM (Computer-Aided Manufacturing) software packages support ramping.
* Spiral Interpolation:** For pocketing, use your CAM software to trace a spiral path outwards from the center. This keeps the tool engaged with the material smoothly and distributes the load.
Here’s a table with recommended starting parameters. Remember these are starting points, and you’ll need to adjust based on your specific machine, end mill, and MDF density.
| Parameter | Recommendation for 3/16″ 2-Flute Carbide End Mill | Notes |
|---|---|---|
| Tool Type | Solid Carbide, 2-Flute, Up-Cut or Down-Cut | Up-cut for better chip evacuation, Down-cut for cleaner top surface finish. Check for “reduced neck” if doing deep pockets. |
| Spindle Speed (RPM) | 18,000 – 22,000 RPM | Higher RPMs can promote a shearing action. |
| Feed Rate (IPM) | 30 – 60 IPM | Start conservative (e.g., 40 IPM) and increase if chatter persists. |
| Depth of Cut (DOC) | ~0.060 – 0.090 inches (approx. 1/3 to 1/2 of tool diameter) | Take multiple shallow passes for deeper cuts. |
| Stepover (for pocketing) | 30% – 50% of tool diameter | A smaller stepover can improve finish but increases machining time. |

