Quick Summary:
Using a 3/16 inch carbide end mill with an 8mm shank for PEEK cutting involves selecting the right type (long reach), understanding feed and speed, and employing dry cutting techniques to prevent melting and ensure clean results. This guide simplifies the process for beginners.
Hey there, workshop adventurers! Daniel Bates here, your guide from Lathe Hub. Ever stared at a piece of tough PEEK plastic, or Polyether ether ketone, and wondered how to machine it cleanly? It’s a common puzzle for anyone new to CNC machining or advanced DIY projects. PEEK can be tricky – it wants to melt! But with the right tool and a smart approach, you can achieve fantastic results without the frustration. This guide is all about demystifying the use of a 3/16 inch carbide end mill with an 8mm shank, specifically tailored for PEEK. We’ll walk through everything, step-by-step, so you can confidently tackle your projects.
Why PEEK is Tricky (And How Our End Mill Solves It)
PEEK is an amazing high-performance polymer. It’s super strong, resistant to heat and chemicals, and works great in demanding applications. Think aerospace, medical devices, and automotive parts! But when you try to cut it with a standard end mill, it can quickly turn into a gummy, melted mess. This happens because the friction from cutting generates heat, and PEEK’s low melting point means it softens and smears rather than cutting cleanly. The key to success is removing material quickly and efficiently to minimize heat build-up, and that’s where our chosen tool comes in.
A carbide end mill is a fantastic choice for PEEK. Why carbide? It’s incredibly hard and can withstand higher temperatures than other materials like High-Speed Steel (HSS). This means it stays sharp and effective even when things get a little warm. When we talk about a “3/16 inch carbide end mill with an 8mm shank,” we’re looking at a specific combination that offers benefits:
- 3/16 Inch Diameter: This size is great for detailed work and smaller features, common in prototypes and intricate parts.
- 8mm Shank: A common metric size, ensuring compatibility with many tool holders and collets on CNC machines and routers.
- Carbide Material: Provides the hardness and heat resistance needed for PEEK.
For PEEK, specifically, we often look for a “long reach” end mill. This simply means the cutting portion of the tool extends further out from the shank than a standard end mill. This can be helpful for reaching into deeper pockets or for parts where you want to avoid clamping too close to the cutting area. The specific keyword often associated with this is “carbide end mill 3/16 inch 8mm shank long reach for peek dry cutting”. This tells us we’re interested in a tool that can handle the material, reach where we need it to, and importantly, work best without coolant.
Understanding Dry Cutting for PEEK
You might be used to seeing cutting fluids or coolants used when machining metals. They help with lubrication and cooling. However, with PEEK, direct application of liquid coolant can sometimes cause issues, like swelling the material or contaminating sensitive parts. Plus, the high-speed nature of dry cutting PEEK with carbide helps to rapidly evacuate chips and minimize heat build-up in a different way. The goal is to have the tool cut so fast and efficiently that the chips are flung away before they can transfer too much heat back into the material or the tool.
This is why “dry cutting” is often the preferred method for PEEK with the right setup. It relies on high spindle speeds and controlled feed rates to keep the material from melting. Proper chip evacuation is crucial here; think of it as using a whisk to beat eggs quickly – the rapid motion helps prevent sticking. When the chips are efficiently cleared, they carry the heat away with them.
Choosing the Right 3/16 Inch Carbide End Mill for PEEK
Not all carbide end mills are created equal, especially when dealing with plastics like PEEK. Here’s what to look for:
Number of Flutes
Flutes are the helical grooves on the end mill. For PEEK, a lower flute count is generally better. This might sound counter-intuitive, but hear me out!
- 2-Flute End Mills: These are often the best choice for plastics. They have more open flute space, which is excellent for chip evacuation. This means chips get cleared out faster, reducing the chance of melting and recutting. The reduced contact area per revolution also generates less heat.
- 3 or 4-Flute End Mills: While common for metals, these can sometimes pack chips more easily in softer plastics like PEEK, leading to overheating and poor surface finish. You can sometimes use them with very aggressive feed rates and shallow depths of cut, but 2-flute is generally the safer bet for beginners.
Helix Angle
The helix angle is the steepness of the flutes. For plastics, a higher helix angle (30-45 degrees) is often recommended. This provides a sharper cutting edge and helps the tool “shear” the plastic more cleanly, rather than just pounding on it. A higher helix also aids in chip evacuation.
Coating
While not always necessary for PEEK, some coatings can further improve performance and tool life. For plastics, coatings like Zirconia (ZrN) or even uncoated carbide are usually sufficient. The primary focus should be on the geometry and material of the end mill itself.
Long Reach
As mentioned, a “long reach” end mill is often specified when working with materials like PEEK. This is because it allows you to machine deeper pockets without needing an extremely long tool, which can be less rigid and more prone to vibration. For a 3/16 inch diameter, a reach of 1 inch or more might be considered “long reach,” depending on the specific tool manufacturer.
Table 1: End Mill Feature Comparison for PEEK
| Feature | Recommended for PEEK | Why it Helps |
|---|---|---|
| Flute Count | 2 Flutes | Excellent chip evacuation, less heat generation. |
| Helix Angle | High (30-45 degrees) | Sharper cut, better shearing action, aids chip removal. |
| Material | Carbide | Hardness and heat resistance ideal for plastics. |
| Type | ‘Long Reach’ or ‘Plastic’ Specific End Mill | Optimized geometry for plastics, better reach or rigidity. |
Setting Up Your Machine for Success
Before you even think about hitting “go,” let’s get your machine dialed in. This setup is key to preventing melted plastic and ensuring a smooth cut.
1. Secure Your Workpiece
This is paramount for safety and accuracy. PEEK can be surprisingly strong, but it can also chatter or move if not held down properly. Use sturdy clamps or a vise, ensuring the workpiece is flat and won’t lift or shift during the machining process. A vacuum table can also be an excellent option for holding plastic parts securely.
2. Use the Right Collet/Holder
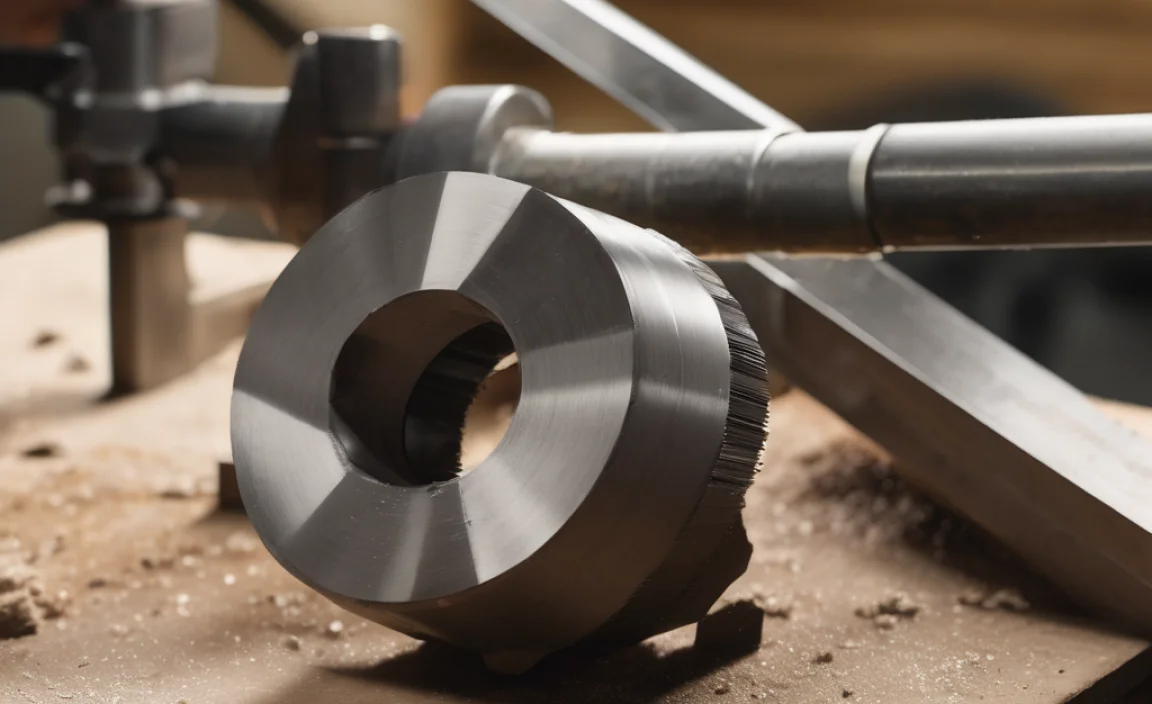
For an 8mm shank end mill, you’ll need an 8mm collet or a tool holder that accepts 8mm shank tools. Ensure the collet is clean and properly seated in your spindle or router. A tight, secure fit minimizes runout (wobble), which is critical for a clean cut and preventing tool breakage.
3. Verify Spindle Speed (RPM)
This is where dry cutting for PEEK really shines. You’ll typically need a high spindle speed. For a 3/16 inch carbide end mill in PEEK, speeds ranging from 15,000 RPM to 24,000 RPM are common. The exact speed depends on your material variant, your machine’s capabilities, and the specific end mill geometry. Start on the lower end of this range if unsure and increase if you’re getting a good, clean chip.
A good resource for basic machining parameters, though often focused on metals initially, is the Metal Formings Machinery Industry (MFM), which provides guidance on material properties and machining considerations that can help frame your thinking for plastics.
4. Calculate Your Feed Rate
The feed rate is how fast the tool moves through the material. For PEEK, you want a feed rate that is fast enough to create a continuous chip and avoid rubbing, but not so fast that it stresses your machine or tool excessively. This is where “Chip Load” comes into play.
Chip Load is the thickness of the material removed by each cutting edge of the end mill as it rotates. A good starting chip load for PEEK with a 3/16 inch 2-flute end mill might be around 0.002 to 0.005 inches per tooth (IPT). You can calculate your feed rate using this formula:
Feed Rate (IPM) = Chip Load (IPT) Number of Flutes Spindle Speed (RPM)
Let’s plug in some numbers as an example. If you choose a chip load of 0.003 IPT, a 2-flute end mill, and a spindle speed of 20,000 RPM:
Feed Rate = 0.003 2 20,000 = 120 IPM
This is a starting point. You’ll always adjust based on the sound of the cut, the appearance of the chips, and the final surface finish.
5. Depth of Cut (DOC) and Stepover
For PEEK, it’s best to take relatively shallow depths of cut (DOC) and moderate stepovers. This means you’re not trying to remove huge chunks of material at once.
- Depth of Cut (DOC): For a 3/16 inch end mill, start with a DOC of about 0.060 to 0.120 inches (about 3-6mm). You can often go deeper if your machine is rigid and you have good chip evacuation, but it’s safer to start shallow.
- Stepover: This is the distance the tool moves sideways on each pass. For a good balance of speed and surface finish, a stepover of 30-50% of the end mill diameter is usually a good starting point. For a 3/16 inch (0.1875 inch) tool, this is about 0.056 to 0.094 inches.
A smaller stepover will give a smoother finish but take longer. A larger stepover is faster but might leave noticeable scallops, requiring a second finishing pass.
Step-by-Step Cutting Process with Your 3/16 Inch Carbide End Mill
Alright, you’ve got your tool, your machine is set up, and you understand the parameters. Now, let’s get cutting!
Step 1: Toolpath Generation
If you’re using a CNC machine, this is done in your CAM (Computer-Aided Manufacturing) software. You’ll define your part geometry and select your tool (3/16 inch, 8mm shank, 2-flute carbide end mill). Input the calculated speeds, feeds, depth of cut, and stepover. For beginners, simple pocketing or contouring toolpaths are a good place to start. Make sure your CAM software is set for “climb milling” (where the cutter rotation direction opposes the feed direction) for best results on plastics. Many CAM packages have specific settings or libraries for plastics.
Step 2: Test Cut (Optional but Recommended!)
Before cutting your actual part, especially if it’s critical, consider making a test cut in a scrap piece of PEEK. This helps verify your feeds and speeds and ensures everything sounds and looks right. It’s much cheaper to find a mistake on a scrap piece than on your final workpiece.
Step 3: Perform the Cut
Once your toolpath is generated and your machine is ready, load your PEEK material securely. Insert your 3/16 inch carbide end mill firmly into the 8mm collet and tighten. Carefully zero your machine at the appropriate origin point.
Start the spindle to your target RPM. Then, initiate the cutting process. Listen for any unusual noises – chattering, screaming, or grinding – which can indicate issues with feeds, speeds, or rigidity. Keep an eye on the chips being produced:
- Good Chips: Small, consistent curly chips that are mostly ejected from the cutting area.
- Bad Chips: Fine dust (too much friction, too slow feed), or large, gummy, melted strands (not enough feed, too much heat).
If you see signs of melting or glazing, pause the cut (if safe to do so), re-evaluate your feeds and speeds, and potentially reduce the depth of cut or stepover. You might need to increase your feed rate slightly to improve chip load.
Step 4: Chip Evacuation
Good chip evacuation is so important that it bears repeating. If your machine has an air blast or vacuum system, ensure it’s active and directed at the cutting zone. This helps blow chips away and further reduces heat. If you don’t have automated systems, you might need to pause the operation periodically to clear chips manually with a brush (ensure the machine is stopped and safe to approach!).
Step 5: Finishing Passes
For PEEK, a single finishing pass with a smaller stepover (e.g., 15-20%) can dramatically improve the surface finish. Use the same speeds and feeds, or slightly adjust them for a smoother result. This will remove any slight scallops left by the roughing passes.
Troubleshooting Common PEEK Cutting Issues
Even with the best preparation, things can go wrong. Here are some common issues and how to fix them:
- Melting/Gummy Chips:
- Cause: Too much heat build-up, insufficient chip load, or slow feed rate.
- Solution: Increase feed rate slightly, increase spindle speed, decrease depth of cut, ensure good chip evacuation. Check that you are using a 2-flute end mill.
- Tool Chattering/Vibration:
- Cause: Machine rigidity issues, tool deflection, incorrect feeds/speeds, dull tool.
- Solution: Ensure workpiece and tool are held very securely. Reduce depth of cut and stepover. Use the shortest possible tool length. Check if your collet is worn or the tool is properly seated. For PEEK, ensure you are not using too many flutes, as this requires higher torque and can induce chatter.
- Poor Surface Finish (Scallops):
- Cause: Stepover is too large, tool runout, worn tool.
- Solution: Reduce stepover for finishing passes. Ensure your tool and collet are in good condition.
- Tool Breakage:
- Cause: Taking too deep a cut, pushing the tool too fast, vibration, tool entering material incorrectly.
- Solution: Reduce depth of cut, reduce feed rate if necessary, ensure secure clamping. Make sure you are not plunging too fast (if your toolpath includes plunging).
Essential Tools and Safety Gear
Beyond the 3/16 inch carbide end mill and your CNC machine, here’s what else you’ll need:
- Safety Glasses: Non-negotiable. Always wear eye protection.
- Hearing Protection: CNC machines can be loud.
- Dust Mask or Respirator: While PEEK dust isn’t as toxic as some other materials, it’s always best practice to avoid inhaling fine plastic particles.
- Clamps, Vise, or Vacuum Table: For securely holding your workpiece.
- Collet Set (with 8mm): To hold your end mill.
- Wrenches: For your collet nut and tool changes.
- Chip Brush: For manual chip clearing.
- Calipers/Rulers: For measuring your part and setting origins.
- A Good Vacuum System: To help with dust collection and chip evacuation.
Remember, proper safety is the bedrock of any workshop activity. Always review your machine’s safety manual and follow established protocols. For more general information on CNC safety, the Occupational Safety and Health Administration (OSHA) provides guidelines for machine safeguarding that are universally applicable.
PEEK Cutting Parameters: A Quick Reference
Here’s a handy table to summarize typical starting parameters for machining PEEK with a