Have you ever wanted to create your own metal projects? Imagine being able to craft unique pieces right at home! A DIY metal lathe can help you do just that. One important part of this tool is the compound rest. But what exactly is a compound rest, and why should you care?
Think of the compound rest as a helper. It allows you to control your cuts and shapes with great precision. If you dream of making lovely shapes or intricate designs, this feature becomes key. Did you know that even a simple change in the compound rest can make a big difference? It’s true!
In this article, we’ll show you how to build a sturdy DIY metal lathe compound rest. You’ll discover easy steps and fun tips along the way. By the end, you’ll feel ready to take on your next project with confidence. Are you ready to start your journey into metalworking?
Diy Metal Lathe Compound Rest: A Comprehensive Guide
Creating a DIY metal lathe compound rest can boost your metalworking skills. It’s a key tool that helps make precise cuts and shapes on metal pieces. Imagine crafting your own parts with perfect accuracy! You’ll learn how to gather materials, build the rest, and fine-tune it for better results. Plus, building it yourself can save money and give you a personal touch. Who wouldn’t want to create something unique for their workshop?
Understanding the Importance of a Compound Rest
Explanation of what a compound rest is and its function in metal lathes. Benefits of having a welldesigned compound rest for precision machining.
A compound rest is a crucial part of a metal lathe. It helps move the cutting tool with precision. This allows for better shapes and sizes in your workpieces. Having a well-designed compound rest makes machining smoother and more accurate. Think of it as the tool’s best friend! With it, you can make perfect adjustments, leading to cleaner cuts. Who doesn’t want that? Plus, it can save time and materials—talk about a win-win!
| Benefits of a Compound Rest | Details |
|---|---|
| Precision | Improves accuracy in cuts. |
| Ease of Use | Makes setups quicker. |
| Versatility | Can create various shapes. |
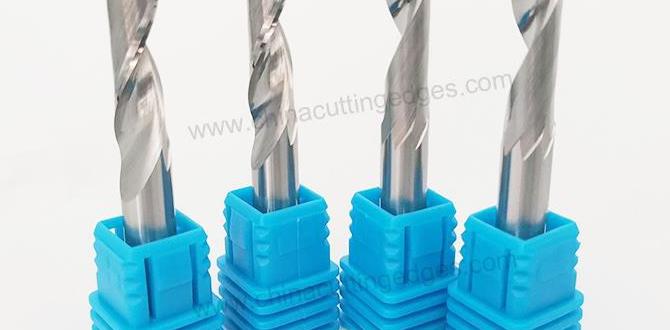
Materials Needed for Building a DIY Compound Rest
Comprehensive list of materials including metal types, tools, and fasteners. Suggestions for sourcing affordable materials and tools.
To build a DIY compound rest, you need several materials and tools. Here’s a list to help you get started:
- Metal types: Aluminum, steel, and brass are great options.
- Tools: Drill, saw, and file are essential.
- Fasteners: Nuts, bolts, and screws will hold everything together.
Look for affordable materials at local hardware stores or online. Sometimes, garage sales or recycling centers can have good deals too. Remember to keep an eye out for discounts!
What materials should I use for a DIY compound rest?
Use aluminum, steel, and brass for the best results. You’ll also need a drill, saw, and fasteners like nuts and bolts.
Step-by-Step Guide to Designing Your Compound Rest
Detailed instructions on drafting your design plans. Considerations for dimensions and functionality in your design.
Designing your compound rest can feel like building a spaceship, but don’t worry! Start by grabbing paper and pencil to draft your plans. Keep in mind the dimensions. Too big? It’ll be like wearing clown shoes! Too small? You’ll end up with a tiny, sad lathe. Make sure your design allows for functionality. It should move smoothly and adjust easily. A well-thought-out design saves you time in the long run and ensures a happy lathe-ing experience. Remember, measure twice and cut once—or your lathe might end up looking like a pizza!
| Consideration | Details |
|---|---|
| Overall Size | Must fit your workspace, but not too large! |
| Adjustment Mechanism | Ensure smooth operation, or you’ll have a workout! |
| Material Choice | Use sturdy materials to withstand usage. |
Fabrication Process of the Compound Rest
Indepth steps on cutting, shaping, and assembling the components. Tips for ensuring accuracy and maintaining quality throughout fabrication.
Start the fun by cutting your metal into the right shapes for the compound rest. Use a saw, and remember to wear safety glasses! Next, shaping comes into play. A file or a grinder can help smooth out those rough edges. Measure twice, cut once—it’s not just a saying; it’s the secret to success! When you assemble the parts, be sure they fit snugly together. A little bit of patience goes a long way. Oh, and keep your workspace tidy; nobody wants to trip over an errant bolt! Check out the handy table below for an overview of the fabrication steps:
| Step | Tool Required | Tip |
|---|---|---|
| Cutting | Saw | Always wear safety goggles! |
| Shaping | Grinder/File | Measure twice, cut once! |
| Assembling | Wrench | Use patience for a snug fit! |
Finishing Touches for Your DIY Lathe Compound Rest
Techniques for smoothing and finishing surfaces to enhance durability. Suggestions for protective coatings to prevent rust and wear.
To keep your DIY lathe compound rest looking great and working well, focus on smoothing and finishing. Start by sanding the surfaces until they feel smooth. Use fine-grit sandpaper for best results. Next, apply a protective coating. This helps stop rust and wear. Here are some tips:
- Use paint or enamel for a shiny finish.
- Try a clear coat for extra protection.
- Wax can also help prevent rust.
These finishing touches add durability and enhance the beauty of your lathe.
What are some techniques for smoothing surfaces?
Use sanding and a file to smooth rough edges. Sandpaper helps create a fine finish. You can also apply a finishing oil for added protection.
Common Issues and Troubleshooting Tips
List of potential problems encountered during the build and their solutions. Advice on maintenance and adjustments for optimal performance.
Building a DIY metal lathe compound rest can feel like putting together a puzzle with a missing piece. Often, you might face issues like poor alignment or too much play in the parts. Don’t worry! Small adjustments can do wonders. Keep everything tightened and lubricated for smooth operation. Check your work regularly, just like you check the fridge for snacks. Here’s a quick fix guide:
| Common Issue | Solution |
|---|---|
| Poor Alignment | Recheck the setup and adjust screws. |
| Unnecessary Play | Tighten bolts or add shims. |
| Rust | Clean and apply lubricant regularly. |
By staying proactive, your lathe will be as happy as a cat in a sunbeam. Who knew maintenance could be this fun?
Upgrades and Modifications to Enhance Your Compound Rest
Ideas for adding features such as digital readouts or adjustable angles. Suggestions for improving the versatility and functionality of the rest.
Upgrading your compound rest can feel like giving it a superhero cape! Adding a **digital readout** helps you see measurements clearly, making even the smallest tasks feel majestic. Plus, think about adjustable angles — they make it easy to cut at different positions without playing gymnastics with your lathe.
Here are some quick ideas to enhance versatility:
| Upgrade | Benefit |
|---|---|
| Digital Readout | Clear measurements |
| Adjustable Angle Mount | More cutting options |
| Tool Holder Add-ons | Swap tools easily |
These upgrades not only boost functionality but will also make your friends say, “Wow, that’s fancy!” Your compound rest will be the talk of the shop!
Real-Life Applications and User Testimonials
Examples of projects that benefit from a DIY compound rest. Testimonials from users on their experiences and satisfaction with their builds.
Many folks have built amazing things using their DIY compound rest. For example, model airplane parts or custom car parts are popular projects. Not only is it satisfying to create these pieces, but it’s also fun to show off to friends. Users say their builds changed the game for them. One happy maker shared, “My lathe now works like a charm! It’s almost like magic!” Here’s a quick look at what people have achieved:
| Project Type | User Testimonial |
|---|---|
| Model Plane Wings | “Perfect fit every time!” |
| Car Customizations | “My friends think I’m a pro!” |
| Jewelry Making | “I made a ring that fits perfectly!” |
This shows that a DIY compound rest opens doors to many creative possibilities! Happy spinning!
Conclusion
In summary, a DIY metal lathe compound rest enhances your lathe’s versatility. It helps achieve precision in your projects. With the right materials and tools, you can build one yourself. Start by gathering your supplies and following design plans online. Don’t hesitate to explore more resources to improve your skills. Let’s get building and create amazing things together!
FAQs
What Materials Are Commonly Used To Construct A Diy Metal Lathe Compound Rest?
To make a DIY metal lathe compound rest, you can use metal pieces like steel or aluminum. You might also need some screws and bolts to hold everything together. Sometimes, people use wood for the base to keep it stable. Don’t forget to use bearings so parts can move smoothly!
What Are The Essential Dimensions And Design Considerations When Building A Compound Rest For A Diy Metal Lathe?
When building a compound rest for a DIY metal lathe, you need to think about size and shape. It should be big enough to hold tools securely but not too heavy. The angle adjustments should let you move the tools easily for precise cutting. You also want to make sure it’s made from strong materials so it lasts a long time. Lastly, plan for smooth movement, so tools slide easily when you adjust them.
How Can I Ensure Accurate Movement And Alignment Of The Compound Rest While Machining?
To make sure the compound rest moves correctly while you work, first, check that it is clean and free of dirt. Next, adjust the screws gently so they are not too tight or too loose. You can use a ruler or a straightedge to help align it straight. Also, move it slowly and watch for any bumps or sticking points. By doing this, you will have better accuracy while machining.
What Are Some Common Features To Incorporate Into A Diy Compound Rest To Enhance Its Functionality?
To make a DIY compound rest better, you can add some cool features. First, use adjustable parts, so you can change the height and angle easily. Next, add rubber grips to hold the compound bow steady. You can also include a tray for tools or accessories, so everything is close by. Finally, make it lightweight, so you can carry it anywhere!
What Tools And Techniques Are Recommended For Fabricating The Components Of A Metal Lathe Compound Rest?
To make the parts of a metal lathe compound rest, you can use a few tools. A drill helps create holes in the metal. A hacksaw cuts the metal to the right size. We also use a file to smooth the edges. Finally, a screwdriver helps put everything together!