Yes, you can absolutely make your own wood lathe chuck! This guide breaks down DIY wood lathe chuck making into simple, step-by-step instructions for beginners. Learn to craft a reliable chuck with common tools, saving money and gaining valuable skills. We cover essential designs, materials, and safety tips so you can get turning with confidence.
Welcome to the workshop!
Ever looked at a fancy wood lathe chuck and thought, “That looks complicated and expensive!”? You’re not alone. For many home woodworkers, a good chuck is a major investment, and sometimes the ones available just don’t have the exact grip or mounting style you need. But what if I told you that you can build your own? It might sound like advanced machining, but crafting a functional and safe DIY wood lathe chuck is entirely achievable, even for beginners. It’s a fantastic way to understand how these vital tools work, save a significant chunk of cash, and end up with a tool that perfectly suits your lathe. We’re going to walk through this step-by-step, focusing on simplicity and safety.
Let’s dive into making your very own wood lathe chuck!
Why Make Your Own Wood Lathe Chuck?
Making your own wood lathe chuck might seem like a big project, but there are some really good reasons to give it a try. It’s not just about saving money, although that’s a big plus. Understanding how a chuck works by building one is an incredible learning experience. You’ll gain a much deeper appreciation for the precision and design involved.
- Cost Savings: High-quality chucks can be quite expensive. Building your own can drastically reduce the cost, especially if you have some spare metal or can source it affordably.
- Customization: Sometimes, you need a specific size or a unique mounting system. DIY allows you to tailor the chuck perfectly to your lathe and specific project needs.
- Learning Opportunity: This project is a fantastic way to learn basic machining skills. You’ll practice measuring, cutting, drilling, and assembling metal parts, which are invaluable skills for any maker.
- Sense of Accomplishment: There’s immense satisfaction in using a tool you built yourself. It’s a tangible result of your learning and skill development.
- Tool Familiarity: Building a chuck helps you understand the mechanics of how different jaw types grip wood securely, which will make you a more confident and safer woodturner.
Understanding Wood Lathe Chucks: The Basics
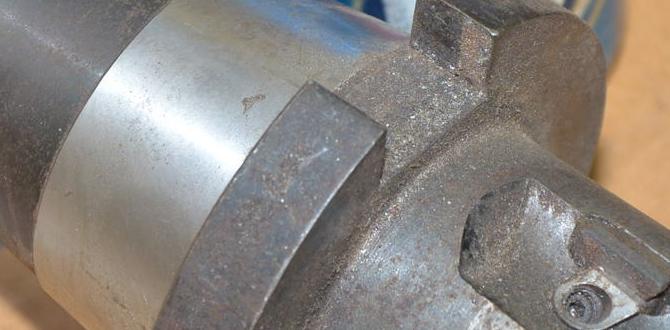
Before we start building, let’s quickly cover what a wood lathe chuck actually does. Its main job is to securely hold a piece of wood on the lathe spindle so you can safely shape it. Chucks typically mount to the directly to the lathe’s headstock through an adapter or directly to the spindle threads. They have jaws that move in and out, usually with a scroll mechanism, to grip the wood either internally (expansion) or externally (contraction).
There are several main types of chucks, but for DIY, we often focus on simpler designs. The most common for a DIY project is a screw-chuck style or a basic jawed chuck.
Jaw Types and Gripping Methods
The way a chuck grips wood is crucial for safety and stability. Most modern chucks use jaws that can be configured in a few ways:
- Direct Screw Chuck: This is the simplest form. It’s essentially a threaded screw that you embed into the wood. These are very basic and often used for smaller projects or specific turning techniques. A DIY version of this is the easiest to make.
- Jaw Chucks: These have multiple jaws (usually 3 or 4) that operate together to grip the wood.
- Expansion Mode: The jaws expand outwards from the inside of a pre-drilled hole or a tenon.
- Contraction Mode: The jaws grip around the outside of a tenon or a spigot.
For our DIY project, we’ll focus on a simpler, robust design that can be adapted. The most approachable for a beginner without a full milling machine setup is often a screw-chucked style or a very basic faceplate-style chuck that uses screws to hold the wood. However, to mimic a more common chuck, we can look at designs that incorporate a basic scroll operation, though this adds complexity. Let’s aim for a reliable, screw-chuck-style approach first, and then discuss modifications for a more traditional jawed chuck.
Essential Tools and Materials for DIY Wood Lathe Chuck Making
Gathering your tools and materials is the first big step. For a basic DIY chuck, you won’t necessarily need a full-blown machine shop, but a metal lathe and possibly a milling machine will make things much easier and produce a more professional result. If you don’t have these, some designs can be adapted for hand tools and drill presses, but accuracy is key for safety.
Tools You’ll Likely Need:
- Metal Lathe: Essential for turning the main body, threading, and ensuring concentricity. A smaller hobbyist lathe can work for many DIY chucks.
- Milling Machine (Optional but Recommended): For cutting accurate keyways, slots, or pockets if you go for a more advanced jawed design.
- Drill Press: For accurate drilling and tapping.
- Bench Grinder: For shaping and sharpening parts.
- Files: Various types for deburring and refining edges.
- Measuring Tools: Calipers (digital or dial), a ruler, and a tape measure are critical for accuracy.
- Taps and Dies: For cutting internal and external threads. Make sure you have the correct size for your lathe spindle.
- Wrenches/Allen Keys: For tightening components.
- Safety Glasses: Non-negotiable! Always wear them.
- Gloves: To protect your hands from sharp edges.
- Deburring Tool: For cleaning up drilled holes.
Materials:
The best material for a chuck body is typically steel. It’s strong and durable. Aluminum can be used for lighter-duty or less critical parts, but steel is preferred for the main body and jaws.
- Steel Bar Stock: For the chuck body. Common sizes like 2-inch or 3-inch round steel are often used. You’ll need enough to turn the diameter and face off the length required.
- Steel Rod: For threaded components or jaw elements.
- T-Nuts or Similar: For attaching to a faceplate or custom mounting system.
- Set Screws or Cap Screws: For securing parts.
- Metal for Jaws (if applicable): Hardened steel is best for durability if you’re making a re-usable jawed chuck. For a simpler screw chuck, the thread itself is the gripping mechanism.
- Lathe Spindle Adapter (if needed): If your lathe spindle threads don’t match standard chuck threads, you might need to machine a separate adapter.
It’s vital to know your lathe’s spindle thread size and type (e.g., 1 x 8 TPI, 3/4 x 10 TPI). This is what the chuck will screw onto. You can usually find this in your lathe’s manual.
Project 1: The Simple Screw-Type Faceplate Chuck
This is perhaps the most straightforward DIY chuck you can make. It’s essentially a robust faceplate with a central threaded hole designed to accept a large screw. The screw is driven into the wood, and the faceplate provides a stable mounting point on the lathe.
Step-by-Step Guide: Simple Screw-Type Faceplate Chuck
This design prioritizes simplicity and uses common materials and operations.
Step 1: Prepare the Faceplate Body
You’ll need a sturdy piece of metal to act as the faceplate. A thick circular steel plate is ideal. You can often start with bar stock and turn it down to your desired diameter and thickness on the metal lathe.
- Material: Start with a 3-inch diameter, 1/2-inch thick steel plate or bar stock.
- Face and Bore: Mount the stock in your metal lathe. Face off one side to be perfectly flat and smooth. Then, bore a hole in the center that matches the thread size of your lathe spindle adapter or the spindle itself. For example, if your lathe is 1 x 8 TPI, bore a hole that is slightly undersized for threading.
- Thread the Hole: Using a die holder or the lathe itself for internal threading, cut the correct thread for your lathe spindle (e.g., 1 x 8 TPI). Be patient and use cutting fluid. Ensure the threads are clean and sharp.
- Drill Mounting Holes: If you are mounting this to a separate adapter plate, drill and tap holes around the perimeter of the faceplate to accept screws for attachment. If it threads directly onto your spindle, you might skip this.
- Add Screw Hole: In the exact center of the faceplate, drill and tap a hole for a large, strong screw. A #10 or #12 screw with a minimum length of 2 inches is a good start. The screw should have a coarse thread to bite into wood. You might also want a smaller hole to the side of the main screw hole to accommodate a stabilizing screw, which helps prevent wood splitting for certain materials.
Step 2: Prepare the Holding Screw(s)
The screw is what actually grips your wood. It needs to be a strong, coarse-threaded screw.
- Screw Selection: Use a high-quality, hardened steel screw with a wide, coarse thread. A lag screw designed for structural wood applications is a good candidate. You can also machine your own screw if you have the tools.
- Trim and Shape: Trim the overall length of the screw if necessary. It should extend far enough into the wood to provide a good grip but not so far that it interferes with the lathe’s operation or the piece you’re turning.
- Drill for Set Screw (Optional): If you plan to use a stabilizing set screw to prevent the main screw from backing out or to help with splitting prevention, drill and tap a small hole (e.g., 1/4-20) into the faceplate body next to the main screw hole. This hole should align with the shank of the main screw.
Step 3: Assembly and Testing
- Mount to Lathe: Thread your completed faceplate onto your lathe spindle or adapter. Ensure it’s snug.
- Test Screw: With the lathe OFF, place a scrap piece of wood against the faceplate. Drive the large screw securely into the wood. If you have a stabilizing set screw, tighten it against the shank of the main screw.
- Turn Slowly: Start the lathe at its lowest speed. Check that the wood is running true and is securely held. Gradually increase speed as you gain confidence.
Safety Note: Always start at the slowest speed and listen for any unusual noises or vibrations. Never remove guards. Ensure all parts are securely fastened before turning on the lathe.
Project 2: A Basic Jawed Chuck Design (Conceptual)
Creating a fully functional scroll-chuck like commercial ones is complex and often requires precise milling. However, we can explore a simpler jawed chuck concept that uses bolts or threaded rods to act as rudimentary jaws. This would be more of a faceplate with adjustable gripping points.
Conceptual Steps for a Basic Jawed Chuck
This approach focuses on a fixed-plate design with manually operated gripping screws.
Step 1: Machine the Chuck Body
Similar to Project 1, you’ll start with a round steel blank.
- Material: Use a steel round, at least 3-4 inches in diameter and 1-1.5 inches thick.
- Face and Bore: Mount in the metal lathe. Face one side perfectly flat. Bore out the center to accept your lathe spindle thread (e.g., 1 x 8 TPI). Thread the bore.
- Machine Recesses: On the face side, machine shallow, radial recesses or slots running from the center bore outwards. These will house your “jaws” (in this case, blocks or bolts). You might create 3 or 4 of these.
- Drill Radial Holes: In each recess, drill and tap a hole that will guide a screw or bolt used to advance your gripping element.
- Drill Tangential Holes (Advanced): For a more advanced design, you might create a circular groove on the outer diameter and machine slots so that each jaw can be moved radially. This is where a milling machine becomes very useful.
Step 2: Create the “Jaws”
For this simpler design, your “jaws” could be sturdy bolts or custom-made blocks.
- Bolted Jaws: Use thick bolts (e.g., 1/2 inch or larger) with flat ends. You would drill and tap holes in the faceplate to act as guides for advancing these bolts. For example, a bolt might thread into a T-nut or a tapped hole on the side of the recess, pushing it radially inward.
- Custom Blocks: Machine small blocks of steel that can slide within the radial slots you created in the chuck body. Drill and tap a hole through the side of the chuck body that pushes against these blocks.
- Gripping Surface: Ensure the face of your “jaws” that contacts the wood is flat or slightly contoured to provide good purchase. For a very basic setup, file a slight angle on the gripping surface.
Step 3: Integrate Gripping Mechanism
This is where you’ll use screws or bolts to move the jaws.
- Screw Drive: Drill and tap holes on the periphery of the chuck body that will accept large screws. Thread these screws to push against whatever you’ve designed as your jaws. As you tighten these screws, they will push the jaws inward or outward.
- T-Slot Design: If you milled T-slots, you could use T-nuts on the jaws and advance them using a wrench.
Important Consideration: A true scroll chuck uses a tapered scroll plate and helical teeth for smooth, synchronized jaw movement. Replicating this is very difficult without precision machining. A simpler approach is radially moving jaws that are advanced independently or by separate screws. Think more along the lines of a four-jaw independent chuck if you are going advanced.
Table: Comparing DIY Chuck Concepts
| Feature | Simple Screw-Type Faceplate Chuck | Basic Jawed Chuck (Manual Adjustment) | Advanced Scroll Chuck (Commercial Style) |
| :—————- | :——————————– | :———————————— | :————————————— |
| Complexity | Low | Medium | High |
| Machining Needs | Lathe Primarily | Lathe & Mill (ideal for slots) | Lathe & Mill (precision needed) |
| Gripping Strength | Moderate (depends on screw size) | Good (user-adjustable) | Excellent (synchronous movement) |
| Cost | Very Low | Low to Medium | High to Very High |
| Safety | Good (with caution) | Good (with caution) | Excellent (if well-made) |
| Learning Curve | Easy | Moderate | Steep |
Safety First! Critical Precautions for DIY Chucks
This cannot be stressed enough: safety is paramount when working with rotating machinery, especially when using a DIY tool. A chuck failure at speed can cause serious injury or damage. Always prioritize safety over speed or appearance.
- Material Choice: Use strong, reliable materials like steel for the chuck body and any gripping components. Avoid brittle materials or unknown alloys.
- Thread Quality: Ensure all threads are cut cleanly and completely. Poorly cut threads can strip, causing the chuck to detach.
- Secure Mounting: Double-check that the chuck is securely threaded onto the spindle or adapter. Consider adding a locking screw if your spindle design allows for it.
- Wood Preparation: For screw chucks, ensure the screw is driven in straight and deep enough for a secure grip. For jawed chucks, ensure jaws are evenly tightened and making good contact.
- Pre-Turn Check: Always spin the chuck by hand with the lathe OFF to check for clearance and ensure nothing is loose.
- Slow Speeds: Start any new workpiece or any piece held by a DIY chuck at the slowest possible lathe speed.
- Listen and Watch: Pay close attention to any unusual vibrations, noises, or wobbles. Stop the lathe immediately if anything seems wrong.
- Know Your Limits: Don’t push your DIY chuck beyond its intended capacity or the speed rating of your lathe.
- Guard Up: Always ensure all safety guards are in place and functional.
- Eye Protection: Wear shatter-resistant safety glasses or a full face shield at all times when operating the lathe.
The <a href=”https://www.osha.gov/laws-regs/regulations/

