Build your own DIY wood lathe faceplate chuck with this essential guide. Learn to create a secure, reliable workholding solution for your lathe projects using readily available materials and basic machining skills. This cost-effective method ensures you can confidently tackle larger or irregularly shaped pieces, expanding your woodworking capabilities without breaking the bank. We’ll walk you through each step for a successful build.
Welcome to Lathe Hub! Ever found yourself wanting to mount a larger, more awkward piece of wood onto your lathe, only to realize your current chuck isn’t quite up to the task? It’s a common challenge for woodturners. Sometimes, commercial faceplate chucks can be expensive, or you might just enjoy the satisfaction of building a crucial tool yourself. That’s where a DIY wood lathe faceplate chuck comes in. It’s a fantastic project that not only saves money but also gives you a deep understanding of your lathe’s capabilities. Don’t worry if you’re new to this; we’ll break down everything you need, step by step, to create a sturdy and dependable faceplate chuck that’s perfect for your workshop. Let’s get started on making your lathe even more versatile!
Why Build a DIY Faceplate Chuck?
Building your own wood lathe faceplate chuck offers several compelling advantages, especially for hobbyists and those looking to expand their workshop’s capabilities on a budget. It’s more than just a cost-saving measure; it’s an investment in practical skills and bespoke tooling.
- Cost-Effectiveness: Commercially made faceplate chucks, especially larger ones, can represent a significant expense. By building your own, you can often use scrap materials or relatively inexpensive stock, drastically reducing the overall cost. This is particularly appealing if you only occasionally need a larger faceplate or a specialized mounting solution.
- Customization: A DIY build allows you to tailor the faceplate to your specific needs. You can decide on the diameter, the number and placement of mounting holes for your workpiece, and even the thread size to perfectly match your lathe. This level of customization isn’t always available with off-the-shelf options.
- Skill Development: This project is an excellent opportunity to hone your machining and metalworking skills. Whether you’re working with a metal lathe, a mill, or even just a drill press and hand tools, you’ll gain valuable experience in measuring, cutting, drilling, tapping, and fitting components.
- Durability and Reliability: When built correctly, a DIY faceplate chuck can be just as, if not more, durable than a purchased one. You control the material selection and the quality of the construction, ensuring a robust tool that will last for years to come.
- For Irregular Workpieces: Faceplates are ideal for mounting large, irregularly shaped pieces that might be difficult or impossible to grip with a standard three-jaw or four-jaw chuck. A DIY version can be designed with ample mounting points to secure these challenging materials.
Understanding the Parts of a Faceplate Chuck
Before we dive into the building process, it’s essential to understand the core components that make up a functional DIY wood lathe faceplate chuck. While designs can vary, most will incorporate these fundamental elements:
The Faceplate Body
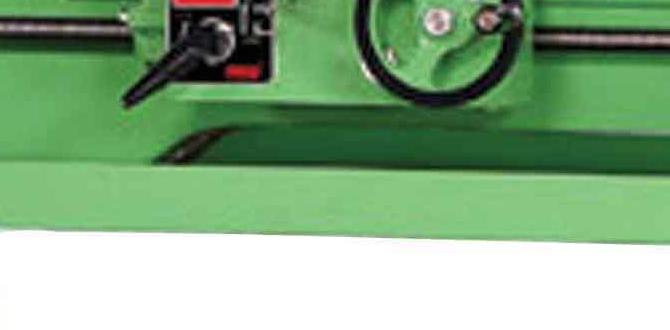
This is the main disc that attaches directly to your lathe’s spindle. It’s typically made of metal (steel or aluminum are common) and serves as the base for mounting your workpiece or additional holding fixtures. The diameter of the faceplate is usually chosen to be at least as large as, if not larger than, what your lathe can safely swing.
The Spindle Thread
The back of the faceplate has a threaded bore that matches the spindle thread of your lathe. This is a critical dimension, and getting it wrong means the faceplate won’t attach. Common lathe spindle threads include 1×8 TPI (Threads Per Inch), 3/4×10 TPI, or imperial/metric threads depending on the lathe’s manufacturer, especially for European or Asian models. Always verify your lathe’s specific spindle thread.
Workpiece Mounting Holes
These are the holes drilled into the face of the faceplate. They are used to bolt or screw your workpiece directly to the faceplate. The number, size, and spacing of these holes depend on the intended use and the typical size of projects you plan to mount. Some designs might include a combination of clearance holes and tapped holes for screws.
Optional: Tapped Holes
In addition to clearance holes, many faceplates have tapped holes. This means the holes themselves are threaded. You can then use bolts with flat heads (like cap screws) that thread directly into the faceplate, providing a very secure and flush mounting surface for your wood.
Materials and Tools Needed
Gathering the right materials and tools is crucial for a successful and safe build. This list assumes you have access to basic metalworking tools. If you’re adapting this for a woodworking-focused DIY, adjust accordingly.
Materials
- Metal Disc: This will form the main body of your faceplate.
- Steel (e.g., mild steel plate): Very strong and durable. Requires more effort to machine.
- Aluminum (e.g., thick aluminum plate): Easier to machine, lighter, and less prone to rust. Good for smaller lathes or less demanding tasks.
- Dimensions: The diameter should be suitable for your lathe (e.g., 6-12 inches), and the thickness should be substantial enough to be rigid (e.g., 1/4″ to 1/2″ or 6mm to 12mm).
- Threaded Rod or Bolt: To create the spindle thread adapter if your faceplate material isn’t already threaded for your lathe spindle. Alternatively, you can machine the thread directly into the center of your metal disc. High-strength steel is recommended.
- Fasteners: Bolts, screws, washers. The type and size will depend on your design for attaching workpieces. For tapped holes, you’ll need bolts that match the thread size.
Tools
- Metal Lathe: Essential for accurately threading the bore, facing the disc, and drilling/tapping mounting holes. This is the most ideal tool for this project.
- Mill (Optional but highly beneficial): A milling machine makes drilling and accurately spacing holes much easier and more precise, especially for a larger number of mounting points.
- Drill Press: If a mill isn’t available, a sturdy drill press with good quality drill bits and taps can be used, though achieving perfect accuracy might be more challenging.
- Measuring Tools: Calipers, ruler, machinist’s square, marking pen/scriber.
- Cutting Tools: Lathe cutting tools (e.g., facing tool, boring bar), drill bits (including clearance and pilot hole sizes), taps (matching your chosen thread size for mounting holes).
- Wrenches and Allen Keys: For holding the stock and tightening components.
- Deburring Tool or File: To clean up sharp edges after cutting and drilling.
- Safety Gear: Safety glasses, hearing protection, sturdy footwear, gloves (when handling material, not when operating machinery).
- Thread Gauge: To accurately identify your lathe’s spindle thread pitch.
- Dial Indicator: For checking runout and ensuring the faceplate is perfectly true on the lathe spindle.
Step-by-Step Build Guide
This guide outlines the process for creating a robust DIY wood lathe faceplate chuck using a metal lathe. Precision and safety are paramount throughout. Always remember to consult your lathe’s manual for spindle thread specifications.
Step 1: Determine Your Lathe Spindle Thread
This is the absolute first and most critical step. You need to know the exact thread specification of your lathe’s spindle. This is usually found by checking the machine’s manual or by using a thread gauge to measure an existing chuck or faceplate if you have one.
Common Threads to Look For:
- 1×8 TPI: Very common on many larger American-made lathes.
- 3/4×10 TPI: Common on smaller or some import lathes.
- Metric Threads: If you have a European or Asian lathe, it might have metric threads (e.g., M33x3.5mm).
If you’re unsure, it’s better to ask for help from a more experienced machinist or consult reputable online forums dedicated to metalworking. Getting this wrong means your DIY faceplate won’t fit.
Step 2: Select and Prepare Your Faceplate Material
Choose your metal disc based on your lathe size and capabilities. For a 12-inch metal lathe, a 6- to 10-inch diameter by 1/4-inch to 1/2-inch thick steel or aluminum plate is a good starting point. Some suppliers offer pre-cut, flat metal discs which can save you significant machining time.
If you’re starting with a larger plate, you’ll need to:
- Cut to Diameter: Use a bandsaw, chop saw with a metal cutting blade, or a CNC plasma/laser cutter to get your disc to the desired diameter. If using a metal lathe, you can potentially bore the outside diameter (OD) to size if you have tooling suitable for that.
- Face the Disc: Mount the disc securely in your metal lathe chuck. Use a facing tool to create a perfectly flat and smooth surface on the front and back. This ensures good contact with your lathe’s spindle flange and provides a true surface for mounting work.
Step 3: Drill and Thread the Spindle Bore
This is where the metal lathe is indispensable. You need to create a precisely threaded hole in the center of your faceplate disc to match your lathe’s spindle thread.
- Center Drill: Mount your disc in the metal lathe and ensure it’s perfectly centered. Use a center drill bit to create a pilot hole at the exact center of the disc.
- Drill the Clearance Hole: Using a drill bit slightly larger than the thread’s minor diameter (the diameter at the bottom of the threads), carefully drill through the disc at the center. For instance, for a 1×8 TPI thread, the minor diameter is approximately 0.88 inches. You would drill a hole slightly larger, perhaps 0.90 inches.
- Bore to Final Size (if needed): If your drilled hole isn’t perfectly smooth or if you’re planning to use a tap that requires a specific drill size, you might bore this hole to the exact minor diameter or the recommended tap drill size.
- Chase/Cut the Thread: This is the most critical machining step. Select the correct threading tool for your lathe and the specified thread pitch (e.g., 8 TPI for 1×8). Carefully engage the half-nuts or chosen threading mechanism and cut the internal thread. This may require multiple passes to achieve the correct depth and form. A common practice is to chase the threads a bit with the die if available to ensure they are clean and sharp, especially if you can mount a die onto a suitable holder in the lathe. Alternately, you can ream the hole a bit larger and then thread a pre-made threaded insert (like a Weka bush) into the faceplate.
Important Note: If you are not comfortable with threading operations on a metal lathe, it is highly recommended to have this step performed by a machinist or to purchase a pre-threaded faceplate blank. A poorly cut thread can damage your lathe spindle.
Step 4: Layout and Drill Mounting Holes
Now, you’ll add the holes for attaching your workpiece. How you do this will depend on your tools and desired flexibility.
- Layout: From the center of the faceplate, accurately mark the locations for your mounting holes. You can use a rotary table on a mill, a dividing head, or mark them out using the lathe and careful measurements with a dial indicator and a scribe. For a basic faceplate, evenly spaced holes around the circumference are common. For example, on a 6-inch faceplate, you might place 4 to 6 holes.
- Drilling:
- Using a Mill: Mount the faceplate securely on the mill. Use a fly cutting tool or a large drill bit to create the holes at your marked locations. This offers the highest precision for hole placement and perpendicularity.
- Using a Lathe: Mount the faceplate on your lathe with a sturdy live center supporting the face. Move the tailstock over and use drill bits to drill the holes. You can rotate the faceplate manually for each hole. Ensure you can reliably index the faceplate to the same position for each subsequent hole (e.g., by using a simple pin in a hole, or if the disc has prior holes, you can use those as guides).
- Using a Drill Press: This is the least precise method but can work for simpler designs. Mount the faceplate securely. Use a drill bit and measure carefully for hole placement. A drilling jig can significantly improve accuracy.
- Tapping the Holes (Optional but Recommended): If you want to use bolts that thread directly into the faceplate for a strong, flush mount, you’ll need to tap these holes.
- After drilling the correct pilot hole size for your chosen tap (e.g., 5/16-18 TPI), use a tap wrench and your tap to create the threads.
- Ensure the tap is perfectly perpendicular to the face. Use cutting fluid for easier tapping and to extend tap life.
- Clean out the chips frequently.
- Clearance Holes: If you prefer to bolt directly through your workpiece and into the faceplate with nuts on the back, drill clearance holes for your bolts. These holes should be slightly larger than the bolt’s shank diameter.
Step 5: Balancing and Finishing
Once all holes are drilled and tapped, it’s time for finishing touches.
- Deburr: Use a deburring tool or a file to remove any sharp edges from all drilled and tapped holes. This improves safety and usability.
- Smooth Edges: Lightly file or sand the outer edges of the faceplate to remove machining marks and create a more finished appearance.
- Clean: Thoroughly clean any metal shavings or cutting fluid.
- Balancing (For high-speed lathes): For larger faceplates that will spin at higher RPMs, balancing is important to prevent vibration. You can often balance a faceplate by drilling small amounts of material from the heavier side or by adding small weights (like set screws) to the lighter side. This is less critical for typical woodworking speeds but a good practice for larger, heavier faceplates. Use a dial indicator and rotate the faceplate on a shaft to find the heavy spot.
Mounting Your DIY Faceplate onto the Lathe
With your DIY faceplate chuck complete, mounting it is straightforward:
- Ensure your lathe spindle and the threaded bore of your faceplate are clean and free of debris.
- Carefully thread the faceplate onto the lathe spindle by hand, going counter-clockwise for most North American lathes or clockwise for some European models. Ensure it threads smoothly without cross-threading.
- Once it’s snug against the spindle flange, use a spanner wrench (if your faceplate has a lip or holes for one) or a block of wood to gently tighten it further. You don’t need to overtighten it; just make sure it’s secure.
- Crucial Safety Check: With the power OFF, gently rotate the faceplate by hand. Check for any wobble or runout using a dial indicator if available. A small amount of runout might be acceptable depending on your lathe, but significant wobbling could indicate an issue with the threading or facing.
Using Your DIY Faceplate Safely
Safety is paramount when using any lathe accessory, especially a DIY one. Always observe general lathe safety practices:
- Secure Workpiece: Ensure your workpiece is very securely attached to the faceplate using appropriate bolts, washers, and nuts. Do not rely on just a few screws for large or heavy pieces.
- Check Mounting: Before turning on the lathe, visually inspect the workpiece attachment and the faceplate mounting.
- Start Slowly: Turn the lathe on at a slow speed, especially for the initial shaping or when removing a lot