Have you ever looked at scrap wood and thought, “I could make something cool from this”? You’re not alone! Many woodworkers start with leftover pieces from other projects. One fun and useful project you can do is making a jam chuck from scrap wood.
A jam chuck is a helpful tool. It lets you hold your workpiece securely while you shape it. Imagine turning a simple log into a beautiful bowl! But how can you make one using just scrap wood? This article will show you easy steps to create your own jam chuck.
Did you know that using scraps helps the environment? It reduces waste and can even save you money. Imagine turning what would be trash into a handy tool! Ready to dive in? Let’s explore how to make a jam chuck from that pile of scrap wood sitting in your garage.
How To Make A Jam Chuck From Scrap Wood Easily

How to Make a Jam Chuck from Scrap Wood
Creating a jam chuck from scrap wood is simple and fun. It helps hold your projects securely while you work. You only need a few tools and some leftover wood pieces. First, measure your wood correctly for a snug fit. Then, shape it for the best grip. Did you know this technique is often used by woodworkers to make turning easier? With a little practice, you can enhance your skills and enjoy your crafting even more!Understanding a Jam Chuck
Definition and purpose of a jam chuck. Benefits of using a jam chuck in woodworking.Ever heard of a jam chuck? It’s a clever tool in woodworking that holds your project securely while you shape it. Think of it as your project’s best friend—it keeps everything steady! Jam chucks help you reach tricky spots and create smooth finishes. With this handy tool, you can enjoy a hassle-free experience creating amazing woodworks. Plus, they are made from scrap wood, so you can save some bucks. What a win-win!
| Benefits of Using a Jam Chuck |
|---|
| Stability: It keeps your wood steady. |
| Versatility: Works for different shapes and sizes. |
| Cost-effective: Uses scrap wood, saving money. |
| Easy to make: A fun project for woodworkers! |
Tools and Materials Needed
List of essential tools for crafting a jam chuck. Types of scrap wood suitable for making a jam chuck.Gathering the right tools is key to making your very own jam chuck. You’ll need a few handy items. A saw will help you cut the wood, while a drill will make those important holes. Don’t forget a measuring tape to ensure everything fits perfectly. And a sander? That’s just for making sure your chuck doesn’t have any splinters that could play tag with your fingers!
| Tools | Functions |
|---|---|
| Saw | To cut wood to size. |
| Drill | To make holes for the chuck. |
| Measuring tape | For accurate measurements. |
| Sander | To smooth out rough edges. |
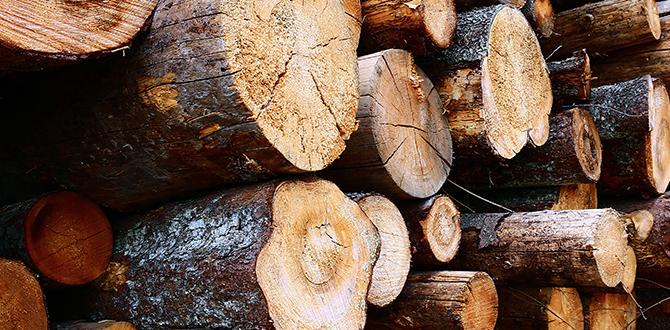
Now, for the wood! You want something strong yet light. Pine and plywood are excellent choices. They are often found as scrap pieces, begging for a new life. So, grab your tools and scrap wood, and let the fun begin. Remember, this isn’t just building; it’s crafting magic!
Selecting the Right Scrap Wood
Characteristics of good scrap wood. How to choose wood based on project requirements.Finding the right scrap wood is like hunting for treasure! Good scrap wood should be strong and free of cracks or knots. Check for a smooth surface; nobody likes splinters! For your jam chuck, choose wood that fits your project size. If you want to create something sturdy, pick hardwood. But if it’s just a practice piece, softwood works fine. Here’s a quick guide:
| Wood Type | Best For |
|---|---|
| Hardwood | Durable projects |
| Softwood | Practice pieces |
Happy hunting, and may your scrap wood pile be ever bountiful!
Step-by-Step Guide to Making a Jam Chuck
Detailed instructions for measuring and cutting the wood. Techniques for shaping and hollowing out the jam chuck.Gather your scrap wood and measure a sturdy piece, about 6 inches wide and 3 inches thick. Use a saw to cut it straight—no wobbly edges allowed! For shaping, you’ll want to create a bowl shape, so take your time scooping it out with a chisel or dado blade. Hollow it out gently, like you’re creating a cozy seat for a small squirrel. Remember, practice makes perfect, and don’t underestimate the power of a good giggle while working!
| Step | Action |
|---|---|
| 1 | Measure and cut 6″x3″ piece |
| 2 | Shape the wood into a bowl |
| 3 | Carefully hollow it out |
Tips for Enhancing Your Jam Chuck
Suggestions for additional features and improvements. Techniques for ensuring a tight fit.To make your jam chuck even better, think about adding some cool features. You can try using rubber bands for extra grip. This helps hold your wood tightly. Another idea is to sand down rough edges. A smooth surface lets your jam chuck fit better.
- Choose a good wood type for strength.
- Make sure your parts are clean for a tight fit.
- Use clamps while the glue dries for better bonding.
Remember, the size of your chuck should match the wood piece. A precise fit makes your work easier and safer!
How can I ensure a tight fit for my jam chuck?
To ensure a tight fit for your jam chuck, **measure your wood accurately and use strong glue** for bonding. Sanding surfaces smooth will also help them fit snugly together.
Common Mistakes to Avoid
Typical errors in making a jam chuck. How to troubleshoot and fix issues during the process.Making a jam chuck can be fun, but small mistakes can happen. Here are some errors to watch out for:
- Using uneven wood can make your chuck wobble.
- Not measuring correctly can lead to a poor fit.
- Forgetting to sand the edges can cause splinters.
If you encounter problems, troubleshooting can help. Make sure your wood is straight and smooth. Double-check your measurements. If it wobbles, you may need to tighten it. Remember, patience is key!
What is a common error in making a jam chuck?
A common error is using wood that is not straight. This can cause the chuck to wobble during use.Using Your Jam Chuck Effectively
Best practices for utilizing a jam chuck in projects. Safety tips for working with a jam chuck.Using a jam chuck can turn your woodwork from “meh” to “wow!” To use it best, always start by ensuring your wood piece is secure. This keeps your fingers away from the spinning danger zone. Safety first! Avoid loose clothing and remember, a dust mask is your best friend—or it might just become your worst enemy. Keep your workspace tidy; no one likes tripping over stray pieces! Grab your project, go slow, and let that creative juice flow like jelly from a jar!
| Best Practices | Safety Tips |
|---|---|
| Secure your workpiece firmly. | Wear safety goggles. |
| Use sharp tools for clean cuts. | Keep loose clothing away. |
| Work slowly to maintain control. | Always have a tidy workspace. |
Alternative Methods and Variations
Exploring other materials for jam chucks. Comparing traditional vs. modern jam chuck designs.There are many ways to create a jam chuck using different materials. While scrap wood is popular, other options can work too. For example, plastic or foam can be used to make lighter chucks. Each material has its own benefits.
- Traditional Wood: It’s strong and stable.
- Modern Foam: It’s lightweight and easy to handle.
- Plastic Variants: They are durable and weather-resistant.
Choosing a design depends on what you need. Some people prefer the classic wooden style. Others enjoy the modern approach. Experiment with different materials to find what works best for you!
What types of materials can I use for jam chucks?
No need to stick to wood. You can try foam or plastic chucks!
Conclusion
In conclusion, making a jam chuck from scrap wood can be fun and easy. You need basic tools and a few materials. Start by cutting your wood to the right size. Then, shape it to fit your project. By using scrap wood, you save money and help the environment. Try making your own jam chuck and explore more woodworking ideas next!FAQs
What Types Of Scrap Wood Are Best Suited For Making A Jam Chuck?The best scrap wood for making a jam chuck is hardwood. You can use pieces from old furniture or leftover blocks. Softwoods, like pine, can break easily, so they’re not the best choice. Look for sturdy bits that are at least 1 inch thick for strength. Remember, we want the jam chuck to hold our wood pieces steady while we work!
How Do You Measure And Cut The Wood Pieces Needed For A Jam Chuck?To make a jam chuck, first, measure your wood with a ruler. You need to know the size of your project. Mark the measurements with a pencil. Then, use a saw to carefully cut the wood along the lines you marked. Always remember to wear safety gear when cutting!
What Tools Are Necessary For Constructing A Jam Chuck From Scrap Wood?To make a jam chuck from scrap wood, you need a few simple tools. First, grab a saw to cut the wood. You will also need a drill to make holes. A measuring tape helps you get the right size. Finally, sandpaper will smooth the edges.
How Can You Ensure That The Jam Chuck Fits Securely On Your Lathe?To make sure the jam chuck fits tightly on your lathe, you can follow a few steps. First, clean both the lathe and the jam chuck to remove dust and debris. Next, check that the chuck is the right size for your lathe. Then, tighten any screws or clamps carefully, making sure they are secure but not overly tight. Finally, give the chuck a gentle shake to see if it holds firm.
What Techniques Can Be Used To Enhance The Grip And Stability Of The Jam Chuck During Use?To improve the grip and stability of a jam chuck, you can use a few simple techniques. First, make sure the jam chuck fits tightly on your workpiece. You can add rubber pads or grip tape to the inside of the chuck for extra hold. Another tip is to tighten the chuck securely with a wrench. Lastly, keep the area clean and dry to prevent slipping.